-
 COLOYOTA EXPO: Vote for your favorite shirt color.
Click here to see the options and place your vote.
You are using an out of date browser. It may not display this or other websites correctly.
You should upgrade or use an alternative browser.
You should upgrade or use an alternative browser.
What have you done to your rig today?
- Thread starter HoneyBadger
- Start date

Installed a Yakima GrandTour Lo ski box with some misc load bars and towers from my collection in the garage. Short fat and long can handle skis up to 215cm. My transformation into suburban mall Cruiser is complete. Let me know when you want to meet for coffee at Starbucks.

IH8RUST
Trail Ready
- Joined
- Jun 13, 2024
- Messages
- 381
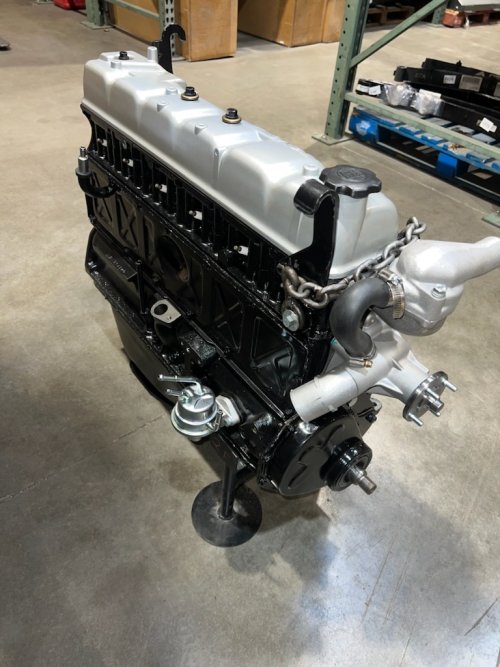
Let’s see if it makes it here in one piece.
The first delivery was returned because the freight company destroyed it. I’m living a nightmare right now.
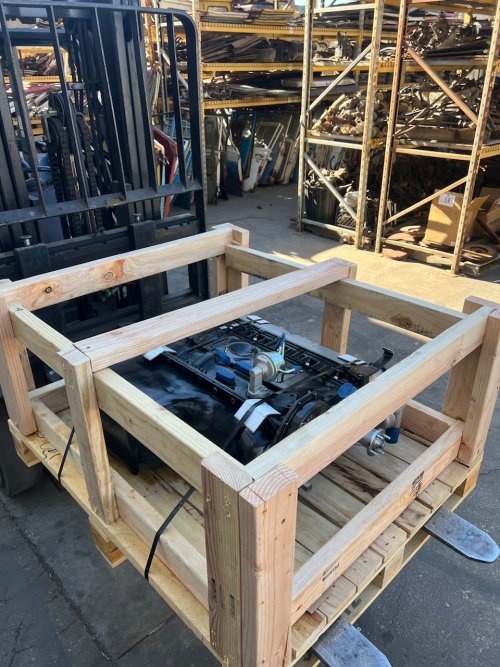
Updated with the crate, homies are taking the delivery seriously this time around.
The first delivery was returned because the freight company destroyed it. I’m living a nightmare right now.
Updated with the crate, homies are taking the delivery seriously this time around.
Attachments
Last edited:
JohnnyP
Rising Sun Member
Let’s see if it makes it here in one piece.
The first delivery was returned because the freight company destroyed it. I’m living a nightmare right now.
Updated with the crate, homies are taking the delivery seriously this time around.
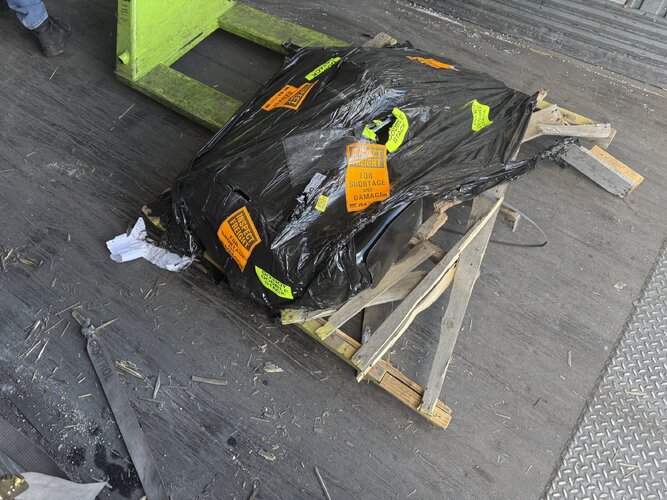
The previous less than one piece….
Attachments


IH8RUST
Trail Ready
- Joined
- Jun 13, 2024
- Messages
- 381
I was trying to spare everyone the horror.The previous less than one piece….
BritKLR
Vice Commander
Damn......that hurts.The previous less than one piece….
I get heavy shipments frequently (Giant rolls canvas can be 300-400lbs) and I'm constantly amazed by how trucking companies can destroy stuff. Even after 12 years of buying from the same suppliers, using the same trucking companies and specifying in writing and paying for enhanced shipping we'll get a pallet of 8-10 rolls of canvas just destroyed from coming loose in the back of a truck!
IH8RUST
Trail Ready
- Joined
- Jun 13, 2024
- Messages
- 381
I'm not fuming as much about it until the next mishap. They used the worst material to pack it; the freight had their hand in it, but the shipper was careless. I feel bad because Johnny is the one who hears my grumpy voice (not directed at him). There is a possible next post: "We replaced a motor, and now we have a very heavy paperweight."
I could start a build post to tell you about my wrong decisions. Stay tuned.
I could start a build post to tell you about my wrong decisions. Stay tuned.
JohnnyP
Rising Sun Member
SorryI was trying to spare everyone the horror.

You honestly didn’t sound grumpy at all but I definitely wasn’t trying to accept the possibility of installing a paper weight…. Saw that and said “NOPE Not today”I'm not fuming as much about it until the next mishap. They used the worst material to pack it; the freight had their hand in it, but the shipper was careless. I feel bad because Johnny is the one who hears my grumpy voice (not directed at him). There is a possible next post: "We replaced a motor, and now we have a very heavy paperweight."
I could start a build post to tell you about my wrong decisions. Stay tuned.
Gave her the Ralph Macchio treatment.


Inukshuk
Rising Sun Member
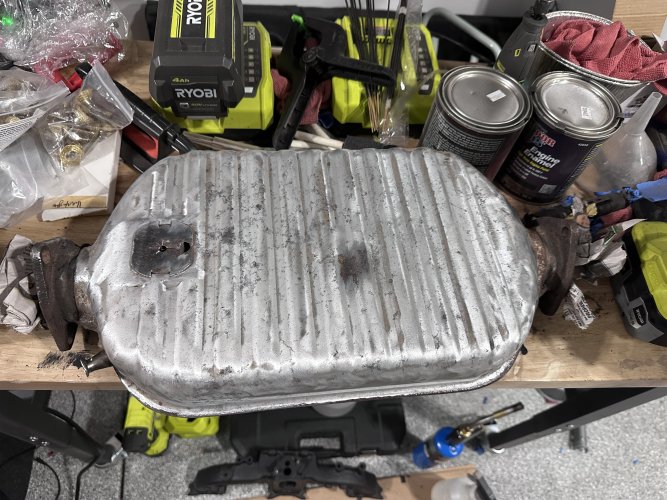
Installed brass heater T's to replace the plastic OE ones. The plastic OE ones of unknown mileage I replaced 9/10/19 at 132,000 crumbled. The ones with 28,000 miles on em I took out yesterday were in great shape. One showed some signs of seepage. These Brass ones will last forever. This is a well known 100 series issue. If you have not done yours - do them. Its a very easy job.


Last edited:
RDub
Trail Ready
Replaced the valve stem seals on the 60. Not a fun job, but worthwhile, no more blue smoke! This is a job for someone you really don’t like, or maybe one of your kids that’s been pissing you off. Haha.
The old seals were very sloppy on the valve stems, the new OEM seals fit niiiiice. Had a few issues along the way, but all good now and seems to run just a little better all around. Could be wishful thinking but I think not having oil seeping into the jugs whenever it’s idling or when letting off the throttle makes a difference.
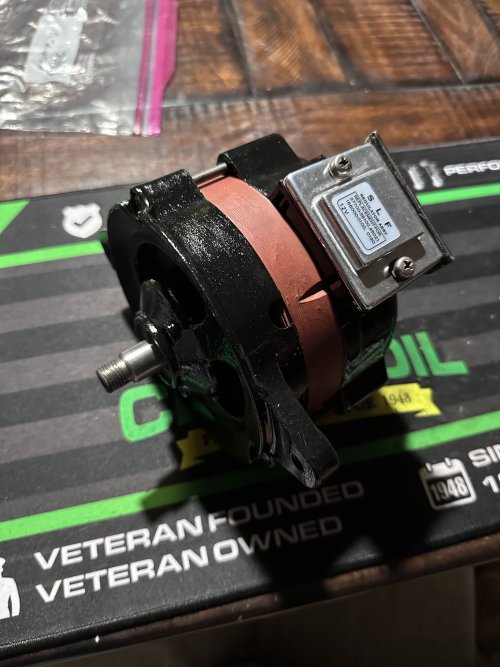
I didn’t have anyone but me to take pictures along the way so not much documented, but here are a couple. New seal just installed.

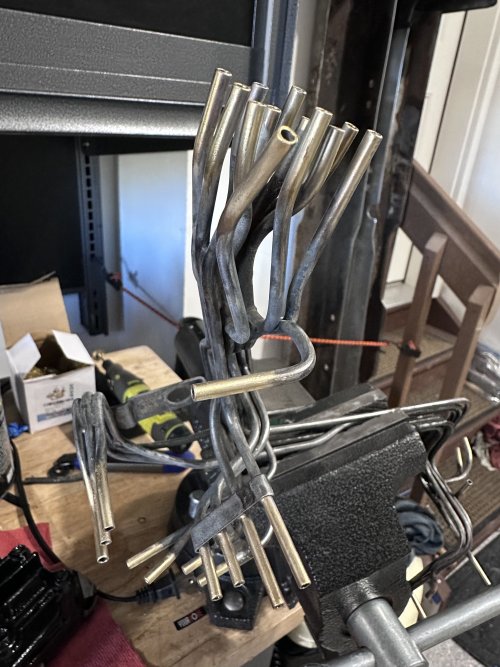
Special garage hack tool to get to that last pain in the butt number 6 exhaust spring. I really should have made something like this at the start, but chose to use a “recommended” tool bought cheap instead. This worked beautifully.

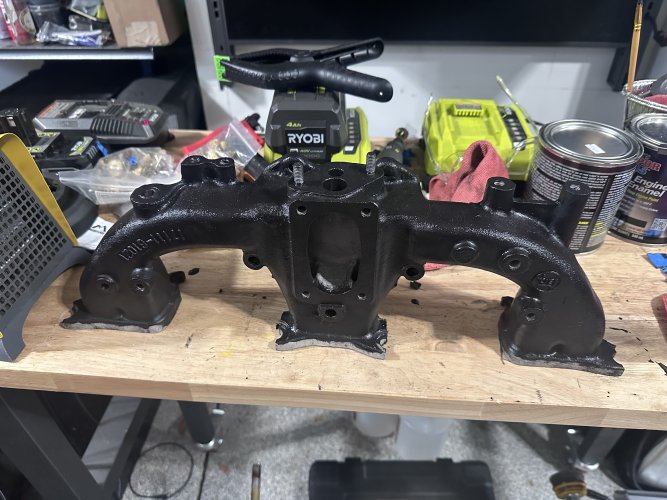
All in all a good experience and great excuse to dig in a little deeper on the motor. Next up is new air cleaner and plugs, a check of the emissions gear, then smog test.
The old seals were very sloppy on the valve stems, the new OEM seals fit niiiiice. Had a few issues along the way, but all good now and seems to run just a little better all around. Could be wishful thinking but I think not having oil seeping into the jugs whenever it’s idling or when letting off the throttle makes a difference.
I didn’t have anyone but me to take pictures along the way so not much documented, but here are a couple. New seal just installed.
Special garage hack tool to get to that last pain in the butt number 6 exhaust spring. I really should have made something like this at the start, but chose to use a “recommended” tool bought cheap instead. This worked beautifully.
All in all a good experience and great excuse to dig in a little deeper on the motor. Next up is new air cleaner and plugs, a check of the emissions gear, then smog test.
IH8RUST
Trail Ready
- Joined
- Jun 13, 2024
- Messages
- 381
You looking to buy one? I have a spare air cleaner for sale, it’s in good shape.Next up is new air cleaner and plugs, a check of the emissions gear, then smog test.
Last edited:
RDub
Trail Ready
One of what? Maybe.
J1000
Rising Sun Member
Nice! How'd you keep the valves from dropping when you removed the springs?Replaced the valve stem seals on the 60. Not a fun job, but worthwhile, no more blue smoke! This is a job for someone you really don’t like, or maybe one of your kids that’s been pissing you off. Haha.
The old seals were very sloppy on the valve stems, the new OEM seals fit niiiiice. Had a few issues along the way, but all good now and seems to run just a little better all around. Could be wishful thinking but I think not having oil seeping into the jugs whenever it’s idling or when letting off the throttle makes a difference.
I didn’t have anyone but me to take pictures along the way so not much documented, but here are a couple. New seal just installed.
Special garage hack tool to get to that last pain in the butt number 6 exhaust spring. I really should have made something like this at the start, but chose to use a “recommended” tool bought cheap instead. This worked beautifully.
All in all a good experience and great excuse to dig in a little deeper on the motor. Next up is new air cleaner and plugs, a check of the emissions gear, then smog test.
RDub
Trail Ready
Thanks. I have one on order, but I appreciate the offer.You looking to buy one? I have a spare air cleaner for sale, it’s in good shape.
RDub
Trail Ready
I shoved about 10 feet of 1/4” rope into the cylinder and rammed it into the combustion chamber by turning the crank pulley by hand. Worked well. Tedious getting the rope in. Did one cylinder at a time, one valve at a time. Slow work.Nice! How'd you keep the valves from dropping when you removed the springs?
I wish I could say I thought of that myself, but it’s a fairly common way to do it, lots of posts about it on Mud and other forums. I ended up using so much because if you don’t get enough rope in it just gets pinched between the piston top and the flat part of the head (quench area) and doesn’t push on the valves. So just cram it full of rope and go for it.
Last edited: