You are using an out of date browser. It may not display this or other websites correctly.
You should upgrade or use an alternative browser.
You should upgrade or use an alternative browser.
What have you done to your rig today?
- Thread starter HoneyBadger
- Start date
J1000
Rising Sun Member
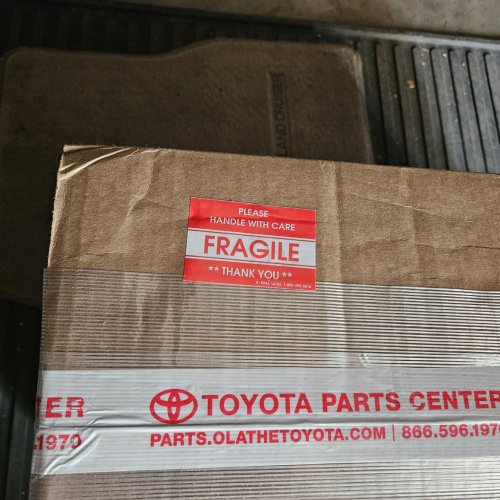
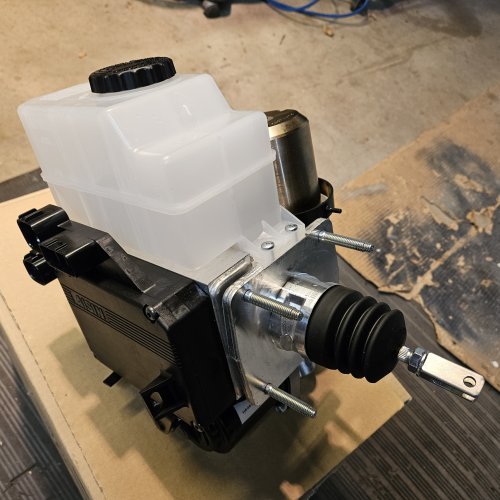
Brake booster?Ha! There are two OEM parts in this box, total price > $1500. $1500 is more than the sale price of at least 4 cars I've owned in my life including 1 BMW, 1 Porsche, 1 Jeep CJ, and 1 or 2 Toyota 4x4's! /oldguyrealizesheold
Any guesses on what I got here? one item should be pretty easy to guess at least.
rover67
Rising Sun Member
Jebus
DaveInDenver
Rising Sun Ham Guru
You want another ugly one?Jebus
A 2005-2011 Tacoma with the fancy stability control VSC and TRAC is 47050-04041.
List: $2,479.28
Good Price: $1,639.43
But your humble reporter went out of his way to find the low tech stick shift that doesn't get stability control so it's 47028-04040.
List: $381.38
Good Price: $254.27

BritKLR
Vice Commander
About 15 years ago while still living in KC I wanted to add a functional snorkel and keep all the emissions on the truck as I was restoring it. There wasn't alot of info on how to do such a thing back then so I just figured I make an intake that still had all the vacuum lines so, I disassembled an extra 2f air cleaner and welded a bottom on it and fabricated the air pump inlet/outlet and mounting bracket. The air filter housing I found of MUD and the rubber hose connecting them is the air filter housing hose off an Isuzu Trooper.Talk to me about that air clear setup!
It all works and the emissions are hit and miss mainly due to the whole system and engine has 233k on it. I have newer emission parts and a carb rebuild planned for the near future to help keep it more consistent.
Hope that helps.
Cruisertrash
Rising Sun Member
Amazing. Thanks for the walkthrough.About 15 years ago while still living in KC I wanted to add a functional snorkel and keep all the emissions on the truck as I was restoring it. There wasn't alot of info on how to do such a thing back then so I just figured I make an intake that still had all the vacuum lines so, I disassembled an extra 2f air cleaner and welded a bottom on it and fabricated the air pump inlet/outlet and mounting bracket. The air filter housing I found of MUD and the rubber hose connecting them is the air filter housing hose off an Isuzu Trooper.
It all works and the emissions are hit and miss mainly due to the whole system and engine has 233k on it. I have newer emission parts and a carb rebuild planned for the near future to help keep it more consistent.
Hope that helps.


rover67
Rising Sun Member
Shawn did a similar thing on his 60. @CardinalFJ60
Cruisertrash
Rising Sun Member
It’s go time on the rebuilt H42/transfer case swap.
Surprisingly the floor pans are immaculate- no evidence of water. I did find the two posts that keep the shift lever slotted into the top of the transmission to be mangled and spinning loose. They were held in with a hose clamp. Karen’s here today deep cleaning inside the cab while I drop the old transmission.
Oh, and while removing the front driveshaft bolts I put the transfer case in 4WD to keep the DS from spinning … apparently I haven’t had 4hi or 4low. Probably explains the weird grinding noise in 4WD that started last fall.


Does anyone have a spare transmission shifter boot? The outer one visible in the cab. Mine ripped coming out. @PVCsnorkel?
Surprisingly the floor pans are immaculate- no evidence of water. I did find the two posts that keep the shift lever slotted into the top of the transmission to be mangled and spinning loose. They were held in with a hose clamp. Karen’s here today deep cleaning inside the cab while I drop the old transmission.
Oh, and while removing the front driveshaft bolts I put the transfer case in 4WD to keep the DS from spinning … apparently I haven’t had 4hi or 4low. Probably explains the weird grinding noise in 4WD that started last fall.
Does anyone have a spare transmission shifter boot? The outer one visible in the cab. Mine ripped coming out. @PVCsnorkel?
PVCsnorkel
Lifted
Unfortunately I do not
DomOfTheDead
Event Coordinator
Knocked out my front driveshaft u joints on the taco. They were in better shape that the rear needle bearings but they still had lots of play. Also removed the slip yoke boot and regressed the splines. At least, I now know it uses Spicer 1310 series UJs if I need to source one and I don't have a spare with me. Not very beefy but common.

New tires, same boring size. Might mount Saturday.

Cruisertrash
Rising Sun Member
Long post ahead on this big project:
Successfully got everything torn down and most things cleaned and certain things painted this weekend. I’m replacing the rear main as part of the transmission/transfer swap, along with new clutch and machined flywheel. I figured I’d drop the oil pan and have a look since I haven’t done that with this truck, or ever, and it’s easier to replace the RMS with the rear main bearing cap removed anyway, which requires access inside the pan I also have a mysterious low end noise that several knowledgeable folks have said isn’t a knock - but nobody has been able to identify it. So I wanted to investigate. Oil pan had no glitter or chunks in the bottom, and hardly any sludge. The paint was flaking off the inside and no doubt getting pumper around. Glad I got a new pan to put on.
I got into taking rod caps off one by one today, cleaning, and plastigaging them. All within spec (.02-.06mm), most of them at .04. All of them have visible wear but nothing that you can feel or hang a fingernail on. They’re all very smooth. #6, however was loose and the backside has some wear, burnishing, or both.

The rest looked about like this:

Karen was instrumental in helping me extract this behemoth. I pulled it with the crossmember attached and with blocks of wood underneath, only to realize that the added height meant it wouldn’t clear the frame or slider, even jacked up. We tilted it just enough to fit under and Karen held the jack down so it wouldn’t flip over. Rookie mistakes = lessons learned.

Somebody had been in here before … on a 124000 mile truck. Why? Maybe a clutch job, who knows. The shift lever looks like it was ripped out by force and the two pins in the transmission cover were shredded and loose - held in by a hose clamp. There’s RTV on the front input shaft cover of the transmission as well - did somebody need to rework the innards of an H42 at that mileage?


In the photo above you can see at the very bottom where somebody pulling the transmission bonked the lip of the tunnel opening. Oops. I pulled the seats & carpet and took the whole cover off for more working room No rust in that part of the floor pan!

One bellhousing bolt was missing a split lock washer, so that had been off. Why remove that if you’re just changing a clutch? The motor doesn’t appear to have ever been taken out though. Usually there’s bent heat shields and hardlines at the firewall and the front radiator support has intact seam sealer. So they pulled the bellhousing for fun? What else … the clutch fork boot is as nowhere to be found, the transfer case shifter linkage was hanging on for dear life and missing a plastic flange bushing, so that’s been apart before. The transfer case neutral position isn’t working - front and rear outputs are still locked together. One of the pressure plate bolts was a hardware store special. Nothing crazy, but evidence of work that was rushed and/or disorganized.
@Capriblue45 with your recent 2F adventures, what do you think about the state of those bearings? I’m still planning on having my spare block rebuilt. I figure tighten these up and run until that’s ready, eh? @RDub thanks for all the consultation work today! If any other thoughts strike you let me know.
So here she sits for tonight. Back at it tomorrow.

Successfully got everything torn down and most things cleaned and certain things painted this weekend. I’m replacing the rear main as part of the transmission/transfer swap, along with new clutch and machined flywheel. I figured I’d drop the oil pan and have a look since I haven’t done that with this truck, or ever, and it’s easier to replace the RMS with the rear main bearing cap removed anyway, which requires access inside the pan I also have a mysterious low end noise that several knowledgeable folks have said isn’t a knock - but nobody has been able to identify it. So I wanted to investigate. Oil pan had no glitter or chunks in the bottom, and hardly any sludge. The paint was flaking off the inside and no doubt getting pumper around. Glad I got a new pan to put on.
I got into taking rod caps off one by one today, cleaning, and plastigaging them. All within spec (.02-.06mm), most of them at .04. All of them have visible wear but nothing that you can feel or hang a fingernail on. They’re all very smooth. #6, however was loose and the backside has some wear, burnishing, or both.
The rest looked about like this:
Karen was instrumental in helping me extract this behemoth. I pulled it with the crossmember attached and with blocks of wood underneath, only to realize that the added height meant it wouldn’t clear the frame or slider, even jacked up. We tilted it just enough to fit under and Karen held the jack down so it wouldn’t flip over. Rookie mistakes = lessons learned.
Somebody had been in here before … on a 124000 mile truck. Why? Maybe a clutch job, who knows. The shift lever looks like it was ripped out by force and the two pins in the transmission cover were shredded and loose - held in by a hose clamp. There’s RTV on the front input shaft cover of the transmission as well - did somebody need to rework the innards of an H42 at that mileage?
In the photo above you can see at the very bottom where somebody pulling the transmission bonked the lip of the tunnel opening. Oops. I pulled the seats & carpet and took the whole cover off for more working room No rust in that part of the floor pan!
One bellhousing bolt was missing a split lock washer, so that had been off. Why remove that if you’re just changing a clutch? The motor doesn’t appear to have ever been taken out though. Usually there’s bent heat shields and hardlines at the firewall and the front radiator support has intact seam sealer. So they pulled the bellhousing for fun? What else … the clutch fork boot is as nowhere to be found, the transfer case shifter linkage was hanging on for dear life and missing a plastic flange bushing, so that’s been apart before. The transfer case neutral position isn’t working - front and rear outputs are still locked together. One of the pressure plate bolts was a hardware store special. Nothing crazy, but evidence of work that was rushed and/or disorganized.
@Capriblue45 with your recent 2F adventures, what do you think about the state of those bearings? I’m still planning on having my spare block rebuilt. I figure tighten these up and run until that’s ready, eh? @RDub thanks for all the consultation work today! If any other thoughts strike you let me know.
So here she sits for tonight. Back at it tomorrow.
Capriblue45
Rising Sun Member
- Joined
- May 28, 2023
- Messages
- 414
They show more wear than one would expect from a relatively low milage 2F. I would get the other engine ready as soon as your budget allows because based on the photo it will become an issue sooner than later. Are you sure someone did not drop in a higher mileage 2F or change out the instrument cluster? Man I remember the days of having to do this kind of work laying on my back, so happy to have a lift.
Rzeppa
Rising Sun Member
I've seen several shackle reversals on 40s but never one on a 60 before. And yeah, working on your back is WORK.
RDub
Trail Ready
On the subject of 2F internals and such…for those that have 2F build experience what is your preferred method of rear main seal replacement - remove rear main cap or push it in with the cap installed? Also, the FSM calls for a light coating of FIPG under both sides of the rear main cap to prevent oil leaks? Do folks do that, and is squeezing it into the bearing space while tightening the cap a problem? Thanks for the insights in advance!
Rzeppa
Rising Sun Member
I always press the RMS in with the cap already on, and I use Perrmatex blue RTV sealant on the cap rather than FIPG. I also use that Blue Permatex on the pan side of the pan gasket, but more as an adhesive than as a sealant, I put the gasket on the pan with clip to hold it to the pan and several pan bolts for alignment and let it dry for an hour or two prior to install. It helps keep everything lined up during install. And of course per the FSM use that stuff on all 4 corners of the pan gasket. I like the factory one piece gasket better than the 4 piece ones that come in most kits. The factory gasket is really 4 pieces but they've glued them together for you.
Capriblue45
Rising Sun Member
- Joined
- May 28, 2023
- Messages
- 414
I have done rear seals both ways. removing or loosening the rear main cap reduces the risk of damaging the new seal. As for the FIPG a little goes a long way in this application and yes it will squeeze out but will also squeeze into the slight gaps and help prevent leaks.
RDub
Trail Ready
Thanks, guys. I ask about the RMS because waaaayyy back when I was putting my 1968 Datsun 510 together an engine builder told me to always press the RMS in rather than put it in with a loose rear main cap because the rubber covering of the seal could get pinched between the cap and the block, causing untold horrors at the rear main bearing. Since so many folks seem to be successful doing it that way in the 2F I wanted to ask.
Cruisertrash
Rising Sun Member
When this thing came to me I found it had two quarts of oil in it. PO was a really good guy, but I got the impression the truck went for long stretches without basic maintenance. I really think the motor is original but the La k of maintenance caused excessive wear.They show more wear than one would expect from a relatively low milage 2F. I would get the other engine ready as soon as your budget allows because based on the photo it will become an issue sooner than later. Are you sure someone did not drop in a higher mileage 2F or change out the instrument cluster? Man I remember the days of having to do this kind of work laying on my back, so happy to have a lift.
The spare head is ready to go. The spare block is mostly stripped - all that’s left is pulling the front pulley, cover, and timing gears, and then dropping the cam and crank. The bearings in that one looked far better than what I’m working with so I think it lived an easier life. After I button this project up I’ll get moving on that and finally get it off to Gunn.


