What have you done to your rig today?

TobyWanKenobi

Brand New
Joined
Nov 8, 2025
Messages
4
New City Racer LED headlights. I can see! :D


IMG_1625.jpg
 

J1000

Rising Sun Member
Joined
Oct 11, 2018
Messages
1,869
Location
Morrison, CO
I pulled my SC and did some other maintenance over the weekend. Discovered I have had a pretty bad boost leak for awhile now. At least 3 cylinders had the gasket bulge out from under the shim. Pro-tip, if you put this blower on a VVTI engine, do not use the OEM VVTI intake gaskets. I reinstalled with Fel-Pro one piece gaskets.

Problem solved. Boost went from 5.5 psi to 7.4 psi. Yes I can feel it :headbang: 
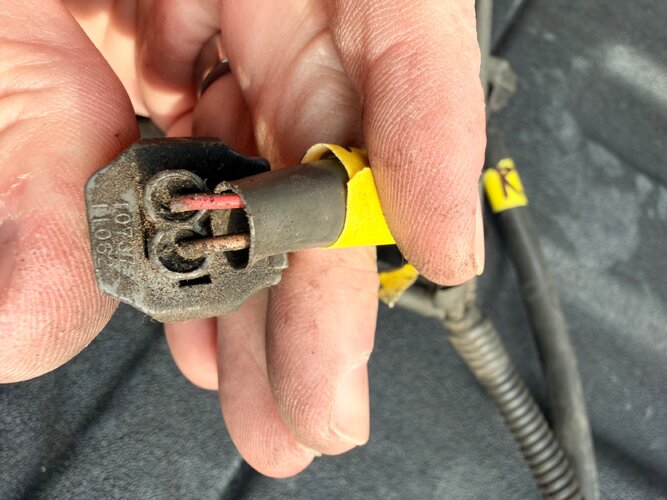
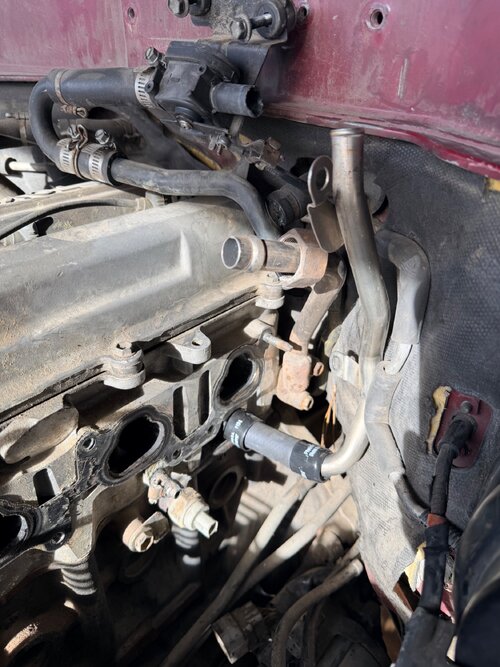
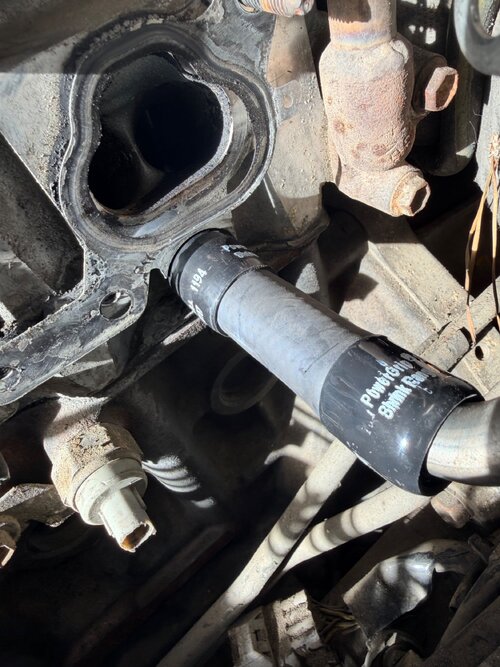
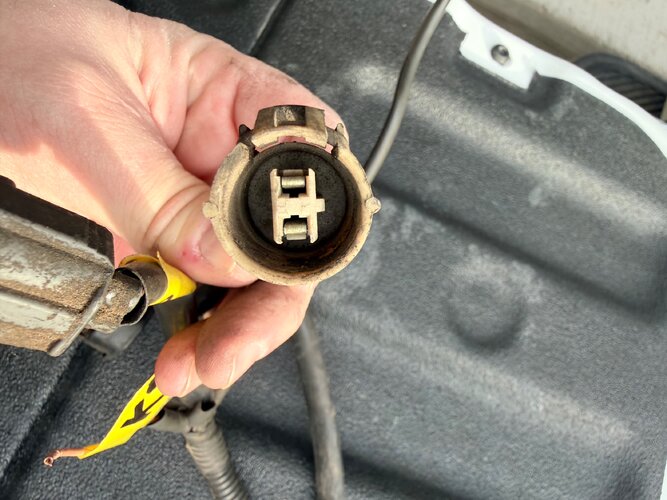
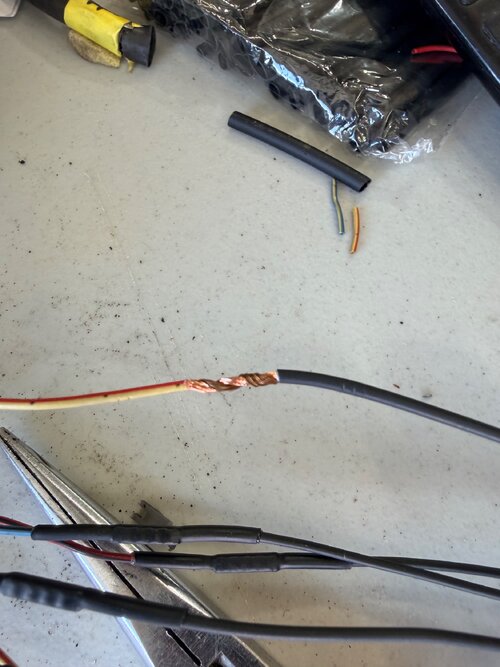
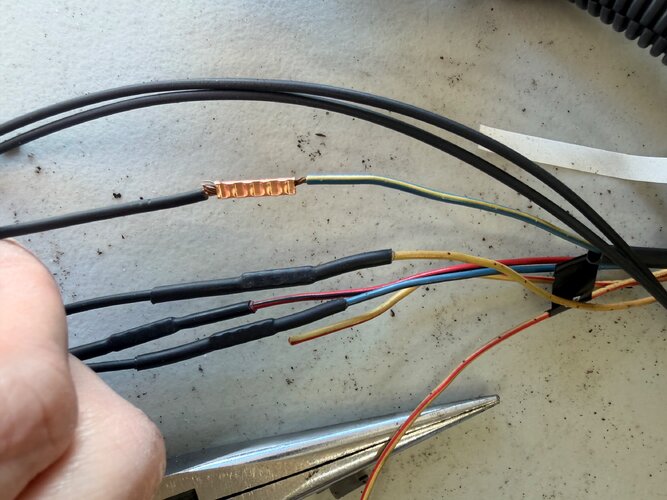
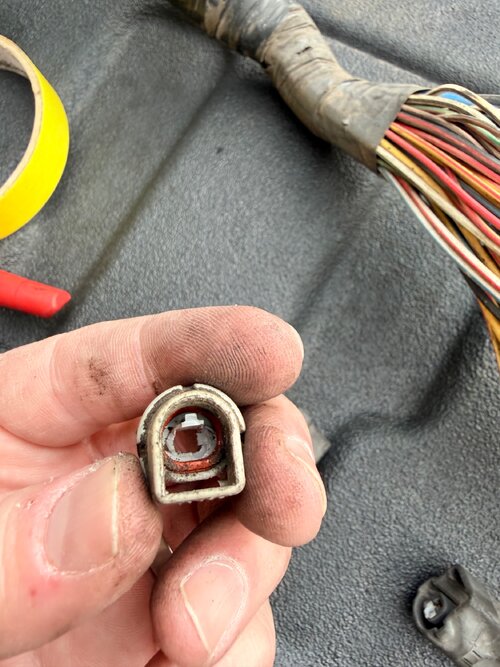
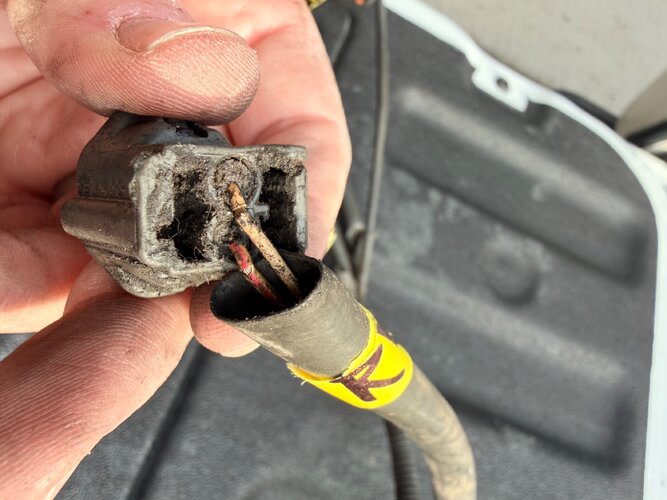
I've been suspicious about this for awhile but didn't have time to fix it until now.

I also changed the SC oil. It has about 50k miles on it, oil looked new. No point in changing it until 100k miles driven or more probably.

Also added my IAT sensor. It fit just fine in the port under the blower. Using Speedhut sensor and gauge.

Also replaced my throttle body, been having issues with it sticking when very cold and it's original to the vehicle (320k).

New Gates green belt.

My driver's door lock and speaker were not working. I replaced the locking module but still didn't work. Pulled apart the harness and found two broken wires. Fixed them and now speaker and door locks are working!

Lastly, I replaced the sway bar bushings and hardware all the way around. Love Cruiser Outfitters for making it easy to get all the parts. Really surprised at how the truck rides and drives now, much better. I have new front suspension bushings etc to install later.

PXL_20260117_183457976.jpg

PXL_20260117_184910878.jpg

PXL_20260117_184914555.MACRO_FOCUS.MP.jpg

PXL_20260117_190202821.jpg

PXL_20260117_193342240.jpg

PXL_20260117_201408952.jpg

PXL_20260118_165441143.jpg

PXL_20260118_215934712.jpg

PXL_20260118_182819647.jpg

PXL_20260118_182844114.jpg
 

Doughboy

Rising Sun Member
Joined
Dec 7, 2018
Messages
910
Got the air lines ran, @CardinalFJ60 and I got the wiring done, just need to be cleaned up a little. It got cold and ran out of light.

Got the air chuck mounted to the front bumper. Mounted a 1.6 gallon tank in the rear, where the spare tire would go. One plug is leaking, so I'll address that eventually. Everything is solid and doesn't rattle one bit.

Installed a bus bar in the back for future things.

Shawn got the auxiliary fuse box ran and in, wired up the switch and it fired right up on the 3rd try. Had a bad ground.

Now I have OBA and don't have to drive home on squishy tires anymore.

20260120_142339.jpg20260120_142333.jpg20260120_164145.jpg
 

nakman

Rising Sun Member
Staff member
Joined
Aug 23, 2005
Messages
15,507
Location
north side
@Doughboy do you have air lockers? curious, why the air tank? other than you already had it, and had the space...
 

Doughboy

Rising Sun Member
Joined
Dec 7, 2018
Messages
910
Ah cool. do you have a way to bypass it? that would be the better setup, IMO.
I can run a bypass if I wanted to. I have to time it to see how long it takes to fill the tank, and then the tires. Then run the bypass and time it.
 

60wag

Rising Sun Member
Joined
Aug 23, 2005
Messages
2,668
What pressure will you charge the tank to? It looks like the compressor can do 150psi but that'll likely draw 68A. Is your wiring up to 68A?
 

MileHigh80Guy

Rising Sun Member
Joined
Nov 19, 2024
Messages
95
Location
Arvada
Done with relooming and pinning the OBD1 80 harness!!

After over a year of chasing O2, then KS CEL’s I decided to pull the harness, that’s where I found the likely culprit; 90% broken KS harness and deeply corroded O2 leads;plus many broken clips. OB1 harnesses are NLA, most of the clips are available though. Except this crazy (well documented on mud) AC thermo sensor connector (pictured). Mine was salvageable.

Replaced 15 (6 injector ones) broken harness clips, new pins and leads on 8 of them. Tested each lead to the in cabin harness pin out, verified each shielded cable grounding shield and rerouted the drivers side O2 so it doesn’t zig zag behind the engine and back over the transmission (also those wires were corroded AF from previous repairs).

Next step is injector seals/rings, cleaning, vac lines and gaskets when reassembling the intake manifold.

Since this will be sold in the near future, to focus on the 97, wanted to get all this sorted for the next owner. While I’m in there also included PHH, HVAC valve, all the other coolant lines back there. Trying the gates power bands for the PHH with the OEM hose for easier removal repair and potential longevity.

Hoping to spend a few more weekends and hopefully the CEL stays in hell, where it belongs and pass emissions and list it for sale.
 

Attachments

  • IMG_0689.jpeg
    IMG_0689.jpeg
    978.3 KB · Views: 17
  • IMG_0607.jpeg
    IMG_0607.jpeg
    1.1 MB · Views: 25
  • IMG_0609.jpeg
    IMG_0609.jpeg
    1.3 MB · Views: 25
  • IMG_0691.jpeg
    IMG_0691.jpeg
    989.3 KB · Views: 31
  • IMG_0802.jpeg
    IMG_0802.jpeg
    929.1 KB · Views: 24
  • IMG_0801.jpeg
    IMG_0801.jpeg
    855.2 KB · Views: 19
  • IMG_0800.jpeg
    IMG_0800.jpeg
    1 MB · Views: 18
  • IMG_0799.jpeg
    IMG_0799.jpeg
    1,019.3 KB · Views: 26
  • IMG_0878.jpeg
    IMG_0878.jpeg
    1.6 MB · Views: 17
  • IMG_0700.jpeg
    IMG_0700.jpeg
    1.1 MB · Views: 16
  • IMG_0693.jpeg
    IMG_0693.jpeg
    909.1 KB · Views: 21
  • IMG_0695.jpeg
    IMG_0695.jpeg
    1.4 MB · Views: 36
  • IMG_0878.jpeg
    IMG_0878.jpeg
    1.6 MB · Views: 23

Johnny Utah

Rising Sun Member
Joined
Mar 6, 2015
Messages
1,520
Location
Arvada
Installed a brand new Toyota power steering pump (old one was leaking) and while I was there I installed the new Cruisers and Company power steering cooler kit.

IMG_5840.jpeg

IMG_5841.jpeg

IMG_5842.jpeg
 
Last edited by a moderator:
Back
Top