-
 UPDATED LOCATION DUE TO FORECAST OF RAIN: MAY 2024 CLUB MEETING
Hi Guest: The next RS meeting will be Wednesday, May 1, 2024 at 7:30 p.m. The meeting will be held indoors at the fabulous Golden Gate Canyon Grange. Click here for directions. We'll be talking ColoYota Expo and Cruise Moab.
⦿ If you are eligible for club membership, please fill out an application in advance of the meeting and bring it with you.
You are using an out of date browser. It may not display this or other websites correctly.
You should upgrade or use an alternative browser.
You should upgrade or use an alternative browser.
Oil and Coolant Mixing
- Thread starter DaveInDenver
- Start date
DaveInDenver
Rising Sun Ham Guru
Thanks for getting to this stage is really Marco and Jackson. A lot from Marco, though. Motivational, tech talk and a fair bit of scolding.Great work Dave. We all had faith that you would get it figured out!
Last edited:
rover67
Rising Sun Member
Glad you got it done Dave! Now on to the rest!!
RicardoJM
Hard Core 4+
Nice work Dave! Enjoy the great feeling now that you are in the other end of the hiccup. Every now and then it’s really good to have chit like this happen to remind you that you are the master of your universe!
DaveInDenver
Rising Sun Ham Guru
I'm elbow deep in a charlie foxtrot now. Pointers on best ways and just how clean the deck of the block needs to be are highly welcome. I started working corner with some Scotchbrite but not sure how aggressive I should be here. Are steel scrapers and razor blades OK?
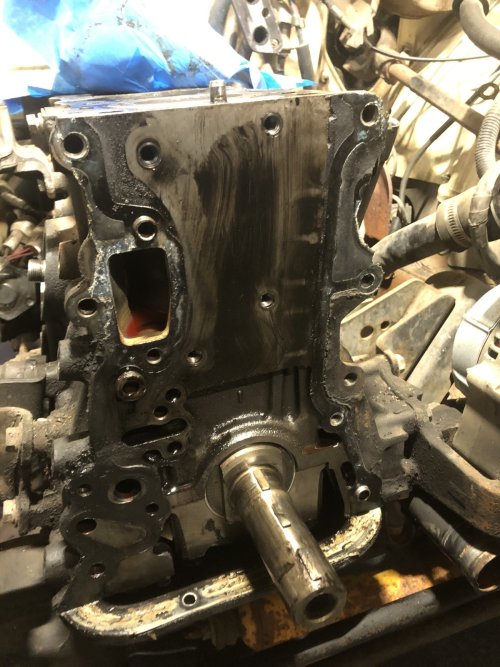
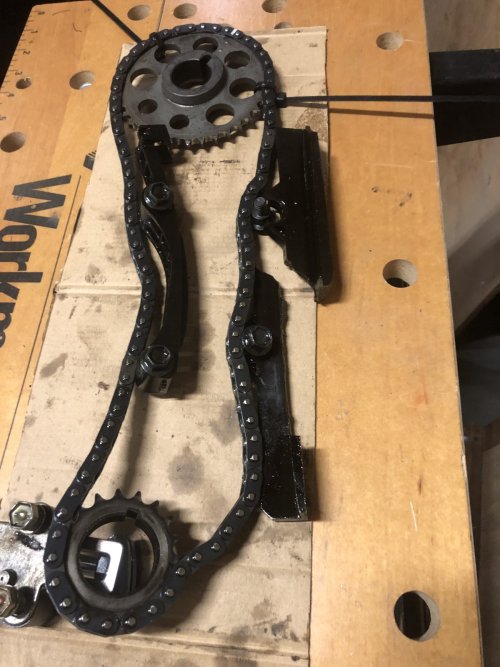
The timing components. the mid section of the driver side is broken and gone. So do need to pull off the pan to find it. The tensioner foot has deep railroad tracks in it but the rubber doesn't seem to have hardened as much as it's aged 39 years would have indicated.
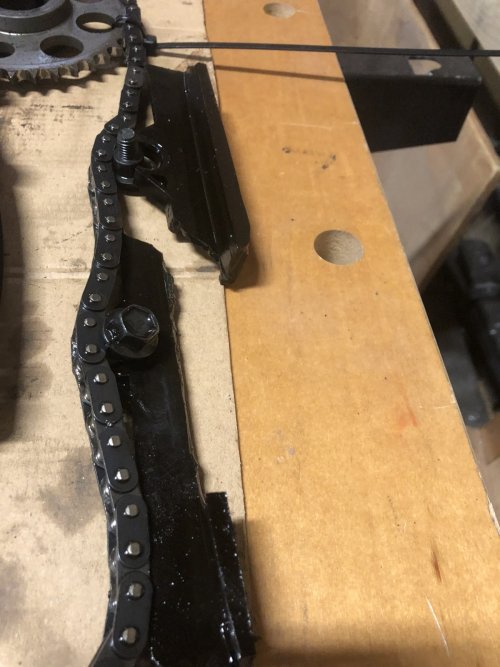
But doesn't seem to have done any significant damage to the timing cover. A little evidence of it tapping it though.
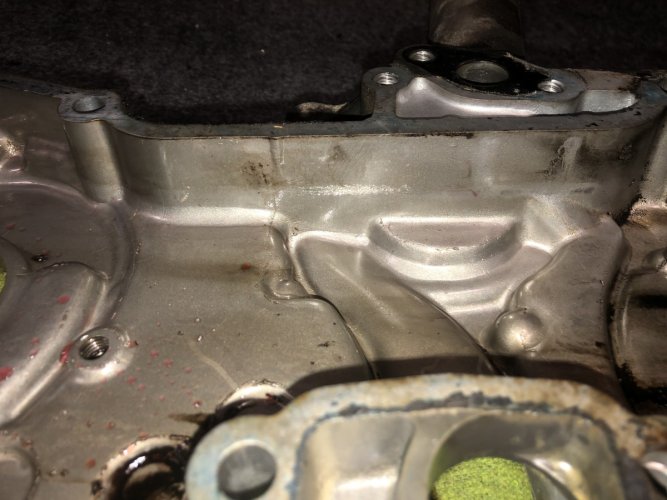


The timing components. the mid section of the driver side is broken and gone. So do need to pull off the pan to find it. The tensioner foot has deep railroad tracks in it but the rubber doesn't seem to have hardened as much as it's aged 39 years would have indicated.


But doesn't seem to have done any significant damage to the timing cover. A little evidence of it tapping it though.

Last edited:
J Kimmel
Hard Core 4+
This is what we stock and use, different colors for different surfaces but I used a white one on a die grinder and cleaned my LS block and heads before reassembly. Worked perfectly

DaveInDenver
Rising Sun Ham Guru
So the general idea is to avoid changes to the surface machining, right? Be careful with hard tools by hand and being reasonably aggressive with Scotchbrite then.
I have a few green Scotchbite pads, you know like for dishes, which 3M I think calls 600 grit. I was looking at the harsher pads in the paint isle so if I can find something I can chuck like Kimmel shows that would be fine?
I have a few green Scotchbite pads, you know like for dishes, which 3M I think calls 600 grit. I was looking at the harsher pads in the paint isle so if I can find something I can chuck like Kimmel shows that would be fine?
Brillow pads / bear hair / scotch bright could be the least likely offender if used with power tools. But then again, a gorilla with a razor blade isn't going to be good either.
The best you can do IMO is remove 95+% of the old gasket material and check flatness with a straight edge. If it is not flat within spec, you are more than likely rearranging deck chairs on the Titanic.
The best you can do IMO is remove 95+% of the old gasket material and check flatness with a straight edge. If it is not flat within spec, you are more than likely rearranging deck chairs on the Titanic.
rover67
Rising Sun Member
Not a CF, just normal ngine work at this point. just hit it with some razor blades and maybe some scotch bright from your sink. dont try to remove all the discoloration left from the gasket because you likely wont. just get it nice and clean. What Jeremy showed would be sweet but I never have one on hand, maybe should get one. DOn't be dumb with the tools and you wont remove too much material from the block. Once you are done shop vac out and wipe out the cylinders with wd-40 to clean it up. stuff in rags to preemptivly keep them clean during gasket removal.
DaveInDenver
Rising Sun Ham Guru
Went over with a razor blade by hand to pick off a few spots of gasket material, followed with Scotchbrite using some brake cleaner to degrease.
Finished chasing the other 9 bolt holes, I hadn't done a couple. Just wanted to make sure before I went too much further, ya know.
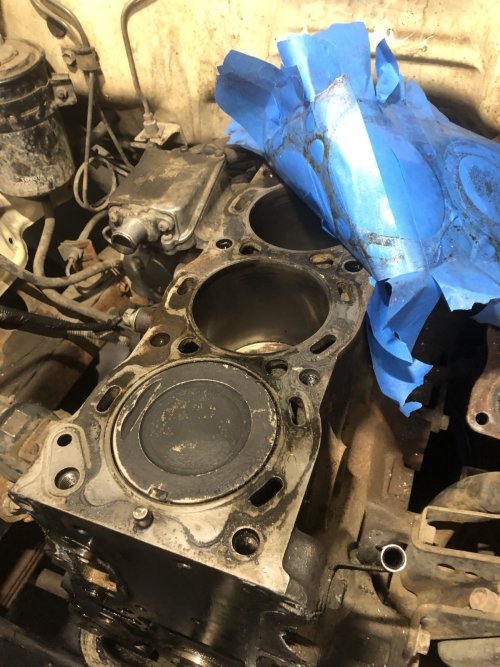
Anyway, I think it's mostly corrosion at this point. The HG came off in one piece so that was actually not too bad. I might try to find that cup tool. I do have a small Scotchbrite wheel for a die grinder I think around here.
I'm using a factory HG so I'd guess the high and low spots should match up. Not really feeling any spots catch a fingernail, so good, bad or indifferent?
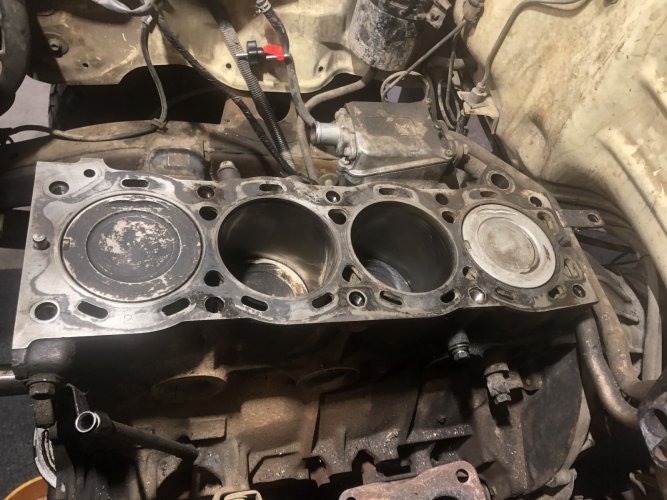
The old timing cover gaskets are still being a pain. Hardened and torn. So I may have to get tougher on them but I'm not worried there as those are thick enough fiber and get a light smear of RTV. Might take a wire brush or something like that.
Finished chasing the other 9 bolt holes, I hadn't done a couple. Just wanted to make sure before I went too much further, ya know.
Anyway, I think it's mostly corrosion at this point. The HG came off in one piece so that was actually not too bad. I might try to find that cup tool. I do have a small Scotchbrite wheel for a die grinder I think around here.
I'm using a factory HG so I'd guess the high and low spots should match up. Not really feeling any spots catch a fingernail, so good, bad or indifferent?

The old timing cover gaskets are still being a pain. Hardened and torn. So I may have to get tougher on them but I'm not worried there as those are thick enough fiber and get a light smear of RTV. Might take a wire brush or something like that.
Last edited:
DaveInDenver
Rising Sun Ham Guru
Ah yeah, Mr. Sparkles. No @rover67, I think I've pressed my luck enough. I am not planning to pull the bearing caps. I know you (and I) want to know but I don't see any positive outcome from that. Either I'm going to know or I will just wonder for a while. Which I will anyway. It's as stripped down as I'm going. More data isn't going to change anything significantly.
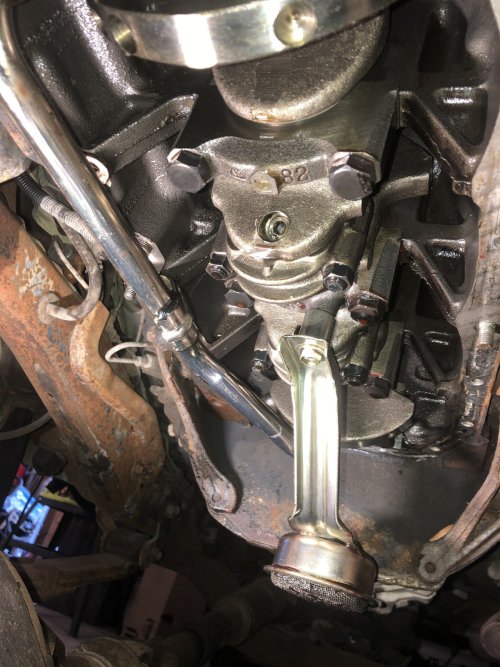
Case closed on the missing timing guide.
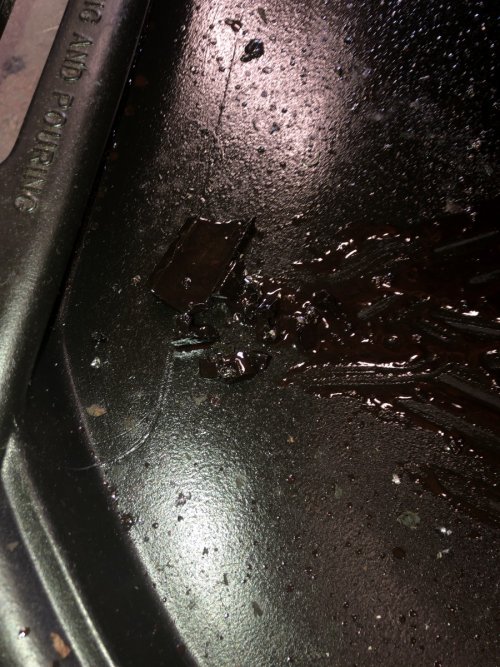
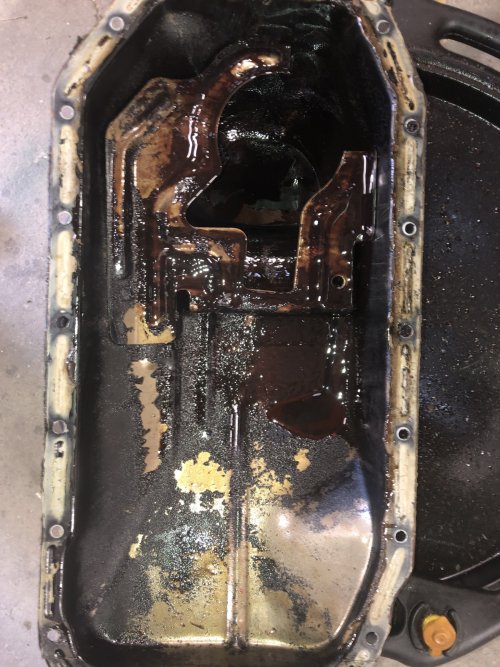
Sludge but not seeing much metallic.
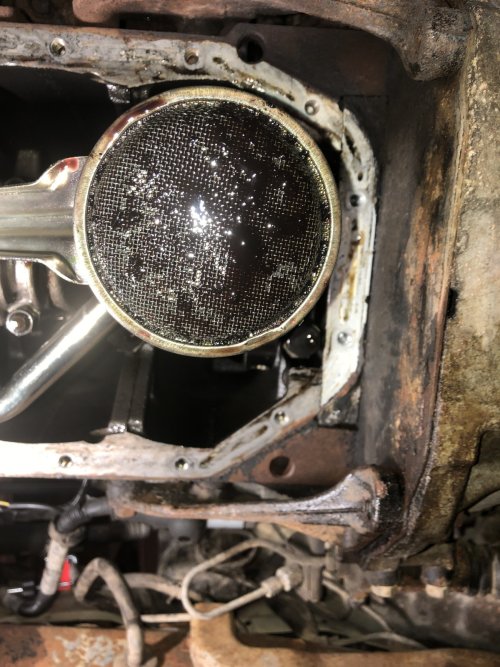
Yeah, yuck. Sludgetastic.
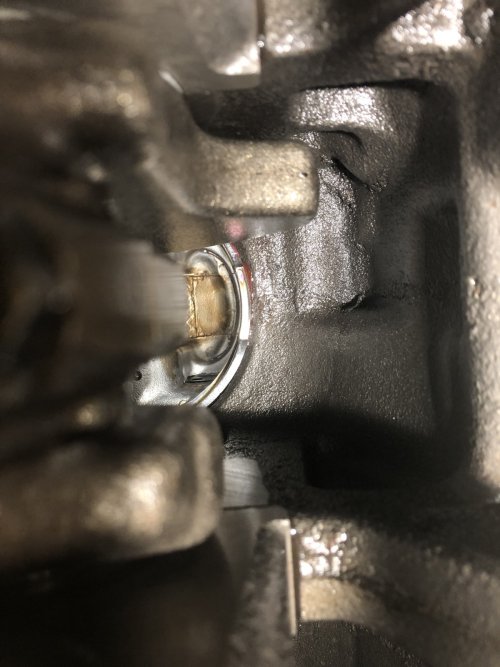
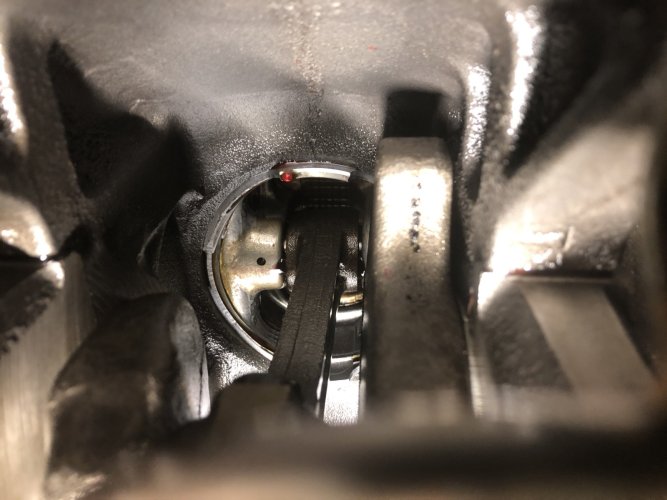
Coolant on the piston skirts. Is it hoping to think that has seeped past from breaking the HG?.

Case closed on the missing timing guide.

Sludge but not seeing much metallic.

Yeah, yuck. Sludgetastic.

Coolant on the piston skirts. Is it hoping to think that has seeped past from breaking the HG?.


DaveInDenver
Rising Sun Ham Guru
Me too. I'll work on it a bit more to smooth and clean. It's not going back together today or tomorrow, so I have time to hear more thoughts. I can really get after cleaning the front now that the pan is off.I think I would say send it.
I'd like to have the pan sandblasted and coated but my powdercoater is 2 to 3 weeks out so elbow grease and rattle can.
rover67
Rising Sun Member
call it a day on the head gasket and send it as Subzali says.
As far as the bottom end goes, call me crazy... but i't pull the big peices of guide out and bolt the pan right back on. if you start cleaning the sludge you'll never end becuase youll have to go till its clean clean. right now its semi steady state.
As far as the bottom end goes, call me crazy... but i't pull the big peices of guide out and bolt the pan right back on. if you start cleaning the sludge you'll never end becuase youll have to go till its clean clean. right now its semi steady state.
DaveInDenver
Rising Sun Ham Guru
I'm with ya. Just letting it drain and was going to just wipe out the sludge in the sump below the drain hole with paper towels. It's last thing to go back on anyway. The engine goes back together head on and torqued, the timing cover glued and screwed (there's a bolt through the head that has to be pulled up tight, which incidentally I can't find anyway) and then the pan back.call it a day on the head gasket and send it as Subzali says.
As far as the bottom end goes, call me crazy... but i't pull the big peices of guide out and bolt the pan right back on. if you start cleaning the sludge you'll never end becuase youll have to go till its clean clean. right now its semi steady state.
The bottom of the short block looks remarkably good IMO (amateur as that is), I'm really not concerned other than a few drops of coolant that had to have come from top side.
The outside of the pan is pretty rusty. My thinking is run over it with a wire brush and sandpaper and paint it with rust converting black. It'll look a lot nicer under the hood not to see a rusty pan and most of the goop cleaned off. The 20R and 22R had the nice feature of a horizontal oil filter so the side of the engine and top of the front axle get a lifetime of oily grime on them.
These engines get the pan sealed with RTV so I have to clean the oil film off now, so might as well give it some spa treatment.
Last edited:
DaveInDenver
Rising Sun Ham Guru
Oh, BTW, what's the 411 on turning the crank at this point? It's TDC 0° on #1 and have been real careful since pulling off the oil pump (where the timing marks reside). Based on what I saw on #1 piston face I think I could knock some carbon off pretty easy from #2 and #3 if I brought them up. Especially #3 looks like it could benefit from some light Scotchbrite work.
Last edited:
J Kimmel
Hard Core 4+
A week ago you were ready to send it to salvage. I’d clean the surfaces the best you can and button it back up. If it ain’t broke don’t fix it.
rover67
Rising Sun Member
put it together, you can have it running tonight, tomorrow at the latest.
