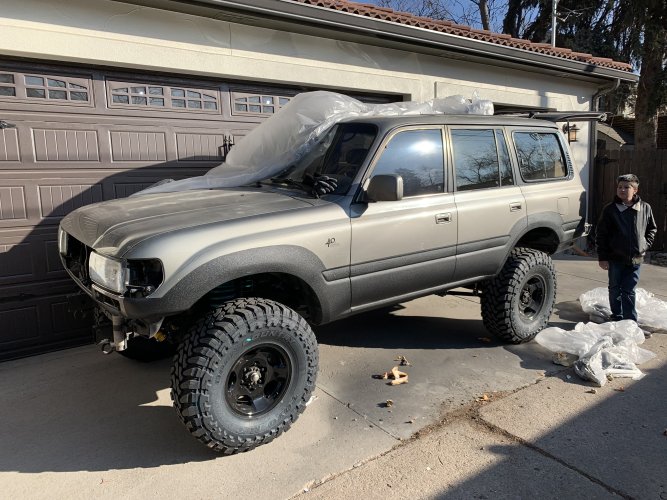
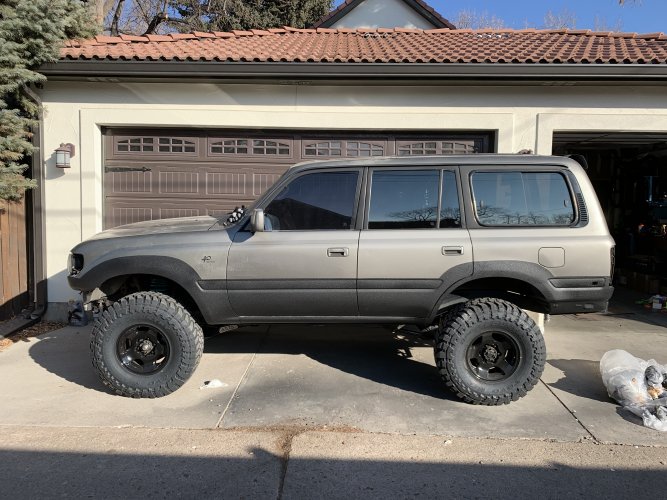
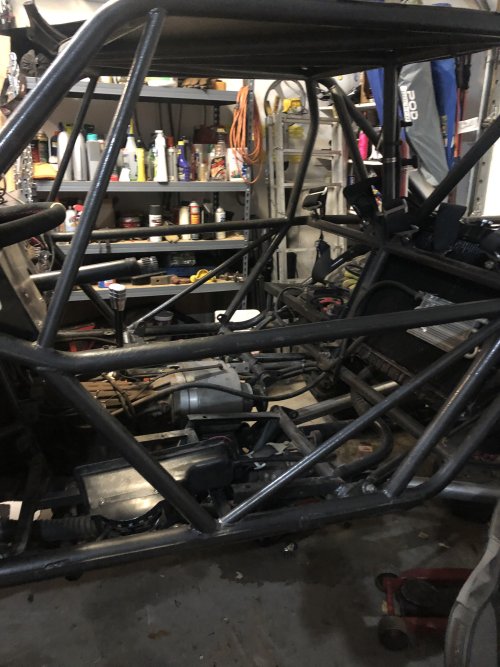
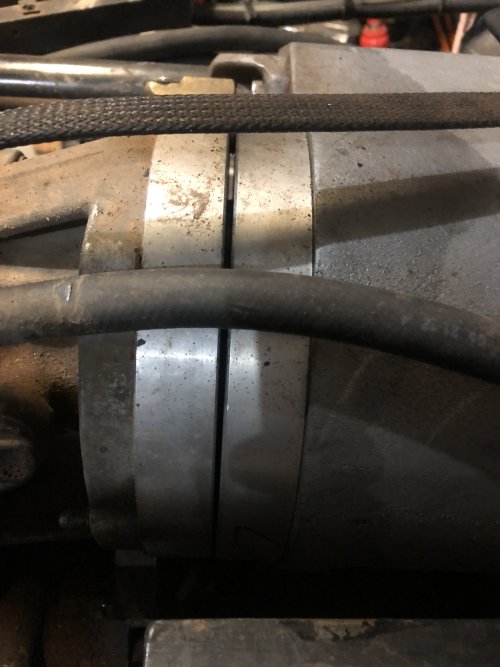
What have you done to your rig today?

DaveInDenver

Rising Sun Ham Guru
Joined
Jun 8, 2006
Messages
13,114
Location
Grand Junction
When looking for those MIL A52425 terminals consider making sure you get the lead ones.

They make them in zinc (e.g. so they're lead-free, which is required in some cases for RoHS) but those didn't hold up over time for me and eventually cracked. They are probably OK if you install and forget, though.

And a FWIW, I prefer the ordnance style personally. These particular ones are made by East Penn (the battery company). The sets I got were very high quality, the casting was very clean.

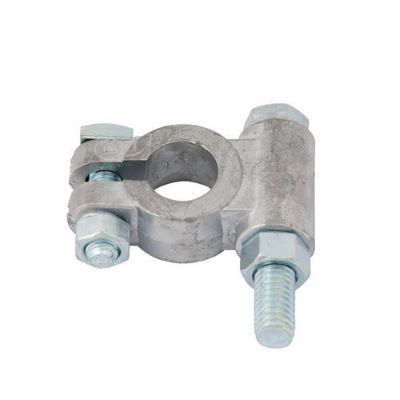
wt-bto.jpg


Last edited:

RayRay27

Cruise Moab Committee
Joined
Jun 26, 2015
Messages
1,478
Location
Thornton via Boulder
For the 80:
1) Installed new stop lamp switch (brake light and cruise control circuits). Why this matters: the 1993 with cruise control has a two circuit switch. One is for the brake lights. The other is for cruise control. The brake light part is robust. The cruise control part is a bent metal contact - lasted a mere 300,000+ miles :sneaky: (337,000 today but it started going out more than a year ago). What happens is when the metal is worn out, the cruise-control-canceling circuit is "always-on." $63 at Stevinson. Aftermarket is available but its a critical safety item so I went OEM. (84340-06010) If your 80 cruise lights up but then blinks and shuts off, this is probably why. Easy to replace once you contort under the dash.

View attachment 91803View attachment 91805View attachment 91804

2) Center Diff Lock indicator light switch. Trouble with your CDL coming on? Does your CDL indicator light flicker or not glow bright. This is why. Beck-Arnley PN 201-1788 is a direct replacement. $15.00 at Amazon. Now its bright and crisp!

To get to it you either need a 27mm angled ratcheting box end wrench or disconnect the transmission cross-member (I loosened the driver's side and removed bolts entirely on the passenger side - use a jack stand and floor jack) to lower it about 2 inches and then I got a 27MM socket on the 1/2 breaker bar in there.

View attachment 91800

3) Intake manifold/"fuel injection" bypass coolant hose in the GX470. Now all coolant hoses are new.

4) changed the oil in the 80.

5) replaced the failing driver's seatbelt webbing. Oddly, both are for a 1993 but the good used one I had would not bolt up so I swapped the webbing. Anyone want a free drivers side seat-belt mechanism with no webbing? Will apparently fit some 80's. I used wire to keep the mechanism from spinning and another wire to help pull the loop back through. The loop is locked in place with a small plastic bar.

View attachment 91801View attachment 91806View attachment 91802
How is your CDL indicator switch working now? Is it engaging every time you push the dash button?
 

AlpineAccess

Hard Core 4+
Joined
Nov 19, 2019
Messages
1,263
Location
Loveland
When looking for those MIL A52425 terminals consider making sure you get the lead ones.

They make them in zinc (e.g. so they're lead-free, which is required in some cases for RoHS) but those didn't hold up over time for me and eventually cracked. They are probably OK if you install and forget, though.

And a FWIW, I prefer the ordnance style personally. These particular ones are made by East Penn (the battery company). The sets I got were very high quality, the casting was very clean.

View attachment 91995


Those look super nice! I'll need to review what mine are. I think the listing specified lead, but am now curious. I wish I could have found something with a 5/16 connector bolt as it was a pain to work around it, not having one on hand in that length. I cut all thread and used some nuts that fit and welded my own but obviously not optimal.
 

DaveInDenver

Rising Sun Ham Guru
Joined
Jun 8, 2006
Messages
13,114
Location
Grand Junction
Those look super nice! I'll need to review what mine are. I think the listing specified lead, but am now curious. I wish I could have found something with a 5/16 connector bolt as it was a pain to work around it, not having one on hand in that length. I cut all thread and used some nuts that fit and welded my own but obviously not optimal.
They look like lead to me but their weight is the easy tell, lead will feel heavier and softer. The zinc ones will be hard, almost impossible to scratch.
 

AlpineAccess

Hard Core 4+
Joined
Nov 19, 2019
Messages
1,263
Location
Loveland
They look like lead to me but their weight is the easy tell, lead will feel heavier and softer. The zinc ones will be hard, almost impossible to scratch.

These were definitely lead in that case. Can scratch them with my fingernail and they are really heavy for what they are.
 

Inukshuk

Rising Sun Member
Joined
Aug 24, 2005
Messages
7,298
Location
Denver, CO
How is your CDL indicator switch working now? Is it engaging every time you push the dash button?
no. Still sometimes hesitates. Now more when cold than hot.
 

AlpineAccess

Hard Core 4+
Joined
Nov 19, 2019
Messages
1,263
Location
Loveland
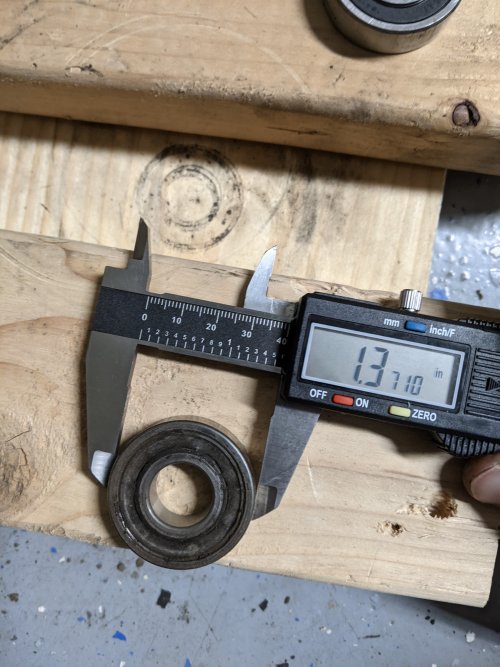
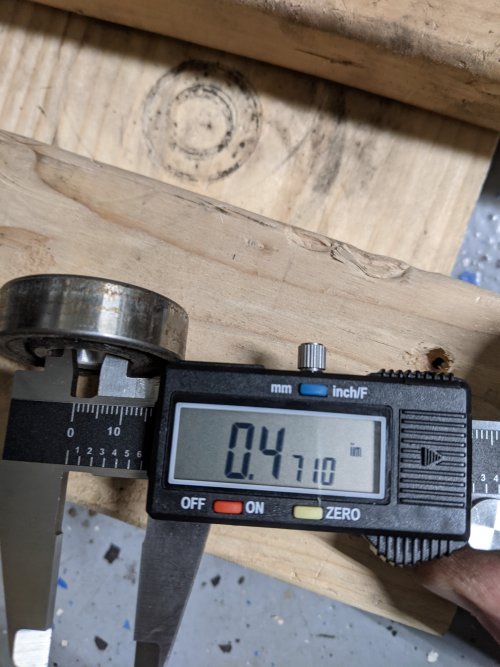
Was replacing idler and tensioner pulleys, couldn't find a tensioner from Toyota for under $50 for the pulley itself and no luck on finding an OEM bearing. Figure I'll replace the tensioner assembly (comes with pulley for like $75) when I do my timing belt in a year or two so a Dorman part will work until then. Wrong. Despite providing VIN, etc. Pulley won't fit over the tensioner due to not being the same diameter and having a different shaped hub.

Good news is the bearing calipered the same so hammered out the OEM and cheap Dorman bearing and pressed it into the OEM pulley.

Thanks to whoever decided this was compatible.
PXL_20210121_013259662.jpg


Some bearing measurements and pics if anyone is looking to find a bearing. This bearings seal on what is likely a Chinese bearing looks cheap but it's an easy replacement and will work for now.

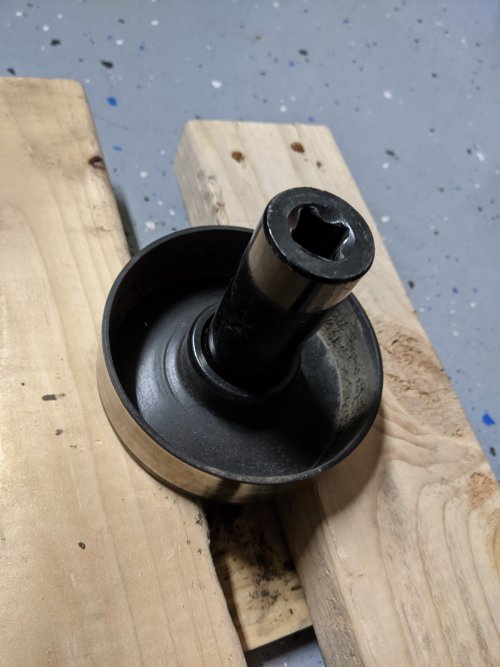
A 22m socket worked to knock the old bearing out of the OEM pulley. A 24mm worked to knock in the new bearing.
 

Attachments

  • PXL_20210121_013221049.jpg
    PXL_20210121_013221049.jpg
    2.9 MB · Views: 144
  • PXL_20210121_013229807.jpg
    PXL_20210121_013229807.jpg
    2.9 MB · Views: 143
  • PXL_20210121_012710287.jpg
    PXL_20210121_012710287.jpg
    2.4 MB · Views: 164

RayRay27

Cruise Moab Committee
Joined
Jun 26, 2015
Messages
1,478
Location
Thornton via Boulder
no. Still sometimes hesitates. Now more when cold than hot.
I have narrowed my issues down to a hot/cold situation. When the truck is cold the CDL locks no problem but once I drive the truck around for 15-20 minutes and warm it up it will not lock. I am going to change out my indicator here in the next week or so. More to come. Do you change your T-case fluid regularly or use a synthetic fluid? I am just trying to narrow down all of the potential causes.
 

Inukshuk

Rising Sun Member
Joined
Aug 24, 2005
Messages
7,298
Location
Denver, CO
I have narrowed my issues down to a hot/cold situation. When the truck is cold the CDL locks no problem but once I drive the truck around for 15-20 minutes and warm it up it will not lock. I am going to change out my indicator here in the next week or so. More to come. Do you change your T-case fluid regularly or use a synthetic fluid? I am just trying to narrow down all of the potential causes.
Mobil 1 changed at reasonable intervals.
 

Smakee

Locked
Joined
Oct 15, 2015
Messages
237
Location
Denver, CO
Installed my Whiteline sway bar and LCP links and prepped for paint yesterday. Got one side done with RaptorLiner today. I’m pretty happy with the results.
 

Attachments

  • 9F69031F-35DB-49F1-8725-515B87ED1ABE.jpeg
    9F69031F-35DB-49F1-8725-515B87ED1ABE.jpeg
    3.7 MB · Views: 153
  • 1BF01010-C7B4-410A-8501-4E627EE93894.jpeg
    1BF01010-C7B4-410A-8501-4E627EE93894.jpeg
    3.6 MB · Views: 151

Johnny Utah

Rising Sun Member
Joined
Mar 6, 2015
Messages
1,114
Location
Arvada
@DanTheMan There hasn't been much accumulation up there this year so the roads are drive-able in 2wd all the way up Pisgah Lake Rd. Pisgah was covered in snow but mostly packed down (not super icy but packed tight) with maybe a couple inches of fresh snow from a couple days prior. Once on Yankee Hill the ruts were 6-8" deep. I think most rigs with 33s+ and 4wd should do okay. I don't have lockers and I didn't air down, I just used 4low and locked the center diff and did fine with a little V8 persuasion. My buddy was in his LX470 with blown out AHC (meaning lowest ride height) and 285s also and he was right behind me the whole way no problem. We stopped before we hit Miners Gulch intersection and headed back down.
Very fun trip, and my first time with the cruiser on a snow packed trail. I was impressed at how it handled. We did bring tire chains, traction boards, and tow straps just in case, but did not need any of them.
 

allen.wrench

Rising Sun Member
Joined
Dec 7, 2018
Messages
376
Location
Syracuse, UT
I've been slowly but surely finishing the last touches on my rear bumper. I'm at the 20% part of the 80/20 rule where all the small details (like fabricobling safety chain tow ears and smoothing out welds) add up to be the same amount of work as the first large steps (like tacking everything together). Granted I can sometimes kick myself for how much I spend on detailing the underside of a banister or polishing a cannon ball. But also yeah it's a learning process and working through it :D Other than my issues, lol, things I've also learned that might immediately help others:
  • the harbor freight titanium MIG 170 is a good welder that I'd recommend based on my use so far. I'm still super thankful for also using @J1000 Miller at an earlier stage of the build and it's neat to have different options available.
  • the bauer rattails are great 4 1/2" angle grinders which I'm liking as much if not more than the makita angle grinder I've owned/used for years
  • a pneumatic pencil grinder and some carbide rotary burrs are extremely handy for getting at sharp corners that might cut the operator (or synthetic soft shackles) later on in the bumper's service. Also gives you a feel for what it's like to be the dentist instead of the poor fellow in the chair. Though breaking several burrs when spinning them at 50,000rpm should be avoided if you're a dentist. Trust me! Experience (mixed with pain) here is the best teacher
  • a hydraulic lift table makes a world of difference for mounting onto the truck frame, welding in different positions, and grinding everything (idk I might have mentioned it before, it's really worth mentioning)
  • having primer (or other paint) makes telling where/how to grind smooth/clean much easier than bare metal alone (plus there's also some corrosion benefits too if you keep putting off the final surface treatment in favor of getting everything else perfected). Fun fact: grinder and paint also makes me the welder I ain't ;) haha
  • trust me a good file is very good for smoothing out some of the final bumps left behind by the grinder. It may seem tedious, but it's very relaxing for me and I believe yields great results. Different tools for different fools, or different strokes for different folks, or well you know what I'm getting at.

First side note, thinking about chopping the last foot or so of tailpipe that protected my old rear bumper. Since the old bumper has been removed I feel like that last foot of tailpipe has no purpose??? Kinda thinking of a diagonal cut though a simple vertical cut might also look good, function, and be easier. And I am planning on definitely making the cut after the cat and muffler so I expect no emissions issues later on, plus I believe it should be far enough back and still near the edge of the body under my truck bed to minimize exhaust fume loopiness. Any thoughts?

Second side note, anyone interested in about 3 pounds of black sand?? I'm selling some for a very good price, haha

I think I'm on the final stretch of the journey. Time will tell us the truth soon enough. It sure has proven to be long and interesting. I should soon finish the license plate holder, the towing electrical connector bracket, drilling/tapping holes as necessary (planning to reuse a lot of M8s from stock bumper), and then yeah hopefully get it to powder coating and final mounting back on my truck.

Hope this helps someone.

Allen


20210114_201901.jpg
20210114_220413.jpg
20210120_190925.jpg
20210122_194303.jpg
20210129_201627.jpg
 

J Kimmel

Hard Core 4+
Joined
Oct 25, 2005
Messages
1,705
Location
Glenwood Springs CO

J Kimmel

Hard Core 4+
Joined
Oct 25, 2005
Messages
1,705
Location
Glenwood Springs CO
Pulled my entire interior because my transfer case decided to back off a bit and create a huge transmission leak. I’ll pull it a re-locktite it tomorrow when I have help
 

Attachments

  • D220782F-0436-469B-A9C3-AA584C404A0F.jpeg
    D220782F-0436-469B-A9C3-AA584C404A0F.jpeg
    1.7 MB · Views: 134
  • A4459314-7530-4AB7-BA8B-73FDE36F2CF4.jpeg
    A4459314-7530-4AB7-BA8B-73FDE36F2CF4.jpeg
    1.2 MB · Views: 132
Top