What have you done to your rig today?

RDub

Locked
Joined
Feb 9, 2021
Messages
248
Location
Boulder, CO
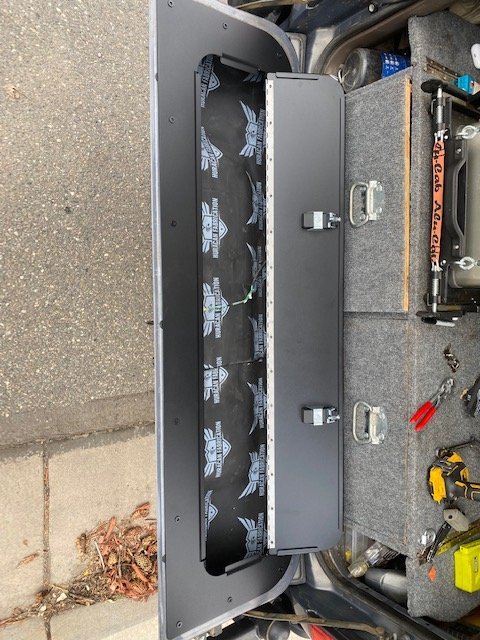
Finally got the ham radio installed in my 60. Went with the Yaesu FT-2980R 2m rig. I decided not to drill holes in any sheet metal so I mounted it similar to an installation I saw on MUD.
IMG_4429.jpeg

IMG_4428.jpeg

What took the longest was figuring out an antenna mount that wouldn’t require drilling holes. Went with passenger fender mount, and built a custom bracket that uses two existing holes in the fender well. I settled on 18ga 304 stainless material as a decent compromise between stiffness and hood/fender gap clearance. Hard to make it stiff enough so I had to add a second piece. The three screws were cutoff after they went in and peened over, like rivets. I used a small piece of 3M VHB tape to try to stick it down to the horizontal lip on the fender well. Probably a lot of overthinking going on here. I need to come up with a slicker way of managing the coax.
IMG_4432.jpeg

IMG_4431.jpeg

Not much of a gap between the hood and fender which made it a challenge. Seems pretty stiff now, but added a piece of thin rubber as a protector. I used a Diamond NMO mount with skinny coax, which Diamond assured me will handle the 80W the radio can put out on high power.
IMG_4433.jpeg

The fender mount is not optimal but it’s fairly clean and has worked well so far. Time will tell. Overall I’m happy with how it turned out.
 
Last edited:

maxpowerzz

Trail Ready
Joined
Oct 4, 2015
Messages
375
Location
Denver
Charged my battery, does that count 😁
20230401_153159.jpg
 

maxpowerzz

Trail Ready
Joined
Oct 4, 2015
Messages
375
Location
Denver
Flipping that headlight bezel would count☺️
Ha! I've purposely left it, it's been like that for over a decade. It feels more balanced with the weightier thickness on the bottom, though I know it's sacrilege. This was Kurt's first cruiser he built in high school with his dad, I'll have to ask how he had the bezel and if he ever got a ticket from the bezel police 😂
 

Fisher67

Rising Sun Member
Joined
Nov 5, 2015
Messages
223
Location
Denver
Getting ready for cruise Moab. figured out mounts for Rotopax 4.5 gallon tank and Kaymar mount for shovel and hi lift Jack.
 

Attachments

  • 9FBB2ACE-EC98-4423-9EBC-11B2F6882B9E.jpeg
    9FBB2ACE-EC98-4423-9EBC-11B2F6882B9E.jpeg
    2.6 MB · Views: 52
  • CCEEFE79-F773-4CF1-8FC7-4666C838438D.jpeg
    CCEEFE79-F773-4CF1-8FC7-4666C838438D.jpeg
    1.8 MB · Views: 53
  • E6638319-7A2B-4399-8221-81E03E0823BC.jpeg
    E6638319-7A2B-4399-8221-81E03E0823BC.jpeg
    1.6 MB · Views: 48

RayRay27

Cruise Moab Committee
Joined
Jun 26, 2015
Messages
1,471
Location
Thornton via Boulder
Getting ready to do my first oil change on the Tundra before heading out to Moab next week. Picked up some oil filters at Stevinson yesterday from Derek. He said I'm the first person he knows of to buy oil filters for the new Tundra. Derek was confused by the part number because he's never seen it before. For those of you that don't know, Toyota went back to the metal oil filters for the new Tundra instead of using just the pleated filter element.

Six filters for 40 bucks. Can't beat it.
20230411_064012.jpg
 
Last edited:

rushthezeppelin

Rising Sun Member
Joined
Oct 14, 2022
Messages
1,109

rushthezeppelin

Rising Sun Member
Joined
Oct 14, 2022
Messages
1,109
Halfway through my LCA swap I found this gem from the last alignment shop. The ugga duggad it so bad that it will no longer come out the cam sleeve, it's been expanded. I mean I partly understand as it's a pain in the ass get basically anything except a box or a crescent on this thing because the steering rack is in the way but holy smokes I think he managed to just barely get a wobble socket on there and set her to the moon with the air impact. I'm going to see if I can't hammer it out and if not then I'll just have to cut it with the cam sleeve that's frozen to the bushing anyway. I don't think I've had a single job on this truck that didn't have some kind of snag.....

IMG_20230412_163204365_HDR.jpg


Also I now miss working on my truck in winter. I'm working up such a stupid amount of sweat today and it doesn't help that I've had an upset stomach since having a breakfast burrito this morning provided by my company for the monthly company meeting....
 
Last edited:

J Kimmel

Hard Core 4+
Joined
Oct 25, 2005
Messages
1,700
Location
Glenwood Springs CO
Deleted all my vacuum stuff which seems to have fixed my hanging/high idle. Tied up all the wires and tucked them away.
EBCB1B28-3F4F-4791-9DEF-B69A1343CB9B.jpeg
Bolt check etc and added more oil to my rear shocks.
 

Lastresort576

Hard Core 4+
Joined
Mar 21, 2016
Messages
587
Location
Westminster
I’ve had to use my recovery gear more on stuff around the house than I have had to get unstuck with it. 😂
7F3CDCF4-0F69-49A6-A859-C61881CECBC8.jpeg
38D375C2-7226-40D5-BF4F-0653A9D848C8.jpeg
 

rushthezeppelin

Rising Sun Member
Joined
Oct 14, 2022
Messages
1,109
Well LCAs are now replaced and I have poly bushings. This job was the worst yet on time estimate too. I think I guessed 3 hours and it ended up being I think 9 or 10 hours. Back is absolutely killing me right now. My bonehead almost killed my battery too because I left the key in for quite a while to keep the steering from locking up on me while I was disconnecting the rag joint so that I could move the rack out of the way. Had to use my jump box to get her out of the garage. Seriously annoying that you have to take the whole rack out in order to take the rear cam bolts out but I understand where they want the tie rods to move as closely as possible to the lower suspension so that it doesn't toe in and out too much as the suspension flexes. Kind of wish I had been ready to do this job when I was doing the rack but that job took a long time too so it's probably better that I broke the jobs up. Def recommend the Milwaukee carbide blades too, they held up really well cutting the cam bolt sleeves out of my passenger arm. Was going to get the diablo blades but a Milwaukee rep was on the aisle and recommended I try their new blades out instead as they are supposed to last twice as long. Just made sure to stop fairly frequently and cool them down with some lube, at least on the far front and far back side of the arm as I had to cut through both the bushings sleeve and and the cam bolt sleeve which was quite a bit of hardened steel. Inner ones were easier as I had enough room to slip the blade outside the bushing itself and it cut those like butter. Ended up taking a paint pen to the self refurbed cam bolts and matched the paint marks from the last alignment so I was able to set the cams about where they were before (with some changes I'm sure due to stiffer poly bushings vs what I'm now pretty sure were clapped out rubber bushings). Either way the alignment was definitely good enough to go down the highway so should have no problem making it to the alignment shop tomorrow. Hoping I can get some really good caster numbers without rubbing and hopefully there's still enough room for me to fit 33s on when my current 31.5s are done for. If not I might be investing is some high caster UCAs next. That's the only component now not replaced on my front end.
 

fyffer

Rising Sun Member
Joined
Sep 22, 2019
Messages
457
Location
Trinidad, CO
Well, it’s been more than today or yesterday. But built a sleeping platform with couple drawers and cabinets to include a fridge slide. Time will tell of outcome and CM should tell.
6E21FFEB-67B8-41C7-BDAC-015764F0B5FE.jpegEEAA8FE4-AD18-4031-ADDD-8515B0BBF84B.jpegFEA251FA-99F3-4B75-8438-B15694631C50.jpeg
 

mosdefjeff

Trail Ready
Joined
Nov 26, 2015
Messages
304
Location
Wheat Ridge
Installed the Huracan Fab tailgate storage I've been wanting for years. Simple install overall. Noisy and messy, but it'll be nice to have another nook to throw crap.
 

Attachments

  • 70311617897__1EC7E329-E36F-4D3C-B5FE-A352C4F6019D.jpg
    70311617897__1EC7E329-E36F-4D3C-B5FE-A352C4F6019D.jpg
    153.8 KB · Views: 99
  • 70311618973__836F44C1-C394-4C48-98CB-B68F28EC2D3B.jpg
    70311618973__836F44C1-C394-4C48-98CB-B68F28EC2D3B.jpg
    95.2 KB · Views: 86

fyffer

Rising Sun Member
Joined
Sep 22, 2019
Messages
457
Location
Trinidad, CO
Installed the Huracan Fab tailgate storage I've been wanting for years. Simple install overall. Noisy and messy, but it'll be nice to have another nook to throw crap.
Hope you used nylocks or blue locktite to nuts, just speaking from experience.
 

CMoore

Rock Stacker
Joined
Mar 21, 2023
Messages
26
Location
Denver, CO
Finished up with the new dizzy/wire install and moving my heater hose. Huge shoutout to @RicardoJM for the help!
 

Attachments

  • 9836F656-1715-4137-84ED-7498B8ACF245.jpeg
    9836F656-1715-4137-84ED-7498B8ACF245.jpeg
    1.8 MB · Views: 64
  • 39117D16-2BF9-4546-A8F9-1D285CD556A6.jpeg
    39117D16-2BF9-4546-A8F9-1D285CD556A6.jpeg
    1.7 MB · Views: 51
  • 73082037-ECD0-45B7-8EB8-3844ADA3996D.jpeg
    73082037-ECD0-45B7-8EB8-3844ADA3996D.jpeg
    4 MB · Views: 52

HoneyBadger

Rising Sun Member
Joined
Apr 24, 2013
Messages
1,807
Location
Pine
It’s been a busy couple weeks.
New carriers bearing.
New rear u-joint.
Oil change.
New Sony stereo, with Bluetooth.
Took out the old Cobra CB and put in a new Midland GMRS/FRS radio.
Touched up a bunch of paint.
New windshield wipers.
And a new windshield.
But the windshield was a multi day problem.
Turns out I had some fairly bad rust hiding behind the windshield due to a crappy install job from the guys who did it back in 2012 in Texas.
I had to take out the old cracked windshield and buzz off a bunch of rust, plug a couple small holes, prime, and paint. Not fun.
But the new one is in and looking good.
F8939555-A76B-4710-9102-3AC2010DA919.jpeg
726E591A-F88C-4388-A82F-3533FBF301CC.jpeg
2C5A4D05-AD5F-4361-A410-ECD1EDF62CD3.jpeg
C0ABF06C-FE27-4F4C-9A13-F81807BE1B2E.jpeg
DB2586F1-FA05-4933-8068-40B590524C62.jpeg
A4E16A00-EEA0-443E-B6DE-BBBB91965B32.jpeg
7C9B6590-EF97-497B-9F3A-CF411AC3588D.jpeg
 
Top