• ColoYota Expo: swap meet + show and shine. Saturday, May 11 from 10 am - 2 pm
    Get Details & Register Now!
    . Only $5 to attend (no additional charge to participate in the swap meet).


    Hey Guest, we need volunteers to help run the event. Please sign up here.

My Sisters 40

kurtnkegger

Rising Sun Member
Joined
Jan 24, 2011
Messages
1,511
Location
Denver Burbs
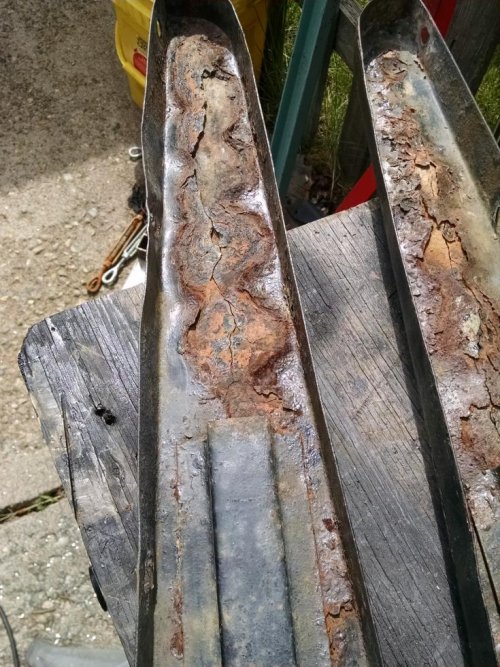
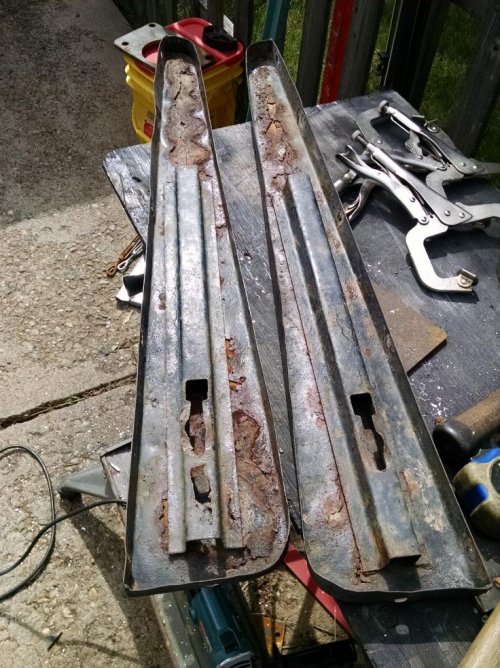
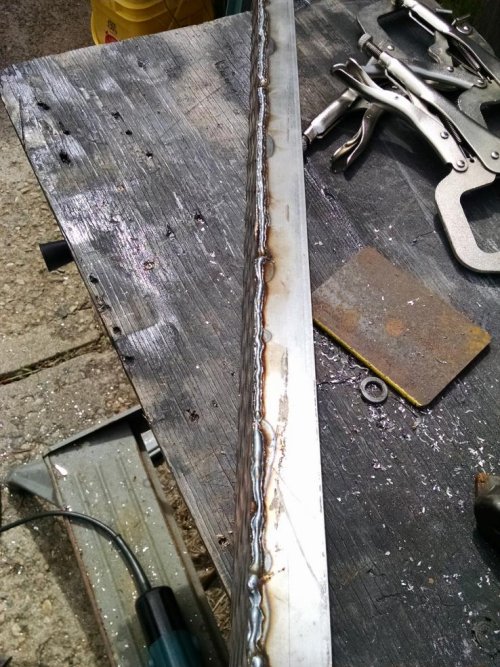
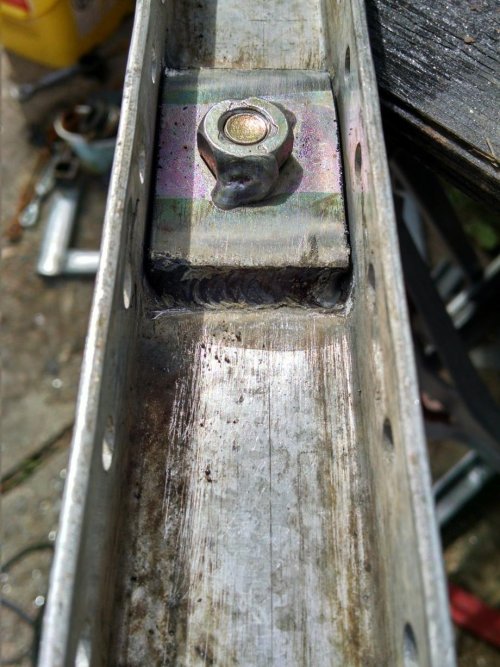
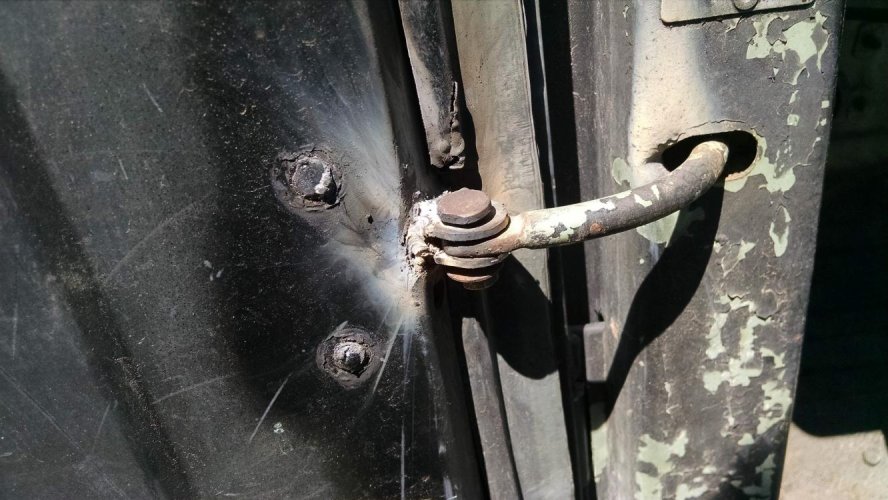
Drew, I butt welded it. The original looked like it was about 16 gauge, and the only tube the vendor had there in stock was 1/8th inch. About twice as thick as the OEM tube. Since the two side walls were so different, I couldn't really put a sleeve in there. I ground a nice edge off of the new steel, and the way the cutter went through the old stuff gave it a bit of an angled edge as well. There was really a decent area to fill, and since the new tube was so much thicker, I was able to leave the molten puddle there longer, and then dance it to fill the crack, and get good adherence. I honestly think I got a good strong weld in the joints.

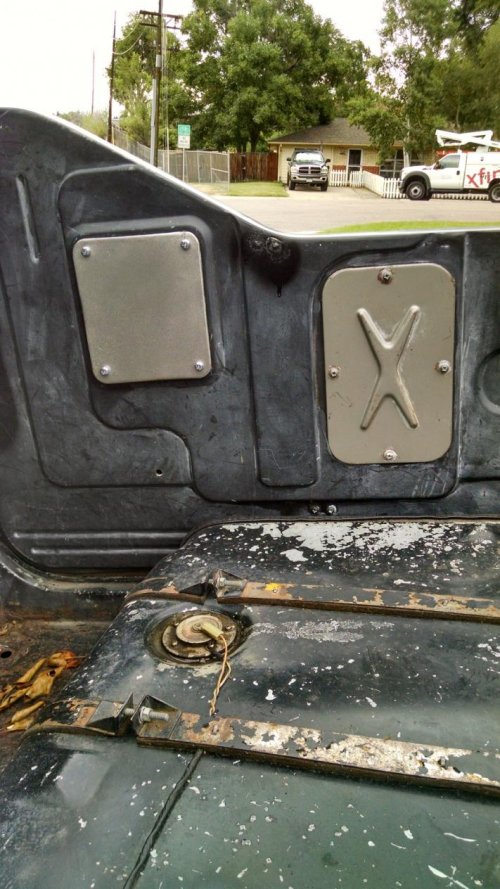
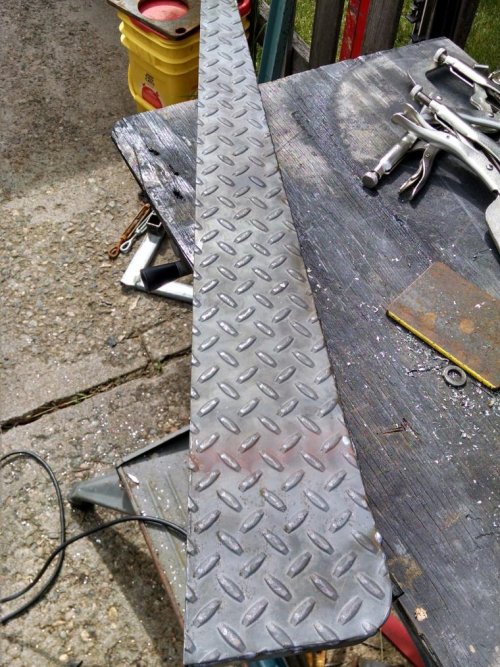
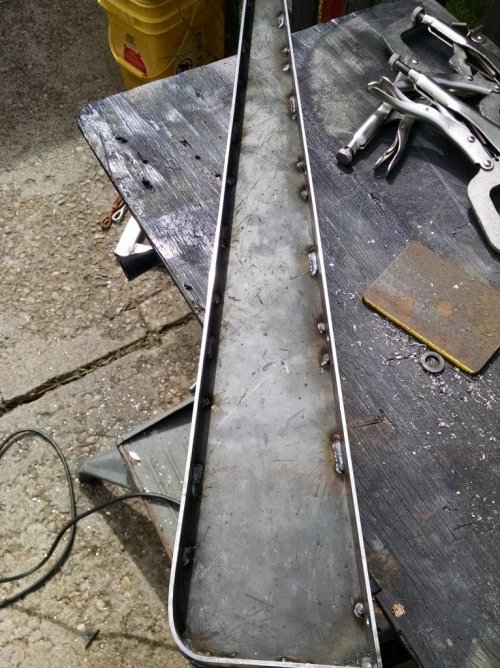
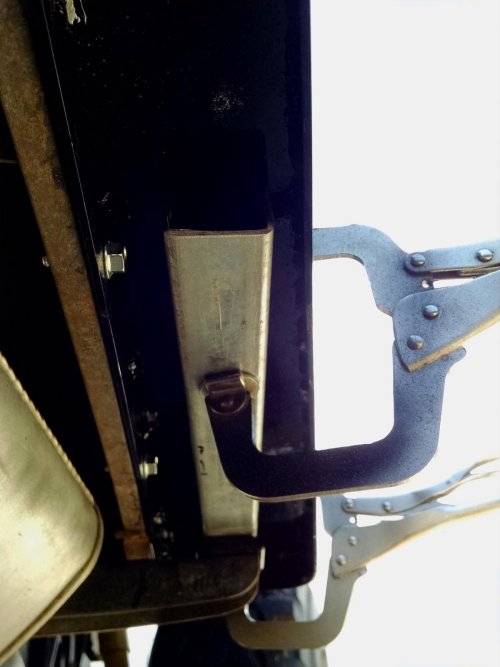
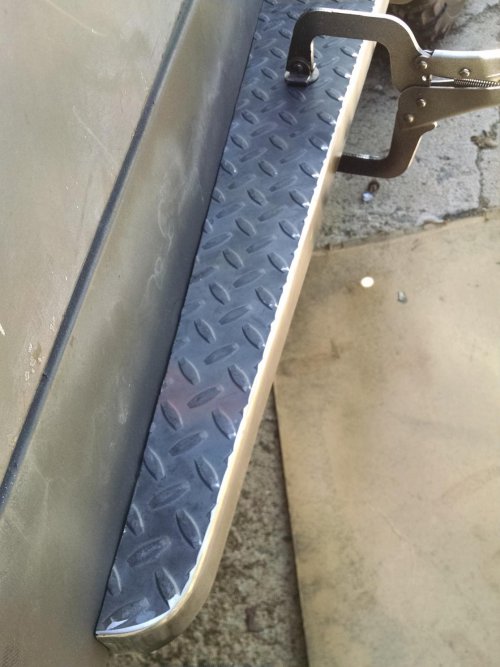
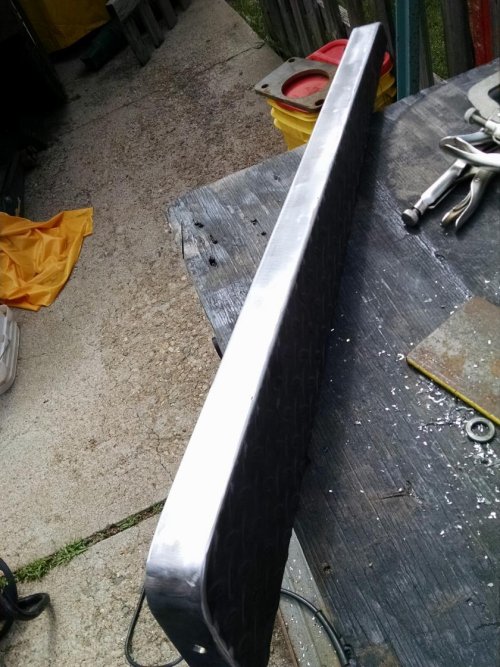
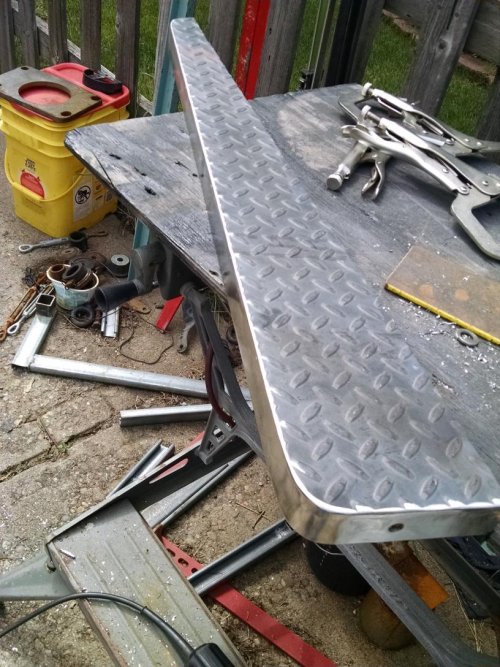
As far as welding the rear quarters in, it wasn't too bad. In retrospect, I should have been more cautious on the top cut, and left the small lip of steel for a little backing (If that could be done) Just something I thought about as I was starting to fit the pieces. The long vice-grip clamps (like about a 10" reach) were real handy to help keep the quarters in place while the first welds were being done. There was about an inch that I had to trim off at the back once it was worked around.

All said and done Drew...I've seen some of your work, and you wouldn't have a problem getting them on...
 

kurtnkegger

Rising Sun Member
Joined
Jan 24, 2011
Messages
1,511
Location
Denver Burbs
The old steps were pretty rust rotted, and I figured it would be easier, and better to just make some new steps. I used 1/8th inch diamond plate, as well as 1/8th inch cold rolled flat stock that was 1 1/4" wide. I measured the old diamond plate, and should have measured the over all dimensions....anyway, the new steps ended up about 3/8" shorter than the old. Not really enough to notice, but now we all know....

I welded about one inch long stitches on the underside, and did a couple of half inch welds by every mounting hole. Welded the gap around the outside edge, so when cleaned up, it would look like one piece.
 

Attachments

  • IMG_20160612_103115889.jpg
    IMG_20160612_103115889.jpg
    172 KB · Views: 300
  • IMG_20160612_103128142.jpg
    IMG_20160612_103128142.jpg
    171.3 KB · Views: 291
  • IMG_20160612_103133804.jpg
    IMG_20160612_103133804.jpg
    170.9 KB · Views: 292
  • IMG_20160612_103242765_HDR.jpg
    IMG_20160612_103242765_HDR.jpg
    174.3 KB · Views: 290
  • IMG_20160612_103247429.jpg
    IMG_20160612_103247429.jpg
    169.1 KB · Views: 287
  • IMG_20160612_103253118.jpg
    IMG_20160612_103253118.jpg
    172 KB · Views: 293

kurtnkegger

Rising Sun Member
Joined
Jan 24, 2011
Messages
1,511
Location
Denver Burbs
I got the grinder with the hard wheel, and took the weld close, then finished it up with a flap disk. The support was made from some scrap "C" folded sheet, that was 1 1/4" as well to keep the support. Welded in a nut, and fit the steps to the side of the 40. Once in, I clamped the support up so the nut matched up to the support piece. I tack welded in place, removed, finished welding, rattle can, and replaced.

Nice sturdy steps in place now...
 

Attachments

  • IMG_20160612_150618394_HDR.jpg
    IMG_20160612_150618394_HDR.jpg
    162.1 KB · Views: 290
  • IMG_20160612_124614219.jpg
    IMG_20160612_124614219.jpg
    126.7 KB · Views: 285
  • IMG_20160612_124554729.jpg
    IMG_20160612_124554729.jpg
    146.8 KB · Views: 286
  • IMG_20160612_104204719_HDR.jpg
    IMG_20160612_104204719_HDR.jpg
    163.7 KB · Views: 280
  • IMG_20160612_103403817.jpg
    IMG_20160612_103403817.jpg
    163.9 KB · Views: 283
  • IMG_20160612_103354884.jpg
    IMG_20160612_103354884.jpg
    170.7 KB · Views: 287

SteveH

Hard Core 4+
Joined
Aug 10, 2006
Messages
2,922
Location
Colo Springs
Running boards = wow. Impressive.
 

simps80

Rising Sun Member
Joined
Jan 22, 2009
Messages
2,721
Location
Arvada, CO
love the steps.
this thread will be real nice inspiration!

do you have a brake you are making bends with?
 

kurtnkegger

Rising Sun Member
Joined
Jan 24, 2011
Messages
1,511
Location
Denver Burbs
Mike, no brake, just a vice and a piece of pipe thats about the right size. I bent the flat stock for the steps cold, it took a little time and the little bend took some hammering to get it to cooperate...
 

aprosise

Hard Core 4+
Joined
Mar 10, 2014
Messages
854
Location
Boulder, Co
Kurt, this is making me want to start on my 40! Very inspirational!

Nice work.
 

nuclearlemon

Hard Core 4+
Joined
Aug 23, 2005
Messages
8,325
Location
windy wyo
again, freakin' awesome job!!!!!
 

simps80

Rising Sun Member
Joined
Jan 22, 2009
Messages
2,721
Location
Arvada, CO
how did you do the mounts for the barn door hinges with the new rear fenders..

did the new fenders come with nuts on the back..i can see in post 48 the top two screws are still there but can't tell what the rest were part of..the new fenders or some support piece?

i checked jeff zepps resto page too, its a 76 so different..but no detail on the holes for hinges

..just curious

edit:
found some good detail of the channel behind the quarter skin here:
http://forum.ih8mud.com/threads/bumps-on-my-78s-rear-tub-fenders.235482/page-8
 
Last edited:

kurtnkegger

Rising Sun Member
Joined
Jan 24, 2011
Messages
1,511
Location
Denver Burbs
Mike, The top two holes are inside the top rail, so I left those to reuse. They weren't rusted, and worked great. The bottom holes were just two free nuts on the inside. I used flanged JIS nuts instead of the nuts and washers.

The bottom hinge was fastened to a plate that was rusted out, so I got the measurements, drilled and tapped the holes in to a new piece of 1/4" plate at the right distance (M6X1.0) and fastened them in.

After I broke the old bolts off the plate came out, so I don't think it was welded in to place. I didn't weld the new plate in.
 

Attachments

  • IMG_20160618_065958562.jpg
    IMG_20160618_065958562.jpg
    145.8 KB · Views: 377
  • IMG_20160618_065939585.jpg
    IMG_20160618_065939585.jpg
    101 KB · Views: 376

kurtnkegger

Rising Sun Member
Joined
Jan 24, 2011
Messages
1,511
Location
Denver Burbs
Not much to report from the weekend....

Cut the reverse light hole.

Made door limiter brackets, and welded them on the half doors.
 

Attachments

  • IMG_20160619_103114944.jpg
    IMG_20160619_103114944.jpg
    144.8 KB · Views: 350
  • IMG_20160619_113555513.jpg
    IMG_20160619_113555513.jpg
    152.6 KB · Views: 347

Rezarf

Hard Core 4+
Joined
Aug 25, 2005
Messages
5,913
Location
In Uncle Ben's Shadow
Kurt,

Do you unplug the battery and or do anything else before welding panels on the rig? You've inspired me to get after my 40's rust.
 

kurtnkegger

Rising Sun Member
Joined
Jan 24, 2011
Messages
1,511
Location
Denver Burbs
You know Drew, I never even thought of disconnecting the battery...until you mentioned it. I never thought the "computer" was that delicate to where I could hurt it. It probably would be a good idea to do that.

The only thing that really made me pucker was welding right next to the gas tank. I put a heavy plastic sheet on the filler part of the neck, and then put rags over to protect from sparks burning through. Since its outside, I wasn't worried about accumulation of fumes.


As far as progress...I made a couple of plates to cover the hole for the door crank. The guy I got them from said he put speakers in there, but there wasn't any extra holes. I painted with some "stainless steel" color paint, and the color matched up ok.

I started taking emblems and some trim stuff off in preparation to go for paint. I put a bungee cord over the hood to stop it from blowing up in case of a wind storm.
 

Attachments

  • IMG_20160701_184000284_HDR.jpg
    IMG_20160701_184000284_HDR.jpg
    154.5 KB · Views: 333
  • IMG_20160701_184013152.jpg
    IMG_20160701_184013152.jpg
    144.3 KB · Views: 317
  • IMG_20160701_184354294.jpg
    IMG_20160701_184354294.jpg
    148.3 KB · Views: 317
  • IMG_20160701_184357916.jpg
    IMG_20160701_184357916.jpg
    154.2 KB · Views: 320

SteveH

Hard Core 4+
Joined
Aug 10, 2006
Messages
2,922
Location
Colo Springs
My exhaust guy welded exhaust systems for 30 years, and never disconnected a battery - and never fried a computer. His point was this: always put the ground clamp as near to the welding area as possible.

A church buddy also importantly pointed out that you never want to ground a weld through a bearing (whether on a lawn mower, axle, or whatever), as you can arc across the rollers in the bearing, and fry the bearing prematurely. With these tips in mind, I think you can safely weld body metal on your FJ40.
 

kurtnkegger

Rising Sun Member
Joined
Jan 24, 2011
Messages
1,511
Location
Denver Burbs
I finally drove it 10 miles to the LineX place for some tub liner. They are going to do the fender wells, and rear wheel wells too.

My Sister talking to the LineX guy....
 

Attachments

  • IMG_20160720_154315349_HDR.jpg
    IMG_20160720_154315349_HDR.jpg
    152.9 KB · Views: 312

simps80

Rising Sun Member
Joined
Jan 22, 2009
Messages
2,721
Location
Arvada, CO
Kurt,

if you don't mind sharing,
what is the approximate cost of the line-x work?

did you find a paint shop to pain it, if so mind sharing cost etc ?

also, what are the plans for the hardtop?

it's looking unreal, especially considering where you started! :thumb:
 

kurtnkegger

Rising Sun Member
Joined
Jan 24, 2011
Messages
1,511
Location
Denver Burbs
Mike, the LineX is going on the inside of the tub, including the footwells and sides. The fenders, and wheel wells and as much under the tub as they can reach for about $1200. It also includes the UV coat, which further seals the little micro-holes for better protection. The Rhino people wanted to start at about $1000, so figured the LineX got the whole thing done for what Rhino wanted to start.

I don't know who, or where the paint is going to be sprayed...costs etc...My Sister told me one paint guy she talked to could repair the fiberglass top before paint, but I was thinking the LineX place could shoot the top, inside and out (since they do colors) and seal the little holes...and still look pretty cool...I would suspect that would cost under $500 for that, but that's only my guess.

What surprised me about LineX, is there isn't a lift at their place to do an undercarriage, or no 90 degree spray tip for tight spaces. It should be ready for pick-up in about a week.
 

kurtnkegger

Rising Sun Member
Joined
Jan 24, 2011
Messages
1,511
Location
Denver Burbs
Well, well...

Line-X got done (months ago), and towed to the paint guy...there it sat, got paint, sat some more, got more paint...FINALLY got finished, and towed back to my place!!

There were a few items that weren't done right...back frame painted the tub color...instrument bezel, ash tray, glove box painted the same color as the tub...inside of the hardtop not painted...little stuff to correct...

The headlight bezel was upside down (quickly remedied)

New tires on painted wagon wheels (to match bezel and top)

Time to start getting the turn signals, brake lights, badges...The end is coming near! I'll post pics as I get stuff done.
 

Attachments

  • IMG_0128.jpg
    IMG_0128.jpg
    87.6 KB · Views: 241
  • IMG_0129.jpg
    IMG_0129.jpg
    100.9 KB · Views: 231
  • IMG_0141.jpg
    IMG_0141.jpg
    124.9 KB · Views: 234
  • IMG_0142.jpg
    IMG_0142.jpg
    119.9 KB · Views: 235
  • IMG_0143.jpg
    IMG_0143.jpg
    122.6 KB · Views: 238
  • IMG_0145.jpg
    IMG_0145.jpg
    125 KB · Views: 222
Top