Engine Freshen, 4 Speed Conversion

Rzeppa

Rising Sun Member
Joined
Aug 24, 2005
Messages
8,881
Location
Kittredge CO, USA
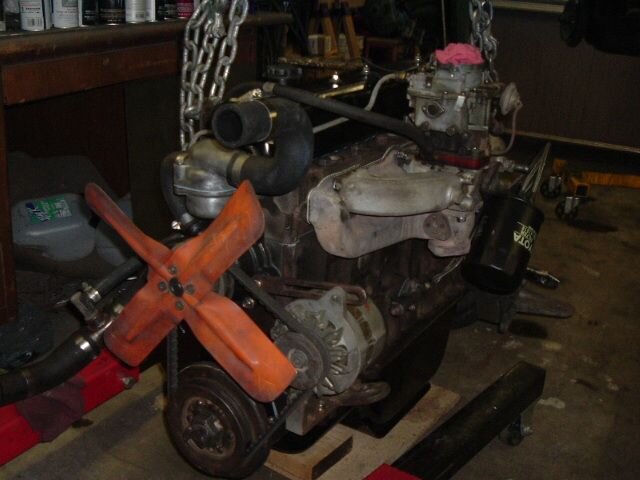
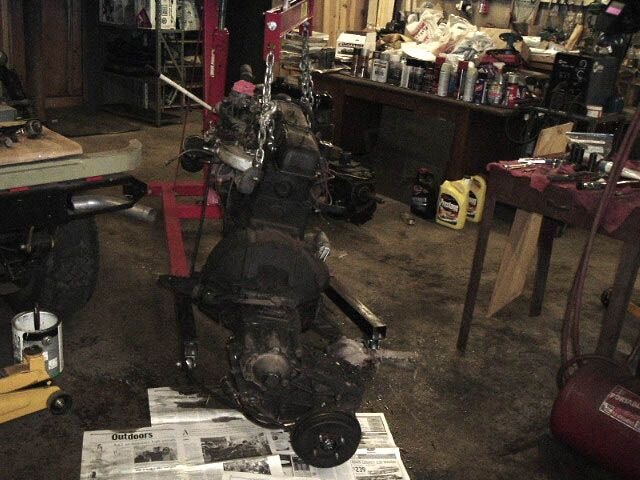
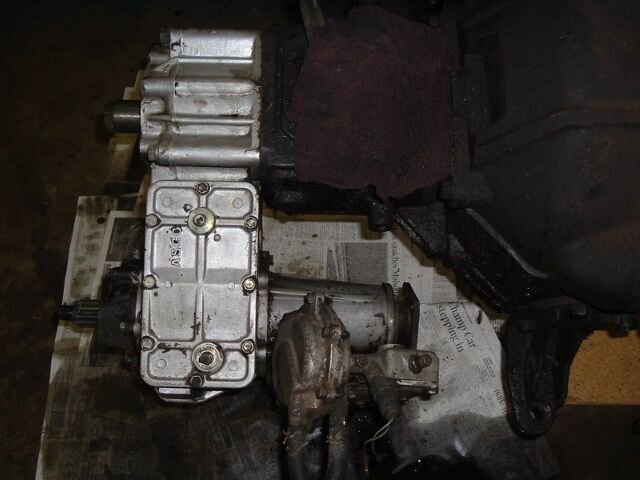
Finally, I got the cherry picker in place and started lifting. Working by myself, it literally took hours - most of a day. I was using a 5 foot pipe as a pry bar to try to manuever the unwieldy assembly. There were still a few things that I had to disconnect or remove as I slowly worked it out. The engine mounting ears on the bellhousing kept bumping into things like the steering box on one side and the splash shield on the other.
 

Attachments

  • 2006_0710Image0090.JPG
    2006_0710Image0090.JPG
    48 KB · Views: 419
  • 2006_0710Image0091.JPG
    2006_0710Image0091.JPG
    70 KB · Views: 412

Rzeppa

Rising Sun Member
Joined
Aug 24, 2005
Messages
8,881
Location
Kittredge CO, USA
I was SO happy to get that sucker clear of the rig. What a PITA! Now that I've done both ways, I don't know which is harder: pulling the engine/tranny/t-case as one unit, or engine only and then trying to stab the tranny while it's in the rig. They're both a pain. The only way that was easy was when I did my 76: with the body off! On that one I laid the engine in first, then stabbed the tranny using the cherry picker, then stabbed the t-case last.

I was also really glad to get the thing down close to the floor. That's a lot of weight up high, and a lot of potential for trouble if anything bad happened.
 

Attachments

  • 2006_0710Image0092.JPG
    2006_0710Image0092.JPG
    69.2 KB · Views: 418
  • 2006_0710Image0093.JPG
    2006_0710Image0093.JPG
    66.3 KB · Views: 420

Rezarf

Hard Core 4+
Joined
Aug 25, 2005
Messages
5,914
Location
In Uncle Ben's Shadow
Yeah, an extra set of hands on a jack make all the difference. Looks like a huge jump in progress, hope to see it come together quickly for you Jeff!

Keep up the great work.

Drew
 

Rzeppa

Rising Sun Member
Joined
Aug 24, 2005
Messages
8,881
Location
Kittredge CO, USA
Yesterday I went about cleaning up the exterior of the t-case. What a mess! Took pretty much all morning to get enough gunk off that I felt comfortable opening it up. I took the e-brake off the back and popped the inspection cover to get at the two inside bolts.
 

Attachments

  • 2006_0711Image0056.JPG
    2006_0711Image0056.JPG
    48.8 KB · Views: 423

Rzeppa

Rising Sun Member
Joined
Aug 24, 2005
Messages
8,881
Location
Kittredge CO, USA
After I got the bolts off, I couldn't believe how easy it was to slide off the tranny output shaft. All the other t-cases I've pulled need a puller, but this one slid right off with my hands.
 

Attachments

  • 2006_0711Image0057.JPG
    2006_0711Image0057.JPG
    43.9 KB · Views: 378
  • 2006_0711Image0058.JPG
    2006_0711Image0058.JPG
    51.5 KB · Views: 1,270

Rzeppa

Rising Sun Member
Joined
Aug 24, 2005
Messages
8,881
Location
Kittredge CO, USA
There's your tranny, Wes! Needs a little cleaning up, but the bearings are in good shape and it shifts smooth. I was surprised at how little the splines on the output shaft were. Usually that's why t-cases are hard to pull: the splines on the output shaft get worn and mated to the t-case input gear.
 

Attachments

  • 2006_0711Image0059.JPG
    2006_0711Image0059.JPG
    46.3 KB · Views: 413

Rzeppa

Rising Sun Member
Joined
Aug 24, 2005
Messages
8,881
Location
Kittredge CO, USA
Got it up on a stand to free up the cherry picker to use with the freshened engine. Last night, I got as far as loosening the manifolds to transfer to the freshened engine, and discovered that two of the three bolts that hold the exhaust and intake manifolds to each other were missing. Can anyone say "exhaust leak"? Anyway, I called it a night. Today I'll go looking for some bolts that will fit and pick up where I left off.
 

Attachments

  • 2006_0711Image0061.JPG
    2006_0711Image0061.JPG
    68.8 KB · Views: 376

Rzeppa

Rising Sun Member
Joined
Aug 24, 2005
Messages
8,881
Location
Kittredge CO, USA
wesintl said:
Are you using the 3 speed xfer off the one you just pulled?
Exactly; that's why I needed to get the 16 spline transition gear & Datsun B210 bearing. For the vacuum front drive mechanism I can just re-route the hoses, in fact it looks like I may be able to just re-bend the vacuum hard lines, they have a lot of service length. For the high-low shift rod, I plan to cut it and weld in a length of 1/2" square tube to lengthen it.

I got some 1/2 NPT fittings and a steam valve to replace the heater valve where it comes off the head, and just discovered that the close nipple I got won't allow me to thread the valve in and clear the rockers, so it's off to the hardware store I go.

Another snag: I discovered I had used my last cork valve cover gasket so I'm going to try to make do with a rubber 2F valve cover gasket.

Looks like I'm going to have to blow off the blow off work run...oh well.
 

subzali

Hard Core 4+
Joined
Aug 22, 2005
Messages
10,762
Location
Denver CO
Aren't you just glad you didn't try and fit this in before Spring Creek? Tonight I kinda ran into the same problem and instead of trying to beat the dealership to closing time I went home and got my parking brake disassembled and got two of my new brake lines installed! :thumb: Looking good Jeff! :thumb:
 

Rzeppa

Rising Sun Member
Joined
Aug 24, 2005
Messages
8,881
Location
Kittredge CO, USA
subzali said:
Aren't you just glad you didn't try and fit this in before Spring Creek? Tonight I kinda ran into the same problem and instead of trying to beat the dealership to closing time I went home and got my parking brake disassembled and got two of my new brake lines installed! :thumb: Looking good Jeff! :thumb:
Actually I did (try to get it done before Spring Creek), but vendors made the decision for me by getting parts in too late. Next "deadline" was today's run, but since I wasn't leading it was easier to blow it off and keep spinning wrenches. More photos soon!
 

Red_Chili

Hard Core 4+
Joined
Aug 24, 2005
Messages
8,335
Location
Littleton CO
Valve cover gasket the easy way: an RTV product called The Right Stuff. Brian Ellinger at Front Range Off Road Fab turned me on to it. Comes in a Cheez-Whiz can. Very nice stuff.
 

nuclearlemon

Hard Core 4+
Joined
Aug 23, 2005
Messages
8,681
Location
windy wyo
Red_Chili said:
Valve cover gasket the easy way: an RTV product called The Right Stuff. Brian Ellinger at Front Range Off Road Fab turned me on to it. Comes in a Cheez-Whiz can. Very nice stuff.
the cheeswhiz can is what permatex calls their powerbead line...you can actually get many of the rtv products in the powerbead containers. the right stuff is awesome stuff. our permatex rep gave me some when i complained that regular permatex wouldn't keep my rear oilbath lockout hubs from leaking. it did the trick. i've got it in caulk tubes.
 

Rzeppa

Rising Sun Member
Joined
Aug 24, 2005
Messages
8,881
Location
Kittredge CO, USA
Red_Chili said:
Valve cover gasket the easy way: an RTV product called The Right Stuff. Brian Ellinger at Front Range Off Road Fab turned me on to it. Comes in a Cheez-Whiz can. Very nice stuff.
I'll have to check it out some time. What I ended up doing was put a very thin bead of permatex ultra blue around the edges of the valve cover while it was upside down, then sticking the 2F rubber gasket to it. It turns out that the cross section of the rubber 2F gasket fits the cross section of the stamped steel F valve cover fairly well. I *think* it's going to work, I went ahead and installed it last night. If it leaks a little but the engine runs when I get it in, that will be fine, I can always replace it pretty easy.
 

Red_Chili

Hard Core 4+
Joined
Aug 24, 2005
Messages
8,335
Location
Littleton CO
nuclearlemon said:
the cheeswhiz can is what permatex calls their powerbead line...you can actually get many of the rtv products in the powerbead containers. the right stuff is awesome stuff. our permatex rep gave me some when i complained that regular permatex wouldn't keep my rear oilbath lockout hubs from leaking. it did the trick. i've got it in caulk tubes.
Yeah, Brian Ellinger got tired of diff seepage every time he smacked a boulder (and Brian is fully capable of sssssSSSSSSSMACKING boulders). No more problems since starting to use the Right Stuff stuff.
 

Rzeppa

Rising Sun Member
Joined
Aug 24, 2005
Messages
8,881
Location
Kittredge CO, USA
I didn't do jack today, but here's pix and narrative from yesterday's work. Before I discover that something's terribly wrong with the oiling system, I prelubed everything by spinning the oil pump with an electric drill. I got a couple barb fittings and some tubing to observe the flow through the oil filter circuit before I installed the oil filter.

On F engines, oil is diverted from the main gallery to both the crank and the oil filter. Part goes through the oil filter and is then dumped back into the pan, and part goes through the crank, then the cam, and then up to the rockers. On 2F engines, it all goes through the filter before the crank.
 

Attachments

  • 2006_0712Image0062.JPG
    2006_0712Image0062.JPG
    52.4 KB · Views: 727
  • 2006_0712Image0063.JPG
    2006_0712Image0063.JPG
    34.9 KB · Views: 911

Rzeppa

Rising Sun Member
Joined
Aug 24, 2005
Messages
8,881
Location
Kittredge CO, USA
To replace the non-functioning heater control valve, I got a steam fitting valve from the hardware store and related fittings. I know I can put a ball valve in the cab, and may do so some day, but I wanted to replace the factory functionality first. I had originally got a close nipple for the section between the head and the valve, but the valve handle stuck out too far to tighten it: it would hit the rocker assemby. So another trip to the hardware store yielded a 2" nipple, just enough to clear the rockers while tightening the threads. BTW, all these threads for the water jacket on the head are 1/2 NPT.
 

Attachments

  • 2006_0712Image0064.JPG
    2006_0712Image0064.JPG
    53.7 KB · Views: 824
Last edited:

Rzeppa

Rising Sun Member
Joined
Aug 24, 2005
Messages
8,881
Location
Kittredge CO, USA
I did get a lot done yesterday and last night. Manifolds installed, carb, alternator, radiator hoses, heater hose, oil filter, bracket and lines, PCV hose and valve, coil and ballast resistor, starter motor and ground strap, fuel pump and fuel line, valve cover. I got new points from Stevinson for the dist, and discovered that they were very much "roll your own". As in, they weren't just a single assembly, they were two separate parts. I was tired and didn't feel like dealing with that. I didn't put them in, although I did get and install a new cap and rotor. The old points were worn but still servicable, I'll deal with that at some other time.

I went to put the dist in and it just didn't seem right. Yes, I had the oil pump engaged, but it kept seeming like it was one tooth retarded, so I gave up around midnight.
 

Attachments

  • 2006_0712Image0065.JPG
    2006_0712Image0065.JPG
    43.8 KB · Views: 780
  • 2006_0712Image0066.JPG
    2006_0712Image0066.JPG
    44.3 KB · Views: 742
  • 2006_0712Image0067.JPG
    2006_0712Image0067.JPG
    52.5 KB · Views: 742

wesintl

Moderator
Joined
Aug 22, 2005
Messages
8,907
Location
in da house
Rzeppa said:
There's your tranny, Wes! Needs a little cleaning up, but the bearings are in good shape and it shifts smooth. I was surprised at how little the splines on the output shaft were. Usually that's why t-cases are hard to pull: the splines on the output shaft get worn and mated to the t-case input gear.

Yeah.. my xfer fell right off too. Are you going to be around sat morning? I have some errands to run all over town and I'd like to get it mostly back together this weekend.:cheers:
 
Back
Top