Engine Freshen, 4 Speed Conversion

Rzeppa

Rising Sun Member
Joined
Aug 24, 2005
Messages
8,828
Location
Kittredge CO, USA
PabloCruise said:
Jeff,

Your write-ups always rock!

Your cylinder cross-hatch looks a little odd - maybe some scoring still present on walls?

Glad I am not the only one who got stumped when they went to put a rocker assembly back on...
Thanks TJ. The cross-hatching is the pattern you want from honing the cylinder walls. They make special hones just for honing...cylinders. You hone for two reasons, one is to break the hardened glaze from the previous tenant (the old set of rings) and two, to let the new tenants break in and make their own special bond with each cylinder. For this reason, freshly rebuilt engines never have as much compression as they do after they are broken in.
 

Rzeppa

Rising Sun Member
Joined
Aug 24, 2005
Messages
8,828
Location
Kittredge CO, USA
Hulk said:
Did you buy a new water pump? You're putting so much care and time into this, I'd hate to see you use a faulty part and have to tear it back apart after you get it done.

Great write-up, JZ. :thumb:
Heh. One of the reasons I only just got home after our field trip was to drop by Import Parts Warehouse and pick up a new water pump. It turned out to be OEM too, a bonus! Even if I had used either of the old pumps and they took a dump on me, I can replace a Land Cruiser water pump in under an hour, done it many times. But as you implied, I figured go ahead and do it right if the old part is questionable.

Not including a couple special tools I had to buy for this project, I've spent $150 on rings and bearings from SOR, $92 for the transition gear for the 4 speed conversion from Joe at CTS, $175 for a clutch kit from Carolina Clutch, and $82 for the water pump. The valve spring compressor, ring compressor and hone will come in handy for future projects. I went ahead and ordered in a new set of coolant hoses and clamps from CCOT for $40 last night, I figure the ones that are in the rig currently are 5 years old anyway. I already had the gaskets and seals laying around my garage, probably would have been another $100-$150 or to go out and buy them. Several years ago, A cruiserhead gave me a complete NIB 2F rebuild gasket kit he didn't need, so that was free. The 72 engine was free, and the 71 engine came out of the rig 5 years ago, so this is pretty low budget considering the scope of the project.

I still need to buy that shifter and bits from FJBen; for now I'll use my old ones from my 76, then use FJBen's for the 76 when it's ready for them.

I've learned a lot from this, and if the darn thing runs when I stick it in there that'll be a bonus ;-)
 

FJBen

0
Joined
Aug 25, 2005
Messages
892
Rzeppa said:
I still need to buy that shifter and bits from FJBen; for now I'll use my old ones from my 76, then use FJBen's for the 76 when it's ready for them.

Jeff, you can just have those parts. I'm trying to think of a way to get them to ya easily. If you want you can PM me your address and I can get them shipped out to ya. I figure it's kinda like cruiser Kharma...:beer: :thumb:
 

Rzeppa

Rising Sun Member
Joined
Aug 24, 2005
Messages
8,828
Location
Kittredge CO, USA
Haven't gotten jack done on this the last couple days, but took a few shots a few nights ago. I installed the new water pump and lower thermostat housing. The alternator tensioning bracket is dangling because it needs a spacer. I rooted through more parts stashes than I should have spent time on before finally deciding that I'll just re-use the one that's on the F that's in the rig after I pull it out. Have to pull the alternator off and put it on this engine anyway...
 

Attachments

  • 2006_0625Image0172.JPG
    2006_0625Image0172.JPG
    52.6 KB · Views: 404
Last edited:

Rzeppa

Rising Sun Member
Joined
Aug 24, 2005
Messages
8,828
Location
Kittredge CO, USA
You saw this in my reply to someone...Max? Anyway, don't forget the rubber gasket ("o-ring" in Toyota parts jargon, even though it has a rectangular cross section). If you leave it out, coolant will always bypass the thermostat and in cooler weather the engine will never get to proper operating temperature and run efficiently.
 

Attachments

  • 2006_0625Image0173.JPG
    2006_0625Image0173.JPG
    55.1 KB · Views: 401

Rzeppa

Rising Sun Member
Joined
Aug 24, 2005
Messages
8,828
Location
Kittredge CO, USA
It seems like there are parts of every wrenching job where you can't use air tools, or in some cases, ratchet wrenches or even gear wrenches. The clearance for the alternator pivot bracket is at least enough to allow a box wrench. I hate those spots where you can only use an open end wrench.
 

Attachments

  • 2006_0625Image0174.JPG
    2006_0625Image0174.JPG
    55.1 KB · Views: 404

Rzeppa

Rising Sun Member
Joined
Aug 24, 2005
Messages
8,828
Location
Kittredge CO, USA
I installed the side cover; was missing a few bolts but found a few extra from the timing gear cover from the other engine. I covered the distributor opening and the fuel pump opening with some tape to keep dust and debris out prior to installing those ancillaries. I also plopped the valve cover on, but didn't install it, as I will still need to set nominal clearances.
 

Attachments

  • 2006_0625Image0175.JPG
    2006_0625Image0175.JPG
    44.8 KB · Views: 398
  • 2006_0625Image0177.JPG
    2006_0625Image0177.JPG
    41 KB · Views: 391

Rzeppa

Rising Sun Member
Joined
Aug 24, 2005
Messages
8,828
Location
Kittredge CO, USA
Notice how the machining of the 72 block doesn't quite match the 71 engine mount. Fortunately the bolt holes line up so all is well.
 

Attachments

  • 2006_0625Image0176.JPG
    2006_0625Image0176.JPG
    76.3 KB · Views: 402

Rzeppa

Rising Sun Member
Joined
Aug 24, 2005
Messages
8,828
Location
Kittredge CO, USA
This isn't the first "awe...cr@p" of this project, and I'm sure it won't be the last. When I took these photos, I noticed that the timing gear cover is off center, just a little low compared to the center of the crank. It probably is at the bottom of the bolt hole slop from gravity as I installed the cover. Just enough to cause a problem down the road. It's subtle and hard to see in the photo, but more obvious when you look at it carefully live with one eye closed and have no parallax. I'm going to have to take it off and use the crank pulley to center it as I re-install it. Otherwise, the top of the seal will wear prematurely.
 

Attachments

  • 2006_0625Image0179.JPG
    2006_0625Image0179.JPG
    58.7 KB · Views: 412

Red_Chili

Hard Core 4+
Joined
Aug 24, 2005
Messages
8,335
Location
Littleton CO
Good catch... not up to the Toyota precision machining of later years, it looks like.
 

Rzeppa

Rising Sun Member
Joined
Aug 24, 2005
Messages
8,828
Location
Kittredge CO, USA
Red_Chili said:
Good catch... not up to the Toyota precision machining of later years, it looks like.
Yeah, I'm glad I caught it now instead of six months down the road when it started to leak. I'm not entirely sure it's a lack of precision machining as much my not being careful enough during assembly. When I stop and think about it, I've had timing gear covers off many times while the engine is in the cruiser, and you really don't get the straight-on view from the front like you can while the engine is out on a stand. Oh well...
 

Rzeppa

Rising Sun Member
Joined
Aug 24, 2005
Messages
8,828
Location
Kittredge CO, USA
So I took the timing cover off and repositioned it as I reinstalled it. The two large bolts at the bottom kept trying to drag it downward, but I got it on more centered than the first time. And yes, I remembered to use new sealant on the two lower bolt threads.

Then I put the crank pulley on. I was hoping to pick up a two-row pulley for future P/S, but nothing came up in the time frame I was hoping for. It didn't look like it was bottomed out, so I pulled it, scratched my head and put it back on. Then I put the fan pulley and fan on, and saw that the crank pulley was lined up perfectly, so I was relieved.

I got a new hose and clamp kit from CCOT so I went ahead and put the bypass hose on that goes between the t-stat housing and the water pump. One less thing to deal with once the engine's installed. So many things are easier when the engine's out on a stand.
 

Attachments

  • 2006_0702Image0148.JPG
    2006_0702Image0148.JPG
    43.5 KB · Views: 386

Rzeppa

Rising Sun Member
Joined
Aug 24, 2005
Messages
8,828
Location
Kittredge CO, USA
I picked up a brass 1/8 NPT plug from Ace Hardware to plug off that orphan port that dumps back into the pan. No one has posted either here or the LCML as to what that port is for, but the consensus agrees with my assessment, just plug it up. I chased the threads with a 1/8 NPT tap, blobbed in grease to keep the chips from falling into the pan.
 

Attachments

  • 2006_0702Image0149.JPG
    2006_0702Image0149.JPG
    75.7 KB · Views: 386

Rzeppa

Rising Sun Member
Joined
Aug 24, 2005
Messages
8,828
Location
Kittredge CO, USA
While I was cleaning up the flywheel prior to install today, I noticed an oddity I haven't seen before. I've seen cruiser flywheels that only have the BB, and ones that only have the TDC mark. But this one not only had the 7° BTDC BB, but it also had a mark slightly more advanced that the BB. Anyone know what's up with that mark? Top photo is the flywheel laying next to the 4 speed bellhousing I'll be using. Middle photo is closer to the flywheel markings, and the bottom photo is a close-up of the weird markings.
 

Attachments

  • 2006_0702Image0150.JPG
    2006_0702Image0150.JPG
    39.8 KB · Views: 398
  • 2006_0702Image0151.JPG
    2006_0702Image0151.JPG
    69.4 KB · Views: 388
  • 2006_0702Image0152.JPG
    2006_0702Image0152.JPG
    55.6 KB · Views: 379

Rzeppa

Rising Sun Member
Joined
Aug 24, 2005
Messages
8,828
Location
Kittredge CO, USA
I set the valve clearances nominally while I still had the engine on the stand, again, much easier. On F series Land Cruiser engines, you want the exhaust valves set to .014" and the intakes to .008". These engines are pretty tolerant of valve clearances that aren't precise, but you always want at least some lash so the valves close all the way. Too much lash and they won't open enough, but the only big down side to that is not quite as much flow and power as would be the case when they open all the way.

You are supposed to set the clearances while the engine is at operating temperature, but unlike a chevy V8, you don't have to do it while the engine is running, spewing oil everywhere. But to set them nominally while the engine is at room temperature, you can get them plenty close enough for the rig to start and run.

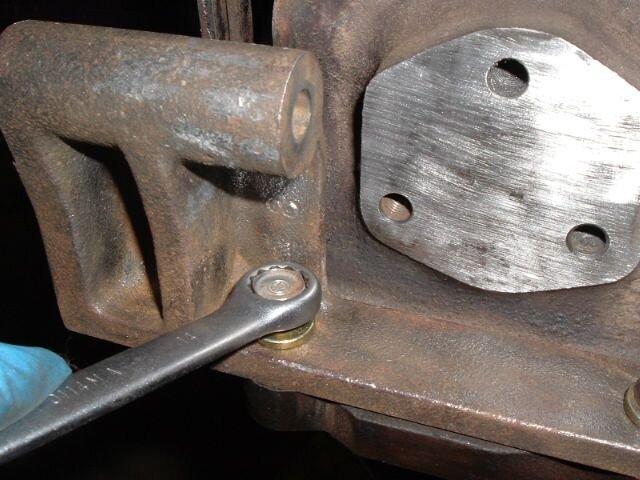
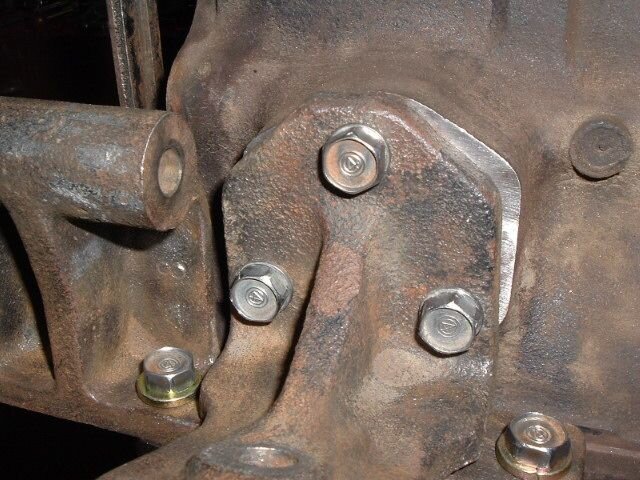
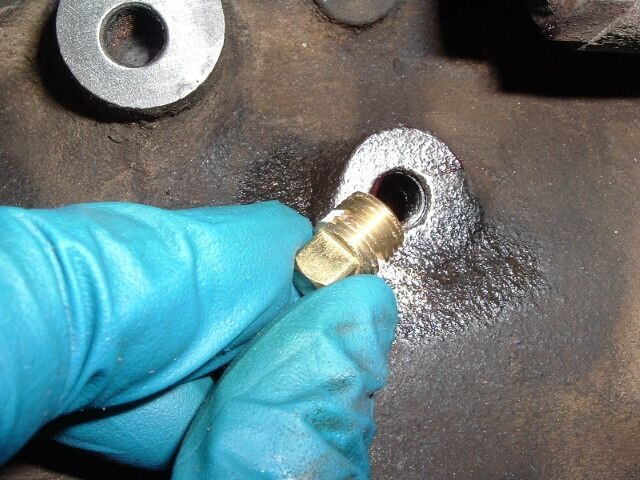
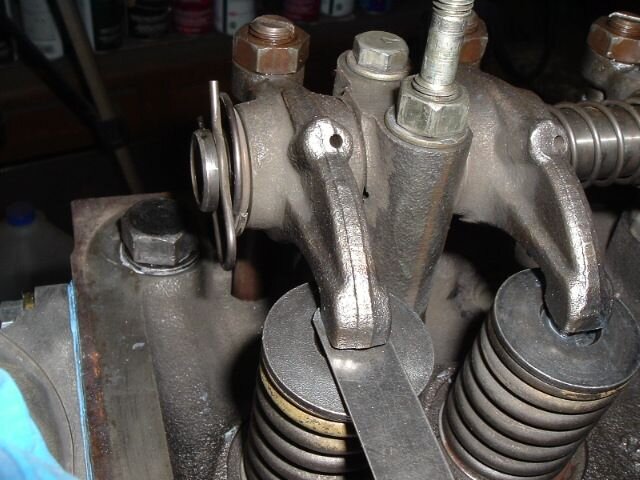
To measure the clearance, slide your feeler gauge between the rocker and the valve stem, as shown in the top photo. This was the exhaust valve for #1. Then, loosen the locking nut with your 17mm wrench and tighten or loosen the adjusting stud with a screwdriver, as shown in the middle photo. Slide the feeler gauge in and out as you turn the adjusting stud, what you want is where it just catches but can still be slid in and out. Once the clearance is set, tighten the locking nut with the 17mm wrench while holding the adjusting stud in place with the screwdriver.

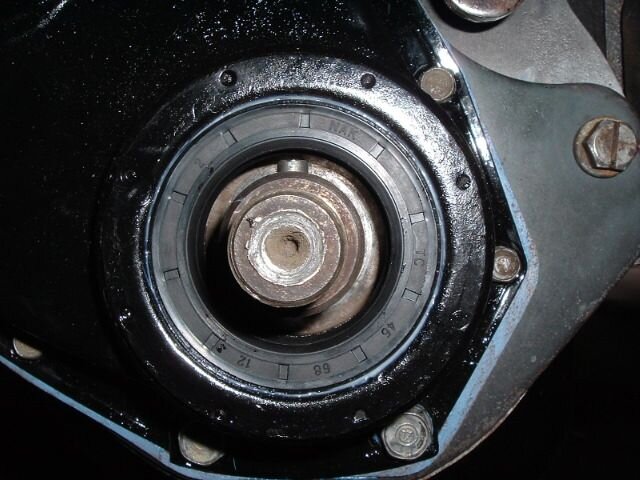
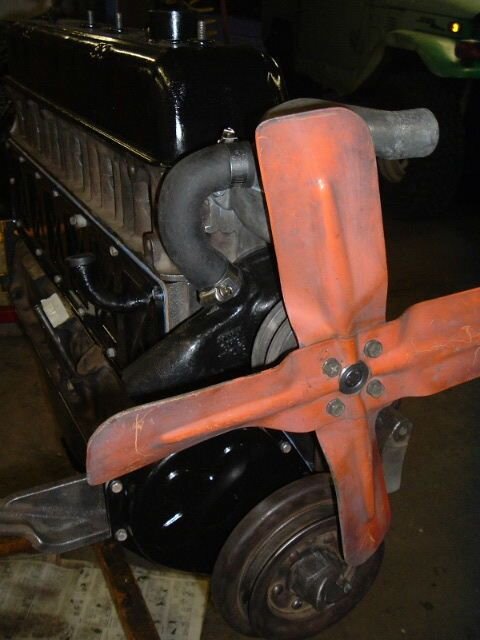
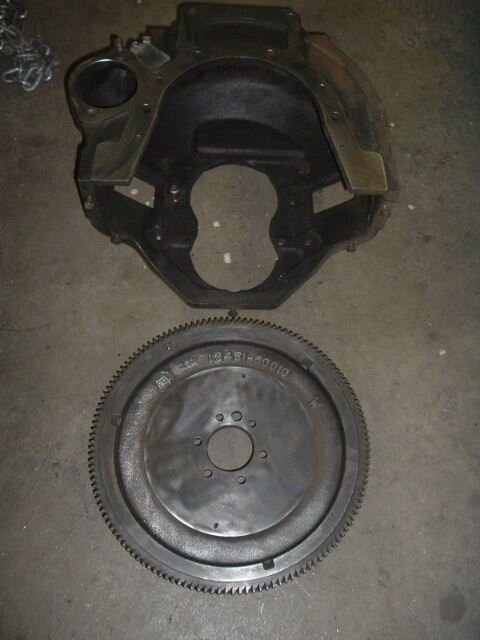
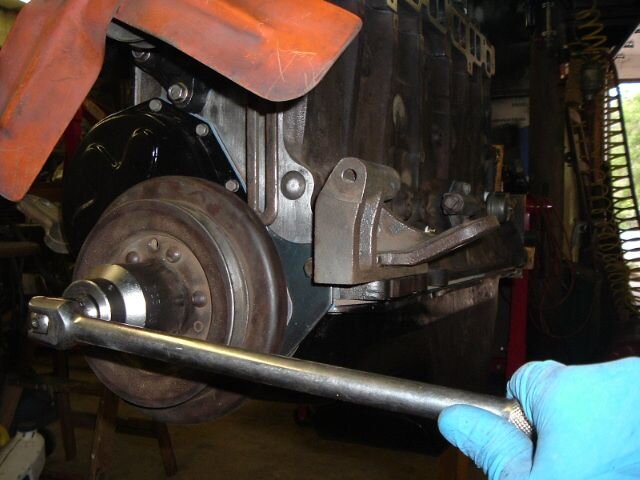
To get each valve to it's clearance position on the cam, turn the crank. It's easy when it's on a stand to do it with the "big ol' nut" on the front of the crank pulley, but you can't turn it this way when it's in the cruiser,there isn't enough space behind the radiator frame. To turn the crank while the engine is in the cruiser, you can either bump the starter, or put it in high gear and push the whole rig a little. Another method is if you have the bellhousing dust cover off, you can use a pry bar or big screwdriver on the flywheel. That's slow, but it works. I've used all these methods to turn the engine, and by far the easiest is the crank pulley nut when the engine is on a stand, as shown in the bottom photo.
 

Attachments

  • 2006_0702Image0153.JPG
    2006_0702Image0153.JPG
    56.8 KB · Views: 400
  • 2006_0702Image0154.JPG
    2006_0702Image0154.JPG
    60.7 KB · Views: 401
  • 2006_0702Image0155.JPG
    2006_0702Image0155.JPG
    47.4 KB · Views: 1,096

subzali

Hard Core 4+
Joined
Aug 22, 2005
Messages
10,712
Location
Denver CO
It seems like at least on a 2F you can use the 17mm (?) nut on the alternator to turn the engine...maybe I'm just high though...
 

Rzeppa

Rising Sun Member
Joined
Aug 24, 2005
Messages
8,828
Location
Kittredge CO, USA
subzali said:
It seems like at least on a 2F you can use the 17mm (?) nut on the alternator to turn the engine...maybe I'm just high though...
With proper (read=not overtight) tension on a belt, it will slip before you can turn the engine with just the belt. If a belt is so tight that it won't slip to turn the engine, the bearings of whatever it's connected to (water pump, alternator, smog pump, etc.) will wear out prematurely. This is something I've learned over the years through painful experience :-(

One last comment on turning an engine by hand: Taking out the spark plugs always makes it MUCH easier unless your compression is so low you have bigger problems than valve adjustment ;-)
 

Rzeppa

Rising Sun Member
Joined
Aug 24, 2005
Messages
8,828
Location
Kittredge CO, USA
I was planning on taking the now-assembled engine off the stand and installing the bellhousing, flywheel, clutch and tranny today. I pulled the tranny out from where I had it stored and discovered that I still needed to clean it. Before cleaning:
 

Attachments

  • 2006_0703Image0156.JPG
    2006_0703Image0156.JPG
    57.1 KB · Views: 356
Back
Top