SteveH
Hard Core 4+
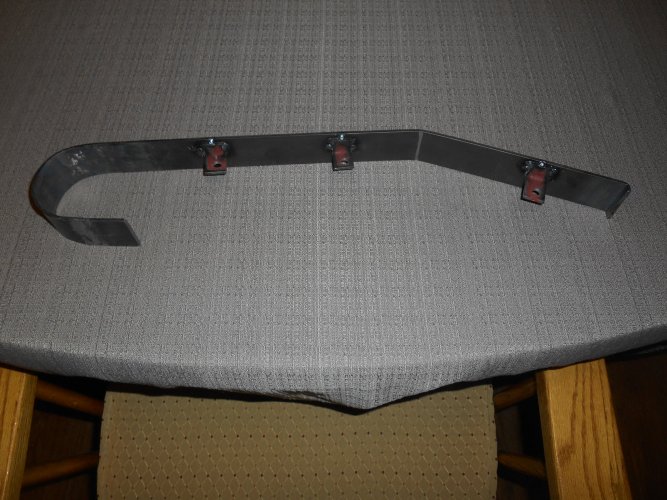
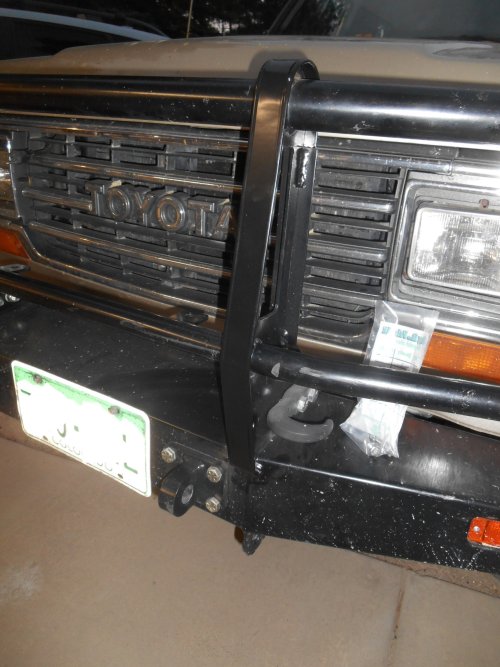
Rehabbed the bent ARB bumper I got from @BritKLR. I cut off the old bumper piece, fabbed a new one from steel strap (torch-bent it around a 3" dia mobile home axle), had it powder coated, and bolted it on tonight. Looks decent, if not perfect. The casual observer won't see the repair.


.jpg")
.jpg")