• RS MAY CLUB MEETING
    Hi Guest: Our monthly RS meeting on Wed. May 1st will be held at the Rooney Sports Complex. Details and directions are here. Early start time: 7:00 pm. to take advantage of daylight. We'll be talking ColoYota Expo and Cruise Moab.
    If you are eligible for club membership, please fill out an application in advance of the meeting and bring it with you.

What have you done to your rig today?

DaveInDenver

Rising Sun Ham Guru
Joined
Jun 8, 2006
Messages
13,067
Location
Grand Junction
Entirely subjective observation. The number of threads showing, the wear ring on the top of the mount, inability to see the grommet under the washer.

Fox's reply would fall under CYA commentary, IMO. Fail to see how bottoming out or over extending a shock that was fasten to their specs not just as easily snap off the stud. Sure there would be ever so slightly more constant pressure, but who uses their shocks as bump stops or limit straps in the first place? :D


[edit]
I think the tighten them until the squish is SOP...


...for rubber grommets. IIRC the ones supplied with Fox shocks is more akin to polyurethane or the like. Would definitely not tighten something like that down until it squishes.
[/edit]
Bushings that I got from FOX are just plain rubber.

For comparison the FSM for my truck on stock shocks lists that nut at 15 ft-lb, which I can't compare in this case to judge because FOX supplied a nyloc nut. So trying to use a torque wrench would of course be misleading.

Another subjective measurement, this is what Monroe says.


Screen Shot 2022-09-06 at 8.24.13 PM.png


So I guess I don't understand how is it a CYA suggestion? What failure are they trying to cover themselves from? It seems they're all trying to say *not* to squish them like SOP.
 
Last edited:

WVU fan

Rising Sun Member
Joined
Jul 27, 2015
Messages
467
Location
Lakewood 80228
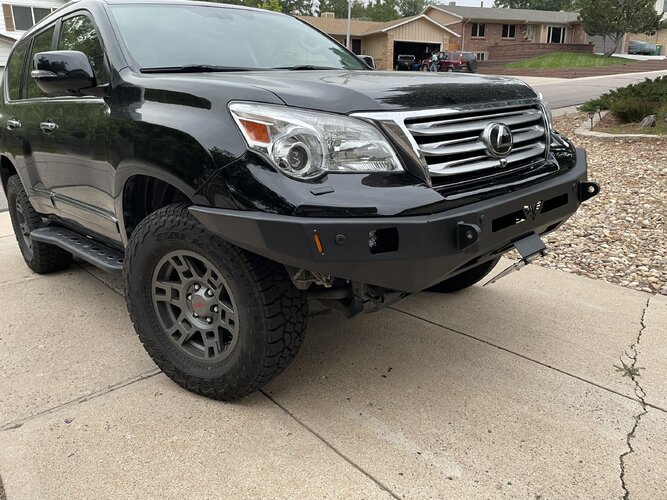
Got a front bumper! Victory 4x4. Wasn’t on the list for this year but bonked the original bumper pretty good on “Blow off work and go wheelin” run so it was a sign form the Off Road Gods. Gotta figure out a dryer vent cover tho as it has a lot of clearance. Also got a full size spare thanks to the Labor Day sale at Stevinson on their already lower online pricing
 

Attachments

  • 8BD3B5D1-44F0-4723-8D3D-C7746A3FEC20.jpeg
    8BD3B5D1-44F0-4723-8D3D-C7746A3FEC20.jpeg
    2.8 MB · Views: 67

DomOfTheDead

Event Coordinator
Cruise Moab Committee
Joined
Jun 2, 2019
Messages
898
Location
lakewood
First I went to the rally to look at all the cool parts and trucks. Then, Installed new unit bearings and hubs on the taco. Thanks to @DaveInDenver for the help w parts sourcing. Also new outer tie rods. Rotated the tires. Adjusted coilovers to even it out and will get the truck to Lakewood brake and alignment this week for alignment. Got to use my newly re-handled hammers thanks to the might @allen.wrench . Still have a mystery clunk but now I know it's not the wheel bearings.:doh:
20220910_155408.jpg
20220910_155408.jpg
 

allen.wrench

Rising Sun Member
Joined
Dec 7, 2018
Messages
368
Location
Syracuse, UT
Glad to help out @DomOfTheDead 😁👍 when there's a chance you'll have to remind me the hammers' names

My offer stands to help other friends who need a rehandled hammer, axe, pick, or other striking tool. I might even be persuaded into doing a shovel or hoe (the garden tool) if someone would like to try. Just can't promise an extremely fast turnaround. I really like the process of rehandling. Especially for friends and family. Unfortunately "paying the bills" and other priorities take my attention on the fast turnaround front, lol. Hope that makes sense.

Allen
 

SteveH

Hard Core 4+
Joined
Aug 10, 2006
Messages
2,917
Location
Colo Springs
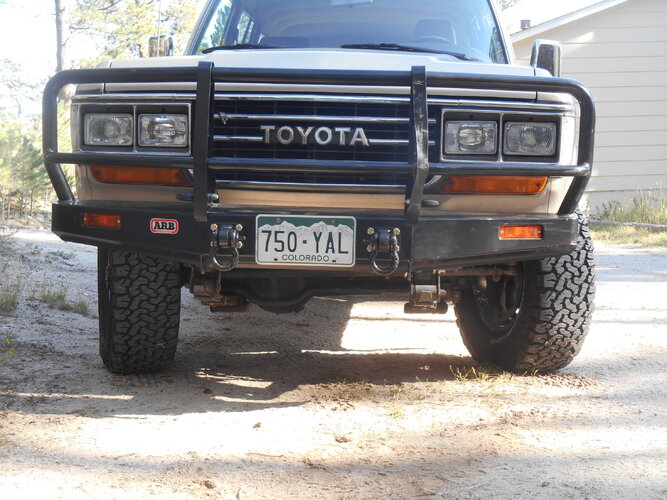
Bolted on the ARB I got from Paul (BritKLR) last weekend. Fit well, very stout. The old style lets my turn signals show through, as I had hoped. I did not have to remove any bumper brackets (as I read years ago). Tried to straighten it, and made a little progress, but may borrow a porta-power and a stout tree and try some more.
 

Attachments

  • DSCN6538.JPG
    DSCN6538.JPG
    877.5 KB · Views: 60
  • DSCN6535.JPG
    DSCN6535.JPG
    861.4 KB · Views: 62

RayRay27

Cruise Moab Committee
Joined
Jun 26, 2015
Messages
1,477
Location
Thornton via Boulder
Straight from the middle east! Two new OEM turn signals. Toyota says theses have been discontinued for the US 80 but I found some replacement ones on PartsSouq. Paid more for shipping then I wanted to but damn they look tight yo!
20220912_135414.jpg

20220912_135424.jpg

20220912_135429.jpg

20220912_135431.jpg

20220912_135711.jpg

20220912_135958.jpg
 

HDavis

Hard Core 4+
Joined
Feb 13, 2019
Messages
1,135
New to the forum and the area. Not sure if this counts but I installed some ceiling winches to take the RTT on and off as needed.


Welcome! It counts. Thats a cool 200.
 

simps80

Rising Sun Member
Joined
Jan 22, 2009
Messages
2,716
Location
Arvada, CO
Nothing but I made a set of nesting tables
I made a set for my patio then my friend said he wanted one
Meh
Wayfair is way cheaper and faster

But at least you can put a transmission on top of one of these if you needed to

How does it go..
Grinder and paint make me the welder I ain’t

796A8ACE-A945-4D7B-8305-379661D7FCFC.jpeg


4FAA97DC-150A-4693-A94C-68827A937832.jpeg
 

Johnny Utah

Rising Sun Member
Joined
Mar 6, 2015
Messages
1,105
Location
Arvada
Scott and crew at AA Performance Muffler fixing up the exhaust on the 80 today. @Hulk, Scott said he is going to be working on yours soon and is going to reinforce the Y pipe on mine to prevent it from breaking.
76509AF5-8091-4F44-9CC3-659F08603552.jpeg
 

Telly

Rising Sun Member
Joined
Jan 4, 2008
Messages
1,345
Location
Monument
Finally got around to installing the new OEM cat back exhaust on my 84 FJ60 last weekend. I purchased this back in April in that free shipping/20% sale deal...delivered for only $198 bucks! Decided to cleanup the frame and paint prior to the install. Highly recommend using Corroseal rust neutralizer prior to top coat. Works very well to encapsulate any surface rust. I plan to spray the inside of the frame with Eastwood Internal Frame Coating next year because I need a break from crawling under vehicles.

84 FJ60 Exhaust Pic 1.jpg
84 FJ60 Exhaust Pic 2.jpg
 

Attachments

  • 84 FJ60 Exhaust Pic 2.jpg
    84 FJ60 Exhaust Pic 2.jpg
    1,005 KB · Views: 55
  • 84 FJ60 Exhaust Pic 1.jpg
    84 FJ60 Exhaust Pic 1.jpg
    772.8 KB · Views: 49

Telly

Rising Sun Member
Joined
Jan 4, 2008
Messages
1,345
Location
Monument
I'll snap a pic of the receipt when I get home.
 

Telly

Rising Sun Member
Joined
Jan 4, 2008
Messages
1,345
Location
Monument
@Cruisertrash Here are the part numbers for the FJ60 OEM replacement exhaust
Exhaust Pipe Assembly: 17430-61170
Isolator Cushions x 2: 17567-61030
Exhaust Flange Donut Gasket: 90917-06056-J
 

fyffer

Rising Sun Member
Joined
Sep 22, 2019
Messages
458
Location
Trinidad, CO
So about 2 weeks ago, to burp front brakes recently installed. Lifted the Rig and discovered a broken leaf.
I pulled the ER brake hard and felt a pop and lever was spoungy. Time to check rear brakes that I had changed just before CM -22 ( Carquest shoes).
Well hell, good thing I did and the pictures tell the story. Cleaned and I did put some grease in the Bell housing, removed and added new wheel cylinders. New brake shoes from O’reillys, Identical to previuos installed except for the hardwear (not Good). So I had to sift through my garbage can full of grass and leaves to use, Not fun at all, pieces are small. Assembled and checked ER brake, Good.
I can’t/won’t test them in real situation until I take it to replace the Alcan front Springs.
15C17ED1-0A8B-412E-8871-3B35DF0F154B.jpeg
11718126-C487-4059-9EF7-EF1FFD188DF1.jpeg
31AF47ED-597F-4A66-8F0D-7FB0B5CD6A32.jpeg
99962B65-60CD-4769-85FE-7EA3D3AD5134.jpeg
531D7500-9C1F-49E7-9812-F6A555EB1615.jpeg
2372EC95-4B69-46F9-89CB-8B0EFDDA5F27.jpeg
71086FAF-4EF4-4964-A403-AD6335A5AFE1.jpeg
305C6EDA-C82F-4C60-8383-8A910DEC4537.jpeg
 
Top