Trigger Pulled

Joined
Mar 25, 2012
Messages
299
Location
Coal Creek Canyon
The motor is on the other side of the plastic tab, yes.

The new one is installed down in the car. The original switch was plastic (mine was broken off), but (as far as I can tell from the stub) a different sort of plastic from the lens and had a proper toggle versus the new one (from Toyota) using the switch as a lever to push a metal leaf to a contact. It is the same as the one in the link (assuming the one the link is Toyota).

When I take it back out to do the modifications to the mounting setup, I'll take photos. It's dark now, and I just got out of the shower, so photos will have to wait.
 
Joined
Mar 25, 2012
Messages
299
Location
Coal Creek Canyon
Can anyone tell me the size of the little machine screw that holds the ignition switch to the steering column? It came to me with nothing there, and I can't find anything that small in my collection of nuts and bolts. I'm hoping to be able to go down into town tomorrow and get some hardware, and it's not really something I can bring with me for reference... If no one knows and someone is willing to find out for me, it's a matter of removing the 6 machine screws holding the plastic steering column cover in place, then it's right there on the DS.
 
Joined
Mar 25, 2012
Messages
299
Location
Coal Creek Canyon
I got my keys cut and my lock keyed this afternoon at Buffalo Lock and Key in Boulder, so I have a complete set and everything matches! Also, for reference, and this was a complete surprise, they had the blanks on hand! I brought in some Toyota blanks, but they only insure their blanks (not sure what sort of insuring you would do for a key, but there it is). So I have two Toyota Motors door keys, and one Ilbis (or something like that). If you need keys made, those are your guys.

I also picked up the gas tank (finally!), and it is everything I wanted it to be. Spike Radiator in Sheridan is the place to go for that. Carl is the owner/operator, is a great guy to deal with, will only do it the right way, and does what he says he's going to do. It was a few days later than anticipated, but he said about two weeks and I thought two weeks, so that's on me. Highly recommended. I have a meeting to get to down in town (what fun, a meeting on a Friday night the Friday before xmas...), so photos aren't going to happen until tomorrow.
 
Last edited:
Joined
Mar 25, 2012
Messages
299
Location
Coal Creek Canyon
Here are some photos of the gas tank:

Top
photocopy8-1_zps5d2a01fa.jpg

bottom
photocopy4-1_zps0649fe80.jpg

Here's the hole that was cut in the top to allow access to the inside for blasting (not everything can be reached from the filler/sender holes).
photocopy7-1_zpsbe96fc00.jpg

Here's the other one in the bottom
photocopy6-1_zps90a94004.jpg

The rest are photos of where he soldered up up pinholes
photocopy9-1_zps2d69b15e.jpg

photocopy10-1_zpsd266afe3.jpg

photocopy5-1_zps3451c355.jpg


Not something you might do for concourse, and I would have likely used a mig instead of solder for a cleaner look, but who sees the gas tank anyway? With the modern liner in there correctly applied, it's better now than when it left the factory floor and I'm a happy camper!
 
Joined
Mar 25, 2012
Messages
299
Location
Coal Creek Canyon
Here's how it sits now:

photocopy11-1_zpsb6a456d9.jpg

photocopy2-1_zps3bf80b13.jpg

photocopy-1_zpsb6be1e89.jpg

photo-6_zpsb08fc7bf.jpg

photocopy3-1_zps1d2a5ea3.jpg


Aside from the missing license plates, spare tire, and the tailgate handle that's about how it'll look for until I get done with my current body-off restoration.

I'm waiting until tomorrow to put the tank in. He said the liner needs to cure for 24 hours, and when I picked it up it still smelled pretty fresh and it's fairly cool in my house. Since I won't be able to get it registered until after I get back from visiting family, I'm going to let it go until tomorrow morning. Tomorrow I'll throw the tank in, plumb it, and fire it up. Then adjust valves and timing, and I'll see what I can do to find that vacuum leak that keeps gnawing at the back of my mind and drive it up the hill to where I can drill out those stupid sheared bolts that have been staring me in the face...

Then it all gets put on hold for a week... Once I get back, I'll take it to Rocky Mountain Cruisers (unless anyone thinks there is a better alternative) and get a wellness checkup (just to make sure I didn't miss anything out of Land Cruiser naiveté) and a new windshield (can't do that solo...), then inspection and registration and finally some good tires!
 

subzali

Hard Core 4+
Joined
Aug 22, 2005
Messages
10,637
Location
Denver CO
Your pictures of your fuel tank reminded me - in some cases the fuel tanks rust from the outside in. Getting grit and water underneath the tank, and letting it sit, can cause those pinholes. That's what happened to mine. So I am planning on putting some POR-15 on it to give it some extra mechanical resistance to rust attack from the outside. Just my two cents.
 
Joined
Mar 25, 2012
Messages
299
Location
Coal Creek Canyon
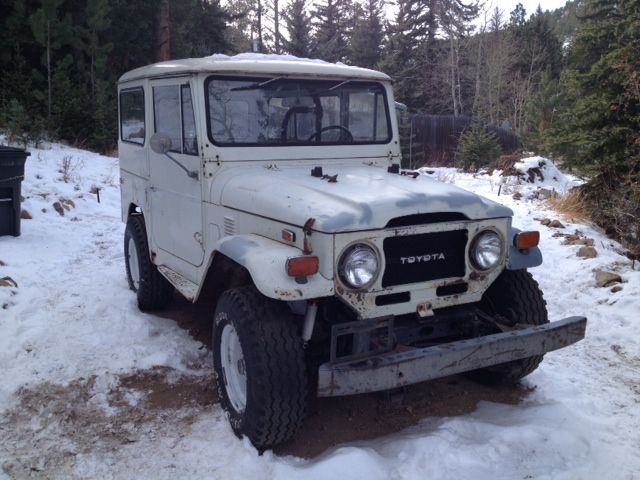
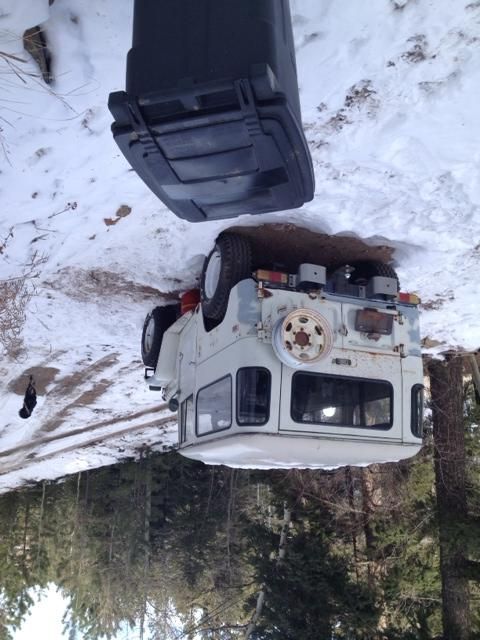
Huzzah! Back together (save some non-critical bits) and running/driving/stopping! :D I drove it about 3-4 miles total from my house to the gas station and back. This would have been a good time for a photo, save that I didn't bring my phone with me (there's usually no point since there's no service up here)...

New to do list:

-I can't seem to get it out of 4 wheel drive. It shifted in and out when I started fooling around with it this afternoon, but won't shift out. Goes from 4 high to 4 low without any trouble... :confused: Not sure what might be the issue here save some linkage adjustment...

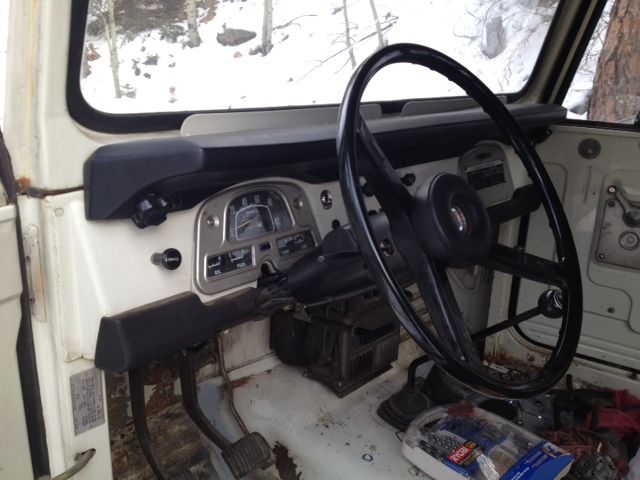
-Did not want to get warm. I know it's cold and all (and the cold weather intake was set accordingly), but I couldn't get it above the lowest tick in the normal range on the temp gauge, and couldn't get it to run without the choke about halfway. Higher RPM resulted in lower temp... I hoping it's just the tune and not the thermostat... That would be my luck.

-No guts. Could not go up my driveway (which is admittedly VERY steep) save in 4 low. After this, I set the timing (was set per the book by PO, now advanced from that 3-4 degrees), which will undoubtedly help.

-Further lack of guts. Once in 3rd, it would not accelerate. Timing accounts for some of this, but the rest is no doubt the poor jetting.

-Brakes pull to the right. Just need to adjust them... Too bad I don't have any solid ground to jack the bastard up on... I'll have to go on a rock hunt for one that's big/flat enough... In the snow... :rant:

-I was messing with the radio while it was warming up, and the tuning knob seems to be messed up somehow... It worked, then let go, then worked a little more, then did nothing again... I gave up without really putting up much of a fight. I'm not much of a radio person anyway.

-Shortly after I got it going, the choke refused to be pushed back in... I came inside and did a quick search on Mud and found the solution (it was pulled past the catch spring, I reached up underneath and poked it up with my finger while pushing it in with the other hand). Choke is again functional.

-Valve adjustment. I was planning to do this after setting the timing, but between not having a replacement gasket, not being sure the best way to advance the valve train with the engine off (I prefer to adjust valves with the engine off to save wear on my feeler gauges), and just running out of time, this will have to wait until I get back from family visitation...

-Distributor seems to wobble a bit... Not sure what to make of that. I don't like it, but I don't know that it's not normal or that there's anything that can be done. Would anyone care to offer some insight?
 

MDH33

Hard Core 4+
Joined
Mar 8, 2006
Messages
7,896
Location
Trapped in a corn field
You're definitely getting to learn about your 40 in this process. It's all good. :hill:

Having to run it with the choke is probably due to that air leak you thought you could hear. Does your carb spacer have the tube to the PCV on ours? Those commonly crack, check that.

Try rolling about 20 feet in reverse and then it will pop out of 4hi.

Make sure none of the wheel cylinders or calipers are frozen before fiddling with adjustments. It's enough of a pain without frozen cylinders.

You can usually re-use the valve cover gasket, so go ahead and get your valves set.

Distributor wobbling, hmm. Is the adjustment handle/screw/not sure what to call it in place and tight? Were you able to freely rotate it too?
 
Joined
Mar 25, 2012
Messages
299
Location
Coal Creek Canyon
Yeah, I forgot to put that vacuum leak on my to do list above... Blurgh... It's definitely between the intake manifold and the brake booster, but that's as close as I can get it without a second set of hands...

It does have the PCV spacer, and it's not cracked (or wasn't when I was messing with it last).

I'll try the reverse trick. It had to roll in reverse for double or triple that for me to park it, and it wouldn't shift out afterwards... Are you suggesting to try to shift it out while it is moving in reverse?

The running gear has all been rebuilt, so that's actually one of the few things I'm not concerned about. :)

Also, while I'm thinking about it, I'm finally to the point where I can start worrying about jetting! It dawned on me during a thread on Mud about jetting that the weird jetting that it came to me with is VERY likely nothing like what it seems. To save anyone from having to go back however many pages, the jetting as it came to me was:

PO jetting
Slows 55/80
primary main 20
secondary main 180
plugs 55/114
power (forgot to write it down and don't have time to open the carb back up to check it out right now)

That jetting obviously didn't make sense, so I rearranged it thusly:
Current Jetting
Slows 55/80 (not much I can do about it without some replacements)
primary main 114
secondary main 180
plugs 55/20
power (same scenario)

Factory recommended jetting for 6,600' (which is actually ideal for me):
Factory jetting
Slows ???
primary main 1.08
secondary main 2.00
power 0.80
plugs 1.12/0.90

So IF the jets are correctly marked (which I very sincerely doubt), I am running a size rich in the primary and a few sizes lean in the secondary... But the PO's jetting was entirely nonsensical. I don't own a set of jetting gauges to find out what I really have, but I'm pretty sure my jetting is just terrible and can only cause trouble. I'm officially in the market for some jets in the sizes recommended in the manual (as stated above). Any ideas where they might be found? SOR doesn't have but maybe one of them, and I haven't found anyone else claiming to have them...
 

subzali

Hard Core 4+
Joined
Aug 22, 2005
Messages
10,637
Location
Denver CO
you'll probably have to get a core carb of the same model year to get the jets you want.

x2 on everything else Martin said. To turn the engine over when it's off, you can put it in high gear and roll it. Easier on a flat surface with a helper, obviously. In your case not sure. If you had the factory hand crank you could do that. You might still be able to get that from Toyota. You could also take off the clutch inspection cover and rotate the flywheel maybe?

If your transfer case isn't bound up then it might be a linkage problem preventing you from disengaging 4wd. Try unlocking the hubs to help ease the tension on the driveline.
 
Joined
Mar 25, 2012
Messages
299
Location
Coal Creek Canyon
http://carcraftstore.com/jetreamerkit.aspx

This is the route I intend to take at this point unless someone has or can point me in the direction of same properly sized jets. I had a buddy back in Dallas with a set that I had access to prior to coming up here. I'm still going to want to get some more jets just in case I screw something up.

If someone can point me in the direction of some place I could purchase a set of new jets, I'm still open to that (it's a bit less dependent on a steady hand).

I can't do the slow jets with this method though, and if that offer for some better slows is still up, I'd really like to take you up on it. I can trade dollars, wrenching, help fine tune your carb (with the reamers you can fine tune beyond what you could when jets WERE available AND it only takes about 20 minutes to have a fresh set of jets versus however many days they take to ship), or pay it forward. That wideband setup would really be useful for this task as well.
 

subzali

Hard Core 4+
Joined
Aug 22, 2005
Messages
10,637
Location
Denver CO
I'm still not convinced it's really going to make that much of a difference. These are Land Cruisers, not sports cars. And this is isn't a Weber or a Holley we're talking about.

Do what makes you happy, but with a known vacuum leak and without adjusting the valves you are not realizing the full potential of your current setup.

A wobbly distributor is not normal either. You need to figure out what the problem is there. Just be aware that the distributor drives the oil pump, so if it's not seated all the way you won't have oil pressure.
 

MDH33

Hard Core 4+
Joined
Mar 8, 2006
Messages
7,896
Location
Trapped in a corn field
Didn't want to look back through this whole thread to see if you had already read this thread:

Carb jetting for altitude

It has the recipe that a few of us are using to jet our carbs. I live at 8000' and mine drives fine from Denver up to 14000'.

:thumb:
 

PabloCruise

Hard Core 4+
Joined
Aug 23, 2005
Messages
2,783
Location
Northern CO
I don't think you're the crazy one. Sounds like you put it back together a little more reasonably.

My '78 carb on my '77 2F has:
1st Main Jet: 136 (1.36mm)
2nd Main Jet: 171 (1.71mm)
1st Slow Jet: 75 (0.75mm)
2nd Slow Jet: 80 (0.80mm)
Power Valve: 80 (0.80mm)

From Moab to Argentine Pass it's never skipped a beat. Problem is it's hard to compare because every year just about was different. See here:
http://www.sor.com/sor/cat042d.tam

We had a discussion about jet sizes a couple years ago here:
http://risingsun4x4club.org/forum2/showthread.php?t=15074

I'll try to find what Randy posted about what he used in the Blue Mule (1974 F.5 engine). Personally I'm not sure it's worth getting down to the gnat's a** on this because we're talking about tractor motors here, and because we change elevation so much. A typical trail run might have you changing 5,000 feet of elevation or more in a day. I might play with mine a bit but honestly it runs fine the way it is and the plugs are fine, even with a different model year carb on it.

Okay, check out this post too from Randy and Ricardo:
http://risingsun4x4club.org/forum2/showthread.php?p=175380&highlight=jet#post175380

This is a good collection of links Matt!
 

PabloCruise

Hard Core 4+
Joined
Aug 23, 2005
Messages
2,783
Location
Northern CO
SOR has two options: one is the OEM Toyota fuel pump, the other is the same manufacturer as OEM in a different box for $10 less. I checked out all of the other parts houses I have bookmarked, and of those that actually had it SOR was the cheapest (after you account for the 15% club discount and core charge). I've never known a dealership to even pretend to be a good place to buy parts without being the only possible source for said part. I could easily be wrong, so if anyone knows a better/cheaper source for such things I would really appreciate the heads up.

Justing getting through this thread now, hopefully someone turned you on to Cruiser Dan at American Toyota...
 
Joined
Mar 25, 2012
Messages
299
Location
Coal Creek Canyon
If it's not one thing it's another... I just went out and pulled the distributor to see if there was any obvious wear on the shaft (nothing really, though the wear on the drive gear indicates it's probably time for a change), and the distributor clamp was pretty loose... I figured there must not have been a captive nut on the other end of the bolt and it just caught enough when I was tightening it to make me think it was tight. Nope! As I was putting back in, I was getting no traction. Turns out the bolt was sheared.

I feel it's worth noting here that almost all of my experience with older cars is with European stuff. I have a tendency to UNDER torque everything without an express torque spec, then come back a bit later and check to make sure it's still tight. I have a good hard shouldered bolt of an appropriate size (it will need some additional threads), but I don't have the time to mess with it right now. What a PITA.

So now I have to ask myself if the distributor was wobbling because of the bolt, or if the bolt was sheared because of the wobbling...

By the way, I was not able to put the truck in a higher gear and move it around (it's in a low spot, and I can't get it to budge at all). I was able to manipulate it using some leverage from the fan though. Lucky for me it's a sturdy steel bladed fan, and the belts are in reasonably good shape (though I think they're going to get a refresh in the not too distant future). Due to the distributor clamp woes and other considerations, it's going to have to wait until I get back.
 
Joined
Mar 25, 2012
Messages
299
Location
Coal Creek Canyon
Good news! It was the broken stud. Definite relief. I told myself I was done with the thing until I got back, but I'm just a little OCD... I had a shouldered bolt from an exhaust clamp (and it's hardened!), and I tapped the threads down far enough to clear the clamp and we were back in business! Just in time too. While I was out there I could feel the temperature dropping, and it started snowing at a good clip as I was gathering my tools to come back inside.
 

subzali

Hard Core 4+
Joined
Aug 22, 2005
Messages
10,637
Location
Denver CO
That brings up another thing you may or may not know about: the "deadly" orange metal blade fan.

These fans can develop stress cracks near the hub, and are known to throw blades off suddenly, which can penetrate hoods, radiators, or any thing else in their way. So it might be worth pulling off to check its condition. If suspect, a plastic-bladed fan is a suitable replacement. I think the water pump hub might have to be changed though. You can do a search on MUD and see.

Here's a few good threads:
http://forum.ih8mud.com/40-55-series-tech/653464-catastrophic-water-pump-failure-photos.html

http://forum.ih8mud.com/40-55-series-tech/220710-heads-up-check-your-fan-blades.html

http://forum.ih8mud.com/40-55-series-tech/587503-fan-shroud-pics.html
 
Back
Top