got a 40 - now it begins

simps80

Rising Sun Member
Joined
Jan 22, 2009
Messages
2,724
Location
Arvada, CO
The rattle trap doors finally drove me nuts enough to fix..

So i ordered the bronze door hinge pin bushings from southbostonfj on mud.
he sends you 8 bushings for 20 bucks iirc..

two.jpg


It wasnt as difficult to remove the doors as i have read because the PO had beat the crap out of the upper pins and they were bent such that the windshield frame no longer interfered.

one.jpg


there was one plastic bushing present on one side..
the remaining 7 were missing..no wonder it was rattling. .

three.jpg


The bronze ones fit nicely on the door side top and bottom of each hinge..

four.jpg


Even though the PO scratched the paint all up..i taped up some to minimize new damage...then installed the top pin upside down after straightening them to bypass the w/s frame interference. ..
this double hammer method worked well to drive the pins back in..one hammer held steady while the second is used to strike the first hammer rather than the pin.

five.jpg


The difference is amazing..so much more solid..well worth the 20 bones.


I finished off todays work recycling the screws from the light i got from treeroots discount parts emporium to replace the two missing screws on each of my turn signals...thanks for that sacrificial light Mike!
six.jpg


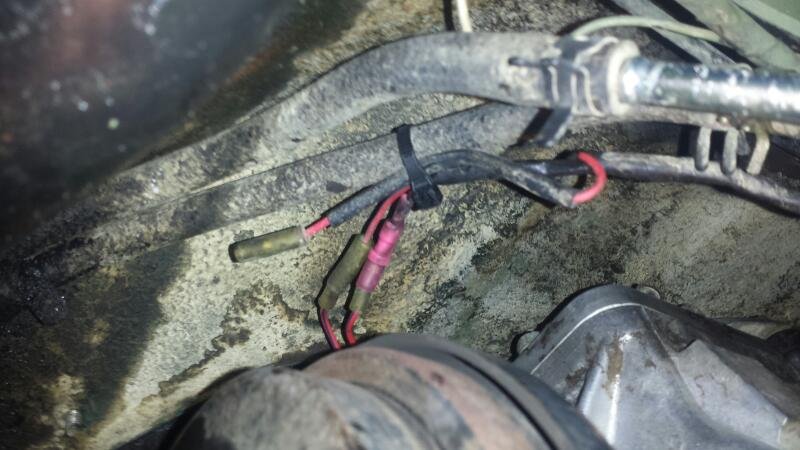
Next up is pulling the heater copper pipes that go through the firewall..
They both have hairline cracks that spread and leak (a lot ) once they get warm.
 

treerootCO

Rising Sun Member
Joined
Aug 22, 2005
Messages
5,422
Very nice! :)
 

subzali

Hard Core 4+
Joined
Aug 22, 2005
Messages
10,322
Location
Denver CO
Kewl I'll have to try those bushings
 

simps80

Rising Sun Member
Joined
Jan 22, 2009
Messages
2,724
Location
Arvada, CO
Lemme know if anyone has a set of these pipes that run through firewall to heater with provision for rear heater...
pipes.jpg
 

simps80

Rising Sun Member
Joined
Jan 22, 2009
Messages
2,724
Location
Arvada, CO
Replaced vr with new oem reman..
It was not functioning quite right after running too much amperage through it with a quick charger...

vr1.jpg


vr2.jpg
 

simps80

Rising Sun Member
Joined
Jan 22, 2009
Messages
2,724
Location
Arvada, CO
I got another thing done...this truck was full of sand even the doors..we cleaned out the ds door and unplugged the drains in the bottom but never did the ps one...
so i took it apart and cleaned it out of a stunning amount of sand.

Then coated the inside bottom with the eastwood converter coating product i used on the inside of the frame.

door1.jpg
 

simps80

Rising Sun Member
Joined
Jan 22, 2009
Messages
2,724
Location
Arvada, CO
you could probably silver solder that... that's how we used to repair the oil lines in 911's

So the front ones were big blow outs..so i bought a used set from cruiser corps...

new1.jpg


But that brought to light a small hairline crack in one of the rear ones....

backones.jpg


i think its definitely repairable in some manner..i have read about brazing and silver soldering..but am confused on it...

So couple dumb questions..
1. Are these copper? They seem like maybe brass?
2. What should be used in this case..brazing rod or silver solder?
3. Is a mapp gas torch good enough? Guessing yes on silvrr solder no on brazing rod?
 

Rzeppa

Rising Sun Member
Joined
Aug 24, 2005
Messages
8,283
Location
Kittredge CO, USA
MAPP gas, silver solder, acid flux. Brighten everywhere that will be brazed to bright metal before applying the acid flux and silver solder, but you knew that, right?
 

simps80

Rising Sun Member
Joined
Jan 22, 2009
Messages
2,724
Location
Arvada, CO
MAPP gas, silver solder, acid flux. Brighten everywhere that will be brazed to bright metal before applying the acid flux and silver solder, but you knew that, right?

No i don't know about this that is why i asked.
Thanks for the info
 

rover67

Rising Sun Member
Joined
Nov 1, 2007
Messages
9,333
Location
Boulder, Co
Yeah silver solder with a MAPP Gas torch and acid flux is what I'd use like Jeff says.

They are Brass lines, but Silver solder would do both brass and copper anyways. Last time I soldered oil lines I got a few rods of silver solder (it's really hard, like welding rod almost, not soft like solder for electronics) from a HVAC friend. Maybe you can buy it locally or somebody you know does HAVC work?

It's easy to do, I'd just go for it if you've sweated pipes before and were happy with the results. very similar process.

can you link the product you used on the doors and frame, looks super slick....
 

simps80

Rising Sun Member
Joined
Jan 22, 2009
Messages
2,724
Location
Arvada, CO
Yeah silver solder with a MAPP Gas torch and acid flux is what I'd use like Jeff says.

They are Brass lines, but Silver solder would do both brass and copper anyways. Last time I soldered oil lines I got a few rods of silver solder (it's really hard, like welding rod almost, not soft like solder for electronics) from a HVAC friend. Maybe you can buy it locally or somebody you know does HAVC work?

It's easy to do, I'd just go for it if you've sweated pipes before and were happy with the results. very similar process.

can you link the product you used on the doors and frame, looks super slick....

http://www.eastwood.com/internal-frame-coating-w-spray-nozzle-qt.html

thanks Marco for the information!

will see if I can source some silver solder rods and give it a go!
 

rover67

Rising Sun Member
Joined
Nov 1, 2007
Messages
9,333
Location
Boulder, Co
It looks like i'm mixing things up, here's what i was thinking:

http://www.gacopper.com/BrazingRod.html

Maybe I was Brazing instead of soldering. I did use those rods though, flat kinda and really stiff. Not anything you could peel off a roll.
 

simps80

Rising Sun Member
Joined
Jan 22, 2009
Messages
2,724
Location
Arvada, CO
maintenance log

This is just the maintenance log:

Completed by 8/2014:
Engine rebuild at 47131 miles.
-Used zddp additive in chevron delo oil.
-replaced 80/90 in front, rear diffs, tcase, transmission
-drive shafts rebuilt with new toyota u-joints


Changed oil at 47469 feb 2015
Used 8 qts of
oil1.jpg

added one 15oz can of stp engine oil zddp additive
also changed coolant and distilled water at same mileage ( when working on heater pipes)
 
Last edited:

simps80

Rising Sun Member
Joined
Jan 22, 2009
Messages
2,724
Location
Arvada, CO
It looks like i'm mixing things up, here's what i was thinking:

http://www.gacopper.com/BrazingRod.html

Maybe I was Brazing instead of soldering. I did use those rods though, flat kinda and really stiff. Not anything you could peel off a roll.

Alright so i bought some 15% silver brazing rod like marcos link and gave it a go...it wasn't pretty but i think its good..it seems to hold air and water..so thats an improvement :) thoughts? Pics stink so probably cant tell if its good or not....


I wound up "practicing" on the two original front pipes i replaced..then moved onto the one long rear pipe that was cracked...


crack.jpg


silver.jpg


meh.jpg


Think I will put them in and reconnect the rear heater and see how it goes...

Seemed a lot trickier than regular soldering and my mouth still tastes weird. Prolly sposed to wear a mask or something
 

Rzeppa

Rising Sun Member
Joined
Aug 24, 2005
Messages
8,283
Location
Kittredge CO, USA
It looks like i'm mixing things up, here's what i was thinking:

http://www.gacopper.com/BrazingRod.html

Maybe I was Brazing instead of soldering. I did use those rods though, flat kinda and really stiff. Not anything you could peel off a roll.

Okay, that makes sense. Silver brazing is quite common and is how radiator and heater cores are assembled/repaired. I've also known guys who braze auto body parts as well, less warping than welding.
 

simps80

Rising Sun Member
Joined
Jan 22, 2009
Messages
2,724
Location
Arvada, CO
electrical day.

Fuse 5..the 20amp fuse that feeds the fan pull the parking brake indicator..the fuel oil pressure and temp gauges
Reverse lights and a couple other things. That fuse would pop intermittently which bothered me cause the gauges stop working...

I started looking for the short...i knew the reverse lights didnt work so figured it was on that portion...
the reverse switch that comes down over the tcase was unplugged from the harness at the frame. The lr (light blue red tracer) hot lead was bouncing around and shorting..you can see it was burned...

reverseswitch1.jpg


So put a new insulated bullet connector on that wire then plugged the rb and lr wires into the switch and now reverse lights work again

reverselights1.jpg


The question I have is does anyone know what the red no tracer goes to?
It isnt on any schematic anywhere i can find..its the unplugged
bullet below
 

Attachments

  • revetseswitch2.jpg
    revetseswitch2.jpg
    56.5 KB · Views: 348

simps80

Rising Sun Member
Joined
Jan 22, 2009
Messages
2,724
Location
Arvada, CO
electric day continued

The next problem i wanted to tackle was this rats nest hack job of a trailer harness someone put in...with the biggest nastiest scotch locks i have ever seen...

trailerplugratsnest.jpg


nonest2.jpg


Ahh much better .. soldered and shrink wrapped back to stock..

nonest1.jpg
 

simps80

Rising Sun Member
Joined
Jan 22, 2009
Messages
2,724
Location
Arvada, CO
electric day continued

The last thing i wanted to do was troubleshoot the license plate lights...i was kind of hoping the rats nest cleanup would fix the license plate lights but it didn't. ..

So after probing around i proved 12 volts present all the way to the socket...but that was with meter and light to known good ground...anyway long story short..when i ground the bulb housing below to the ground bolt on inside of rear door below below..the lp lights work...

lplight1.jpg


lplight2.jpg


So...my guess is the lp light housings cant get good ground through the powdercoat on the lp bracket. ..

so..i was thinking about bringing grounds through the grommets from the bolt to the light housing bolt.
I think the only other solution is to chip off the powder around the bolts...
any other ways to get these lp lights to work?

So in short..two questions..if anyone has any input much appreciated...
1. Whats the red no tracer female bulleted wire for 2 posts above
2. Run ground wires to lp light housings from the door bolt ground through the grommets to the lp light housings the right way to fix the lp lights?
 
Last edited:
Top