You are using an out of date browser. It may not display this or other websites correctly.
You should upgrade or use an alternative browser.
You should upgrade or use an alternative browser.
Confession?
- Thread starter rover67
- Start date
rover67
Rising Sun Member
I’m going to try to just keep the spare under the back for now so I opted for a 255 and one of the Witt’s End tire leveling kits. I think I am pleased with the results at least for the time being...

rover67
Rising Sun Member
Yup. Boring old OME shocks and springs.ome lift?
I called Slee and Christo answered. I told him what I was doing and how the truck sat currently and he set me up with the lift. I think it's "heavy" springs in front and "mediums" in back. I'm just gonna use the OME caster correction bushings as he suggested. When I replace all the bushings maybe I'll do OEM rubber ones and caster plates if the OME bushings are harsh or wear out or whatever. When the shocks wear out maybe I'll go a different route. For now this makes $en$e though.
As far as I can tell It's the most logical and economical for what we'll be doing with the truck which is camping and exploring. It'll mean it won't be as big as the 60 so it'll take more thought to go some places but for the most part I don't see it being limiting. If the going get's tough I'll just actually have to pick a line for a change. The shocks will probably fade if the motor doesn't blow up trying to make them do that. I don't care at this point. It'll work. It'll sit nice. It'll carry stuff. It'll clear rocks n shit.
rover67
Rising Sun Member
Welp... got the OME front springs and shocks on and when I went to replace the bushings for the camber correction ones I noticed the rubber was pretty old on everything. Not like flopping around in there old, but pretty cracked. Sooooooooooo since I ain't going to Utah next week and there really aren't any trips in the foreseeable future I decided what better time to just do bushing replacements.
So I ordered bushings. Hopefully they get here kinda soon. Price isn't toooo bad for everything.

So I ordered bushings. Hopefully they get here kinda soon. Price isn't toooo bad for everything.
So I ordered bushings. Hopefully they get here kinda soon. Price isn't toooo bad for everything.
Wise choice. The Wits’ End press tool is worth the investment. It made quick work of all my bushing swaps.
rover67
Rising Sun Member
Made brackets to fit a rigid LED bar in the short bus bumper. Brother sent it to me in the mail. Pretty excited about the light and that it fits in the bumper with the winch.
still have space for lights on the normal mounts which is nice.

still have space for lights on the normal mounts which is nice.
rover67
Rising Sun Member
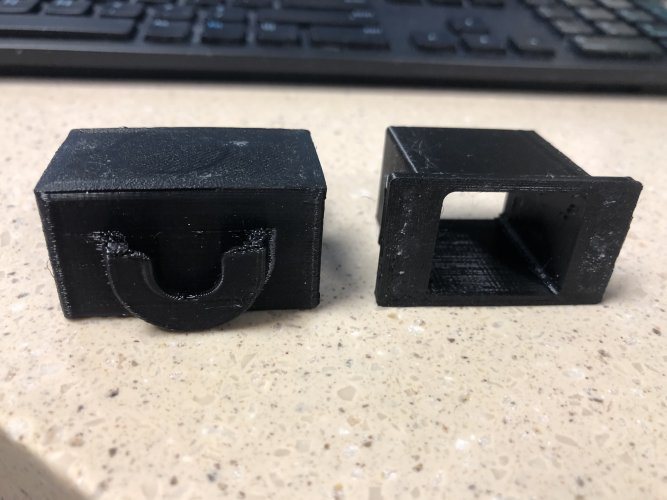
So I like many others had a super annoying sun visor that wouldn’t stay up. Thanks to ‘mud I knew an LS400 visor would fit so while I was at Colorado Auto and Parts getting other stuff I walked over to an LS400 they had there and snagged the visors. Now if you have a grey interior 80 the visors are still available overseas..... so this whole deal only applies to oak interior 80s..
Anyhow I got home and finally got around to installing them. They fit but not very well. So I made a shim to get them all squared up and working right. If you are doing the LS400 visor swap in an 80 these shims make it fit like factory.
Enjoy. Gratis. They took a few (ok maybe 4) tries.
Go to a library and print some up. Or get a buddy with a printer to do it.
edit: including .stl files.
Attachments
Last edited:
rover67
Rising Sun Member
Bushing removal started today, seems like so far it’s going ok:

rover67
Rising Sun Member
Little light bar fits awesome in the short bus bumper:


rover67
Rising Sun Member
The bushings pressed right in with the 12 ton harbor freight press. Maybe I got lucky.
need to torque the suspension stuff on the front but otherwise it sits on its own front feet again. I like it a lot so far.


need to torque the suspension stuff on the front but otherwise it sits on its own front feet again. I like it a lot so far.
LXBRADY
Hard Core 4+
Looking sharp, looks like you will be ready for Blanca late summer ")
rover67
Rising Sun Member
Oh boy that sounds real nice right now.....Looking sharp, looks like you will be ready for Blanca late summer
Looking sharp, looks like you will be ready for Blanca late summer
I'd like to get in on that if I'm up and running by that point.
rover67
Rising Sun Member
Well, so far only a handful of the bushings were actually needing to be replaced... BUT if the first set lasted 180k miles the next set should last till the truck is totally used up?
everything is done except the right reat arms, spring, and shock.
b spring on right rear and left front..... right?


everything is done except the right reat arms, spring, and shock.
b spring on right rear and left front..... right?
DaveInDenver
Rising Sun Ham Guru
Did you paint the frame?
rover67
Rising Sun Member
Naw, I just sprayed it down with some Cosmoline I had left over from the 40 Resto.
rover67
Rising Sun Member
Lift and full bushing replacement done. Found an upper link bushing that was trashed in the rear. Thinking that was my clunk. Who knows but I can only hope.
Where it’s at now was my goal for CM this year. I only have a garage photo for now since it’s late and puking snow again :/
I’m sad because my brother and I would be havin a blast out there and it was a lot of work to get the rig ready. Anyhow it was good motivation to git er dun anyways and now she’s ready for camping season. Truthfully each year it’s CM that motivates me to do all the rig PM and mods for the upcoming year
Only a few fun things left to do and from here on out it’s tinkering. Gotta finish wiring the fridge and I do want drawers I think..... maybe a solar panel and another shower setup like the 60. Allison specifically requested that one.
One thing is for sure so far I totally dig the platform. I think it’s gonna work very well for us for many years.
Last edited: