You are using an out of date browser. It may not display this or other websites correctly.
You should upgrade or use an alternative browser.
You should upgrade or use an alternative browser.
Brahma On-Board Air
- Thread starter subzali
- Start date
Red_Chili
Hard Core 4+
That thing is huge.
That thing is huge.
True. But I think it's going to be easier to keep it and work around it than to return it and pay more for a smaller one. Just gives everyone another thing to make fun of me for

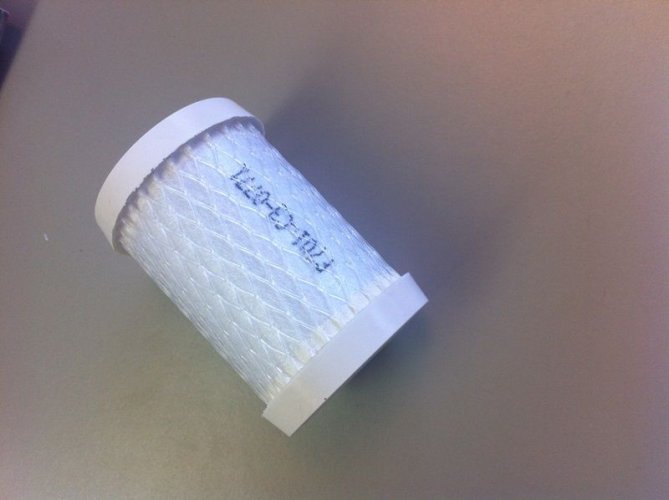
Looks like a fridge water filter")
Yeah I guess. shrug.
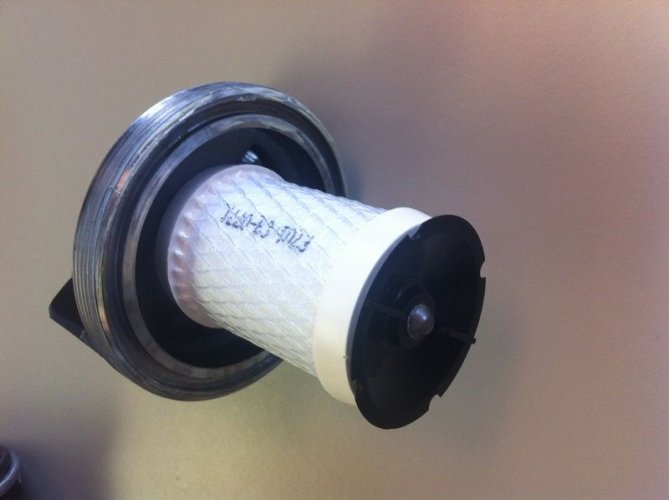
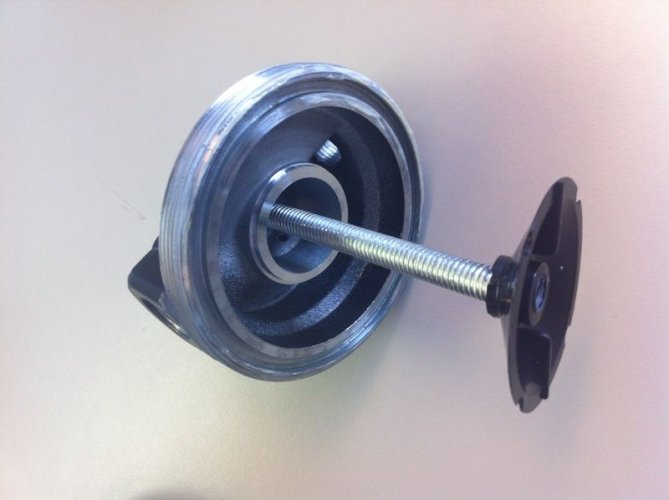
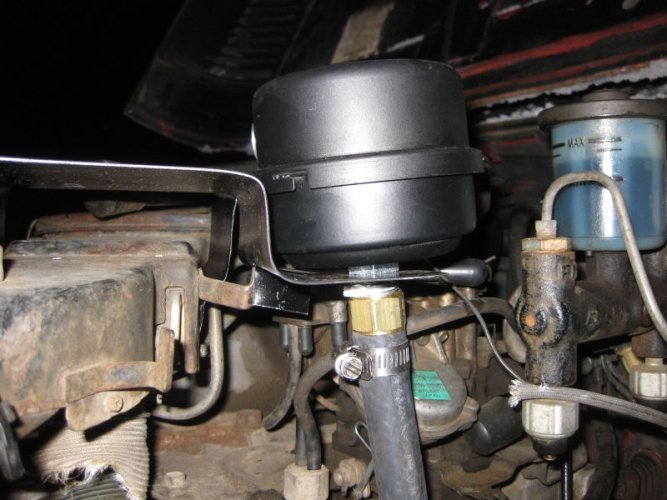
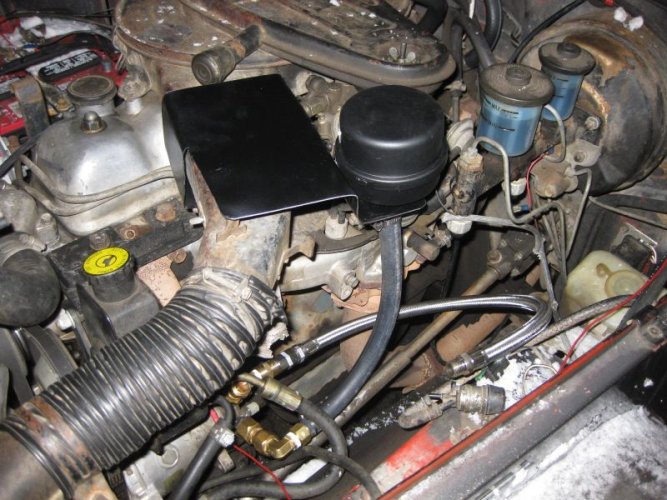
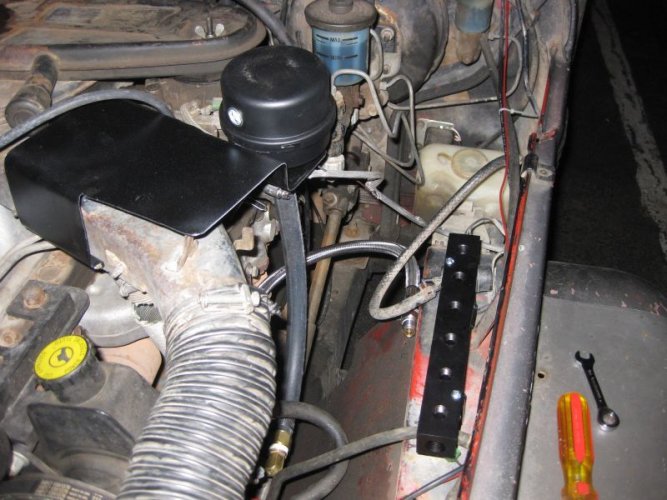
Tonight I hit a big milestone in this project. I got the inlet side of the compressor all plumbed up and ready to go. Got a coat of flat black on the bracket (yes I painted it while it was snowing - I hid under a juniper bush  ) and when it was dry to the touch I bolted it on. It has a little bit of flex, which I was worried about, but I can stiffen it up if need be, and when I put the hose on the filter it's actually pretty stiff and helped hold the filter up a bit. I should probably get a rubber washer or something to put under the filter so it sits on the bracket square and tight, but at least it's secured on something for now. I'm kinda getting tired of this project, tired of working for an hour at a time after work, outside, in the cold, after dark, so I am just trying to get this thing done.
So the inlet air filter is 1/2" MNPT. I have a 1/2" FNPT to 5/8" barb fitting under it, then a 5/8" hose to the fittings on the compressor. I hope the 5/8" hose is stiff enough that it won't collapse under vacuum. We'll see.
Oh and BTW, this thing barely clears the hood. I measured as best I could, but in the end I think I just got lucky.
) and when it was dry to the touch I bolted it on. It has a little bit of flex, which I was worried about, but I can stiffen it up if need be, and when I put the hose on the filter it's actually pretty stiff and helped hold the filter up a bit. I should probably get a rubber washer or something to put under the filter so it sits on the bracket square and tight, but at least it's secured on something for now. I'm kinda getting tired of this project, tired of working for an hour at a time after work, outside, in the cold, after dark, so I am just trying to get this thing done.So the inlet air filter is 1/2" MNPT. I have a 1/2" FNPT to 5/8" barb fitting under it, then a 5/8" hose to the fittings on the compressor. I hope the 5/8" hose is stiff enough that it won't collapse under vacuum. We'll see.
Oh and BTW, this thing barely clears the hood. I measured as best I could, but in the end I think I just got lucky.
Attachments
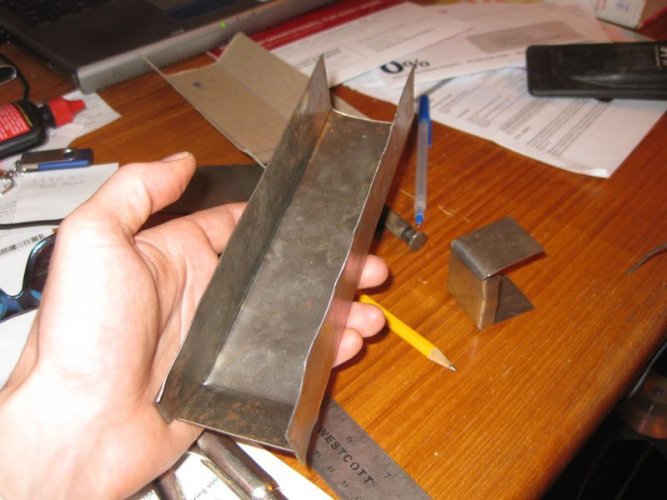
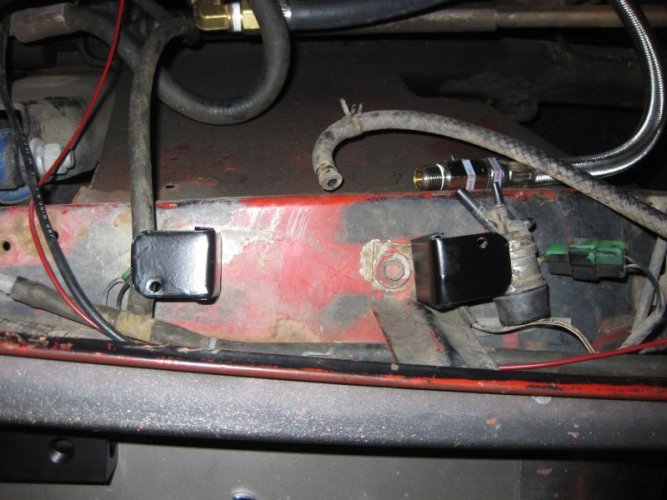
I also am going to take a whack at the support for my outlet filter/coalescer and air manifold. We'll see how this turns out. For the outlet filter/coalescer, I'm going to have this c-channel that I made out of the remainder of the 22ga. that I bought run down to the angled part of the fender, and run a couple bolts through it. It will support a pipe nipple on the inlet side of the filter, as close as I can get to the filter.
For the air manifold, I need to raise it about 1 1/2" off the fender, so I made up a couple other little brackets for that. I made some webs on them to stiffen them up as well, and that should end up being pretty rigid when it's all bolted up. Then I need to get a couple more fittings and all I'll have left is a little more wiring and then I'll be done.
For the air manifold, I need to raise it about 1 1/2" off the fender, so I made up a couple other little brackets for that. I made some webs on them to stiffen them up as well, and that should end up being pretty rigid when it's all bolted up. Then I need to get a couple more fittings and all I'll have left is a little more wiring and then I'll be done.
Attachments
Looking good Matt!
Your fab skills with a lack of tools is impressive. I don't know if my brackets would look that good even with the fab tools in the shop.
Dan
 whatever Dan. You did a frame-off with a custom under-bed storage box that looked (and looks) totally awesome. If you were to look close at what I have here you'd probably lose your lunch.
But thanks for the compliment

I'm just trying to get something thrown together. Something you don't see in the pictures is that after I had my bracket all painted nice and shiny black, I realized it was hitting another bracket on the air cleaner housing due to dropping the elevation of where the inlet filter sits. If it had stayed high like I originally intended it would not have been a problem, but I didn't go re-measure after I made some changes and it bit me. So I just took my snips and made a little adustment. I'll probably be tweaking the bracket anyway, so it didn't break my heart too much.
I also would have like to use a heavier gauge steel than 22 ga., but Ace didn't have 18 ga. and they didn't have snips strong enough to cut 16 ga. Not sure I would have wanted to try and work with 16 or 18 ga. with the limited resources I have right now anyway. A welder, as usual, would be nice to fill in the seams of these brackets and add to their rigidity, but we'll see how they do without it.
rover67
Rising Sun Member
I though there was supposed to be a drip oiler on the suction side?
Maybe someday I'll do that, but right now I'm just going to use the fill plug on the compressor to add a little oil periodically (like after every trail run). That's one of the differences between the Sanden and the Aisin, the Sanden has a fill plug and the Aisin does not.
rover67
Rising Sun Member
Maybe someday I'll do that, but right now I'm just going to use the fill plug on the compressor to add a little oil periodically (like after every trail run). That's one of the differences between the Sanden and the Aisin, the Sanden has a fill plug and the Aisin does not.

Matt if you want to drive a little north for a day you're welcome to come up and knock this out at my house. Nothing special, other than a garage with heat, tools, air, drill press, welder... will be around all weekend, give me a call if you want.
Thanks for the offer Tim, and I know others have offered as well. I'm not really complaining about what I've got, I'm making it work, the point is that I am really excited to get a house with a garage. The problem with driving anywhere is that that takes up a significant portion of the very little time I have at the present to get this done. If I had more time to be working on it I'd probably take more people up on the offer. Or I'd drive the 1/2 hour to my parents house where I have total familiarity and pretty much unlimited access to my dad's tools I hate being a mooch though too, and I hate imposing on people. I'm figuring out a way to "get 'er done!"
Speaking of being short on time, this weekend is a busy one for me, so I don't think any work is going to get done until Monday night
I hate being a mooch though too, and I hate imposing on people. I'm figuring out a way to "get 'er done!" Speaking of being short on time, this weekend is a busy one for me, so I don't think any work is going to get done until Monday night
That's cool, and understand completely!
Coming together...
Made a little progress today...
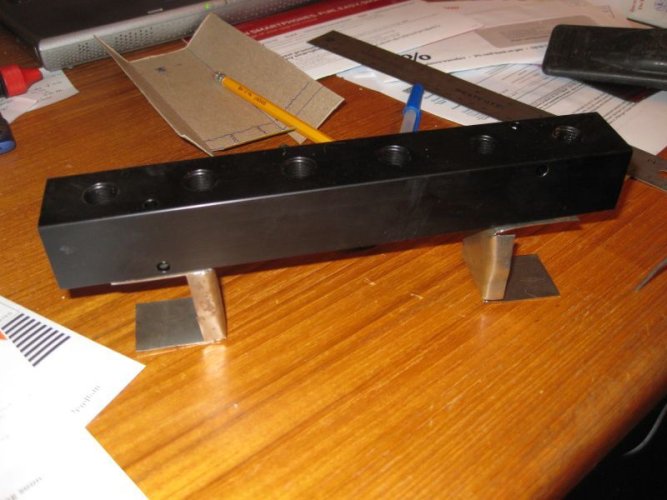
-Finished drilling holes in my little support brackets for my air manifold, then cleaned them up with the Dremel and gave them a coat of primer and flat black.
-Added a couple oz. of compressor oil to the compressor, so it's good to go for a few test runs.
-Gave it a run test - found out my leader hose was installed backwards (don't know why I thought I had it on right - there's no arrow on the check valve in my defense though). Flipped that around and it seems to be pretty happy just plugging along.
-Bolted up my air manifold to the fender using the little brackets - oh yeah had a $1.58 parts run to Ace Hardware. This thing sits really close to the hood support rod. I knew that was going to be the case, but I got it just in the perfect spot. It's not so much a problem with my manifold but more with the pressure gauge and pressure switch, I had to be a little careful where I put those. I had to get a little creative with the brackets as well because of the VSV that one bracket has to share mounting points with.
-Took some measurements for the last item - mounting the filter/coalescer. Going to pick up some stuff tomorrow to get that a little closer. Hopefully I'm going to get my clip-on air chuck tomorrow or Tuesday, so I can get this thing wrapped up! Still have a little electrical to do, been waiting on my 90/120 pressure switch from 4WheelParts (going to return the 110/145). They said it was going to be here a week ago Monday, then this past Thursday, then tomorrow Good thing I'm not quite ready for it yet.
-Still have to get my relay bolted on somewhere and wired in.
Made a little progress today...
-Finished drilling holes in my little support brackets for my air manifold, then cleaned them up with the Dremel and gave them a coat of primer and flat black.
-Added a couple oz. of compressor oil to the compressor, so it's good to go for a few test runs.
-Gave it a run test - found out my leader hose was installed backwards (don't know why I thought I had it on right - there's no arrow on the check valve in my defense though). Flipped that around and it seems to be pretty happy just plugging along.
-Bolted up my air manifold to the fender using the little brackets - oh yeah had a $1.58 parts run to Ace Hardware. This thing sits really close to the hood support rod. I knew that was going to be the case, but I got it just in the perfect spot. It's not so much a problem with my manifold but more with the pressure gauge and pressure switch, I had to be a little careful where I put those. I had to get a little creative with the brackets as well because of the VSV that one bracket has to share mounting points with.
-Took some measurements for the last item - mounting the filter/coalescer. Going to pick up some stuff tomorrow to get that a little closer. Hopefully I'm going to get my clip-on air chuck tomorrow or Tuesday, so I can get this thing wrapped up! Still have a little electrical to do, been waiting on my 90/120 pressure switch from 4WheelParts (going to return the 110/145). They said it was going to be here a week ago Monday, then this past Thursday, then tomorrow
Good thing I'm not quite ready for it yet.-Still have to get my relay bolted on somewhere and wired in.
Attachments
My air chuck came in today. But then I stopped at Ace (one that's close to my work vs. the one that's close to where I live where I bought my other stuff) and saw they had one too 
Also made a $57.18 shopping trip to Ace to pick up the (hopefully) last of the parts I need.
-3 x 1/4" NPT hex head plugs
-3/8" x 1/4" reducing coupling
-3/8" short nipple
-2 x 3/8" 90 degree elbows
-2 x 3/8" x 3" nipples
-3/8" x 1 1/2" nipple
-1/4" short nipple
-1/4" x 1/8" reducing coupling
Total: $361.89
Ouch.
Last edited:
farnhamstj
Hard Core 4+
farnhamstj
Hard Core 4+
Just razzing you Matt. It's another $36 for the hose and chuck anyway. Keep the picture coming.