What have you done to your rig today?

allen.wrench

Rising Sun Member
Joined
Dec 7, 2018
Messages
825
Location
Syracuse, UT
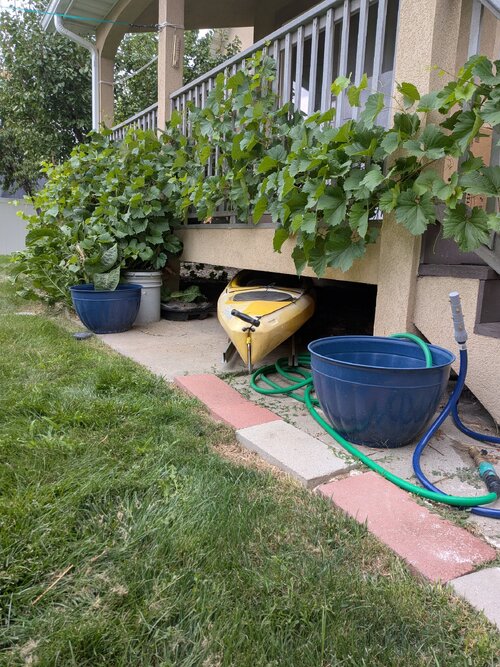
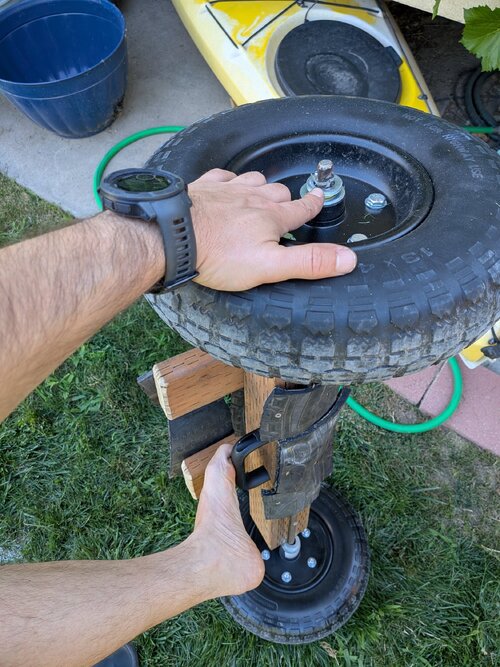
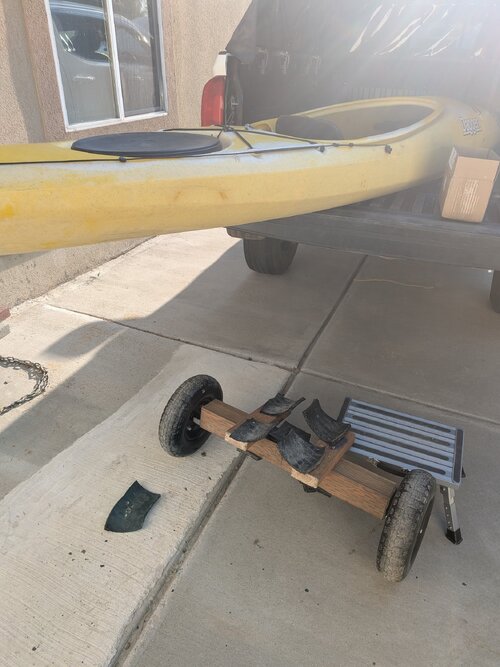
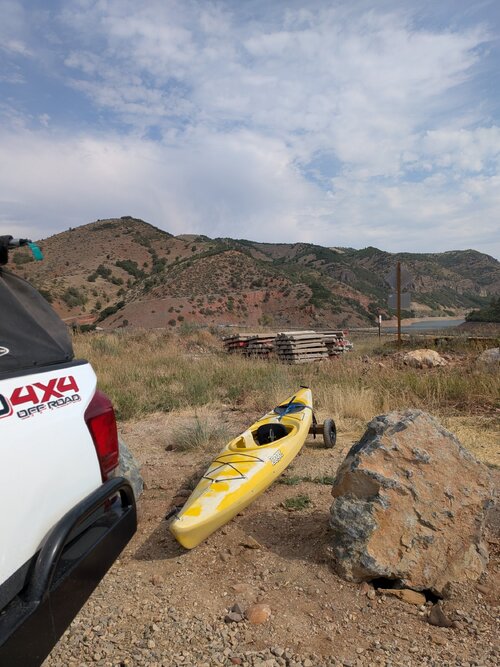
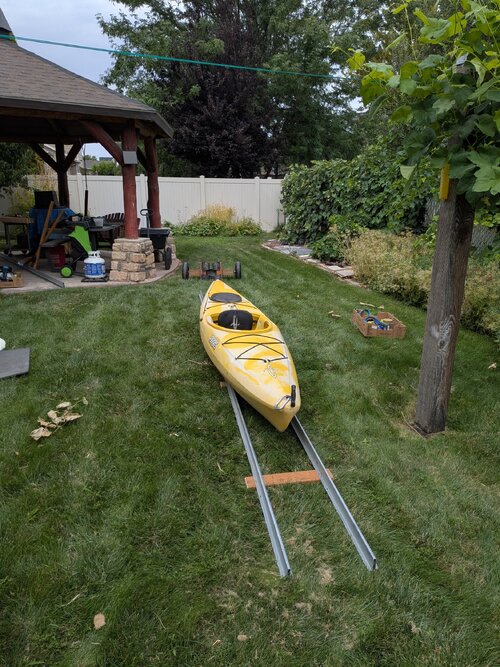
Since a certain someone is showing off his shop organization, not his rig, then I'll show off a set of tracks and sweet wheels for my kayak! šŸ˜Ž

The tracks let better store my kayak under my deck where space was mostly being used by dead leaves and spiders. The wheels give my arms a break from having to bicep curl my kayak to the water from my truck. I love that the majority of parts were already had sitting around. The solid wheels were the only parts specifically bought for these upgrades. Stockpiling tools, parts, and materials is awesome!

Allen
PXL_20260812_204426364.jpg

PXL_20260812_210035360.jpg

PXL_20260816_224002485.jpg

PXL_20260809_004540008.jpg

PXL_20260808_161312373.jpg
 

Doughboy

Rising Sun Member
Joined
Dec 7, 2018
Messages
1,041
I got some new wheels and tires a month or 2 or 3 ago. Method 703 bead grips in gloss titanium and some Yokohama 37s. Also installed the delta 3L radius arms with the help of @Notyourmomslx450 . Yes the 37s rub, yes they'll pop off fender flares. No, I haven't regeard. Yes I'll regear. Hopefully this winter.

DSC_0650.JPG

20260815_103201.jpg

20260626_165436.jpg

20260626_214141.jpg
 

MarkEva

Rising Sun Member
Joined
May 15, 2024
Messages
143
Two free steel military gas cans. One is pretty much spotless inside, the other has a dark brown spot that looks like it actually had some gas evaporate out of it. A little superficial rust on the outside as well as flaking paint. And the gaskets are shot.
 

Attachments

  • IMG_3969.jpeg
    IMG_3969.jpeg
    1.3 MB · Views: 21
  • IMG_3972.jpeg
    IMG_3972.jpeg
    596.2 KB · Views: 19
  • IMG_3974.jpeg
    IMG_3974.jpeg
    422.9 KB · Views: 48

DouglasVB

Rising Sun Member
Joined
May 5, 2015
Messages
2,453
Location
People's Soviet Socialist Republic of California,
Flushed my AHC fluid and bled the system today. The AHC fluid comes in the coolest JDM container:


PXL_20260824_171039893.jpg

PXL_20260824_171047413.MACRO_FOCUS.jpg
Wow that's a work of art! Frame it and put it on your wall!
 

MarkEva

Rising Sun Member
Joined
May 15, 2024
Messages
143
Yesterday I tied up all the loose bits of plastic on the front of my wheel wells and now the rubbing noise is all gone when I turn. Then I made new gaskets for my "new" gas cans. Today I'm fixing my camp chair.
 

MarkEva

Rising Sun Member
Joined
May 15, 2024
Messages
143
Camp chair is done. I used my favorite composite, Oak.
 

Attachments

  • IMG_4011.jpeg
    IMG_4011.jpeg
    915.8 KB · Views: 41
Joined
Aug 1, 2026
Messages
82
Location
Lakewood
Yesterday I tied up all the loose bits of plastic on the front of my wheel wells and now the rubbing noise is all gone when I turn. Then I made new gaskets for my "new" gas cans. Today I'm fixing my camp chair.

How'd you make the gaskets for your gas cans? I relocated my windshield fluid reservoir and the one i bought off Amazon didn't come with a gasket and it spills quite a bit of fluid on the trail if it's too full. I haven't been able to find a flat gasket that fits or that's thin enough to mostly seal it but still let a little bit of air in so I don't vacuum lock my windshield sprayers.
 

MarkEva

Rising Sun Member
Joined
May 15, 2024
Messages
143
At a parts store I bought a pack of miscellaneous gasket sheets that included a 1.5mm thick rubber and cork sheet (that is rated for gasoline). I drew what I needed with a ball-point pen and cut them out with sharp scissors. If you're coming to the meeting next week I could bring the pack because there are two very thin sheets I'd be happy to share with you. One says "rubber and fibre" and the other says "rubber and cellulose." (Which I realize doesn't make any sense, but that's what it says.) For the vent, I would drill a tiny hole in the top of the filler cap if it's still needed. I would leak a bit, especially when full, but it might be worth it.
 

MarkEva

Rising Sun Member
Joined
May 15, 2024
Messages
143
Today I drilled a very small hole in my backup light to let the water drain out. You'll be amused to know the water was Moab pink. Thanks to Craig J for telling me about it.
 

allen.wrench

Rising Sun Member
Joined
Dec 7, 2018
Messages
825
Location
Syracuse, UT
Today I drilled a very small hole in my backup light to let the water drain out. You'll be amused to know the water was Moab pink. Thanks to Craig J for telling me about it.
You mean your backup light at the top of your cab?

There is a TSB/"recall" for 3rd Gen Tacos for that top cab light letting water into the cab. Mine would sometimes get the headliner damp, and the light used to condensate on the lens. A dealership did the fix a few years ago for $0 on me, and so far it has been good.

Allen
 

Wild-FJ

Rising Sun Member
Joined
Feb 3, 2026
Messages
37
I had had fun watching it ( it was a small ocean)
when I followed Mark on the trail.
And yes, when you put the truck in reverse, the light looked "yucky pink".:ROFLMAO:
 

Wild-FJ

Rising Sun Member
Joined
Feb 3, 2026
Messages
37
Back to: What did you do to your Rig today?

I hung my Brand New parts that I took off my FJ Cruiser in 2014
(doing mods) on my Garage Wall. My wife is happy I removed the
boxes from the basement and now I have "Wall Art" !
Included is the Rising Sun 4x4 sticker on the drivers side back window.
 

Attachments

  • IMG_7034.jpeg
    IMG_7034.jpeg
    533 KB · Views: 26

Corbet

Moderator
Staff member
Joined
Oct 24, 2006
Messages
10,384
Location
Durango, Colorado
Little roof rack install. Kuat DEK Rack. I’ll do a full write up to follow in my build thread but here’s some teasers. Work done at the Gruntled Garage.

IMG_2996.jpeg

IMG_3012.jpeg

IMG_3013.jpeg

IMG_3020.jpeg

IMG_3023.jpeg
 
Last edited:

Corbet

Moderator
Staff member
Joined
Oct 24, 2006
Messages
10,384
Location
Durango, Colorado
Just did the spark plugs for the first time on the LC250. Easiest vehicle I’ve done plugs on. #1-3 you can even leave the coil packs connected. #4 you need to disconnect so you can rotate the coil 180° to clear the hybrid harness.

#2 seemed to have oil on the threads. Took a little more effort to remove. An extra long plug socket is handy. I still used a 6ā€ extension. Picked up a full set of plug sockets from the Cornwell truck. On sale and I’ll need the Subaru one soon.

IMG_3035.jpeg

IMG_3039.jpeg

#4 clearance. Still easy.
IMG_3038.jpeg

IMG_3040.jpeg
 
Last edited:
Back
Top