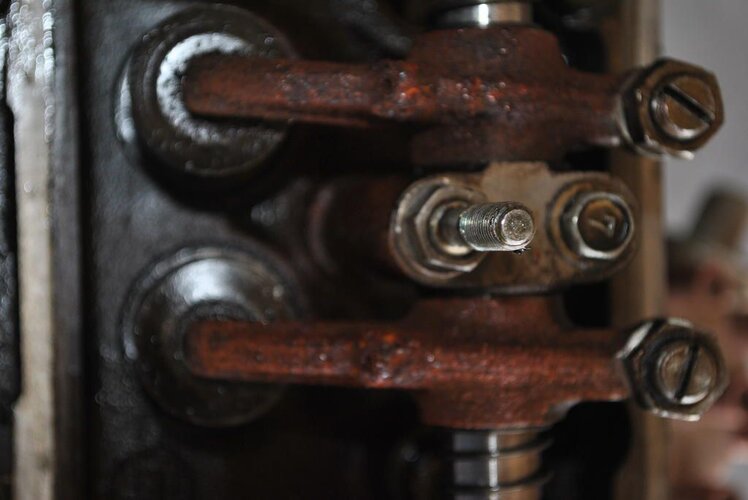
got a 40 - now it begins

MDH33

Hard Core 4+
Joined
Mar 8, 2006
Messages
7,701
Location
Trapped in a corn field
so tempting to go full blown OCD with this thing and start taking it all apart and powder coating everything and painting bolts and craziness... don't want to do that; want to get it going and drive it.

It's such a clean rig, I can understand what you mean.

I only need an air pump and air rail.

right ?

I believe so. I think I have both for a '77 2F if you need them. At a minimum, I would try to get it to pass without all the other stuff first before you go through the hassle of trying to re-smog it.
 

treerootCO

Rising Sun Member
Joined
Aug 22, 2005
Messages
5,422
...I think I have both for a '77 2F if you need them. At a minimum, I would try to get it to pass without all the other stuff first before you go through the hassle of trying to re-smog it.

1976 missed the Ritter cutoff for collectors plates by one year :( Because of that, he needs to pass emissions every two years. I am hoping the 76 doesn't need an EGR but I would put the catalytic converter, smog pump, air rails, and the VSV stuff on it.
 

MDH33

Hard Core 4+
Joined
Mar 8, 2006
Messages
7,701
Location
Trapped in a corn field
1976 missed the Ritter cutoff for collectors plates by one year :( Because of that, he needs to pass emissions every two years. I am hoping the 76 doesn't need an EGR but I would put the catalytic converter, smog pump, air rails, and the VSV stuff on it.

Does it already have a catalytic convertor on it? If so, the other stuff will be easy. Also, based on that other thread about the '77 with headers, it sounded like they passed with just the air rail and pump. :)

I'm bummed about the collector plates too. My '80 hilux needs to pass every two years also.
 

wesintl

RS Moderator
Moderator
Joined
Aug 22, 2005
Messages
8,596
Location
in da house
76 didn't have a cat. doesn't mean you can't run one to be cleaner.

I bet you would be fine with an air rail and pump.
 
Last edited:

Jacket

RS Moderator
Staff member
Moderator
Joined
Feb 3, 2006
Messages
5,285
Location
Lafayette
Yea - not cats on the '76. Mine passed 5 years ago with a functional EGR and no air pump, but it required carb and timing adjustments (that I can't remember the details on any more....).
 

subzali

Hard Core 4+
Joined
Aug 22, 2005
Messages
10,321
Location
Denver CO
I wouldn't take it apart. Clean it up and enjoy driving it. Seen too many rigs get taken apart and then never get put back together again.
 

MDH33

Hard Core 4+
Joined
Mar 8, 2006
Messages
7,701
Location
Trapped in a corn field
I wouldn't take it apart. Clean it up and enjoy driving it. Seen too many rigs get taken apart and then never get put back together again.

Agree 100%. Let us know when you're going to drop in the 2F. I would be happy to lend a hand. You're going to love having it on the road/trail. :thumb:
 

treerootCO

Rising Sun Member
Joined
Aug 22, 2005
Messages
5,422
Does it already have a catalytic convertor on it?...

76 didn't have a cat. doesn't mean you can't run one to be cleaner.

I bet you would be fine with an air rail and pump.

Yea - not cats on the '76....

I was thinking '76 was the first year based off of the 6,000 GVW and higher specs that dd not require them in '76. Looks like Toyota ran them from 1/79-1984. Cool, so no cats :)

1/75-12/78 FJ40
046B.gif


Exhaust manifold flange
 

Rzeppa

Rising Sun Member
Joined
Aug 24, 2005
Messages
8,259
Location
Kittredge CO, USA
Sweet! Nice find!

My Kalifornia 1976 came with EGR, but I am told that federal didn't get them until 1978. The head dude at Colorado AIR who tested my 1978 FJ45 told me flat out that we don't need EGR up here on the old iron because combustion temps don't get high enough to make much NxOx. You do need the smog pump though. It doesn't need to work, just look like it's working. I had mine mounted but disconnected for about 15 years and she always passed every year. Just before the test I would throw the belt on, then take it back off after it passed.
 

subzali

Hard Core 4+
Joined
Aug 22, 2005
Messages
10,321
Location
Denver CO
Sweet! Nice find!

My Kalifornia 1976 came with EGR, but I am told that federal didn't get them until 1978. The head dude at Colorado AIR who tested my 1978 FJ45 told me flat out that we don't need EGR up here on the old iron because combustion temps don't get high enough to make much NxOx. You do need the smog pump though. It doesn't need to work, just look like it's working. I had mine mounted but disconnected for about 15 years and she always passed every year. Just before the test I would throw the belt on, then take it back off after it passed.

According to SOR, California EGR started in 9/'73 ('74 model year), and Federal EGR started in 1/75 (late '75 model year?). My Federal '77 has it...
 

simps80

Rising Sun Member
Joined
Jan 22, 2009
Messages
2,720
Location
Arvada, CO
so...been staring at it for a year now, accumulating ...stuff...

found a complete 2f with a March of 76 production date, (serial number 080859), fits nicely with the May of 76 vehicle date.

Here it is:

web_DSC_0278.jpg


it was a bit rusty. it was cheap.
the guy said it has been sitting in his garage since the mid 80s.

so I took a chance on it...
put a spare hook on the rear to lift it so I could mount it on the stand...

finally found the right orientation of the plate and arms for the stand to fit nice and square and centered without hitting rear main housing etc.

its 12x1.75x80 times 4 plus 4 12mm flat washers per, between block and stands...

web_DSC_0284.JPG


as rusty as it was, I was worried it would be seized, but it cranked over perfectly with very very little pressure on the front nut so I was encouraged.

I was planning on pulling the head to have it gone through, then investigate what the inside looks like while the head was off....

I fought a lot of bolts removing all of the externals so I was a bit concerned what the inside will look like, but it turned over so nicely and the exhaust ports were puffing nicely.

I was more concerned when I pulled the valve cover .....
 

Attachments

  • web_DSC_0320.JPG
    web_DSC_0320.JPG
    58.3 KB · Views: 498

simps80

Rising Sun Member
Joined
Jan 22, 2009
Messages
2,720
Location
Arvada, CO
I was even more concerned when it took a 36" cheater bar and a can of pb blaster to get the head bolt by #3 exhaust out...

but it eventually came out.

as it sits now I'm ready to take the head off everythings removed and ready to go, but the head has told me its not ready to come off yet.

I can literally lift the whole engine connected to the stand by the head with nothing mechanical attaching it to the block...!!! :D

we'll see, its soaking again tonight, i'll give her another shot tomorrow or thursday.

I would love to use this engine because its from a CA emissions 76 like the cruiser is, but if its not usable its not usable. I just have to think it is based on how easy it turns over....

we'll see.
 

subzali

Hard Core 4+
Joined
Aug 22, 2005
Messages
10,321
Location
Denver CO
It's not uncommon for heads to be difficult to remove. There are little slots on the side you can put a large screwdriver or pry bar and pry up or whack with a mallet. Hopefully you'll be golden after a head rebuild if the engine turns over smoothly.

It's also recommended to chase the head bolt threads in the block before reassembly. I'm sure you're already getting good help with this project though :thumb:
 

simps80

Rising Sun Member
Joined
Jan 22, 2009
Messages
2,720
Location
Arvada, CO
It's not uncommon for heads to be difficult to remove. There are little slots on the side you can put a large screwdriver or pry bar and pry up or whack with a mallet. Hopefully you'll be golden after a head rebuild if the engine turns over smoothly.

It's also recommended to chase the head bolt threads in the block before reassembly. I'm sure you're already getting good help with this project though :thumb:

before I lifted the engine by the head with all the bolts out (wow) I whacked it to death and used the side slot to pry extensively, but I haven't given up yet.
:)
 

DaveInDenver

Rising Sun Ham Guru
Joined
Jun 8, 2006
Messages
13,114
Location
Grand Junction
It's also recommended to chase the head bolt threads in the block before reassembly. I'm sure you're already getting good help with this project though :thumb:
It was mentioned to me and probably worth parroting, when you chase the head bolt threads use a thread chase, either a manufactured one or something you make, and not a tap. You don't want to remove any material you don't have to, especially from good threads.

I ended up making my own since all the tooling I had long enough were bottoming taps. I used a long 10.9 bolt, cut 3 slots along the length with a die grinder and ran it through a die to clean its threads. My 22R short block was factory new but I got a few small pieces of debris, although nothing more than dirt and paint.
 

simps80

Rising Sun Member
Joined
Jan 22, 2009
Messages
2,720
Location
Arvada, CO
Wow, great thread, great find!!

Thanks!

so I made some progress...after soaking over night with 2 cans of pb blaster and more lifting by the head and dead blows etc the head came off.
there was an astonishing amount of rust chunks and carbon chunks that I assume was just gluing it down.

I spent a good 3 hours cleaning it, taped off the hols, left the head bolts in :blah:
and this is where it stands with a crappy cell phone pic cause I broke the lcd on the nikon (14 dollars for new lcd on ebay...i love ebay...but I digress)

engine_no_head.jpg
 

simps80

Rising Sun Member
Joined
Jan 22, 2009
Messages
2,720
Location
Arvada, CO
I do have a problem that I would like input on though.

the pistons are all stamped ra2648 .075 then 0.04 UD

.075 converts from MM to .0295 inches so I'm assuming this is .30 over...searching on mud reveals that's true:
http://forum.ih8mud.com/60-series-wagons/176742-repco-piston-part-number-info.html

but I can't figure out 0.04 UD.

I care because number 3 has a gouge the radius of which matches the intake valve:

no_3_piston.jpg


so...I wonder if these are .04 "under height" to allow for block and head decking.

I would assume so, which then makes me ask why #3 got smacked..

so do you concur this is the valve contacting the piston? I think that's the only logical explanation for this shape and location, I should have taken a picture with the camera orientated square so the location of the mark was more clear, but it lines up with the intake valve.

for it to be one valve to piston, my likely flawed logic rules out too much milling of the head or block or other causes like timing that should affect more than one hole.

so ... floated valves and one kissed the piston?

its not deep, can catch your finger nail on it just barely is all ...
the cylinder walls are pure,
I think I'll continue with original plan and have the head reworked, I'll check the block for warpage, then turn it over and look at the bottom end before deciding on anything for certain especially since its already been rebuilt at least once it would appear.

thoughts on that approach?
 

60wag

Rising Sun Member
Joined
Aug 23, 2005
Messages
2,476
Doesn't the notch in the piston point to the front of the truck? If so, the nick in the piston looks too close to the centerline of the pistion to be the edge of the valve, (or you have some really small valves.)

Does the head or block have any numbers stamped on them? The shop that decked my 2F head stamped an "050" on it to indicate to future generations that it had been shaved 0.050".
 

treerootCO

Rising Sun Member
Joined
Aug 22, 2005
Messages
5,422
The internet says the pistons are made by Rebco and or ACL. The "RA" means it is a set of pistons (rings not included).

http://www.acl.com.au/

Piston:
RA2648 = piston only (was probably ordered as part of a rebuild kit)
6KRY2648 = KRY (contains Plain rings)
6MKRY2648 = MKRY (contains Premium rings - Moly or Chrome)

TOP UD ???
TOP YD ???
TOP YC ???
TOP YK ???
TOP CF ??? - http://www.ebay.com/itm/Toyota-2F-M...D&orig_cvip=true&rt=nc&_trksid=p2047675.l2557


Still working on the UD marking...

http://www.mitsubishilinks.com/fsm/acl_pistonproducts_pp99.pdf
Page 199

This was the kit that included RA pistons:

http://www.acl.com.au/web/aclwebsit...c53d38e394ca256afc007c9674/$FILE/FitBuild.pdf

page 9

I like finding similarities on the web. This guy has the same question as you with the same conclusion even though his is marked with YC instead of UD...

http://forum.ih8mud.com/60-series-wagons/176742-repco-piston-part-number-info.html
 
Last edited:
Top