• Jack-it Night: April 2024 RS Meeting Hey Guest: Wed. April 3rd is the next Rising Sun meeting, and you won't want to miss it. We're doing our annual offroad recovery equipment demonstration and trail skills training aka "Jack It Night." Meeting starts at 6:30 p.m. (early) Click here for all the details.

Brahma's Saginaw/FJ60 Power Steering Conversion

subzali

Hard Core 4+
Joined
Aug 22, 2005
Messages
10,309
Location
Denver CO
Little update: it worked.

Spent some time getting the hub pressed off the Volvo p/s pump, then pressed back on my p/s pump. So moral of the story is this: Use the Volvo style pulley, I don't know why I didn't do this before. The JT Outfitters pulley is a bad solution, just for the pure fact that it is a narrow pulley and a 2F wants a wide pulley. Anyway...

1. My Saginaw pump (from JT Outfitters, basically the same as the Volvo pump)
2. The pulley puller/installer tool
3. Hub installed
4. Pulley bolted on to hub
 

Attachments

  • IMG_3999.jpg
    IMG_3999.jpg
    84.3 KB · Views: 1,380
  • IMG_4000.jpg
    IMG_4000.jpg
    90.7 KB · Views: 1,362
  • IMG_4001.jpg
    IMG_4001.jpg
    85.1 KB · Views: 1,426
  • IMG_4002.jpg
    IMG_4002.jpg
    88.7 KB · Views: 1,320

subzali

Hard Core 4+
Joined
Aug 22, 2005
Messages
10,309
Location
Denver CO
Tonight, after going to 3 parts stores, I finally found a belt that would be suitable at Pep Boys. I tell ya what, I'm getting to be more and more impressed with that place, they seem to have what I need and are open reasonable hours (unlike the AHEM! NAPA on County Line :rolleyes:)

Anyway, my old belt was a 15520 and the new 17540, so I went from a 15mm wide, 52" long belt to a 17mm wide, 54" long belt. I think the Toyota width is actually 22mm, because the 17mm is still narrow, but it's better.

Best part is, no squeaks! Even when I hit the steering stops, the belt chattered a little but it didn't squeak like before! That was a main goal of this project!

Looking at the pictures, you can see how tight of a fit it is. My Sanden compressor is mm away from the p/s gear, and my belt is mm away from my upper radiator hose.

So I was thinking about it, and I was about 80% satisfied with my execution of my p/s job. I was hoping this was going to bump me to 85%, but with the belt still being a touch narrow I'm going to say 82.5% for now. I have three more somewhat major modifications that will bring me to 100%.

5% for steering damper, 2.5% for radiator support, 2.5% for FJ40 column/Borgeson intermediate shaft, 5% for reamed TRE/FJ60 rebuildable end, 5% for wide groove pulley and belt
 

Attachments

  • IMG_4006.jpg
    IMG_4006.jpg
    75.3 KB · Views: 1,286
  • IMG_4007.jpg
    IMG_4007.jpg
    88.6 KB · Views: 1,311
  • IMG_4008.jpg
    IMG_4008.jpg
    55.1 KB · Views: 1,300
  • IMG_4009.jpg
    IMG_4009.jpg
    55.4 KB · Views: 1,300
Last edited:

subzali

Hard Core 4+
Joined
Aug 22, 2005
Messages
10,309
Location
Denver CO
Someone pm'd me about this thread and steering columns a couple weeks ago - could I get you to re-pm me? I deleted them accidently and I forget your username but I wanted to follow up with you :eek:
 

SteveH

Hard Core 4+
Joined
Aug 10, 2006
Messages
2,907
Location
Colo Springs
Looks great - that Volvo PS pump fits about as well as anything could. You might put a sleeve (plastic, like Jeeps and Fords use) on the upper radiator hose, so that a flying/loose/oscillating belt won't hack through your hose. You could also loosen the hose ends and perhaps twist the hose to angle it further away from the belt.
 

subzali

Hard Core 4+
Joined
Aug 22, 2005
Messages
10,309
Location
Denver CO
Bump - update:

I installed a new OEM upper radiator hose (as part of The Projects), and it makes the clearance with the p/s pump pulley a lot better:

IMG_1815.JPG


My old hose had been cut and shortened several times:

IMG_1787.JPG


IMG_1788.JPG


IMG_1789.JPG


More updates/a re-writing should be coming soon :D
 

subzali

Hard Core 4+
Joined
Aug 22, 2005
Messages
10,309
Location
Denver CO
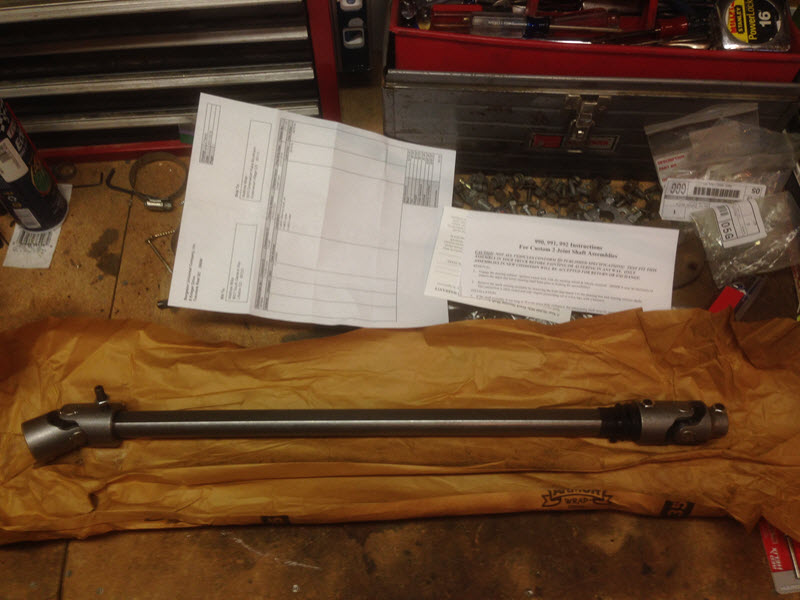
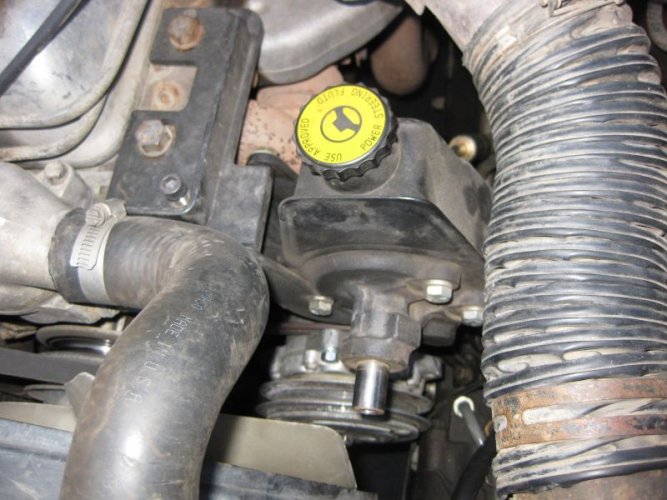
Finally got a shiny piece of hardware that will make me a little happier with this power steering conversion. Should have done it this way from the beginning. Oh well.

If you recall, I originally did the FJ55 column, because at the time I wanted to try to do it with all Toyota parts. Well it’s been demonstrated that it can be done that way, but it is not optimal. The FJ55 column is 1 ½” longer than the FJ40 column, which puts it both closer to the driver, and high enough that on long drives it was uncomfortable to hold my arms up. FJ55 columns are also harder to find, I was just lucky to have found one at the moment I was working on that project. You also need FJ60 intermediate shaft components, which may or may not be easy to source depending on where you are at and the timing of your project.

So for all these reasons I went back to the FJ40 column, and I’m going to use a Borgeson intermediate shaft on it. Borgeson shafts have nice tidy u-joints, have about 6” of slip joint, and are readily available. The FJ55/FJ60/Corolla u-joints on the Toyota intermediate shaft system are large and caused me to have to cut into my inner fender when I did the installation. If I had gone with a Borgeson shaft I wouldn’t have had to do this. Lesson learned.

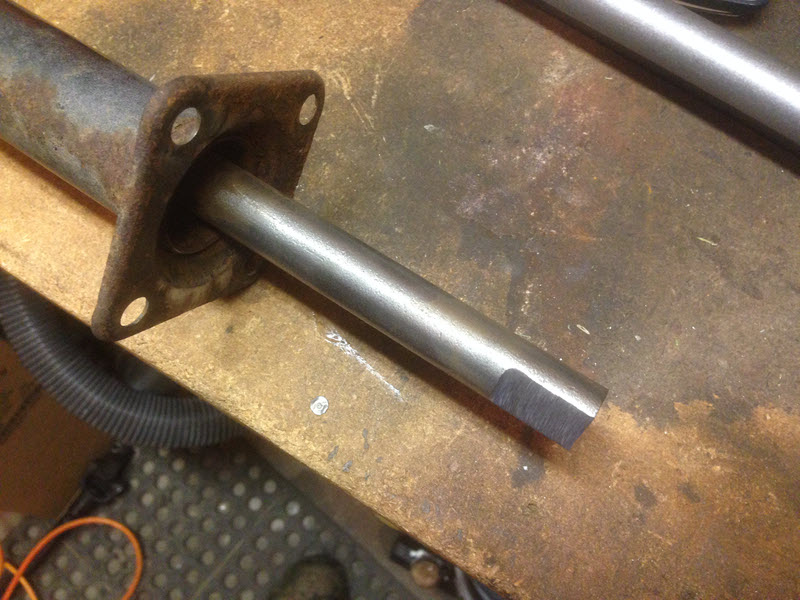
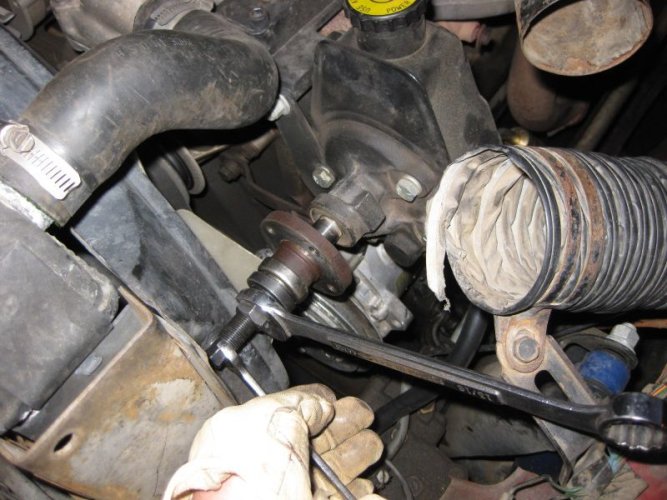
I ordered a custom Borgeson shaft, after doing some searching around. The FJ60 steering box is a 36-spline, 17mm input. That’s REALLY close to the 11/16”, 36 spline available from Borgeson, and works perfect. On the firewall side, you cut the rag joint end off the FJ40 shaft and grind a “double D” onto the end of the shaft, which is basically two flats opposing each other. The shaft is 19mm, which is REALLY close to ¾”, so you can order a ¾” double D u-joint from Borgeson for that end. The length may vary, in my case the “c” dimension was 22” (see http://www.borgeson.com/Designing/shaftlengths.html). That’s all you need and they will send you a shaft in a few days.

I cut the rag joint off close to the seam where it’s connected.
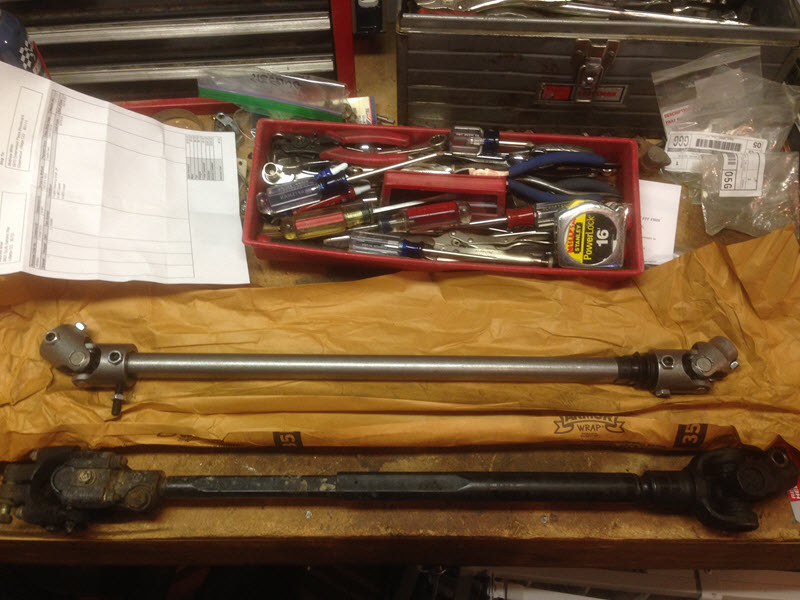
New shaft:
IMG_6325.jpg


New shaft and old shaft compared:
IMG_6326.jpg


Grinding the double D: the distance across the flats was 9/16” in my case:
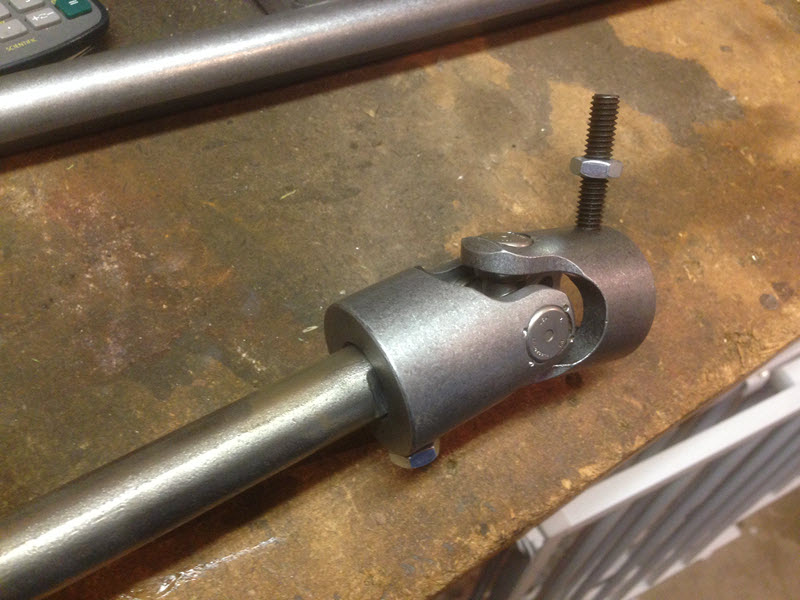
IMG_6327.jpg


Test fitting:
IMG_6328.jpg


You also order the column support bearing from Kurt at Cruiser Outfitters (http://www.cruiseroutfitters.com/powersteering.html), because the OEM bushing will disintegrate upon removal, and you smooth down the shaft just a tad so you can slide/tap the bearing in.

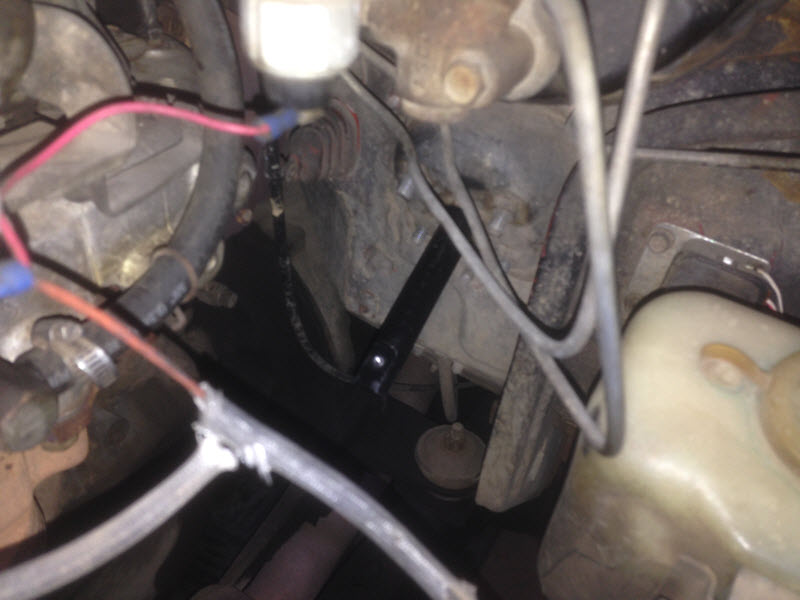
Steering column re-installed and ready to receive the intermediate shaft:
IMG_6330.jpg


The Borgeson shaft will arrive a little long, and comes with instructions on how to shorten it up properly. Amount of material I removed:
IMG_6329.jpg


One thing I did which is not mentioned in the instructions is I drilled small dimples for the set screws to seat in. I reasoned that this will help prevent the shaft from slipping out on a 4x4, whereas it may not be needed quite the same on a street rig. Can’t go too deep as the set screws don’t have much excess length to work with. Overall, nice, well-built, shiny hardware and good instructions, very happy with the product!

Painted and ready for install:
IMG_6331.jpg
 
Last edited:

kurtnkegger

Rising Sun Member
Joined
Jan 24, 2011
Messages
1,506
Location
Denver Burbs
Nicely done, Matt! I did a Borgeson shaft when I did my power steering conversion, and it's been great. Nice instructions for people looking for information
 
Top