You are using an out of date browser. It may not display this or other websites correctly.
You should upgrade or use an alternative browser.
You should upgrade or use an alternative browser.
Brahma's Saginaw/FJ60 Power Steering Conversion
- Thread starter subzali
- Start date

today I had some good Cruiser love time in preparation for the Ghost Town Run and got a couple little things fixed:
-when I moved my headlight switch when I put in a tach I suddenly lost my instrument cluster lights. Oh great. Well today I found out that it was just the set screw on the knob wasn't seated properly, so I had turned the knob so the lights were off and wasn't able to spin it back because the knob was just spinning on the shaft. That was simple.
-so I finished wiring in the backlight for the tach so now I can see rpms at night!
-somehow I lost the clamp bolt for the base of the steering column inside the truck, so my keyswitch/turn signals could spin around. Got a bolt and nut and got that bolted down solid.
-Since that was taken care of my newfound turn signal problems went away - I guess the force of the switch going up and down twisted the column enough to keep them from engaging or something.
-While switching out my turn signal/keyswitch to my new column I had taken the turn signal lever cover thing off for the regular/high beam switch and the detent ball fell out. I was able to get it put back together but must have done something wrong because the detent wasn't doing its job properly and my lights wanted to be in the bright position all the time and I had to hold the lever back if I was driving at night to keep from blinding people. After some finagling with it today I got it put back together properly so the detent does what it's supposed to and my switch works amazingly much better than before!
-Got my steering wheel centered
-topped of my t-case
-Adjusted my brake pedal height/freeplay and took care of the problem of having the brake lights stay on after releasing the pedal (I hope)
So little by little buttoning everything up! I'm excited to get the truck out on a long-distance drive!
Last edited:
Dr. Schlegs
Hard Core 4+
RicardoJM and Subzila,
I would like to talk to you two about the conversation. Ricardo and I discussed this a little bit at the last meeting, but it would be nice to compare the two set-ups. I have heard of this conversation being done several ways and just want to get the best one for my '72.
I would like to talk to you two about the conversation. Ricardo and I discussed this a little bit at the last meeting, but it would be nice to compare the two set-ups. I have heard of this conversation being done several ways and just want to get the best one for my '72.
Sure! Ricardo's is a minitruck conversion on a F engine, mine is a Saginaw/FJ60 conversion on a 2F engine. The minitruck is a very popular conversion because it's so easy! A full Saginaw conversion is also very popular because of the extra boost desired for tires larger than about 35". Mine is using the Saginaw pump but I liked the design/placement/linkage configuration of the FJ60 steering box better so that's what I went with! You can start a new thread or keep posting to either one of ours with questions!
Had a couple questions from MUD today so I thought I would copy my response:
The big thing that his thread brought out is that Wayne (crushers) suggested (based on lowenbrau's advice) to use a 79+ drag link end at the tie rod. To me this makes sense because the threaded part will be the larger diameter just like the 60 and 70 series, but (hopefully) it will have the smaller diameter tapered stud to connect to the FJ40 tie rod. The other cool thing is that even though the driver side FJ40 tie rod end (at the steering arm) works fine for that connection as well, the stud is just a hair on the short side (as far as length is concerned), because the hole in the steering arm is shorter than the hole in the tie rod, so the tapered stud is designed to be a different length for those two applications. However, looking at SOR.com they show the same part number up until 1984 for the 40 series, so it looks like that didn't change even though some of the other front-end components did (like the large pattern steering knuckles, Aisin hubs and short birfields). The 60 one won't work because the rebuildable end is too long to use the 70 series drag link tube. So there you have it. I hope you're thoroughly confused now. I think I am.
Basically I will hold my breath and see if his works ok, and if his guinea pig experiment works out I'll cough up the $40 or $70 to get another end to replace the one I have.
subzali said:Hey Dan, I replied below. It would be awesome to see your truck up here sometime (either one!)
DanS HJ-45 said:Matt:
Excellent writeup in the RS section.
Couple of questions...
1)How do you like it? Any funny steering issues like bump steer? I absolutely love it! Still working on belt tension, I get some squeals once in a while. No bump steer that I can tell (though I have never experienced it before so I'm not sure what to look for) - I kept the drag link as parallel as possible to the tie rod as I could (it's at least as parallel as factory) so I can't imagine why I would have any problems...
2)Could you look at this thread http://forum.ih8mud.com/diesel-tech...here-we-go-fj-40-getting-3b-turbo-h55f-6.html and let me know how the position of the steering box on yours compares to mine? They look pretty close to me. I would suggest having the small end of the pitman arm centered under the big hole in the frame if your intermediate shaft allows for it, or even a small bit forward. If you check my thread you'll see where I had to cut into the inner fender a small bit to allow my intermediate shaft u-joint to have full rotation. If your intermediate shaft is using a smaller u-joint then I would keep it where you're at, looks about the same as mine.
3)Anything you'd do differently? Mine is pretty much the exact same thing, so I figured I'd ask someone who had recently done the same thing to see if there was anything I should do differently. I would either shorten the FJ55 steering column 1 1/2" or move the seats back. I just got back from a road trip where we were doing light 4-wheeling from 10-4 or so plus another 2 1/2 hours of driving and my arms are pretty tired, mostly I think because the wheel is too close to me so I'm holding my arms up just a tad. The other thing I would NOT do is combine the 70 series TRE at the pitman arm to the 70 series drag link tube to the FJ40 TRE at the tie rod. Way too expensive for what you get. I would have a custom tube made to connect a 60 series TRE at the pitman arm to an FJ40 TRE at the tie rod (basically they will take a tube and thread one end left handed for the 60 end and thread the other end right handed for the 40 end). Also pay attention to the rod end you use at the tie rod. The stud has to be pretty long because the boss on the rod for the drag link to plug into is pretty thick, thicker (I found out) than the steering arm. If you notice in my thread I used the driver (left) side FJ40 tie rod end for my drag link-to-tie rod connection. The stud is ALMOST too short to work, but it does work. If you find a better solution (Wayne mentioned 79+ components - that sounds like it will work in theory) then I will probably switch over to that just to be on the safe side.
Hope that helps!
The big thing that his thread brought out is that Wayne (crushers) suggested (based on lowenbrau's advice) to use a 79+ drag link end at the tie rod. To me this makes sense because the threaded part will be the larger diameter just like the 60 and 70 series, but (hopefully) it will have the smaller diameter tapered stud to connect to the FJ40 tie rod. The other cool thing is that even though the driver side FJ40 tie rod end (at the steering arm) works fine for that connection as well, the stud is just a hair on the short side (as far as length is concerned), because the hole in the steering arm is shorter than the hole in the tie rod, so the tapered stud is designed to be a different length for those two applications. However, looking at SOR.com they show the same part number up until 1984 for the 40 series, so it looks like that didn't change even though some of the other front-end components did (like the large pattern steering knuckles, Aisin hubs and short birfields). The 60 one won't work because the rebuildable end is too long to use the 70 series drag link tube. So there you have it. I hope you're thoroughly confused now. I think I am.
Basically I will hold my breath and see if his works ok, and if his guinea pig experiment works out I'll cough up the $40 or $70 to get another end to replace the one I have.
PabloCruise
Hard Core 4+
Thanks Matt.
I still have a little bit of shimmy on the 40 (I adjusted the box) so I think I am going to replace TRE's all the way around.
I want to put 60 ends at both ends of the "drag link" (relay rod in my mind), get custom tube relay rod made and use a tapered reamer on the pass side 40 TRE.
I'll keep you posted!
that sounds like probably the best solution TJ, especially since those ends are rebuildable and the parts are cheaper than replacing the whole thing. Sounds like it will work! That's probably what I will end up doing someday after I'm done trying to figure out all the options (the '79+ thing still has me puzzled) and my TREs are worn out.
That's probably what I will end up doing someday after I'm done trying to figure out all the options (the '79+ thing still has me puzzled) and my TREs are worn out.rover67
Rising Sun Member
My saginaw pump with FJ60 steering box would start to groan when it got hot, so I added a tranny cooler to the return line and it seems to have cured it. I don't know if that would help yours though.. It'd only do it after several hours of "hard" wheeling.
I think I have the same JT mount. I checked mine today and the clearance is different. Not sure why...
Here is an old pic:

So Treeroot are you using a wide belt on the narrow groove p/s pulley?
EDIT: he pm'd me and said the pulley is from an AMC Eagle...
Last edited:
PabloCruise
Hard Core 4+
Matt,
Did you end up adding a PS cooler?
I saw a neat little cooler on a Tundra that I think would work perfect. I will try to post pics later...
Did you end up adding a PS cooler?
I saw a neat little cooler on a Tundra that I think would work perfect. I will try to post pics later...
No not yet. My red truck starting puking oil (front main seal) right when I was about at that part of the project so I had to get the 40 back together to drive it for a week. Then I bought the Tundra, then I got married, then I got relocated to New Mexico so I haven't really worked on it at all. I'm still battling an issue that keeps killing my batteries as well, and not really interested in spending money on the Cruiser at the moment (tires for her car and mine as well as a timing belt change are eating into the budget $$  ). Anyway there are a lot of loose ends that I would like to clean up, and the cooler is just one of them. I have the cooler from a 60 series that I was going to try first, but I've seen tranny coolers from 80 series and I guess Tundras like you mention used that would seem to work pretty well. It's only groaned at me once so...
...but post up some pictures! Someday it'll get finished!
). Anyway there are a lot of loose ends that I would like to clean up, and the cooler is just one of them. I have the cooler from a 60 series that I was going to try first, but I've seen tranny coolers from 80 series and I guess Tundras like you mention used that would seem to work pretty well. It's only groaned at me once so......but post up some pictures! Someday it'll get finished!
PabloCruise
Hard Core 4+
I didn't know you got relocated to NM - I thought it was just a field assignment (temporary).
I sitll miss being in northern NM, beautiful country...
I sitll miss being in northern NM, beautiful country...
PabloCruise
Hard Core 4+
Enjoy it while you are there...
Matt,
Did you end up adding a PS cooler?
I saw a neat little cooler on a Tundra that I think would work perfect. I will try to post pics later...
Time to update this thread...
November 20, 2010 - 4 hours
Tools needed
1. wrenches
2. screwdrivers
3. ratchet/sockets
4. tubing bender
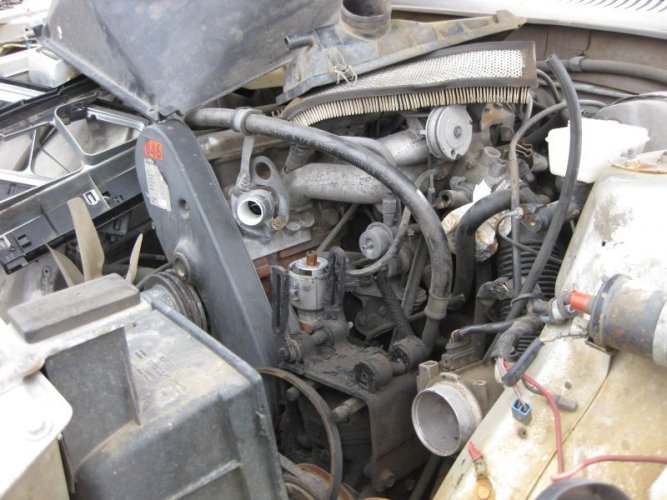
Tonight I got kicked out of my apartment because my wife had a bunch of friends over, so I decided to tackle a piece of the power steering project that I intended to do during the original conversion, but wasn't able to. In August of '09 I spent a day up on Argentine Pass, and towards the late afternoon my pump began to groan a little bit, presumably due to the fluid getting hot from me being aired down the whole day. Well tonight I set about to add a power steering cooler.
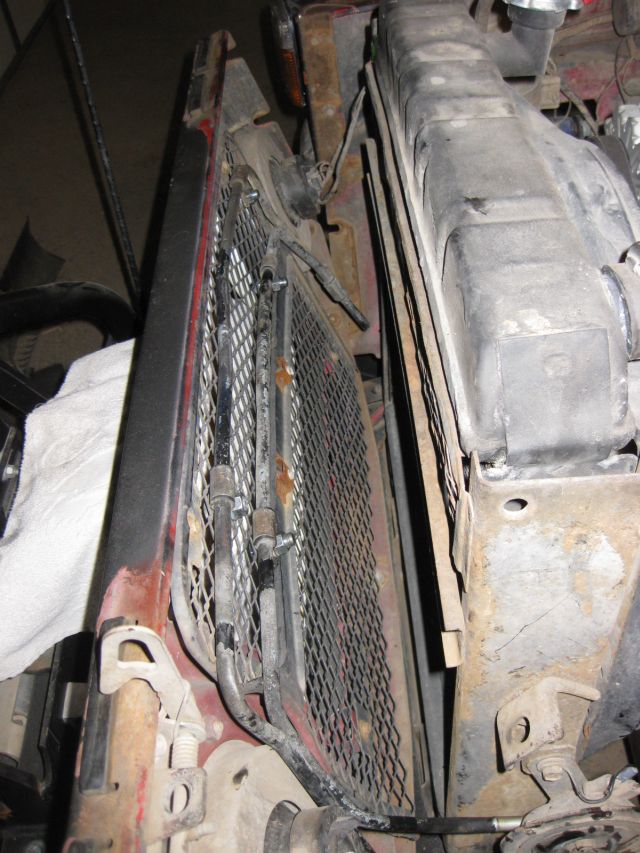
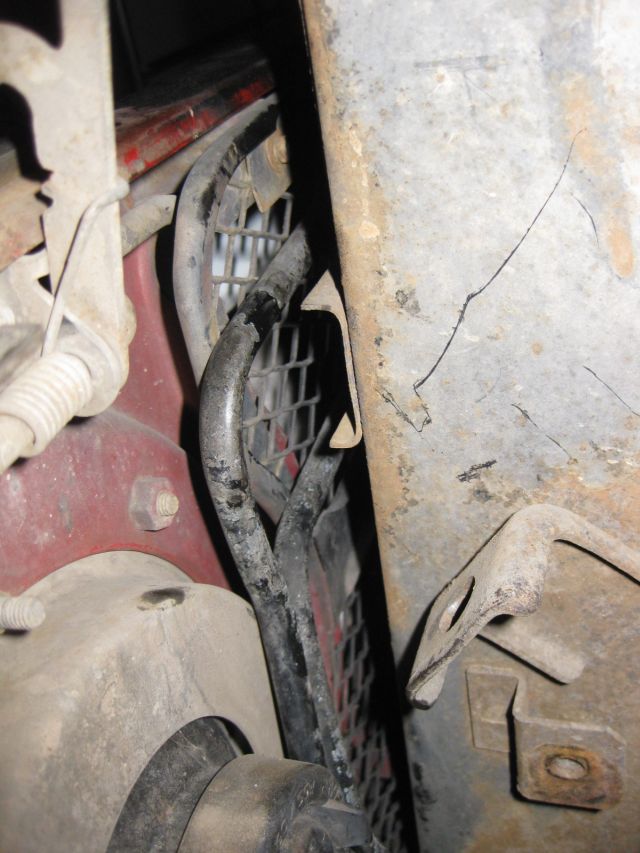
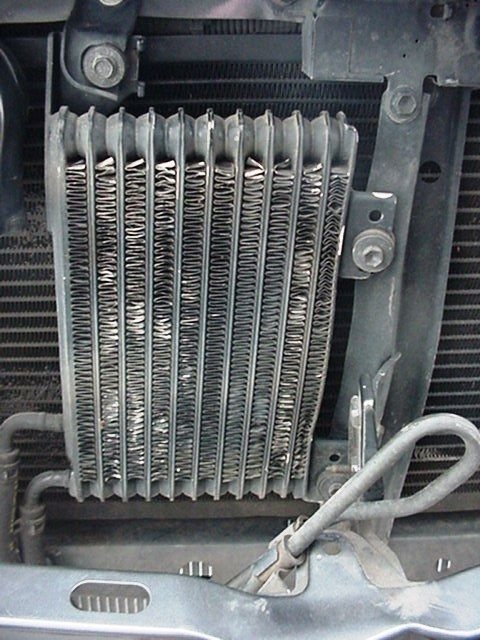
I've had the p/s cooler loop from an FJ60 ever since I started acquiring parts for the conversion, and that's what I intended to install tonight. After looking at it for a few minutes I came up with what I thought was a decent solution and went to it. I mounted the cooler loop to the grille, attaching it to the mesh screen. After some slight rebending of the the tube I got the fit I wanted and it made a perfect match to the low pressure outlet of the p/s pump, needing just a short section of hose to connect the two. I then ran the other side of the coil back up to the pump. I like how it sits in front of the radiator and should benefit from the extra airflow moving across it, as opposed to its factory position in an FJ60.
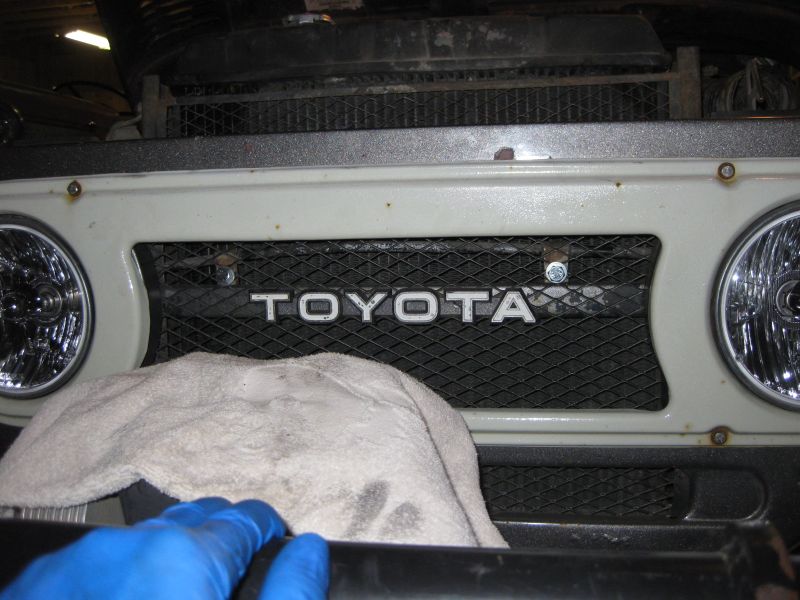
Here's a couple pictures of how it sits on the grille:
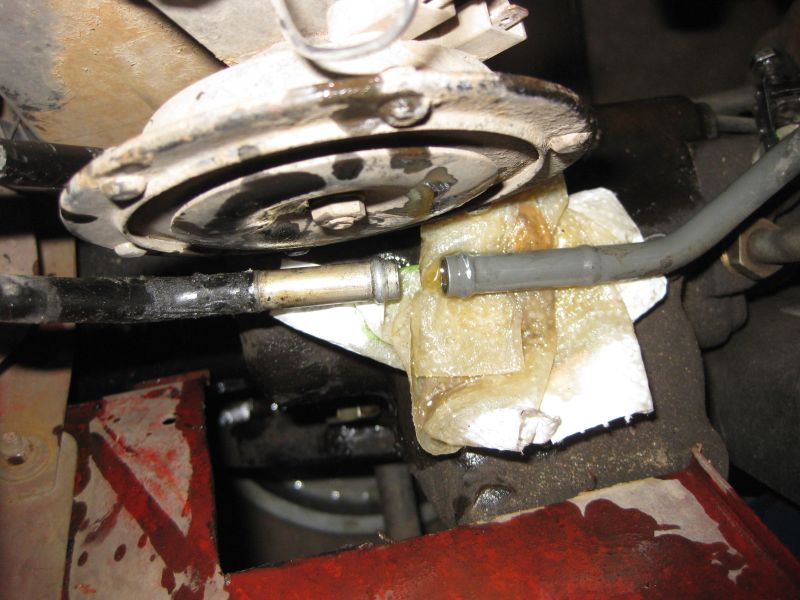
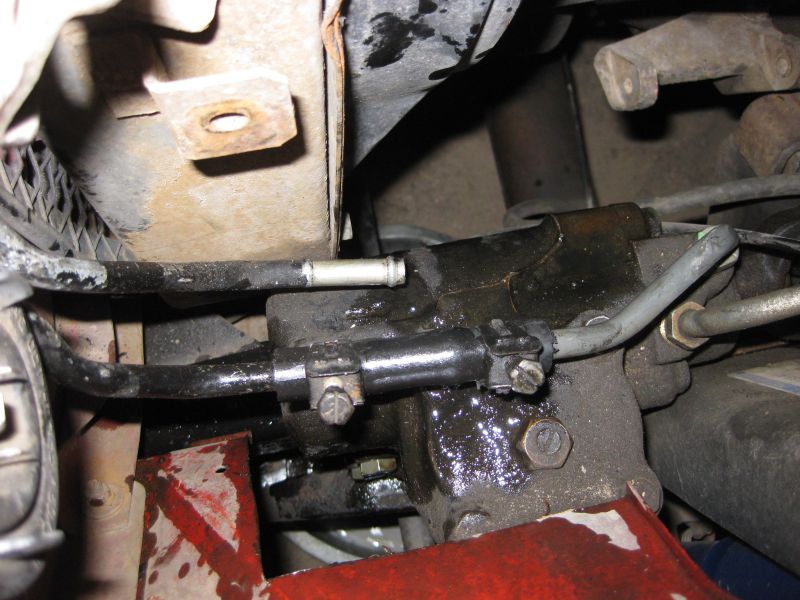
Here's a couple pictures of the distance between the low pressure outlet and the coil:
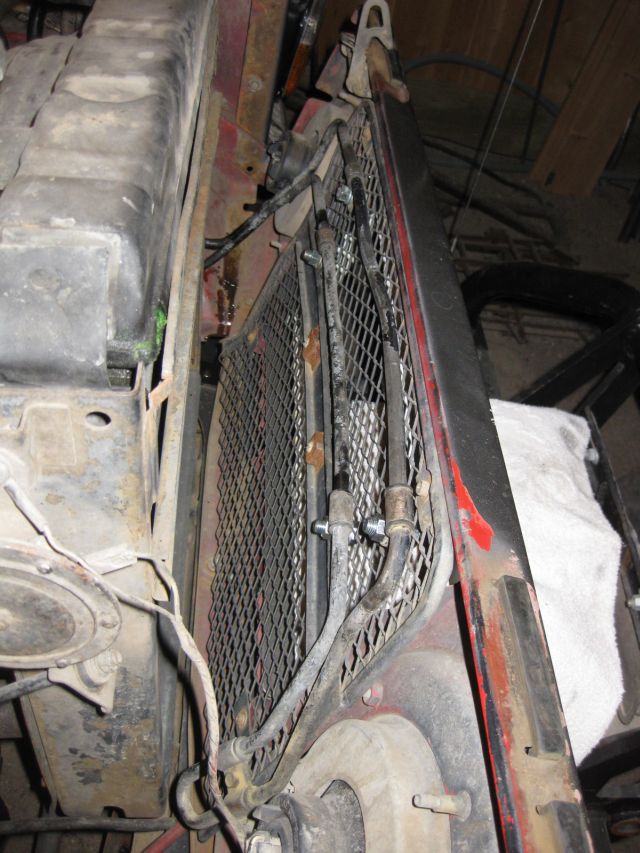
And here's a picture of it sneaking past the radiator:
I have a couple issues with it, but I'm very happy with the way this turned out considering I'm just using what I already have and not doing any more significant fabbing. Here's my issues:
-The bolts used to fasten the cooler to the grille mesh. Two of the bolt heads are plain as day on the grille. I'm not really going to worry about it now, but it does kinda bother me a little bit.
-The loop is really longer than it needs to be. It also bends down on the far side away from the box, which I don't think will be a problem; we'll just have to wait and see once I run it.
Here's a picture of the bolt heads (the other two are hidden behind the bezel):
Other than that I don't think I could have asked for a better fit!

Last edited:
Old40Dog
Rising Sun Member
Here's my issues:
-The bolts used to fasten the cooler to the grille mesh. Two of the bolt heads are plain as day on the grille. I'm not really going to worry about it now, but it does kinda bother me a little bit.
-The loop is really longer than it needs to be. It also bends down on the far side away from the box, which I don't think will be a problem; we'll just have to wait and see once I run it.
Other than that I don't think I could have asked for a better fit!
Great job Matt!
A little black paint on the bolt heads and you'll barely notice them and the extra length of the tube will only add to the effectiveness of the cooler on extremely hot days!  Glad to see you got back to the project!
PabloCruise
Hard Core 4+
Time to update this thread...
November 20, 2010 - 4 hours
Tools needed
1. wrenches
2. screwdrivers
3. ratchet/sockets
4. tubing bender
Tonight I got kicked out of my apartment because my wife had a bunch of friends over, so I decided to tackle a piece of the power steering project that I intended to do during the original conversion, but wasn't able to. In August of '09 I spent a day up on Argentine Pass, and towards the late afternoon my pump began to groan a little bit, presumably due to the fluid getting hot from me being aired down the whole day. Well tonight I set about to add a power steering cooler.
I've had the p/s cooler loop from an FJ60 ever since I started acquiring parts for the conversion, and that's what I intended to install tonight. After looking at it for a few minutes I came up with what I thought was a decent solution and went to it. I mounted the cooler loop to the grille, attaching it to the mesh screen. After some slight rebending of the the tube I got the fit I wanted and it made a perfect match to the low pressure outlet of the p/s pump, needing just a short section of hose to connect the two. I then ran the other side of the coil back up to the pump. I like how it sits in front of the radiator and should benefit from the extra airflow moving across it, as opposed to its factory position in an FJ60.
Here's a couple pictures of how it sits on the grille:
Here's a couple pictures of the distance between the low pressure outlet and the coil:
And here's a picture of it sneaking past the radiator:
I have a couple issues with it, but I'm very happy with the way this turned out considering I'm just using what I already have and not doing any more significant fabbing. Here's my issues:
-The bolts used to fasten the cooler to the grille mesh. Two of the bolt heads are plain as day on the grille. I'm not really going to worry about it now, but it does kinda bother me a little bit.
-The loop is really longer than it needs to be. It also bends down on the far side away from the box, which I don't think will be a problem; we'll just have to wait and see once I run it.
Here's a picture of the bolt heads (the other two are hidden behind the bezel):
Other than that I don't think I could have asked for a better fit!
Very cool Matt - good job!
Here is the cooler I was talking about:
Attachments
Next Phase - Wide Belt Pulley
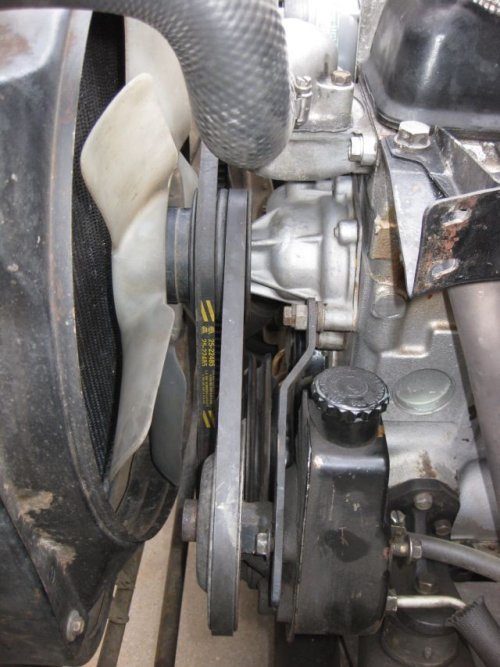
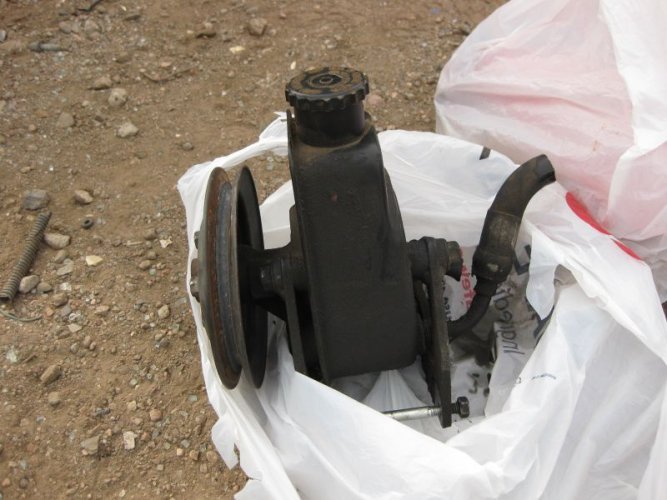
One thing I haven't liked about my power steering conversion is the use of the narrow belt for the JT Outfitters pulley. Since everything else on a 2F is designed for a wide belt, including my new Sanden compressor that I will be using for on-board-air, I'm determined to make the switch. Besides, my belt squeals when turning at a stop, which I think will be remedied by going with a wide belt. I stopped by Ricardo's to take some measurements of his pump, which came off a Volvo 240 series. His didn't make a peep, even when turned up against the steering stops, so I have to believe that there is something different about his setup that works better. I'm betting on the belt.
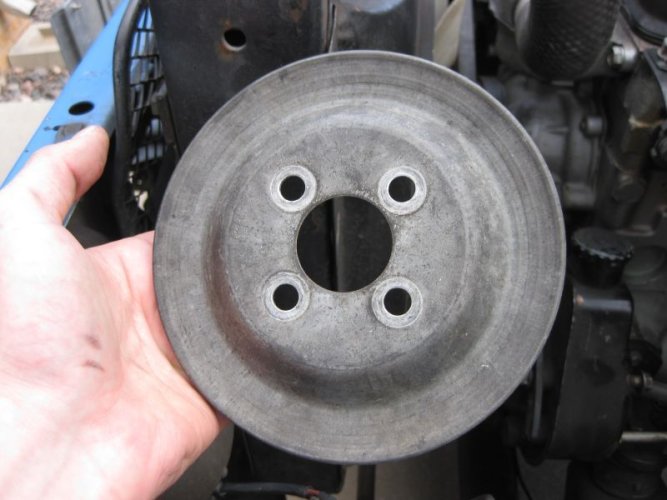
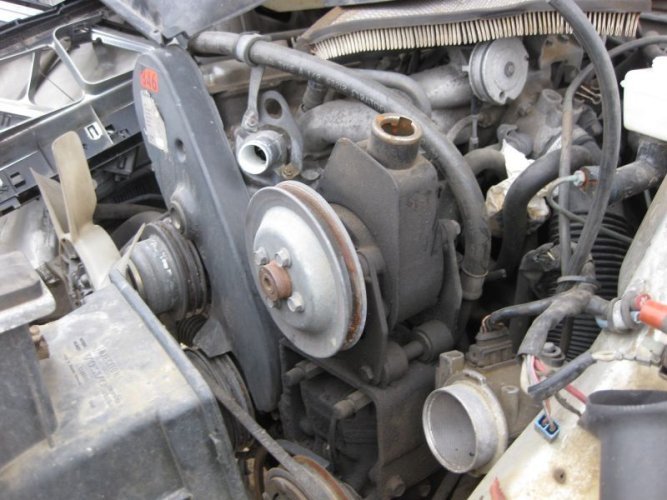
Anyway, back to the Volvo pump. I think it's basically the same Saginaw pump with the 3/4" press-fit shaft like mine has (i.e. not keyed), except the pulley has 4 bolts on its face. I wanted to find out what they bolted to and how this thing was put together. Basically the pulley is bolted to a hub that is pressed onto the shaft. Some pictures:
One thing I haven't liked about my power steering conversion is the use of the narrow belt for the JT Outfitters pulley. Since everything else on a 2F is designed for a wide belt, including my new Sanden compressor that I will be using for on-board-air, I'm determined to make the switch. Besides, my belt squeals when turning at a stop, which I think will be remedied by going with a wide belt. I stopped by Ricardo's to take some measurements of his pump, which came off a Volvo 240 series. His didn't make a peep, even when turned up against the steering stops, so I have to believe that there is something different about his setup that works better. I'm betting on the belt.
Anyway, back to the Volvo pump. I think it's basically the same Saginaw pump with the 3/4" press-fit shaft like mine has (i.e. not keyed), except the pulley has 4 bolts on its face. I wanted to find out what they bolted to and how this thing was put together. Basically the pulley is bolted to a hub that is pressed onto the shaft. Some pictures:
Attachments

Last edited:
I took some measurements and everything looks the same: boss depth (protrusion from pump body), centerline of pulley to mounting face of pump body, centerline of pulley to end of shaft, etc., so if I can get a junkyard pump and pull the hub/pulley off they will line up exactly the same as my current setup and I won't have to drain any fluid or anything, just swap pulley.
So I pulled off my JTO pulley, essentially destroying it in the process.
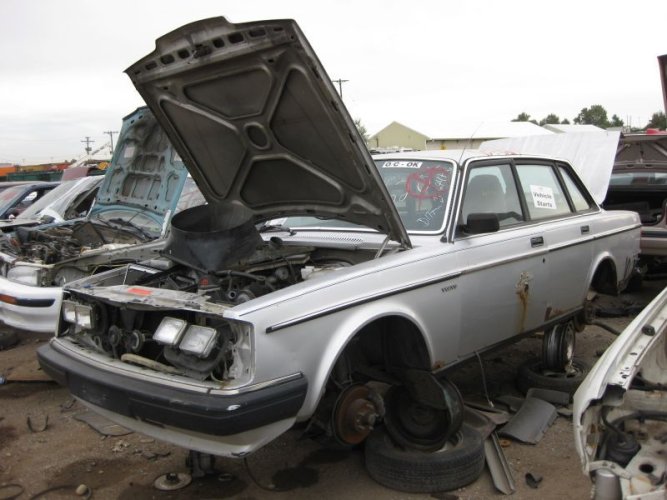
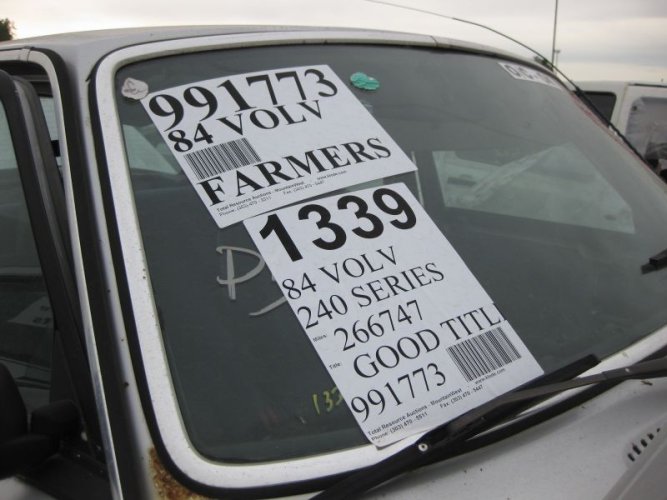
On Ricardo's recommendation, I went to Colorado Auto and Salvage, near Svigel's. Turns out they had a 240 that looked promising. After pulling the pulley off and trying to put a puller on the hub and then realizing it wasn't going to budge, I gave up, cut the hoses, and pulled the whole pump. $28 later I'm out of there, figuring I have an extra pump in case something happens. I'm going to soak the pulley/hub with PB Blaster etc. for a little while and try again; I'd really like to not end up swapping pumps, which would require me to drain the fluid and then try to find out if my hose fittings work or if I'll have to get a new high pressure hose.
So I pulled off my JTO pulley, essentially destroying it in the process.
On Ricardo's recommendation, I went to Colorado Auto and Salvage, near Svigel's. Turns out they had a 240 that looked promising. After pulling the pulley off and trying to put a puller on the hub and then realizing it wasn't going to budge, I gave up, cut the hoses, and pulled the whole pump. $28 later I'm out of there, figuring I have an extra pump in case something happens. I'm going to soak the pulley/hub with PB Blaster etc. for a little while and try again; I'd really like to not end up swapping pumps, which would require me to drain the fluid and then try to find out if my hose fittings work or if I'll have to get a new high pressure hose.
Attachments
Last edited: