Day 5 (or "Since I am a redneck I drove this thing around today"  ): May 10, 2009 - 9 hours
Tools needed
1. Various box end wrenches (loving my stubby Gear Wrenches)/ratchet/sockets
2. Center Punch/Hammer
3. Pipe wrench
4. Grease
5. Drill Press/Drill bits
6. Portable electric drill (happens to be 1/2" drive with a big motor)
7. Scribing tool
8. 6" dial caliper
9. machinist scale (metric would have been nice)
10. straightedge
11. square
12. angle grinder (probably the most useful metal working tool ever invented)
Today I got a lot done (I would hope so with 9 hours to work with), trying to stay on schedule with getting my welding done this coming Friday. It doesn't sound like much, but it's a lot of work. I got my drag link assembled and mounted (very relieved to find that it's going to work just fine) and got the holes drilled in my frame to mount my steering box.
1. First I threaded my FJ40 tie rod end deeper into the drag link tube, since I knew it would have to be in almost all the way from some of my previous measuring. A pipe wrench and putting the stud into the tapered hole on the tie rod made this part very easy. Note: the tie rod end is a little thicker than the steering arm that that the TRE is designed to fit into, so the stud is a *little* on the short side, but a small modification to the castle nut and all is good.
2. Next was the moment of truth: I threaded the J7* drag link end into the drag link tube. I used some grease to make it easier and threaded it in quite a ways, again knowing that I would have to to make it work. I got each side so they had about the same amount of threads showing. I then held it up to the pitman arm and plugged it in. Perfecto. I put the driver side tire on to get a better idea of whether everything was straight and perfect! I had to actually lengthen the drag link a little bit to get the tires straight when the pitman arm is straight, and even with a little plate spacer for the steering box it will put the amount of threads showing at a very comfortable amount.
3. Having gotten that out of the way I was now ready to get the drill pattern for the steering box transferred to the frame. But first I wanted to go for a drive
")
Seriously, I wanted to make sure my spring wouldn't hit the drag link (as Mark Whatley notes the FJ60 pitman arm has a pretty good drop in it) when the spring is flexed upward. So I hooked a couple things up, made sure the clamps holding the steering box on were tight and started the truck up and drove out of the barn to the hillside so I could tweak it out. I backed up the bank and let the weight of the truck sit on the front driver corner. I had it on the bumpstops and I still had 1/2" or a little more of clearance between the spring and the drag link, so I should be good. (note: that was just with the steering box clamped to the frame, so it turns out the pitman arm will be higher when it's actually installed than I had it here - the way I'm mounting it leveled out the steering box quite a bit.)
4. So I took it back in the barn and copied the bolt pattern onto a piece of paper. Took the dial caliper to measure the distances and took readings that correspond really closely to nice even metric measurements (110mm, 50mm, 5mm), so I was pretty sure they were close.
5. I then took some of the 3/16" flat stock I got from John and copied the hole pattern onto it. Took it to the drill press and drilled the pattern. I was able to duplicate the hole pattern pretty closely so I felt confident I could use that to drill the holes in my frame. The FJ60 box is mounted with an M12 bolt, which is about 0.466" in diameter. A 12mm drill bit is 0.472", and that's what I'm going to drill the sleeves out to for a snug fit.
I'm going to use 1/2" Sch. 160 pipe for the sleeves. EDIT: I went with 3/8" Sch. 80 pipe for the sleeves in the end. See post #33.
The OD of 1/2" pipe is 0.840", and the ID of Sch. 160 is 0.464", so I can drill it out just a tad to get the bolts to slide through. If the alignment is off I can take it up to 1/2", if something warps or something. 1/2" Sch. 80 pipe has an ID of 0.546" (same OD), which will probably have too much slop for what I want to do. Edit: The OD of 3/8" pipe is 0.675", and the ID of Sch. 80 is 0.423", so I can drill it out just a tad to 12mm (0.472") to get the bolts to slide through. If the alignment is off I can take the ID up to 1/2", if something warps or something. For now I drilled 1/2" holes in the frame
, because I'm going to have to eventually go up to 27/32" (0.84375") or so to have a clear hole for the sleeves through the frame and reinforcement plates.
6. So since I've had the steering box mocked up for a few days and drove with it today and it worked well I decided to keep it in that spot. So I marked it and went to work. My intermediate shaft will have plenty of room to slide in and out, and it won't interfere with getting my shock tower mounted (too much). The frame slopes down right here, so trying to bolt through the frame because tricky because you have to stay inside the ID of the frame box. Luckily the FJ60 bolt pattern isn't too long to accomplish this while keeping the box level. I located my upper left bolt hole as close the ID of the frame as I could (keeping room for the sleeve as well), marked it, and drilled it. Something to note: the frame is double thick on top and bottom because it's actually two c-channels connected together, and the c-channels overlap on top and bottom.
7. Once I got the upper left bolt hole located I drew an arc for my lower right bolt hole, and found the point on the arc that's as close to the ID of the frame as I could get and marked and drilled it too. I found that the box was now sitting level and the pitman arm swings very close to the bottom of the frame. Perfect, further from the spring the better, without interfering with the frame. I did make a small mistake though, which I hope will get rectified, which is that there's a boss on the steering box that is hitting the frame, keeping the box from sitting flush against the frame. There are two solutions: my lower right bolt hole should have been a little bit higher, tilting the box down slightly, or if I space the box out from the frame it should clear. I have to space the box out away from the frame anyway because of the radiator support, so that's how I'm going to solve that issue.
8. I then finished off the other two bolt holes, which have all kinds of room away from the ID of the frame.
9. While I was doing all this I was thinking about how to sequence the welding event to maximize efficient use of time. I need to purchase some drill bits and I think I have a good sequence figured out, just gotta clear out some of the parts that are in the way and figure out a way to get the truck to the welder!
I'm already thinking of things I would do differently if I were to do this again (thinking, wow, I'm putting a lot of work into this. Hopefully nothing happens to this truck but if it did...).
1. I would NOT do the drag link the way I did it now. I would have a custom one made (single center tube, not sleeved and welded or cut and welded).
2. I also would NOT do the intermediate shaft the way I did it. Since I know where the box is going to be mounted I would have a custom one made, with smaller u-joints and a dedicated slip joint.
3. I would (still might) shorten the steering column inside the cab (hopefully I would have a little more developed fab skills by then so I could do such a thing).
Okay, for some pics:
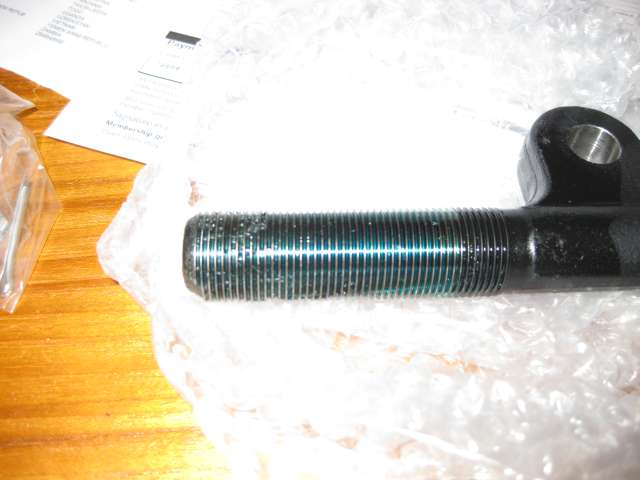
FJ40 TRE threaded in almost all the way (it ended up getting back out a little bit before all was said and done today)
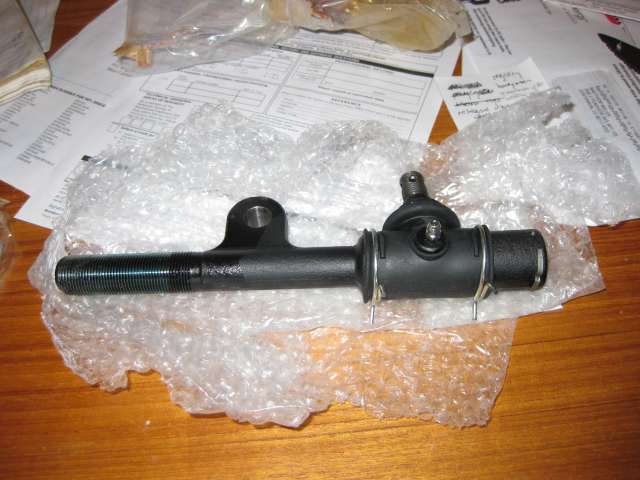
J7 end threaded in and hooked up
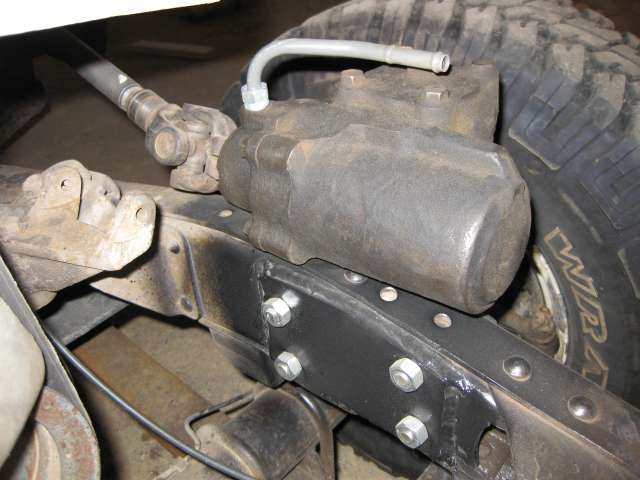
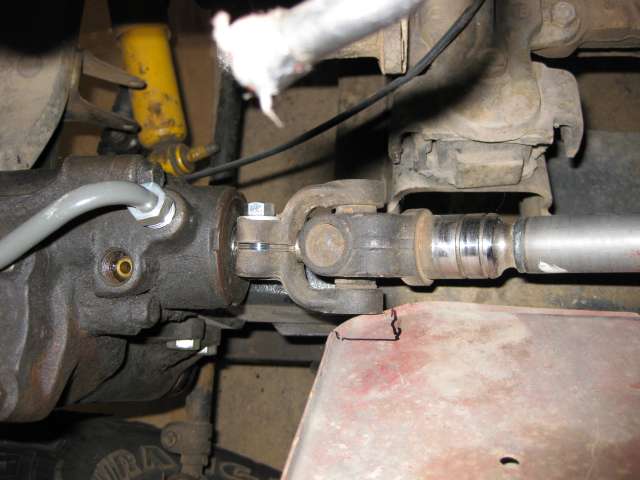
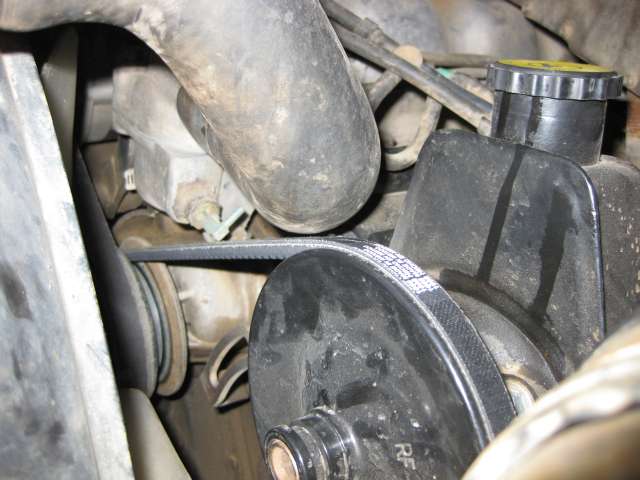
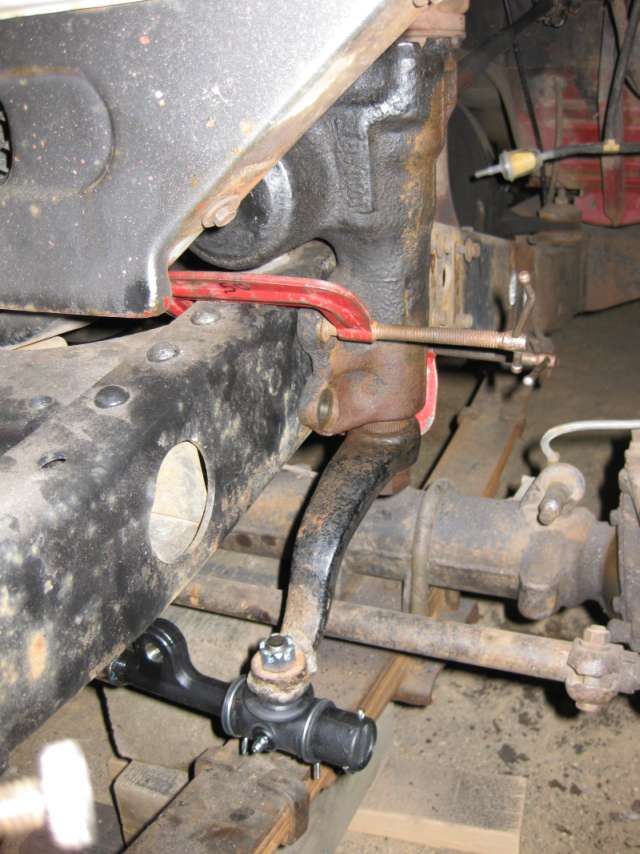
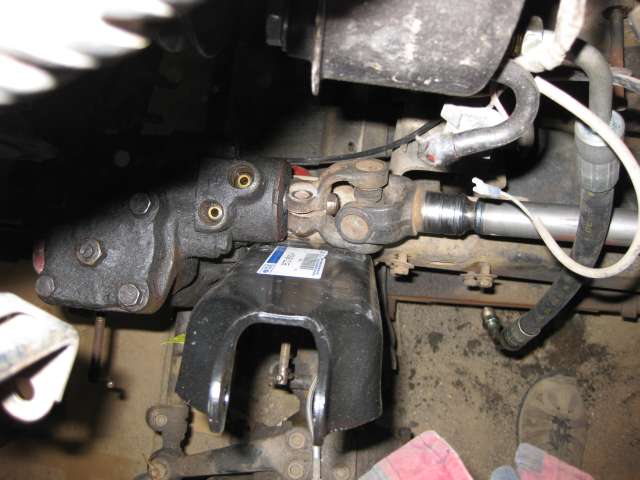
Front view of steering box with J7 end hooked up
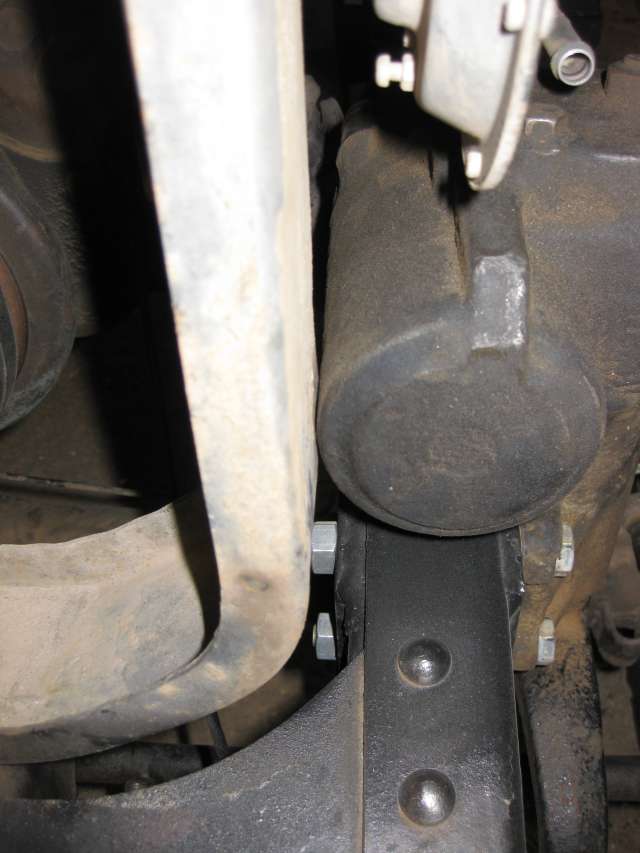
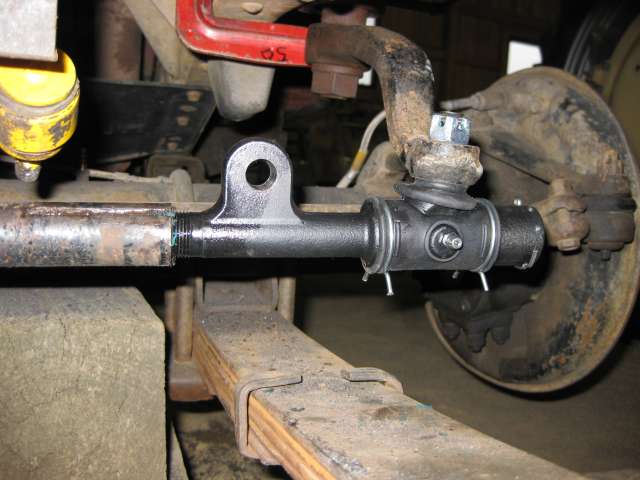
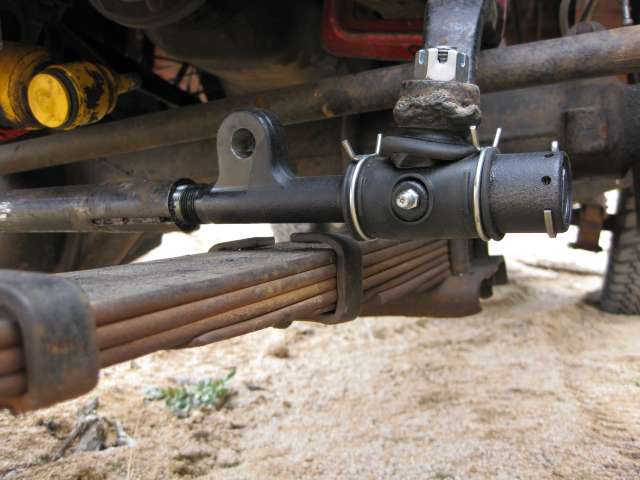
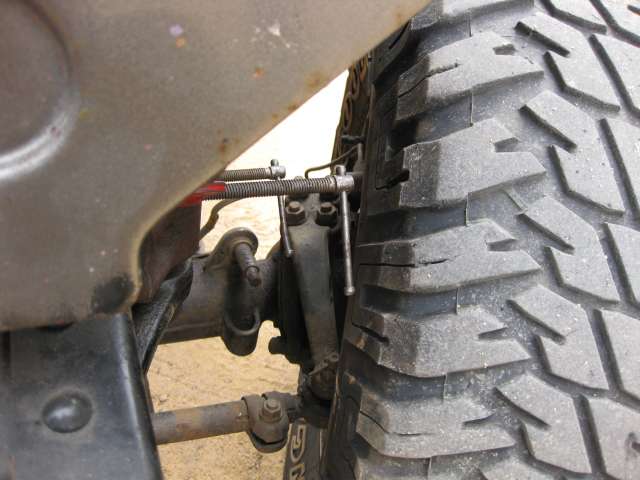
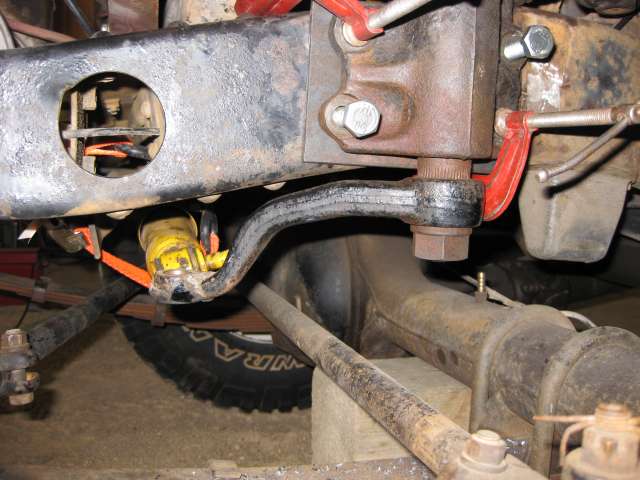
Side view of drag link all hooked up (notice plate in front of steering damper - that's in the way and is going to have to come off sometime soon. It's welded on there pretty good - I'm going to have to get several cutoff wheels to get it off.
Showing that they are close to parallel
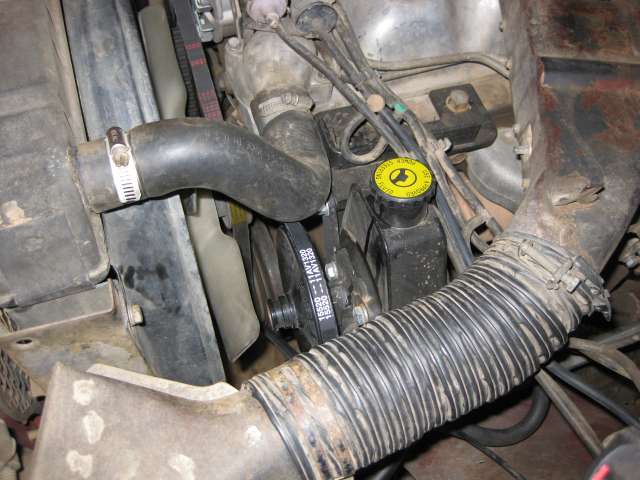
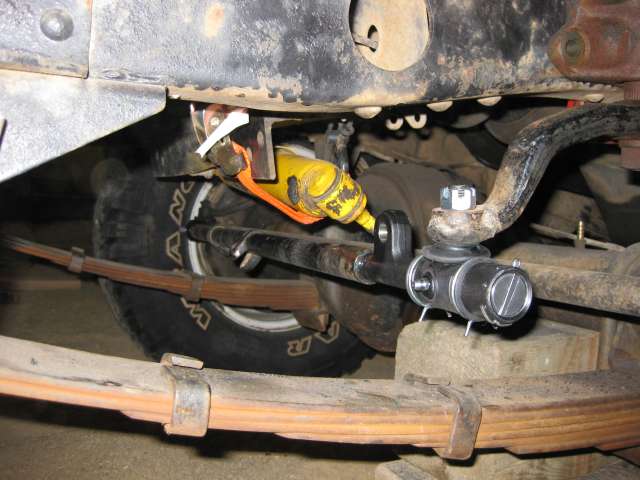
Mocking up my unstraightened shock tower ($17 apiece at dealership, in stock)
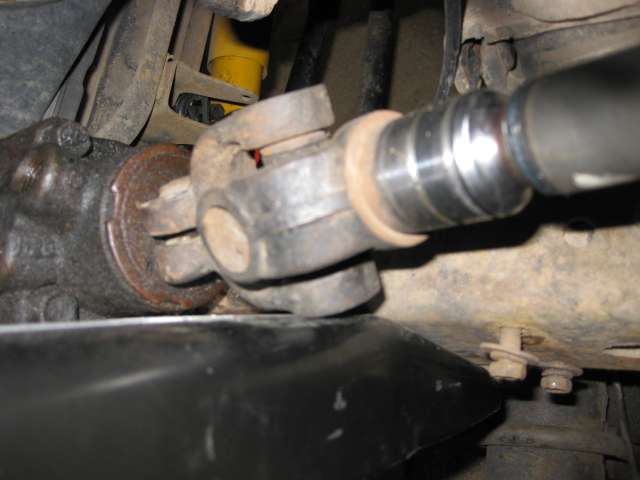
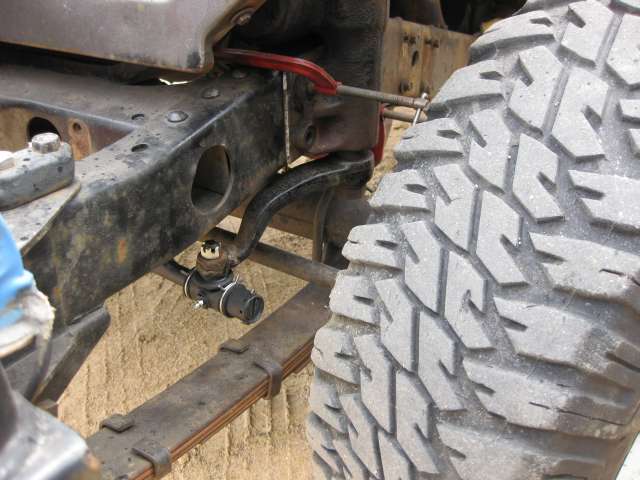
Showing how close the shock tower is to the steering u-joint. With the box spaced out it's going to be worse; I'm going to have to add a spacer to the shock tower to get it away from the u-joint.
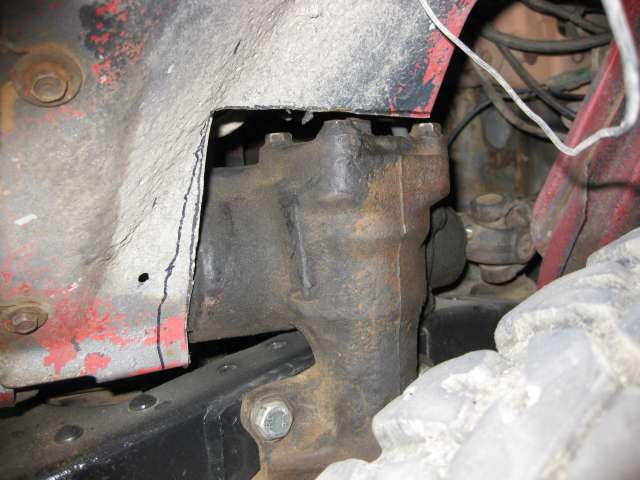
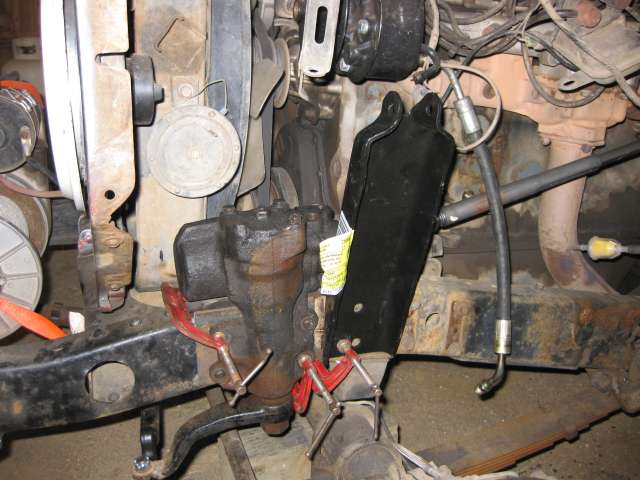
Showing how close the radiator support is to the steering box. It needs to go a touch more, a 1/4" plate should do it.
Yep, found some interference!
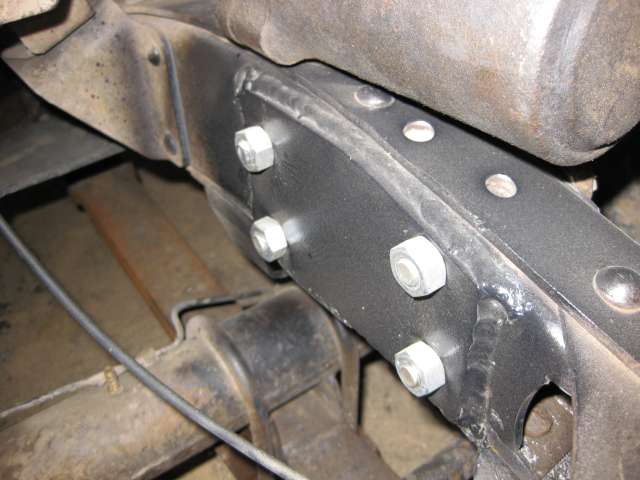
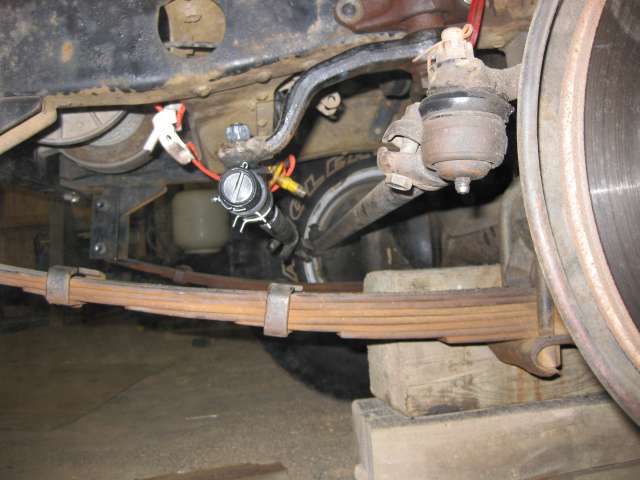
If you look down between the brake hose and the c-clamp you can see the lower shock mount. It's probably going to have to move a smidge.
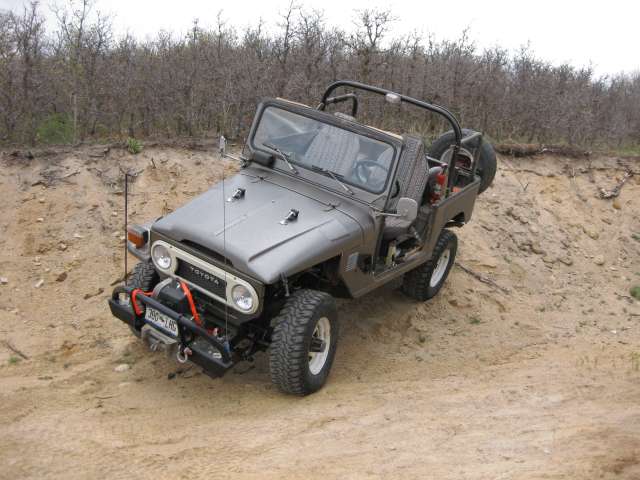
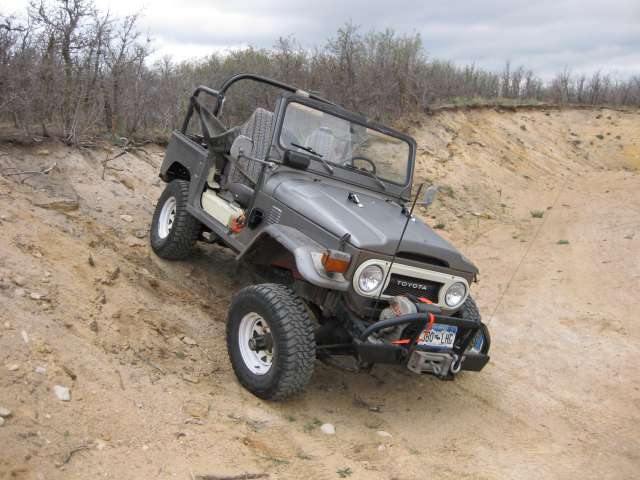
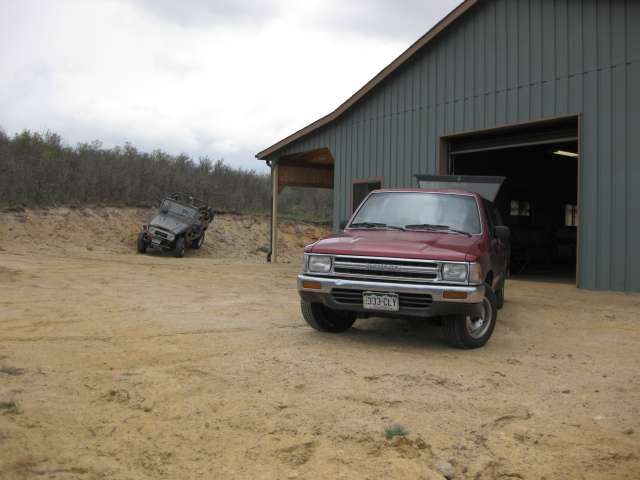
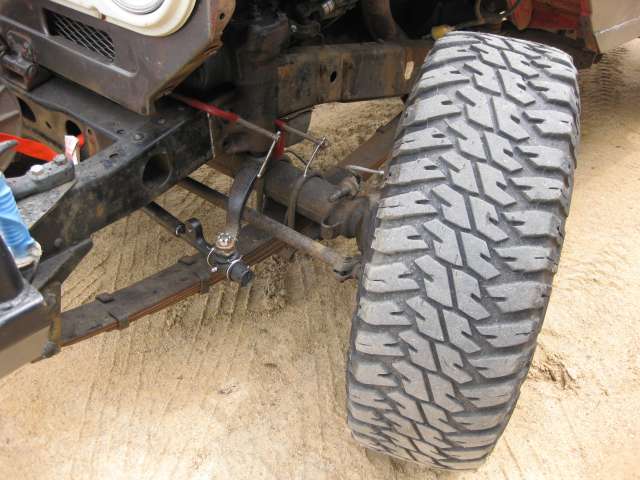
Driving redneck style! (actually checking for system interference)
All the weight's on the driver's side and I didn't break a birf!
Here's the setup:
Here's how close it is/was with the suspension on the bumpstop: remember the pitman arm got raised during the course of the day so it's no longer THIS close...
See it's on the bumpstop

Oops found some interference!
 good thing those aren't going to be on the final product...
And this is what I like about FJ60 steering over minitruck/OEM steering: wheel turns right, pitman arm turns right (my (now) old steering had a boot that was always torn up from steering right and rubbing it):
Wheel turns left, pitman arm turns left:
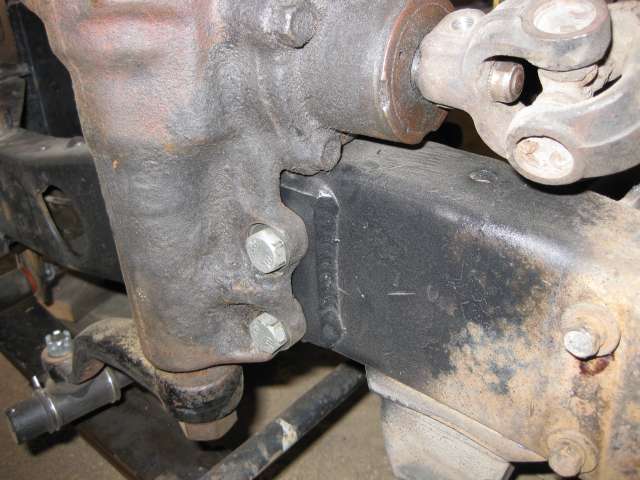
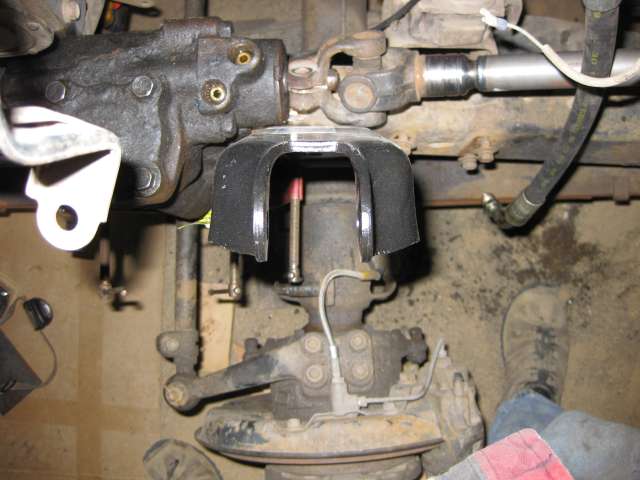
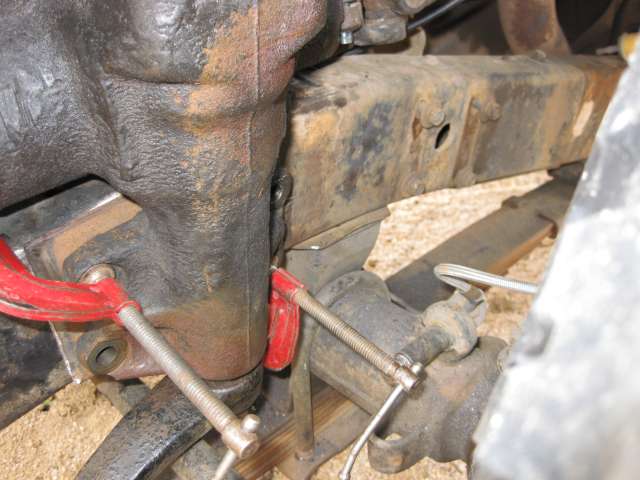
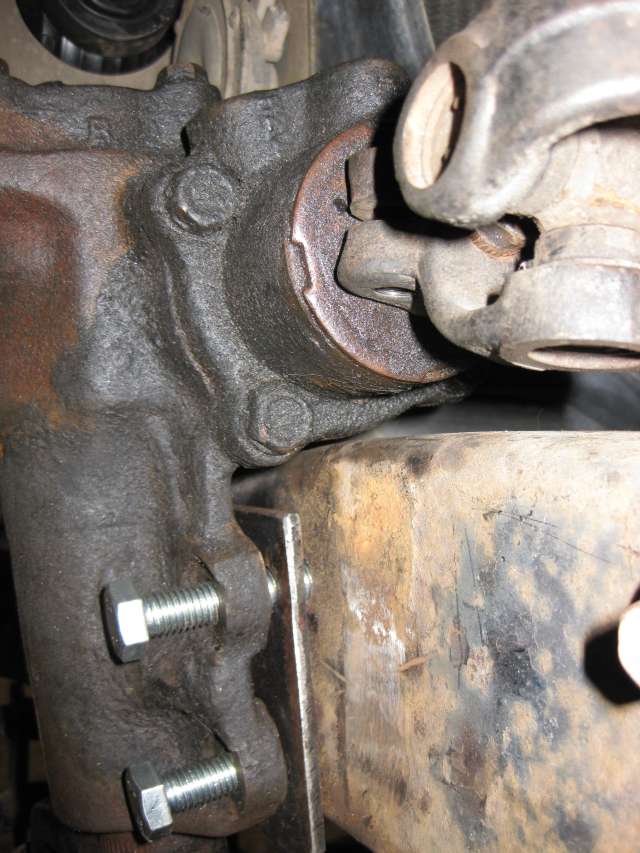
Here's the interference I was talking about where I should have made the lower right bolt hole a little higher. Putting the 1/4" spacer plate in there should solve this little issue though...
See how the upper left and lower right bolt holes are the restrictions on what angle the box can be at? Raising the lower right bolt would have tilted the box forward and prevented the above interference from happening.
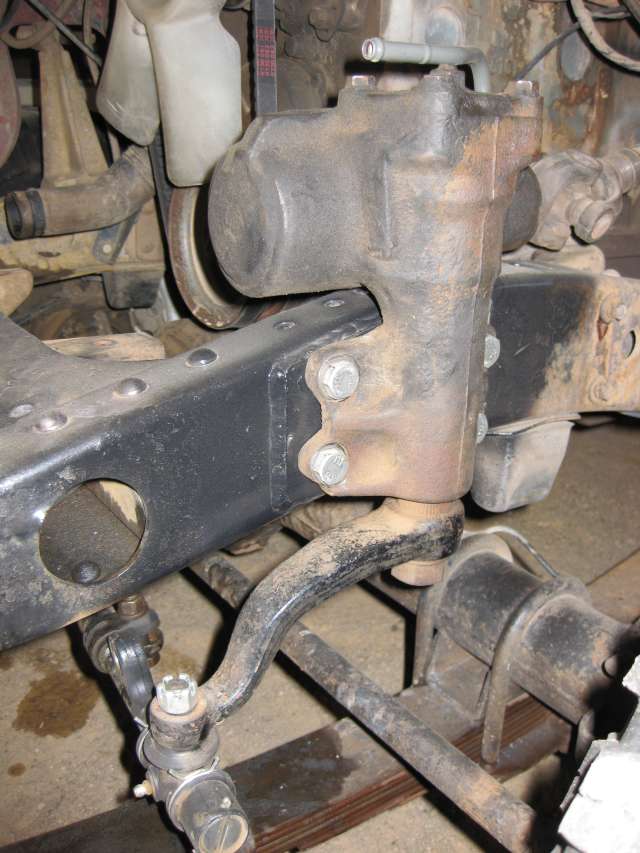
My pitman arm swings close to the frame but it misses
")
It stays well clear of the spring.
So now I have to prep my truck for welding day. I am going to remove the radiator, shroud, bib and hood. That way the welder can get to the back side of the frame to fill in some of the flex holes. I'm going to have him weld those two plates in, as well as a blank 1/4" reinforcing plate. Then I'm going to go all the way through the frame with the 1/2" holes I have started on the front side. Then I'm going to step all four holes up to the 27/32" size so the sleeves can slide in. Once I get the sleeves in I'm going to put the 1/4" spacer plate on the front side, bolt the box on to make sure everything aligns properly, and have him tack the plate in place. Then take off the box, tack the sleeves in place, then burn it all in.
Punch List:
1. I need to start a list of mounting hardware I will need to get (I want to stay JIS metric for as much of this as possible) - box mounting bolts, exhaust clamp bolt, intermediate shaft bolts, etc.
2.
I need to get my u-joint for the intermediate shaft to mock up my box fore/aft. EDIT: As of 4/28/09 I have this in hand
3.
I am waiting on my drag link parts (FJ40 TRE and BJ70 drag link end) to mock up my box side-to-side. EDIT: As of 4/28/09 I have the TRE in hand. Still waiting on BJ70 drag link end - those Canadians are slow eh? EDIT: As of 4/30/09 4Wheel Auto in Canadia received the 70 series drag link ends they ordered. But they now come with the drag link tube attached, and the retail price has increased from about $100 CA for just the end to more than $225 CA for the end plus the tube  . It's cheaper to order the rebuild kit with all 4 ends than it is to order just this one...going to wait and see if they come up with any solutions...Specter's kit is $179. EDIT AGAIN: Don was able to find a 70 series drag link end for a "reasonable" price and it should be here this week.
4.
I need to get the FJ55 column keyswitch removed by a locksmith (I don't have a key so I can't do it the kosher way and I don't want to destroy it) so I can use my current keyswitch. EDIT: As of 4/30/09 I went to a locksmith down the road from work and had them rekey my ignition switch to match to match my current keyset. We'll see if that stops the run-on problem I've had as well since I've owned this truck.
5.
I need to mock up my shock towers and see what modifications will need to be made. EDIT: As of 4/29/09 I know I will need to bend the shock towers back to their original location. Maybe I can get rid of these to somebody who wants straight F-250 shock towers and I can go buy me some new bent shock towers? Any takers?
6. I have to get some plates
(NOW!)(at least one, maybe two 1/4" plate) cut and drilled to the bolt pattern of my steering box.
7. I have to get some pipe
(NOW!)for sleeving my frame, cut to length.
7a. I have to cut off the plate that's in the way of the steering stabilizer (some PO did it

)
7b. I have to figure out what kind of bracketry will be needed for the Sanden air pump
7c. I have to get a low pressure return fitting for my steering box
8.
I have to sharpen a bunch of drill bits so they are ready for use. I have to buy some drill bits that I will need.
9.
I have to get the frame drilled to the bolt pattern.
10. I have to remove anything that will be in the way of the welder.
11. (Welding day)
a.
Two plates will need to be made to fill in the flex hole in the frame, ground flush.
The reinforcing plate will have to be welded in place on top of these plates.
b. The mounting holes will need to be extended through these plates.
c. The sleeves will have to be placed in the frame.
d. The spacer plate will have to be tack welded in place.
d1. Everything has to get burned in
e. I have to get a plate made in place of the EGR pipe that connects to the exhaust manifold.
f. I need a change made to the back end of my exhaust - tab with bolted connection.
g. I need my windshield frame support brackets (where the knobs screw in) to be rewelded in place so I can drive around with the the top (including bikini top) off.
h. I need to have a spacer plate welded to my shock tower.
12.
There's a plate on my frame, welded in front of my steering stabilizer. It isn't really doing all that much good (maybe a little bit), but it's mostly in the way, so I'm going to have to cut that off. (See 7a)
13. The drag link, steering column, and intermediate shafts will have to be bolted up.
14. The shock towers will have been located and mounting holes drilled, but I will need to do some measuring and figure out what shocks I need to get (thinking Bilstein). Also figure out what steering damper is needed.
15. Trim fender(s) to accept steering box and shock towers.
16.
Make sure high pressure hose works properly. If not figure out what needs to be done to make it work (research thread pitches if necessary, rebend hard sections to position loop in hose where I want it to be). It should work as long as the fender doesn't get in the way
17.
Figure out what I'm going to do about a return line cooler (I decided I'm going to buy a tubing bender for $15 and try to rebend the tubing to fit where I want it to go, in front of the radiator behind the grille).
18. Get my steering all centered, get everything buttoned up, flush power steering system and go for a drive!


 ) but will get some as soon as I can. Have to put it back together now.