• Jack-it Night: April 2024 RS Meeting Hey Guest: Wed. April 3rd is the next Rising Sun meeting, and you won't want to miss it. We're doing our annual offroad recovery equipment demonstration and trail skills training aka "Jack It Night." Meeting starts at 6:30 p.m. (early) Click here for all the details.

40th Anniversary salvage rebuild

HDavis

Hard Core 4+
Joined
Feb 13, 2019
Messages
1,116
I checked the local junkyards to see if there were any 80s around and found one at the U-Pull. I was fortunate enough to salvage the radiator core support, transmission cooler, radiator tank, fan shroud, and the front frame section from the junkyard 80. This marks many of the really damaged and somewhat difficult to get parts off the list. I've also spent some more time cleaning it out and poking around it a bit. The lift is an OME 851/860 with nitro charger shocks which all seem relatively new. Also, most of the consumables are Toyota branded leaving me to believe it was well cared for. It does seem to have the typical valve cover leak and the wipers on the knuckles look like they could be replaced. I'm sure there are other maintenance items that need to be addressed but so far it looks pretty good.
IMG_1999.JPG
 
Last edited:

J1000

Rising Sun Member
Joined
Oct 11, 2018
Messages
1,557
Location
Morrison, CO
I've got a radiator and condenser from my 96. Ok condition both functional with no leaks. Make an offer and they're yours.
 

Attachments

  • PXL_20211223_170837899.jpg
    PXL_20211223_170837899.jpg
    4.4 MB · Views: 132

HDavis

Hard Core 4+
Joined
Feb 13, 2019
Messages
1,116
After getting the 80 in the back yard I have slowed down a bit on working on it but did manage to get some stuff done. I found a set of airbags as a pair on MUD for a great price. I also scheduled the windshield install for it next week and decided to have the 100 series done at the same time. I also cleaned up the interior and it looks really good for the age and mileage. One thing I noticed when it first got here but didn't think much of it is that it rolls when it is in park. I assumed that means one of the drive flanges is bad and after a quick inspection the driver's side isn't looking so hot. I was kind of assuming that I would need to do a knuckle rebuild sooner or later, so hopefully a new drive flange will get me on the road and I can do a full rebuild this summer. I would also like to note that I appreciate the generosity of all the members who have reached out with replacement parts to help me get this on the road, thank you.
IMG_2009.JPG

IMG_2013.JPG

IMG_2010.JPG

IMG_2008.JPG

IMG_2007.JPG
 

Attachments

  • IMG_2002.JPG
    IMG_2002.JPG
    1.7 MB · Views: 130

cbmontgo

Hard Core 4+
Joined
Dec 10, 2007
Messages
1,137
Location
Divide, Colorado
After getting the 80 in the back yard I have slowed down a bit on working on it but did manage to get some stuff done. I found a set of airbags as a pair on MUD for a great price. I also scheduled the windshield install for it next week and decided to have the 100 series done at the same time. I also cleaned up the interior and it looks really good for the age and mileage. One thing I noticed when it first got here but didn't think much of it is that it rolls when it is in park. I assumed that means one of the drive flanges is bad and after a quick inspection the driver's side isn't looking so hot. I was kind of assuming that I would need to do a knuckle rebuild sooner or later, so hopefully a new drive flange will get me on the road and I can do a full rebuild this summer. I would also like to note that I appreciate the generosity of all the members who have reached out with replacement parts to help me get this on the road, thank you.
View attachment 100486
View attachment 100487
View attachment 100488
View attachment 100489
View attachment 100490
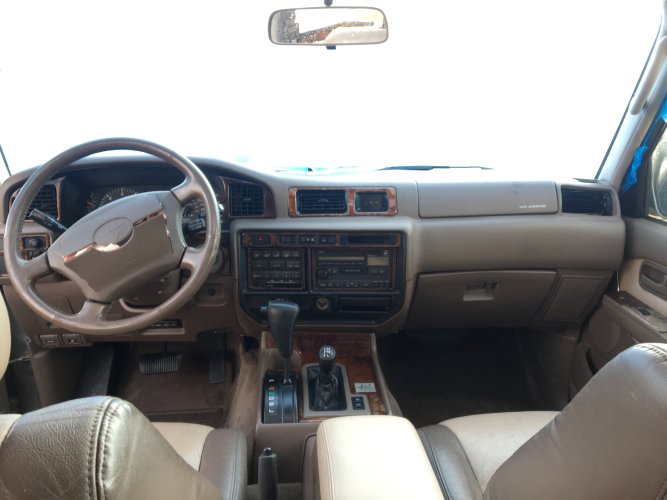
That rig looks to be in really nice shape, all things considered. Can’t wait to see her come back to life. Good work.
 

subzali

Hard Core 4+
Joined
Aug 22, 2005
Messages
10,311
Location
Denver CO
Looking really good. Might be a broken parking pawl on the transmission? Don’t know if that’s a thing…
 

HDavis

Hard Core 4+
Joined
Feb 13, 2019
Messages
1,116
Looking really good. Might be a broken parking pawl on the transmission? Don’t know if that’s a thing…
I had a similar thought but there really isn't an easy way to test or check for a broken parking pawl from my research.
 

DouglasVB

Rising Sun Member
Joined
May 5, 2015
Messages
2,158
Location
People's Soviet Socialist Republic of California,
Looks like a fun project! That interior is really clean for the mileage. I bet the owner was sad to see that truck go.
 

Jenny Cruiser

Hard Core 4+
Joined
Nov 22, 2006
Messages
1,168
Location
North of Hell
Looks good. It looks like you have most of what you'll need, but if you find you need something and aren't able to find it you might try Irbis. I haven't been by there in years, but they used to have 10 of everything 80 series at reasonable prices.
 

Inukshuk

Rising Sun Member
Joined
Aug 24, 2005
Messages
7,271
Location
Denver, CO
I had a similar thought but there really isn't an easy way to test or check for a broken parking pawl from my research.
Unless they hit the telephone pole in park, pawl not implicated.
But they are easy to check. Put in park and roll .....
I have an 80 parking pawl on my workbench. They are huge.
 

HDavis

Hard Core 4+
Joined
Feb 13, 2019
Messages
1,116
Unless they hit the telephone pole in park, pawl not implicated.
But they are easy to check. Put in park and roll .....
I have an 80 parking pawl on my workbench. They are huge.
I think you are on to something. It does indeed roll when in park and the shift lock engages so you cannot shift it out of park without the key in the ignition. I did notice that the gear indicator was not selecting the correct gear per the indicator lights. For example, when I put the truck in reverse the dash indicator light showed it was in Neutral and when trying to select Reverse it engages between Park and Reverse. I think this might also explain why it starts in Neutral but not in Park. Additionally, when shifting from Park to Reverse there is a noticeable tension that moves the lever from Park to Reverse as soon as the brake is depressed, and the shift button is engaged. Meaning it automatically shifts itself from Park to Reverse. I looked at the shifting linkages to make sure the bushings were in good shape, and everything looked alright with no notable issues.

I still don't think it's the Pawl and I am also thinking that the Drive Flange might not be the cause of it rolling in park. Are there any components on the interior side of shifter assembly that could cause the tension? Do these ever get out of adjustment? Is there anything keeping me from unbolting the linkage at the transmission and seeing if I can put it in Park at the trans?

UPDATE: I decided to see if I could adjust the shifter rod at the trans to get it in park. Sure enough the linkage was just out of adjustment so that it wouldn't allow the trans to engage park. Refreshing to have it be something so simple.
 
Last edited:

Inukshuk

Rising Sun Member
Joined
Aug 24, 2005
Messages
7,271
Location
Denver, CO
Are there any components on the interior side of shifter assembly that could cause the tension? Do these ever get out of adjustment? Is there anything keeping me from unbolting the linkage at the transmission and seeing if I can put it in Park at the trans?

UPDATE: I decided to see if I could adjust the shifter rod at the trans to get it in park. Sure enough the linkage was just out of adjustment so that it wouldn't allow the trans to engage park. Refreshing to have it be something so simple.
Perfect! I was going to say that with the forces of that accident it could have easily tweaked the linkage.
 

HDavis

Hard Core 4+
Joined
Feb 13, 2019
Messages
1,116
I have been spending an hour or so each day hacking away at what was left of the arb. It was really fused on after the accident to say the least. I then made quick work of the trans cooler, condenser, and radiator. Even at this point it is starting to turn in the right direction. The frame horns certainly crumpled where Toyota intended, fortunately I was able to get that section from the salvage yard. As is visible there is quite a bit of cleanup of the bay overall all needed before I move too much further. Aside from the obvious valve cover leak what else would one recommend with the front of the engine so accessible?
IMG_2048.JPG
IMG_2050.JPG
 

Inukshuk

Rising Sun Member
Joined
Aug 24, 2005
Messages
7,271
Location
Denver, CO
Aside from the obvious valve cover leak what else would one recommend with the front of the engine so accessible?
Distributor o-ring (probably not the valve cover gasket - but I think I have a valve cover gasket (toyota new) , oil pump cover, front main. https://forum.ih8mud.com/threads/how-to-replace-oil-pump-seal-w-pics.72514/
Long thread, but its really pretty easy, Remove crank nut and pulley. Tap the phillips bit in before you try to turn it. JIS #2 bit is best. Happy to loan you. The rest is easy.
alternator brushes ($20)
high pressure PS hose (ONLY buy Toyota)
Pesky Heater hose at engine rear.
Maybe water pump and Thermostat to baseline? (Those I don't know much about for an 80)
ohhh - check the engine mounts! Probably check tranny mounts too.
 

subzali

Hard Core 4+
Joined
Aug 22, 2005
Messages
10,311
Location
Denver CO
^^^

+Power steering pump…
 

HDavis

Hard Core 4+
Joined
Feb 13, 2019
Messages
1,116
I took the above advice and ordered a whole cache of parts to help address the maintenance items to do while I have the front end apart this much. Does anyone have the SST for the crank pulley they could loan? I also started to clean off the grime and removed the alternator for better access to the power steering hoses. Eventually I will have everything clean enough, so I don't get covered in oil when I work on this thing..
IMG_2061.JPG
 

Inukshuk

Rising Sun Member
Joined
Aug 24, 2005
Messages
7,271
Location
Denver, CO
Crank nut: Socket and 1/2" Edit: 3/4 breaker bar. Big impact can do it too. Use another socket to hold the flywheel through the inspection cover or something like that. If you can't crack it loose, use the engine bump method.
 
Last edited:

Hulk

RS Webmaster
Staff member
Moderator
Cruise Moab Committee
Joined
Aug 22, 2005
Messages
16,431
Location
Centennial
Use a 3/4" breaker bar with engine bump. Easy peasy.
You'll need a giant torque wrench to get the crank pulley tightened correctly.
 

DaveInDenver

Rising Sun Ham Guru
Joined
Jun 8, 2006
Messages
12,950
Location
Grand Junction
The breaker bar and starter method can get that bolt off, but hold the breaker like someone shows on IH8MUD. I use the driver's side top of the frame on the 22R instead but conceptually the same thing.

ETA: I can't say for sure about the 80 but on my old mini truck the frame was flat and perpendicular to the crank in such a way it makes one think Toyota sorta expected this sort of hack. Probably just coincidence tho...

crank-nut-starter-bump1.jpg
 
Last edited:

HDavis

Hard Core 4+
Joined
Feb 13, 2019
Messages
1,116
I've been doing little projects here and there over the last few weeks. First up, The AC Evaporator. @Inukshuk Recommended I pull this out since the AC lines were already disconnected. It was a good suggestion as mine was pretty gross looking and smelled even worse. I gave it a flush and cleaned it with a soft bristle brush. No after photos but it cleaned up really well and easily. I was able to have the windshield installed a few weeks ago by Blue Crush as recommended by @nuclearlemon. Thanks for the recommendation. I have also been installing the parts as suggested when time allows, and all has been going smoothly. I still haven't tackled the crank seal and oil pump but will be tackling that in soon as well. In addition, I have started to dissect the frame rail and have developed a solid plan of approach for the replacement. I will be digging deeper into the frame stuff soon and look forward to sharing what I come up with.
IMG_2065.JPG
IMG_2080.JPG


IMG_2078.JPG
 

Attachments

  • IMG_2062.JPG
    IMG_2062.JPG
    2.1 MB · Views: 113
Top