1982 Toyota RN48 SR5 Long Bed thread

original Gray or current Blue

  • gray

    Votes: 16 94.1%
  • blue

    Votes: 1 5.9%

  • Total voters
    17

simps80

Rising Sun Member
Joined
Jan 22, 2009
Messages
2,947
Location
Arvada, CO
I am going to fix it
they’re all the same that i have seen
it’s a poor design rust factory made in the usa
 

MDH33

Hard Core 4+
Joined
Mar 8, 2006
Messages
7,944
Location
Trapped in a corn field
I am going to fix it
they’re all the same that i have seen
it’s a poor design rust factory made in the usa

You got the skills, can't wait to see it when you're done! I have a Stout cab that needs some magic too... also rust factory

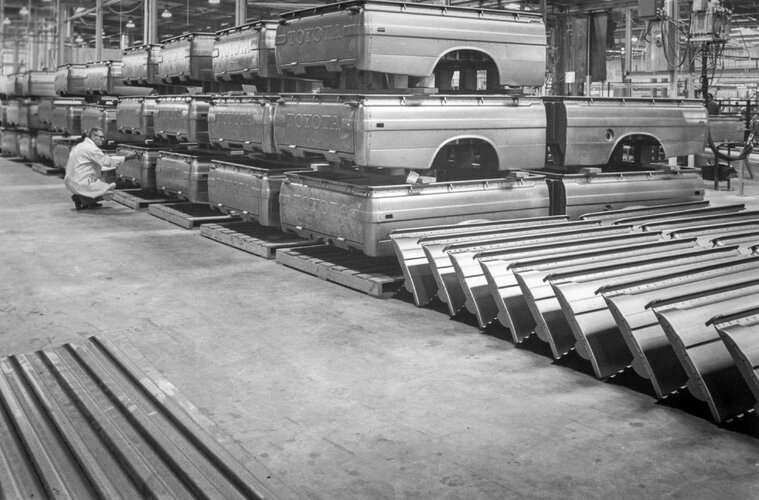
Did you see this article? Interesting read! :)

Toyota Truck bed factory

Toyota-Truck-Production-bed-lineup-lede-1-scaled.jpg
 

simps80

Rising Sun Member
Joined
Jan 22, 2009
Messages
2,947
Location
Arvada, CO
Did you see this article? Interesting read! :)

Toyota Truck bed factory

Toyota-Truck-Production-bed-lineup-lede-1-scaled.jpg


i did see that article!
interesting read..
if only one could use a time machine and roll up to the door and drive off with one of them beds from the stack!

i did finally get this side down as far as it needs to go,
so now it’s more clear in my head what the process will be to put it back together

IMG_0113.jpeg

IMG_0109.jpeg
 

simps80

Rising Sun Member
Joined
Jan 22, 2009
Messages
2,947
Location
Arvada, CO
finally got a few hours in the garage
made some progress putting metal back in place of the holes

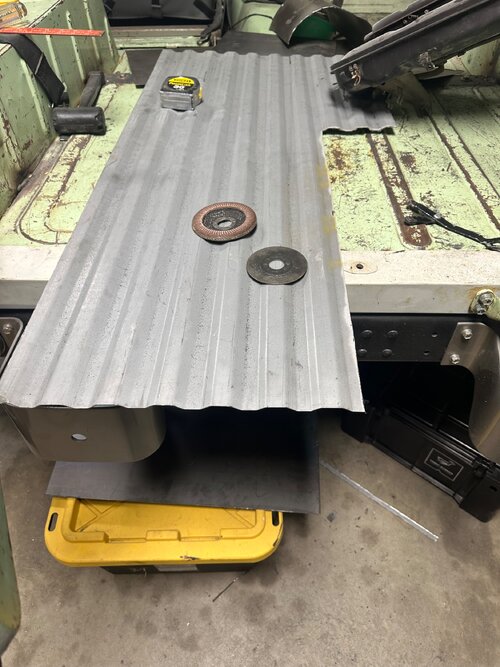
i bought this bed blank from canada

IMG_0170.jpeg

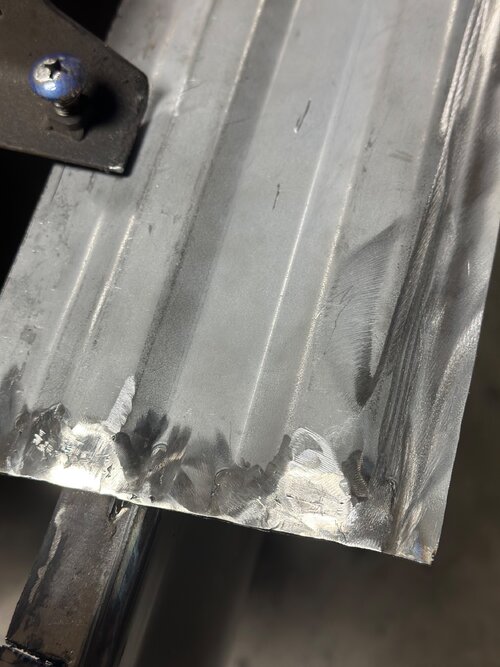
i then discovered the side pieces that run from the well to the tail end have two ribs that are different than the bed and the wheel hump has yet a third rib profile

so i decided to cut out the two different ribs and replace them with the bed ones

this requires “terminated” ends to the ribs
so i did that by hand

IMG_0165.jpeg

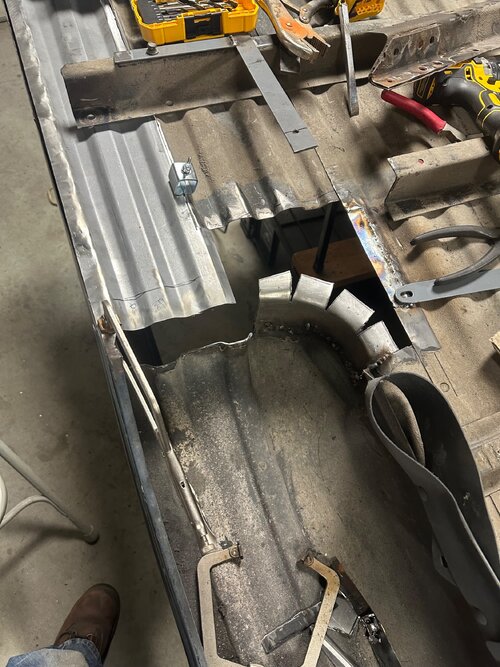
also got the wheel well partially done
i had to pizza slice it to make the round and then convex
but it will be fine

i left some extra metal on the rib panel until i can measure out what needs to happen where the well meets the floor layers

i will then have to “terminated” all these rib ends as well like the above two

IMG_0168.jpeg

i think i am going to end the floor ribs right at that line which will catch the bed support mount holes and the put flat in to meet the wells which is how it was from the factory near as i can tell
 

simps80

Rising Sun Member
Joined
Jan 22, 2009
Messages
2,947
Location
Arvada, CO
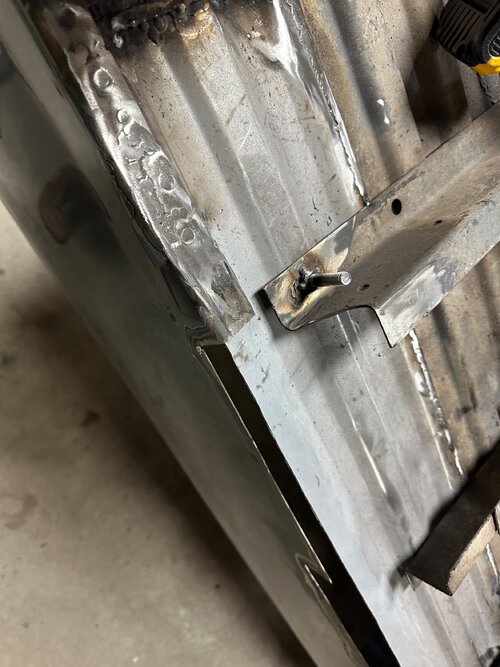
got a few more hours in today.

I need to get the floor where it will live back attached to the cross members before making the patch that joins the wheel tub to the floor.

so i started there
since I changed the profile of the outermost floor the rear crossmember attachment point was off
so I fixed that first cutting the square nut off welding the hole closed, drilling a new one in the right place and moving the square nut inboard over the new hole
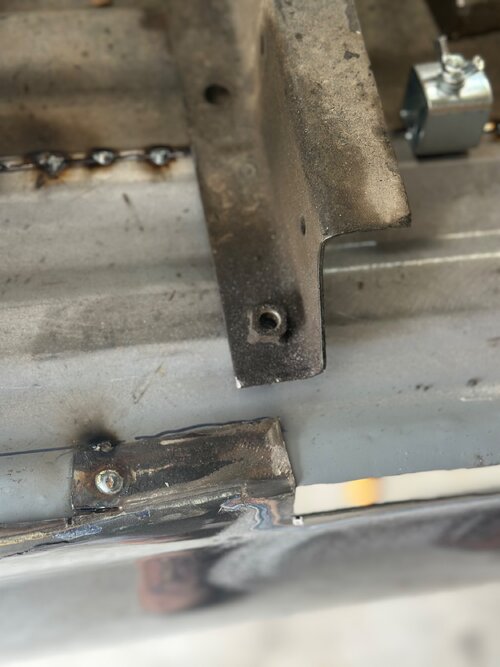

IMG_0219.jpeg
after
IMG_0229.jpeg

i also finished welding in this panel in after i had a bolt in that to hold the floor proper flat like against the crossmember

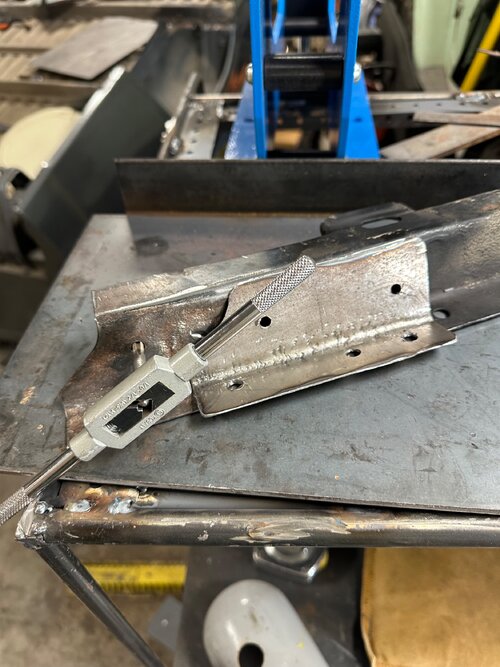
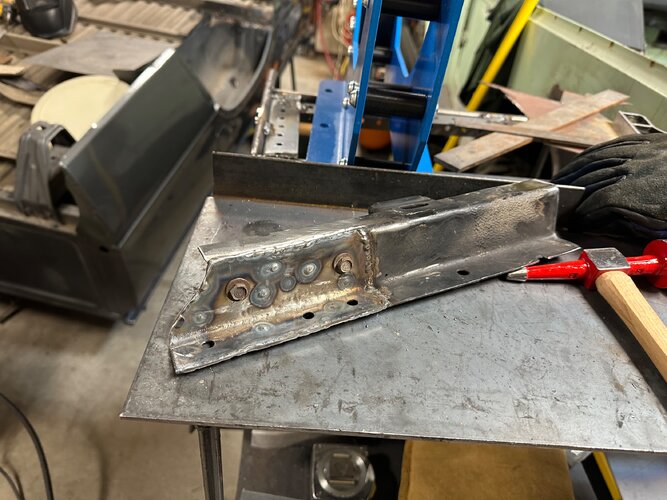
the next step was to put the “front rear” cross member hunk back in place I had cut out to get to all the rusty bits

this one has a sandwich of metal on the outer part of the crossmember to add strength.

as with most things that are two pieces of metal sandwiched together with some spot welds that live under a truck, it was crusty between the layers and it bothered me.

so i separated the two layers and made a new scab plate to put back in.

this time i seem welded all round the new piece and spot welded to slow the intrusion of water and also left one open hole on the bottom so if water does ingress somewhere it has at least a fighting chance to egress its ass

i am now less bothered
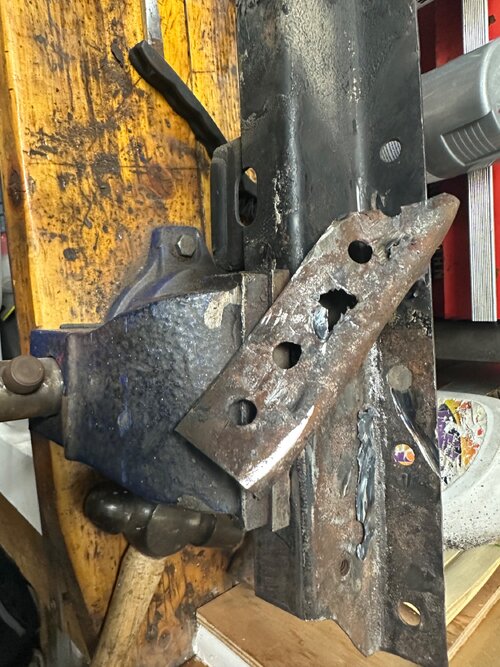
IMG_0223.jpeg

IMG_0225.jpeg

IMG_0227.jpeg

after that i just cleaned up some of the welds and put a couple boring flat patches in so i can get this crossmember chunk welded back in and then the floor secured in the right plane.

that will dictate the extended of the curve on the patch coming off the wheel tub

glad to be done with all the “ribbed” patches those sucked because nothing was exactly right from the patch panel i bought and required a lot of panel beating

i am glad i thought ahead and made this 3 point reference jig so I can get the crossmember out back together true because there are two bed mounts involved in that 3 point jig so it needs to be right before i weld it back together

then i can put the truss-head bolts in the floor through that cross member and THEN finally be able to get the profile right for that last patch

this was my stopping point
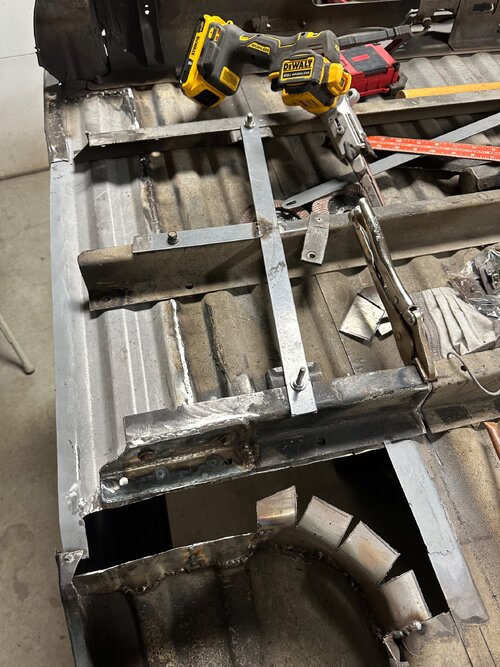
IMG_0230.jpeg

I am SLOW at this and getting SLOWER 😂
 
Last edited:
Back
Top