• REGISTER FOR RISING SUN'S 2ND BEST EVENT: THE COLOYOTA EXPO. IT'S ONLY $5, DUDE.
    → No extra fee to bring yer extra stuff and sell it at the swap meet.
    → It's not Cruise Moab, but it's way cheaper and you can sleep in your own bed.
    Businesses: Still time to register your company to be an exhibitor at the event, too!
    Click here to register today..

IH8RUST: FJ60

IH8RUST

Trail Ready
Joined
Jun 13, 2024
Messages
443
I would take the time to do it. The seal on my 80 is busted and the top of the hood vibrates a bit.

Just dont have too many beers before like I did. Mine looks awful.

Also the white roof looks badass with the paint job!
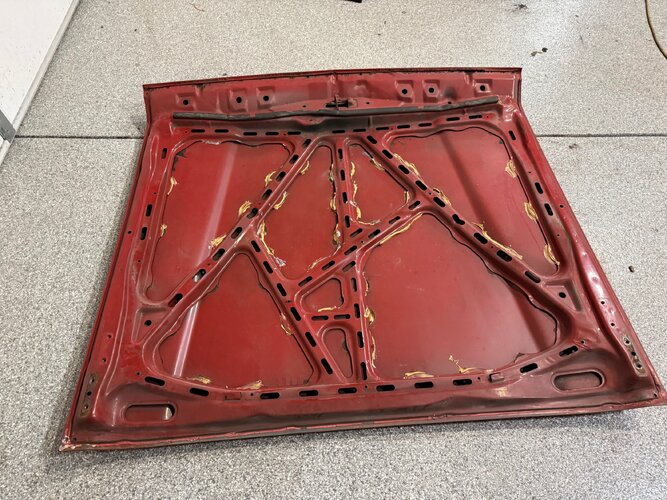
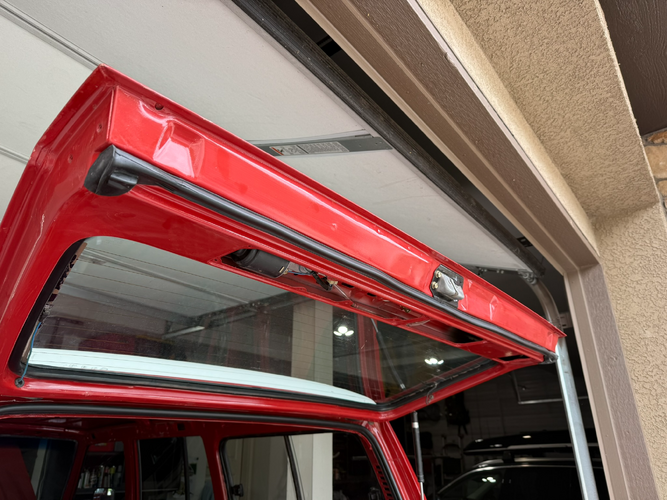
Ayye, I just saw your post on Mud. What material did you use? I got the Eastwood seam sealer, but also bought 3M 08365 Beige.
 

RDub

Trail Ready
Joined
Feb 9, 2021
Messages
498
Location
Boulder, CO
Maybe get a look at another 60 hood first. You like to keep things looking factory.
 

IH8RUST

Trail Ready
Joined
Jun 13, 2024
Messages
443
Found it. I think they had one too many beers.

IMG_0585.jpeg
 

IH8RUST

Trail Ready
Joined
Jun 13, 2024
Messages
443
Found it: 3M Flexible Foam 08463

Factory matching based on the online notes/images/car community posts, including one of our own on YouTube.
 

RDub

Trail Ready
Joined
Feb 9, 2021
Messages
498
Location
Boulder, CO
I thought the sealant gets applied prior to paint at the factory. Do you have touch up paint to color match after applying it? I know it will be under the insulation pad and out of sight…
 

IH8RUST

Trail Ready
Joined
Jun 13, 2024
Messages
443
Same. Seam sealer goes on after epoxy, then the paint. My old hood had it on top of the paint and nothing stops you from applying over the new paint, just looks ugly.

I’ve got about a quart of the red, can buy more locally since I have the exact code and brand as well. That said, the foam isn’t paintable, so I’ll just apply conservatively and not fuss over it once covered.
 

RDub

Trail Ready
Joined
Feb 9, 2021
Messages
498
Location
Boulder, CO
My 60 hood has the factory adhesive, but it’s no longer stuck together. It makes an awful sound when I close the hood, I just hate it. Need to reglue it someday. That and rebuild the t-case, get a better transmission, rebuild the engine…
 

MonPetiteShoe

RS Club Commander
Cruise Moab Committee
Joined
Oct 7, 2020
Messages
726
Location
Aurora
If you want it to look truly awful...

4 beers and then do it upside down with the hood on the vehicle.
I'm pretty sure the FSM says: "You need 5 beers before you install adhesive upside-down with the hood installed."
 

IH8RUST

Trail Ready
Joined
Jun 13, 2024
Messages
443
My 60 hood has the factory adhesive, but it’s no longer stuck together. It makes an awful sound when I close the hood, I just hate it. Need to reglue it someday. That and rebuild the t-case, get a better transmission, rebuild the engine…

Safe to say, I'm not looking for total period correctness; that's pursuing perfection when none even existed out of the factory floor back then. Heck, probably more perfect now than before? Tooting my own horn.

I'm sure they sort of knew the compound's longevity when they originally installed it, they probably didn't have the benchmarks to know for sure. Use the foam, cover it up, and enjoy the rig.

The transmission part feels like a solved problem if you've got the cash. Pay George in Stockton, and he'll slap the T-Case on that H55F; masterful work. That was my shortcut. The alternative is to do it yourself, and I recall you have the chops for it, so it's a matter of "how quick do you want it back on the road?" versus "I want to wear the rebuild as a badge of honor." There's a part of me that wishes I had the patience, but I'm not, and I want it now, even now is 1 year in the making from the time I got it back from Cruisers and Co, and six months from the body and paint work, it's all relative. Perhaps a topic best suited for my therapist.

Some of our peers, ehem, @Capriblue45, have the superpowers to do it all. I'm jealous.
 
Last edited:

IH8RUST

Trail Ready
Joined
Jun 13, 2024
Messages
443
I truly wish the diagrams were just a tad bit better, so I wouldn't have to ask. I used a caliper to measure, went online searching, the kit didn't include a fit, kept searching on the parts websites, nope, can't identify, I feel dumb.

1779395985382.png

Gave up, asked on Mud. Part number for the grommet is: 90189-05012
 

IH8RUST

Trail Ready
Joined
Jun 13, 2024
Messages
443
Bought all new sets of rubber seals. Slowly putting the pieces back together. Decided the lower liftgate could use a seal on the lip, turned out pretty decent, it'll help avoid paint chips. The upper liftgate has two parts: the bottom and the top. Doing the top seal while it's mounted is a bit of a chore. Also, ended up replacing the 12mm mount nuts all the way around. In hindsight, it made sense to replace before painting to maintain consistency; lesson learned.

The cool part is that when I shut the gates, there's a smooth, closing sound.


1779477082952.png


1779477140186.png


1779477130864.png

 
Last edited:

IH8RUST

Trail Ready
Joined
Jun 13, 2024
Messages
443
Just noticed the upper liftgate latch is all dull and grey, can't have that, time to bust out the plating kit.
 

RDub

Trail Ready
Joined
Feb 9, 2021
Messages
498
Location
Boulder, CO
How is your old one? If it’s straight I’d be interested.
 
Back
Top