Putting a locked 99 OE LC axle in a 2000 Land Cruiser

Shuksan

Rising Sun Member
Joined
Nov 1, 2017
Messages
906
Location
Denver
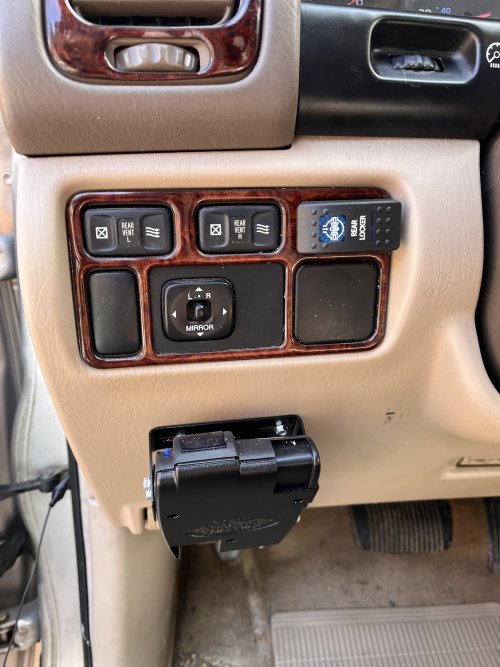
Finally got around to wiring up the locker switch as part of my to dos before CM. About 90% done. Need to go grab some more zip ties this morning to finish the harness wiring and tap the dimmer switch for the light functions to work (anyone know exactly where this is to save me some time searching around @AimCOTaco maybe?).

Could also clean up the switch install a bit. Pics sometime this afternoon.
 

Shuksan

Rising Sun Member
Joined
Nov 1, 2017
Messages
906
Location
Denver
Everything is all wired up and install, but I still have an issue. When I engage the locker, I can hear the actuator move, but the light on the toggle switch to indicate the locker is engaged is not lit up. I tested the switch and that is not the issue. I suspect it could be the locker indicator switch. My understanding is that it should connect the ground when the locker is engaged, but I don't think this is happening.
IMG_6033.jpeg
Has anyone ever had an issue with this part failing as it is likely a similar mechaism for most toyota e lockers.
1647799881278.png
 

gungriffin

Rising Sun Member
Joined
Dec 4, 2017
Messages
1,031
Location
Denver
Everything is all wired up and install, but I still have an issue. When I engage the locker, I can hear the actuator move, but the light on the toggle switch to indicate the locker is engaged is not lit up. I tested the switch and that is not the issue. I suspect it could be the locker indicator switch. My understanding is that it should connect the ground when the locker is engaged, but I don't think this is happening.
View attachment 102981
Has anyone ever had an issue with this part failing as it is likely a similar mechaism for most toyota e lockers.
View attachment 102980
My locker engages, but the indicator never goes solid. 1999 w/ factory locker
 

Shuksan

Rising Sun Member
Joined
Nov 1, 2017
Messages
906
Location
Denver
My locker engages, but the indicator never goes solid. 1999 w/ factory locker
Does it blink or just no indicator? I assume on yours this would be the dash OE indicator.
 

gungriffin

Rising Sun Member
Joined
Dec 4, 2017
Messages
1,031
Location
Denver
Does it blink or just no indicator? I assume on yours this would be the dash OE indicator.
The indicator on the dash blinks when engaged and never goes solid.
 

Shuksan

Rising Sun Member
Joined
Nov 1, 2017
Messages
906
Location
Denver
The indicator on the dash blinks when engaged and never goes solid.
If you are interested in fixing it this could just be a bad sensor (the two wire plug), which I guess is known to go bad. Since yours is factory installed, it is going through the computer and I believe it blinks because it is not sensing the response from that sensor. I ordered a replacement from partsouq (pictured above) for mine. Supposedly aftermarket options that work as well.
 

gungriffin

Rising Sun Member
Joined
Dec 4, 2017
Messages
1,031
Location
Denver
If you are interested in fixing it this could just be a bad sensor (the two wire plug), which I guess is known to go bad. Since yours is factory installed, it is going through the computer and I believe it blinks because it is not sensing the response from that sensor. I ordered a replacement from partsouq (pictured above) for mine. Supposedly aftermarket options that work as well.
I will get under there before CM to get it fixed. I am glad that I have the PN for the sensor. Now I have no excuse to continue being lazy!
 

AimCOTaco

Cruise Moab Committee
Staff member
Cruise Moab Committee
Joined
Aug 13, 2010
Messages
2,260
Location
Longmont, CO
I think you can tap into the dimmed dash lights at the quarter window switch there, should be across the white with red and the green wire from what I found in the schematic, check first of course. Your switch may not be dimmable if it has an led backlight.
Did 12v guy set you up to use the indicator switch?
Can you hear the motor stop? (IIRC the system has limit switches internally for the motor controler to use but the 'engaged' switch is another circuit)

On mine right now the rear locker works and I can control it but the dash light will only flash, won't go solid because the wire is cut at the sensor (rock-scorpions :D ). The separate indicator switch closes not when the motor has done it's work to load up the spring but later one when the diff actually 'chunks' into locked position. That help or make any sense?

Now that my front diff is back together and I'm on the road again I should also go back and fix my rear sensor wiring...
 
Last edited:

Shuksan

Rising Sun Member
Joined
Nov 1, 2017
Messages
906
Location
Denver
I think you can tap into the dimmed dash lights at the quarter window switch there, should be across the white with red and the green wire from what I found in the schematic, check first of course. Your switch may not be dimmable if it has an led backlight.
Did 12v guy set you up to use the indicator switch?
Can you hear the motor stop? (IIRC the system has limit switches internally for the motor controler to use but the 'engaged' switch is another circuit)

On mine right now the rear locker works and I can control it but the dash light will only flash, won't go solid because the wire is cut at the sensor (rock-scorpions :D ). The separate indicator switch closes not when the motor has done it's work to load up the spring but later one when the diff actually 'chunks' into locked position. That help or make any sense?

Now that my front diff is back together and I'm on the road again I should also go back and fix my rear sensor wiring...
I tapped the dimmer switch over by my radio actually. I think there are many spots to tap, but I didn't want to tap close to the actual rheostat and affect everything downstream. That works and there are 2 LED system on my switch. One for that, which only lights up when headlights are on. The other one is fed by the sensor (2 wire part above), when the actuator rod engages it pushes on the little ball of the sensor. I think it goes 12V to ground. I was able to test this successfully with some alligator clip jumping.

...But now I have a new problem. Before I could hear the motor move (and stop), locker actuate and "click". With rear wheels in the air I could confirm the locker was engaged. While I was working to test and trouble shoot the sensor the motor stopped working. Now there is no sound when I hit the switch to engage or unengage.

I wonder if a magnet in the motor fell off, which I hear is also common. I think @Inukshuk posted something about glueing these back in a little while back. So I might be taking the actuator off to check it out soon. At least it stopped working with the locker disengaged.

Does anyone know from experience if you can just pull the motor cap off to check the magnets without fully removing the whole actuator unit?
 

Shuksan

Rising Sun Member
Joined
Nov 1, 2017
Messages
906
Location
Denver
So an update after some very annoying and delayed trouble shooting. I really want to get this operational and trustworthy by CM (~11 days). There are many threads around here and mud describing various issues and rebuilding. Magnets coming loose from the motor housing and water/corrosion mucking up the spring/gear/contacts area.

So I thought to pull the actuator and inspect. Maybe just a magnet had fallen off...

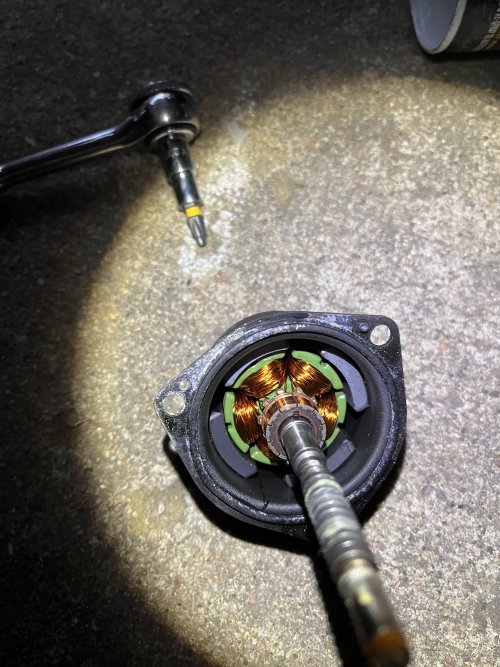
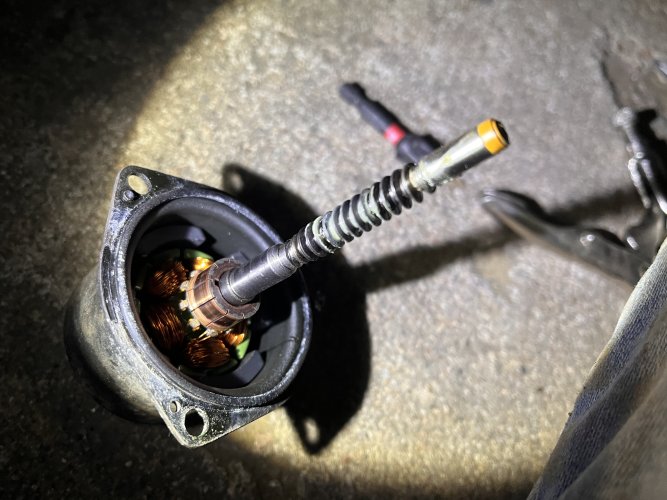
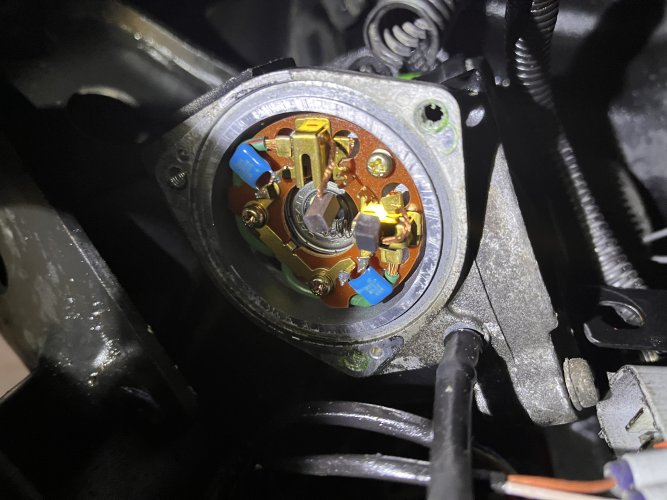
I removed the motor cover first to inspect the magnets... and pristine!
IMG_6094.jpegIMG_6096.jpegIMG_6095.jpeg

No evidence of water in here. All magnets look great and secure. Compared to all of the horrific pictures on mud, this looks like it just came from the factory!
 

AimCOTaco

Cruise Moab Committee
Staff member
Cruise Moab Committee
Joined
Aug 13, 2010
Messages
2,260
Location
Longmont, CO
Dude, I'd get that back together and run wires to a 9v battery to.... then you could manually lock without overloading it.

That darn thing is way to nice inside to be your problem. I think the control wiring ain't right somehow...
 

Shuksan

Rising Sun Member
Joined
Nov 1, 2017
Messages
906
Location
Denver
When I took the motor cover off the armature came out too. As you can barely see in the 3rd picture above one spring is still in the little housing and the other one must have fallen out. After I realized this I got the HF floor magnet out and found a little sucker that could be the other spring, but it is a different size.

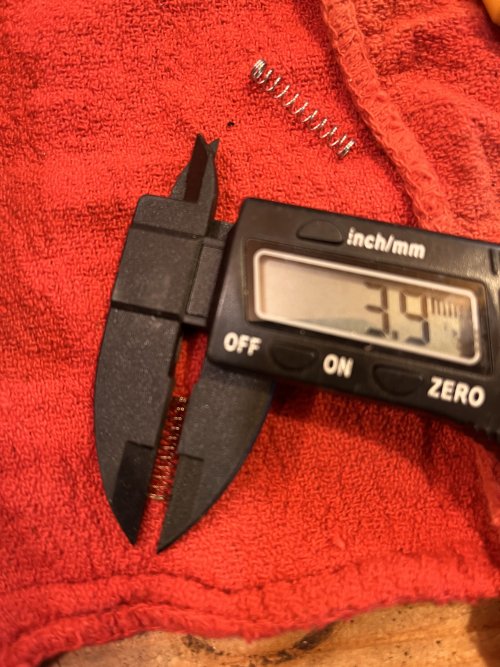
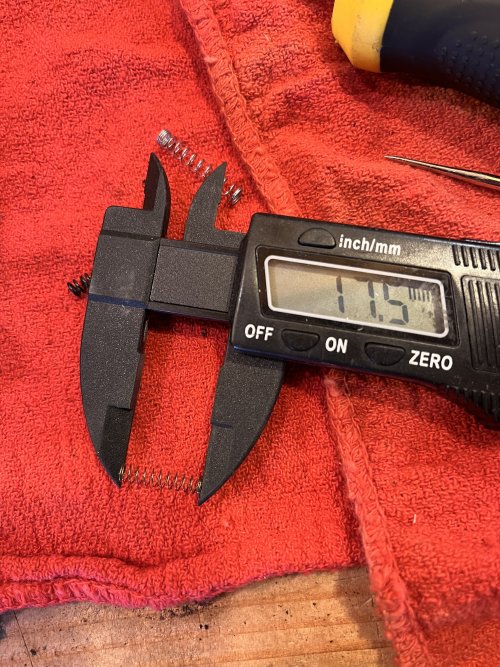
The one that was still in the housing (~ 4 x 17.5 mm uncompressed):
IMG_6117.jpegIMG_6118.jpeg
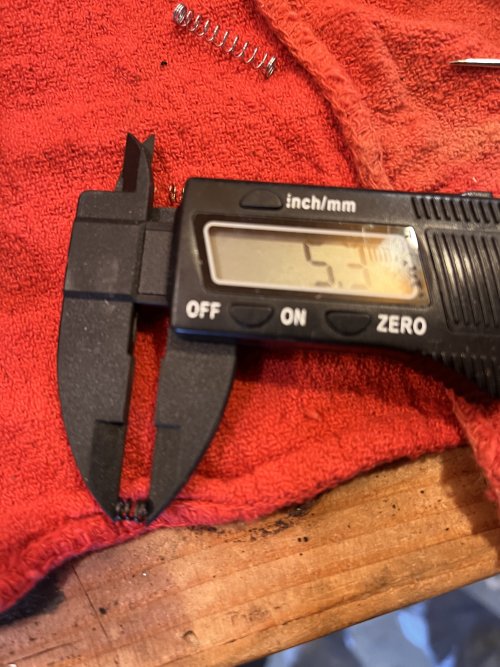
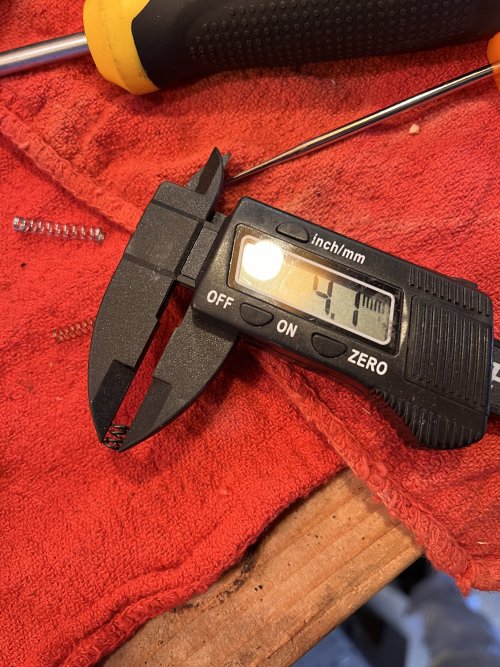
The one I found on the ground is definitely smaller (~4 x 5.3 mm):
IMG_6119.jpegIMG_6120.jpeg

The other spring you see in the above pictures is from a ball point pen, which folks on mud have found to work although may need trimming.
 

Hulk

RS Webmaster
Staff member
Moderator
Cruise Moab Committee
Joined
Aug 22, 2005
Messages
16,455
Location
Centennial
Is the issue that the locker doesn't lock, or that the light doesn't show that it's locked?
If it's just the light, I deem you "Cruise Moab Ready" in my official capacity as CM 2022 Chairman. :bill:
 

Shuksan

Rising Sun Member
Joined
Nov 1, 2017
Messages
906
Location
Denver
Dude, I'd get that back together and run wires to a 9v battery to.... then you could manually lock without overloading it.

That darn thing is way to nice inside to be your problem. I think the control wiring ain't right somehow...
I suspect you are right!

After showing this to Andy at the meeting last week I wanted to get the armature back into the actuator housing and get the motor cover back on. However, you have to get those brushes to stay in place with the springs behind them to get the armature back in. This just didn't seem feasible on the vehicle so I decided to pull the actuator even though this could risk clocking/positioning issues.

I was took the sensor cover off, which I needed to replace anyways because the sensor had gone bad. With the armature out you can put both wheels in the air and manually engage the locker by moving the rod to the right. FSM says to lock before removing actuator although they assume everything is functional. I was able to slide to the right shimmy axles and clearly engage the locker. Good to know that works!

(picture later)

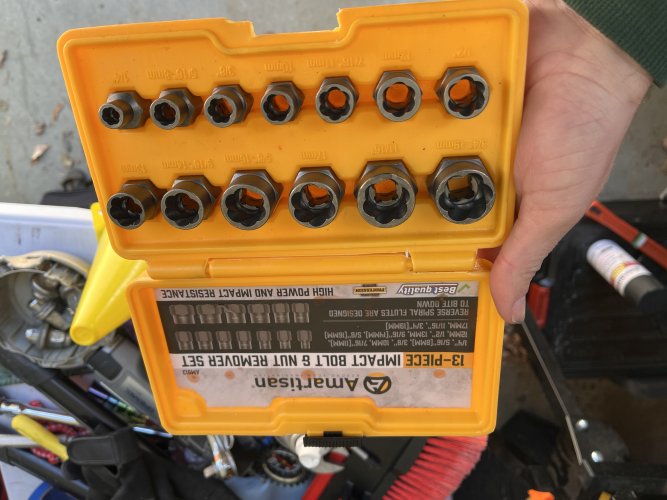
Now all I had to do was remove 4 bolts. Simple right... wrong. Two came out easily, but two did NOT. They started to round quickly and of course its a tight space, etc.

For the one on the bottom, which had better access I tried a bunch of things. I'll let you guess based on the bolt (one on the right). The hardest to reach bolt is the top left one (left one in picture below), where the actuator housing hinders access. After hours of trying different things I needed to either get a nut welded on (which would require moving vehicle as I don't have a welder) or try some other tool.
IMG_6124.jpeg

Project farm to the rescue (). I bought this set (https://www.amazon.com/gp/product/B...FYZB7&linkId=ad3a18c208b4708a655e34b013c61f33) off amazon and got the bolt out in ~15 minutes. I did have to dremel down some edges to get a smaller sized remover on there, but it worked great.
 

Attachments

  • IMG_6125.jpeg
    IMG_6125.jpeg
    1.5 MB · Views: 87

Shuksan

Rising Sun Member
Joined
Nov 1, 2017
Messages
906
Location
Denver
Is the issue that the locker doesn't lock, or that the light doesn't show that it's locked?
If it's just the light, I deem you "Cruise Moab Ready" in my official capacity as CM 2022 Chairman. :bill:
Locker doesn't lock unless you take the cover off the sensor and move the actuator rod over. Seems impractical. Sure I could go without it, but that doesn't sound as fun.
 

Shuksan

Rising Sun Member
Joined
Nov 1, 2017
Messages
906
Location
Denver
With the bolts that hold the whole assembly onto the axle removed you remove the set screw and use a flathead to break the actuator free (held on with FIPG too).

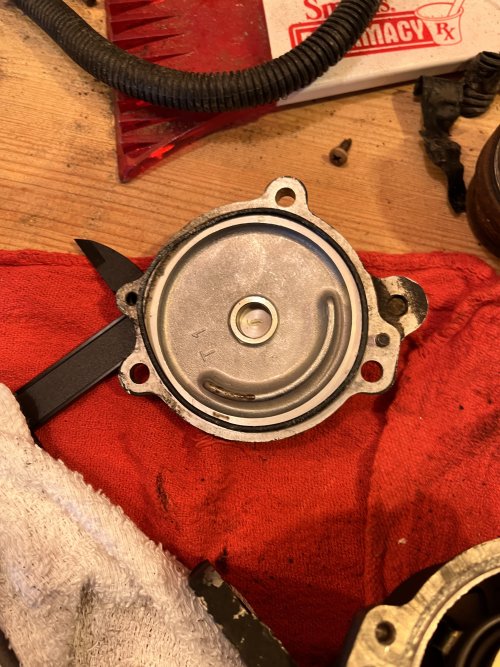
With the actuator assembly on the bench I could get the brushes back into their housings using the two different springs above. I could carefully hold them back and get the armature back into the actuator housing and it engaged with the gears inside. I could move the position of the rod by manually rotating the armature.

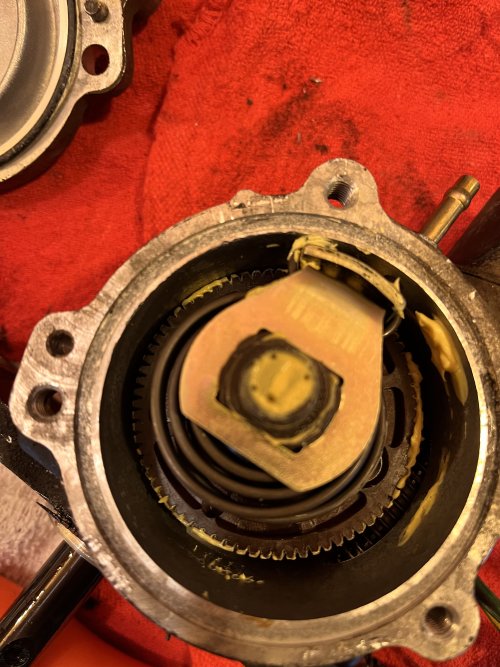
I decided to open the actuator to inspect even though this is making a little more work for myself as I will need to set the gear positions back correctly. I took a picture right wen I opened it up to note the positions. Again everything looks great inside:
IMG_6121.jpeg
IMG_6122.jpeg
 

Shuksan

Rising Sun Member
Joined
Nov 1, 2017
Messages
906
Location
Denver
This all seems to be going well, but nothing yet explains why the I couldn't hear the locker motor run in either direction. I reassembled everything and connected to the harness on the land cruiser. Since it was in out(locked) position, I hit the switch to move it into the in (unlocked) position. THE MOTOR moved! but it wouldn't go back to the locked position... interesting. Now I really think Andy's comment above is pointing towards the harness as the culprit. I had checked all the harness positions for continuity to the switch, but not voltage yet.

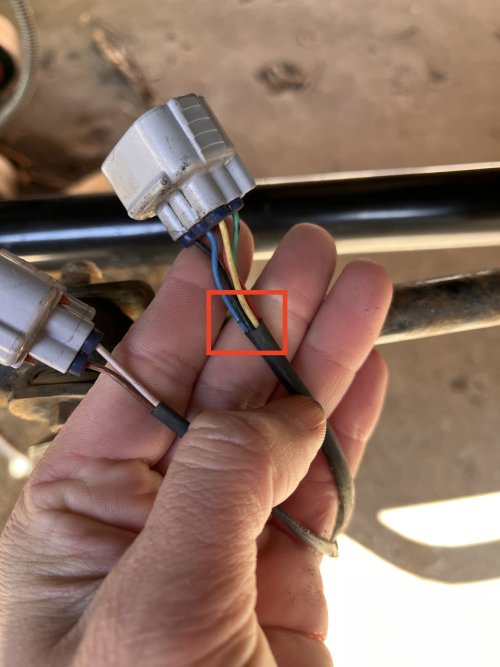
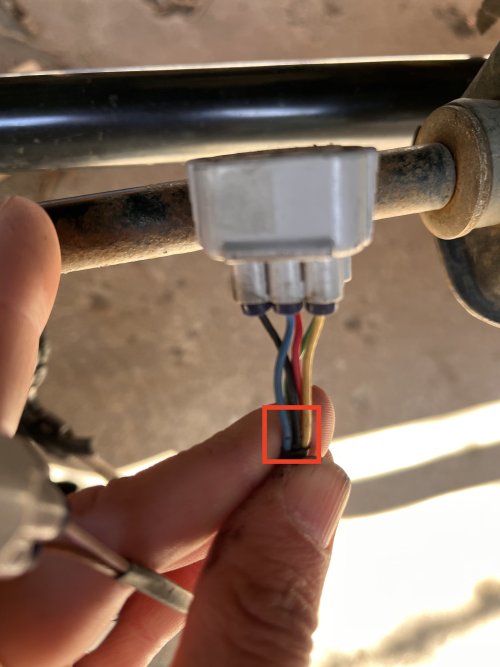
Inspecting the harness (12V guy, not OEM) doesn't show much obvious, except this one small cut:
IMG_6131.jpegIMG_6132.jpeg
 

Shuksan

Rising Sun Member
Joined
Nov 1, 2017
Messages
906
Location
Denver
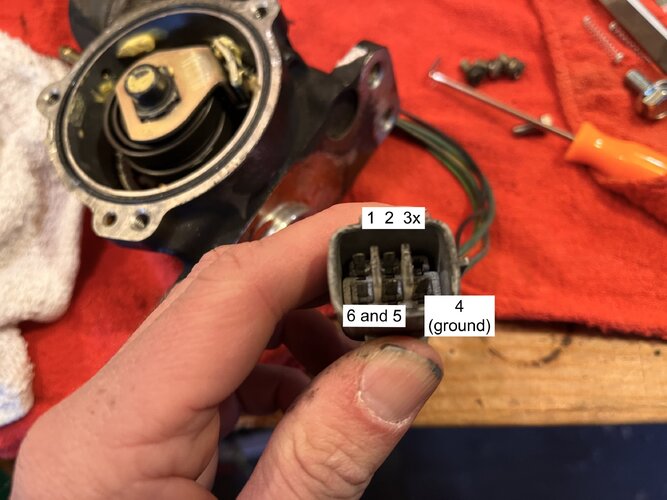
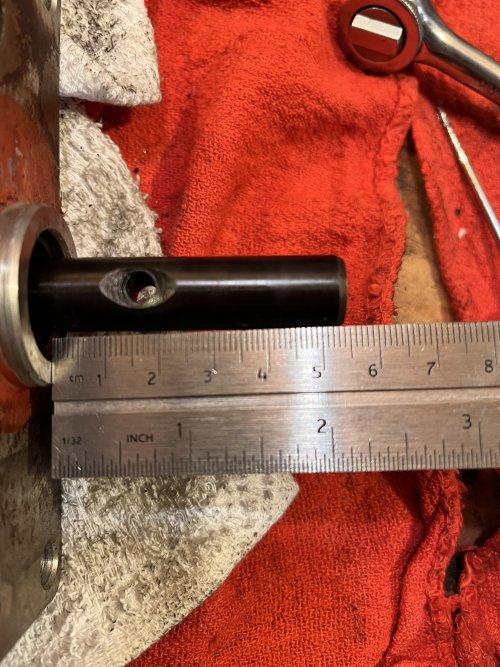
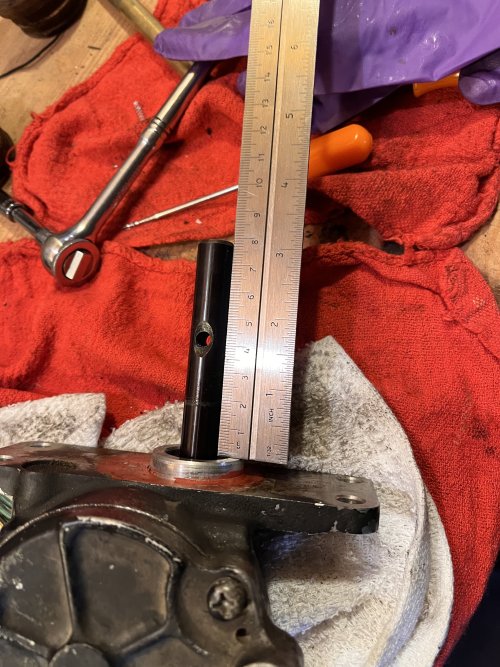
Ended up checking the positions of gears and output shaft. I started by setting the output position to 73 mm 2 7/8" slightly different than this mud thread (post 7 in this https://forum.ih8mud.com/threads/rear-locking-dif-assembly-help.17701/), then clocking the internal gears to hold this position right when continuity is lost between 4 (ground - black) and 6 (green - sensor telling ecu to stop sending power).
IMG_6138.jpeg

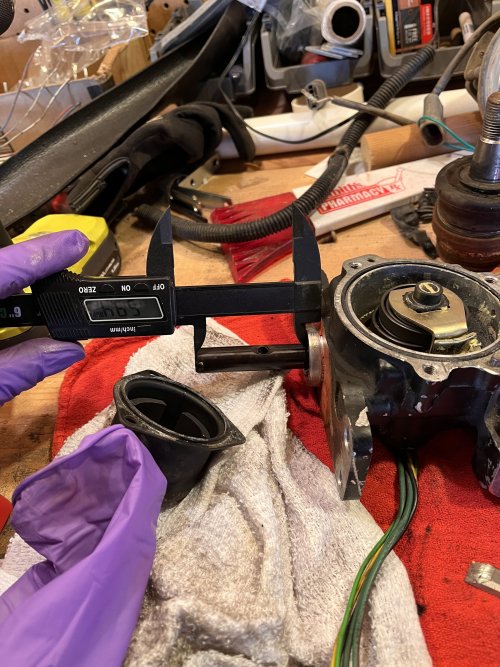
Then I rotated the motor by hand while monitoring continuity between 4 (ground) and 5 (yellow - sensor saying in position). For me this ended up at 59.4 mm, which is pretty close to the reported 2 3/8".
IMG_6143.jpeg

At this point I reassembled everything with a little cleaning of the lips and dielectric grease along the o-ring lips. I replaced the old philips head screws that held the motor housing in place with some small bolts and washers.

Now my harness has all of the pins, but I don't know if it cuts power when those continuity points are hit. The actuator housing has another mechanism to stop extension or retraction of the rod. There is a lip on the inside of the housing that will stop the rotation of the gears. However the continuity stops are not up against this lip. So if you just drive the motor to hit the lip stop the in position is 54 mm and the out position is 78 mm.

IMG_6144.jpegIMG_6145.jpeg
 
Top