Hahahaha yesssss! Oh this will be there for sure.All I'm saying is just think about a MOAB Scooter Adventure Run.....

115K views · 6.2K reactions | Thanks AI. #ai #aiart #aiartcommunity #4x4 #overland #scooter #thanksai | Brendt Petersen
Thanks AI. #ai #aiart #aiartcommunity #4x4 #overland #scooter #thanksaiwww.facebook.com
You are using an out of date browser. It may not display this or other websites correctly.
You should upgrade or use an alternative browser.
You should upgrade or use an alternative browser.
Jackson’s Vespa-Piaggio project he doesn’t have time for thread
- Thread starter jps8460
- Start date
Heard it fire up tonight. I made a ghetto electric start. I wanted to get it running before I bolted all the crap to it. Blown away that it fires right up 
View: https://youtu.be/ZIKIGLMqk04?feature=shared
View: https://youtu.be/ZIKIGLMqk04?feature=shared
BritKLR
Vice Commander
Heard it fire up tonight. I made a ghetto electric start. I wanted to get it running before I bolted all the crap to it. Blown away that it fires right up
View: https://youtu.be/ZIKIGLMqk04?feature=shared
Congrats! That sounds bad ass!
Thanks! Hoping to take it for a rip this week.Congrats! That sounds bad ass!
Curly
Event Coordinator
- Joined
- Apr 17, 2024
- Messages
- 287
Heard it fire up tonight. I made a ghetto electric start. I wanted to get it running before I bolted all the crap to it. Blown away that it fires right up
View: https://youtu.be/ZIKIGLMqk04?feature=shared
That thing sounds like pure joy and trouble. Great work!
It will be a lot quieter, that was just a quick test fire, with the exhaust just open at the cylinder haha.That thing sounds like pure joy and trouble. Great work!
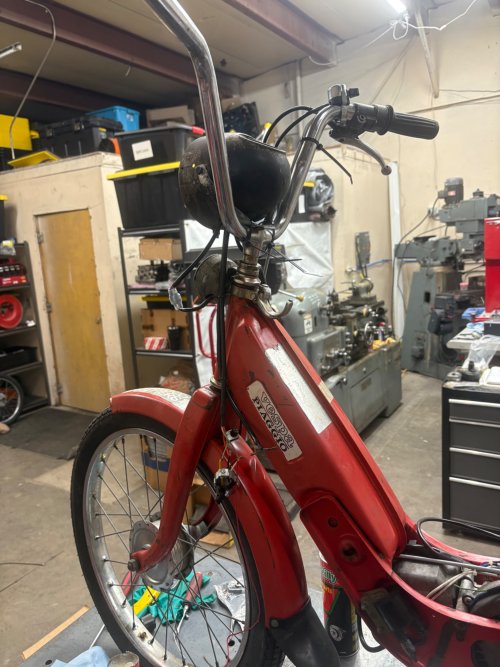
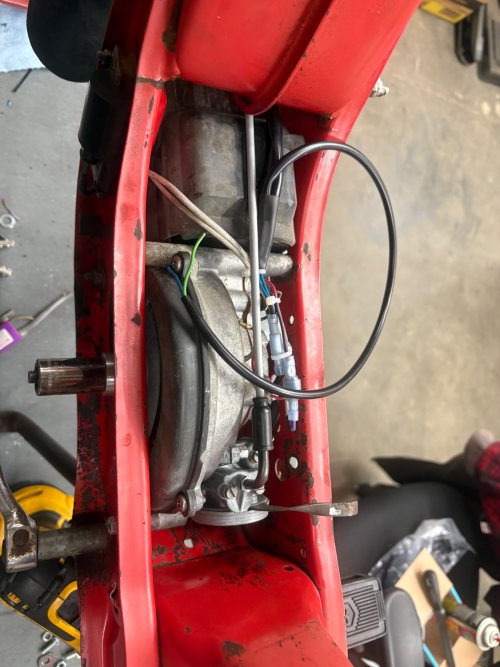
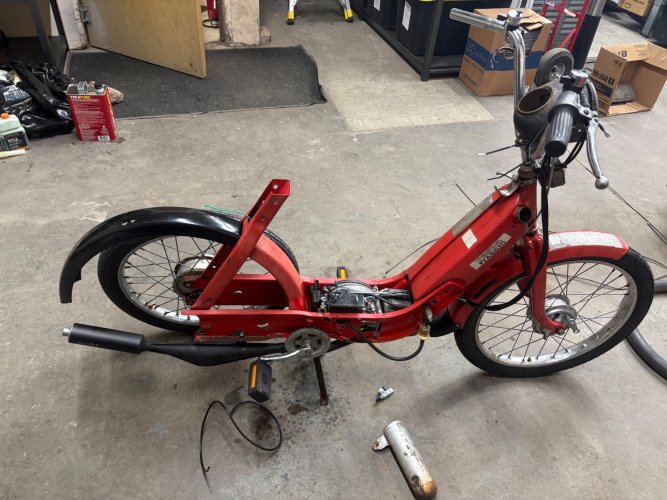
Got like 90% of the wiring done tonight. Quick night in the shop
I wired up the LED front light and horn temporarily, they both work great! Wahoo. The front LED landscape light is bright as hell.
I re-pvc wrapped some of the factory wire, and just replaced any white that was cracked with an appropriate colored wire.
Attachments

Haha, the ol’ “I’m excited to see this stuff work before I button it all up” trick.Looks great, except for the twisted wiresI'm jealous of the machine shop.
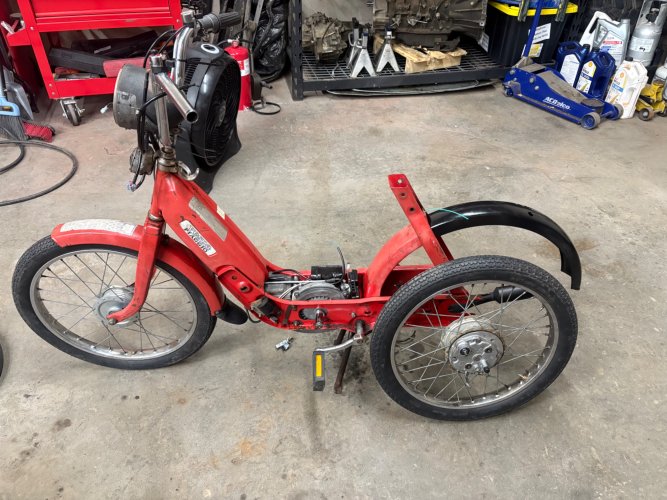
Had some time to tinker this afternoon. The stock exhaust was all plugged up. I cut it open to try and salvage it last week…. But decided to just buy a pipe for it. I had to do quite a bit of messaging to make it fit, but it definitely woke the bike up.
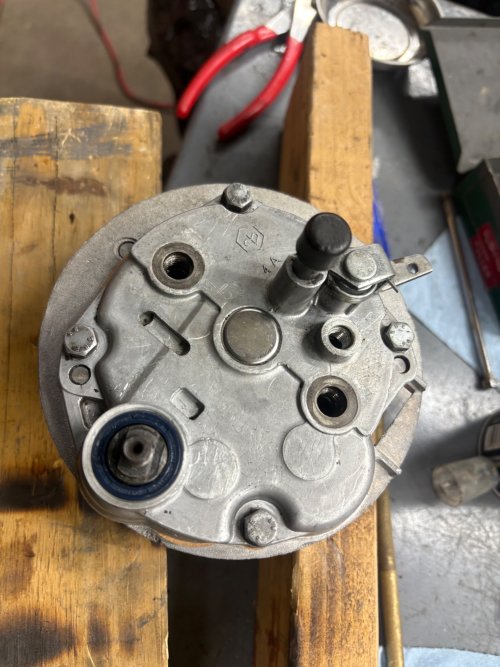
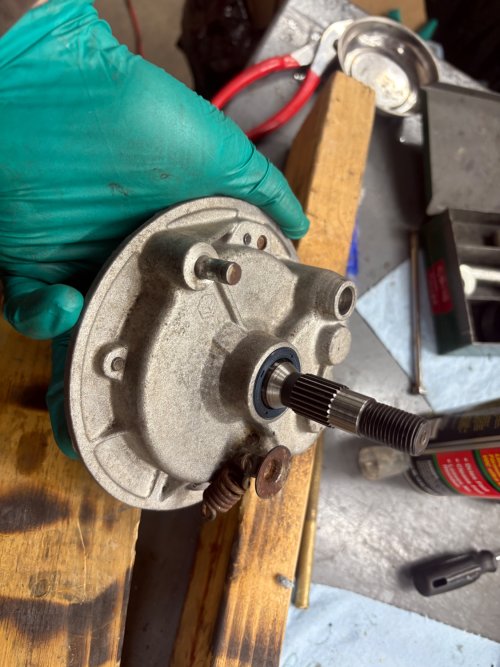
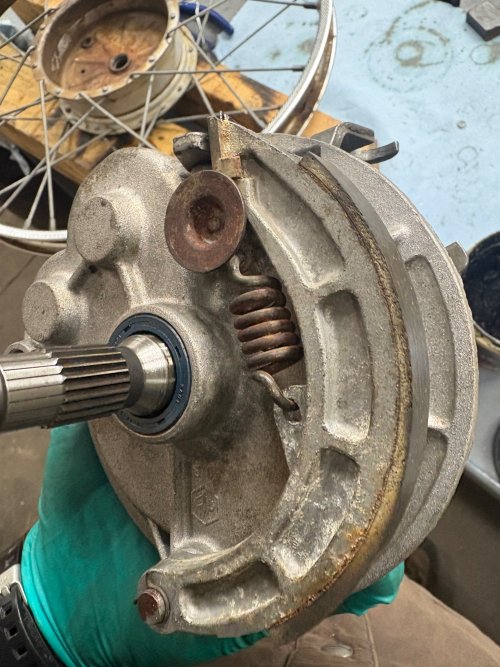
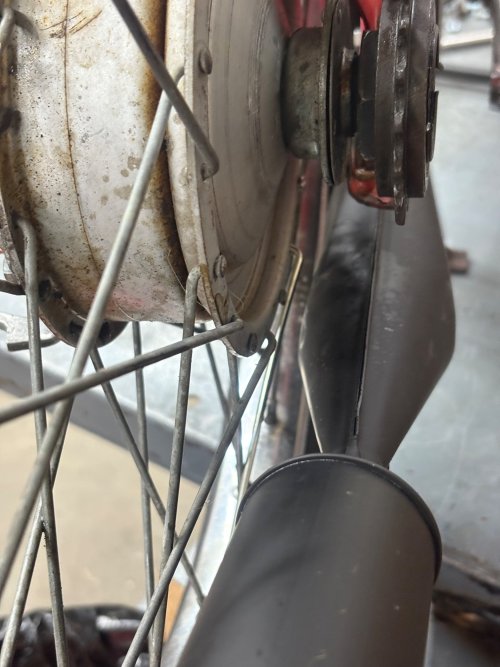
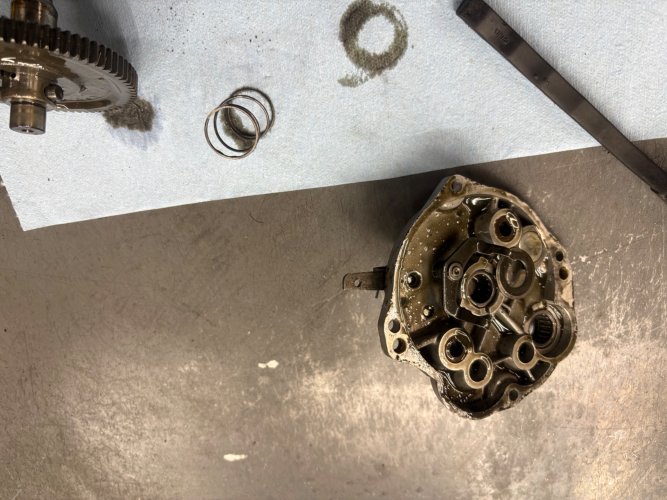
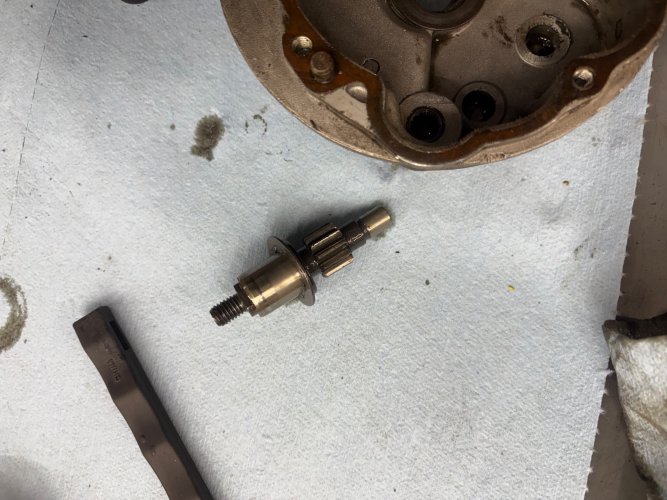
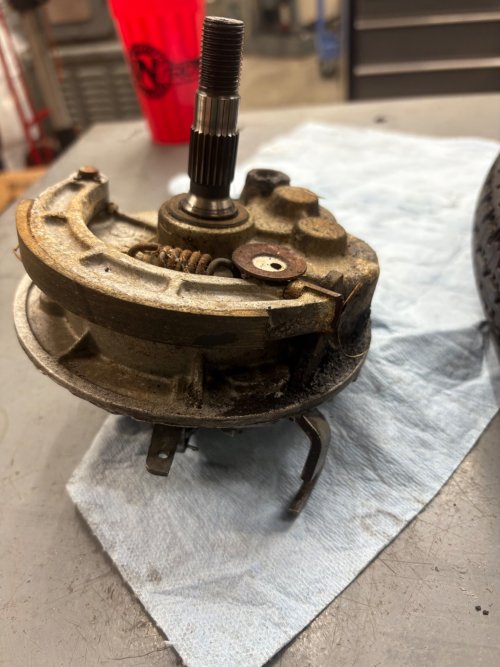
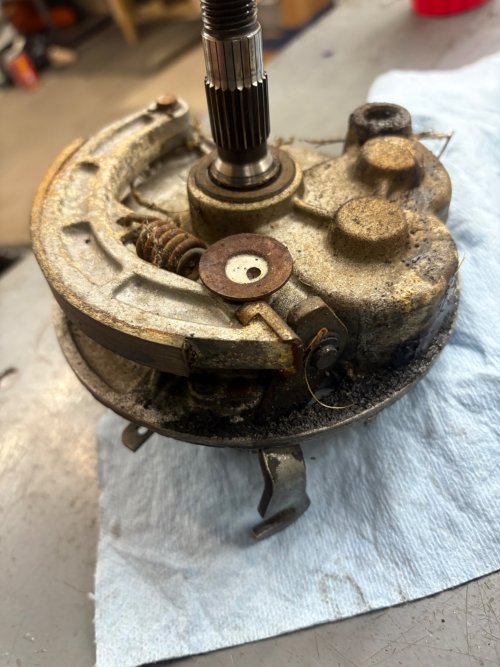
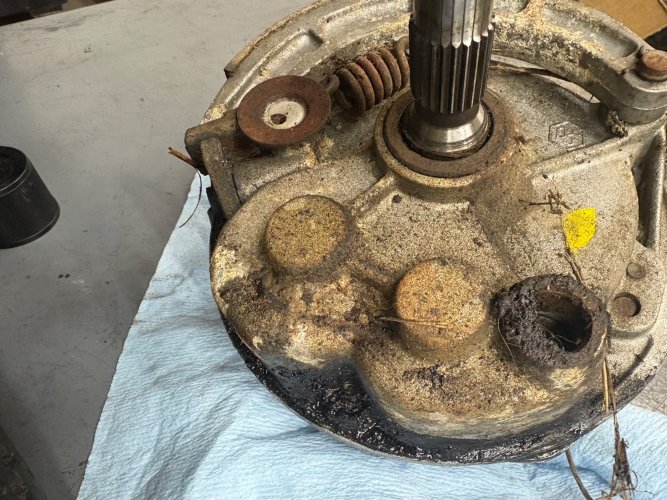
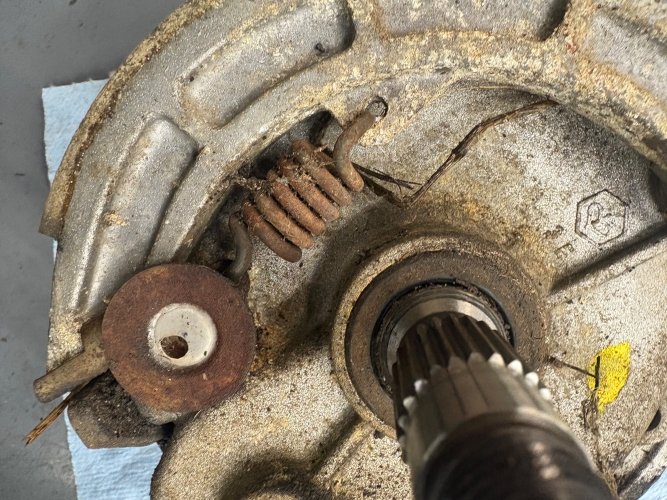
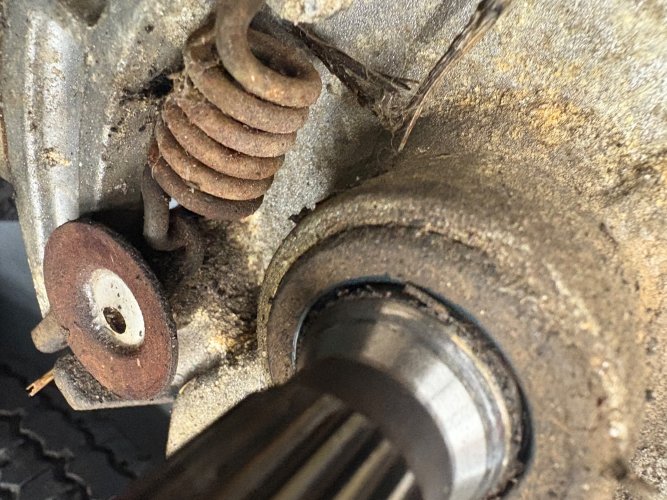
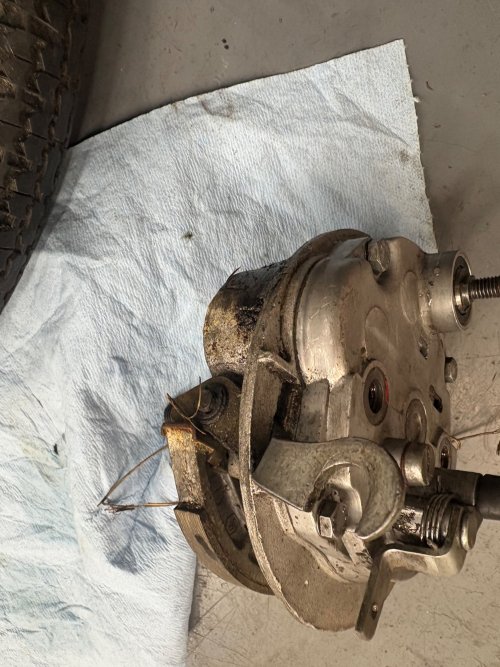
I rebuilt the rear hub with new bearings and seals.
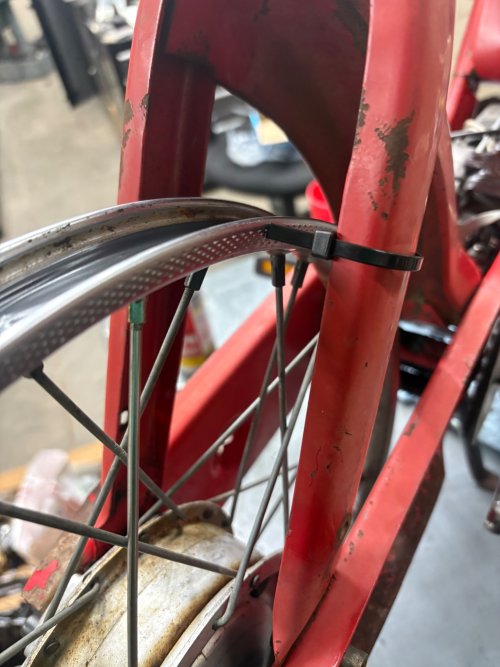
I replaced 2 broken spokes on the rear wheel and did a halfassed job of truing it up. Put a new tube in and got it ready to mount and fill with 80-90w
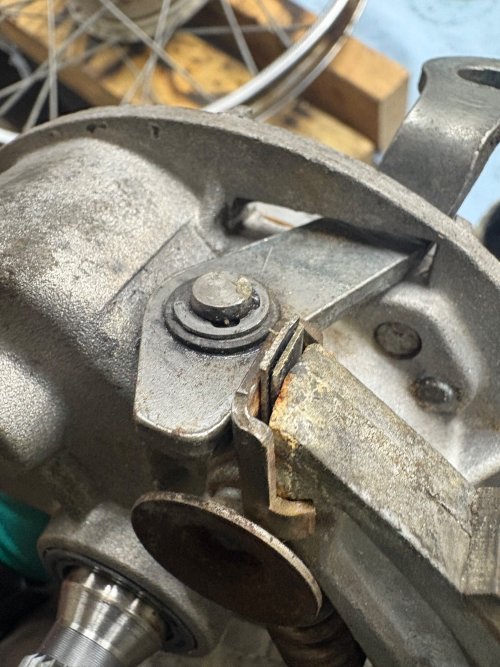
The rear brake shoe was engaging right at the end of the throw, but it had plenty of meat left, so I wedged some shim stock under the wear plate, works great, engaging about the same as the front brake now.
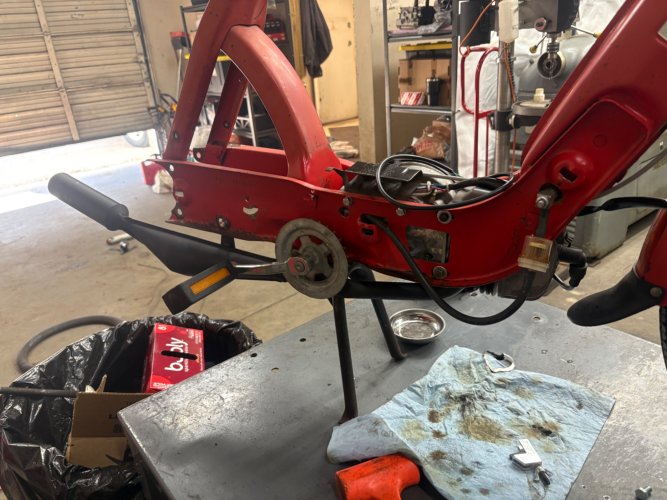
Got the rear fender mounted and started wiring up the tail light.
I rebuilt the rear hub with new bearings and seals.
I replaced 2 broken spokes on the rear wheel and did a halfassed job of truing it up. Put a new tube in and got it ready to mount and fill with 80-90w
The rear brake shoe was engaging right at the end of the throw, but it had plenty of meat left, so I wedged some shim stock under the wear plate, works great, engaging about the same as the front brake now.
Got the rear fender mounted and started wiring up the tail light.
Attachments
-
 IMG_9608.jpeg962.3 KB · Views: 173
 -
 IMG_9609.jpeg968.5 KB · Views: 187
 -
 IMG_9610.jpeg1.3 MB · Views: 185
 -
 IMG_9611.jpeg1.2 MB · Views: 202
 -
 IMG_9612.jpeg769.3 KB · Views: 177
 -
 IMG_9613.jpeg1,018.6 KB · Views: 179
 -
 IMG_9615.jpeg989.9 KB · Views: 176
 -
 IMG_9617.jpeg1.3 MB · Views: 183
 -
 IMG_9618.jpeg1.1 MB · Views: 179
 -
 IMG_9548.jpeg1.2 MB · Views: 184
 -
 IMG_9547.jpeg1.2 MB · Views: 175
 -
 IMG_9546.jpeg1.2 MB · Views: 165
 -
 IMG_9537.jpeg898.1 KB · Views: 161
 -
 IMG_9538.jpeg917.1 KB · Views: 176
 -
 IMG_9539.jpeg1.6 MB · Views: 183
 -
 IMG_9540.jpeg1.7 MB · Views: 190
 -
 IMG_9541.jpeg1.4 MB · Views: 196
 -
 IMG_9542.jpeg1.3 MB · Views: 183
 -
 IMG_9543.jpeg844.1 KB · Views: 185
 -
 IMG_9544.jpeg1 MB · Views: 186
 -
 IMG_9545.jpeg1.1 MB · Views: 182
 -
 IMG_9616.jpeg852.9 KB · Views: 171
Last edited: