Head Gasket Replacement

subzali

Hard Core 4+
Joined
Aug 22, 2005
Messages
10,641
Location
Denver CO
Well my engine has been on green since before we came to own it, seems pretty happy since we've put over 100,000 miles on it since we've owned it. At this point I don't see the point in switching back? :confused:

No idea how old the water pump is, (back up: here's the story: We are the third owners as far as we know. Truck was originally sold in eastern Nebraska (probably) and I think it was owned by an older gentleman. He then sold it to my grandfather (another older gentleman obviously) who gave it to me as a 16th birthday present of sorts and it had about 85,000 on it. That's why I think a lot of this stuff has never seen replacement, because I KNOW we haven't replaced it since we've owned it.) Did not do a compression check, felt that at 200,000 head gasket needed to be done anyway. I'm going to investigate into the water pump a little more, might be worth replacing anyway just for peace of mind.
 

DaveInDenver

Rising Sun Ham Guru
Joined
Jun 8, 2006
Messages
13,960
Location
Grand Junction
I personally use Toyota Red, but I was just poking that hornet's nest. Some people swear by it and others swear at it. I dunno, I figure Toyota specs parts in the engine based on the chemicals in their coolant, but really keeping clean, fresh fluid in the cooling system is probably far more important to the life of the HG, water pump, radiator, etc. than how much silica is or is not in the coolant.

If you do not know that the water pump is 100,000 or less old, I would replace it. They tend to weep for a while like you are seeing before they blow out. Same as Cruisers. If it's off, spin it and if there's not a lot of friction, it's definitely toast.

I'm of the same opinion, that the HG on the 22R has a similar life as the timing components. I base that on the FSM procedure for R&R the timing stuff having you pull the head. We've touched it before, either Toyota expected that you would replace the HG and timing at the same time and wrote the procedure to do that or they found that was pretty optimal during testing. I personally think the parts were designed to be R&R at the same time from the get go. The OEM timing parts are typically safe to about 125,000 miles and that happens to be 200,000 km. On an iron block/aluminum head engine designed in 1983 I'm very sure that Toyota expected the HG to wear out faster than on an iron/iron engine and so it would not surprise me at all to hear that the factory wanted the HG replaced sooner rather than later. That they go to 200,000+ is 'cause the 22R is a robust engine that isn't taxing it's internals and Toyota didn't build the cheapest possible truck by using the cheapest possible parts. The factory 22R HG is a pretty decent part.
 

Evrgrnmtnman

Trail Ready
Joined
Aug 22, 2005
Messages
392
Location
Bailey
call Jesse. He Offered, Take Him Up On It. 5 Minutes On The Phone And You Will See Why I Asked Him To Do The Engine Change For Me. Jesse Just Did A Clutch For A Customer Of Mine. He Is Extremely Happy!

X2
 

Red_Chili

Hard Core 4+
Joined
Aug 24, 2005
Messages
8,335
Location
Littleton CO
Okay, got all the wiring and fuel lines disconnected etc.

BUT I CAN'T GET TWO OF THE HEAD BOLTS OUT!!! I figured I'd better call it a night before I break something, #5 and #8 on the loosening order are WAY too tight! I afraid of rounding my 6 point impact socket or breaking my breaker bar :eek:

I might take an impact wrench to it in the morning...

Help?
Mine was rough too. #3 and #4 cylinders, exhaust side, perchance? :lmao:

The carbon builds up in the threads like none other. That is a hot zone. In fact, the Toyota OEM head has been known to develop a crack between #3 and #4, allowing coolant to weep into the exhaust but hard to find as it only happens when it is hot. Not sure the rate of occurrence, probably low, but that was enough to persuade me to switch to a Topline head with slightly more thickness in that coolant passage (also why I elected to use ARP head studs, but that is another $100 you probably don't need to spend). I am sure you don't need to do that, just mentioning why those head bolts gum up.

The few 22RE headgaskets I've seen have shown incipient breakdown around the #3 fire ring, between 3 & 4, exhaust side, also. The Chili had a failure there at 145K right after I bought it, and the block deck was corroded as a result. :( Change your coolant often, biggest cause besides overheating.

If they break, they break, but I doubt they will. You DO need to clear the threads either with a thread chaser (preferable to a tap, a couple thousandths smaller) or a used head bolt with a groove ground in it to clean the threads out. Of course, you will be using new head bolts. They are a single use item.

I too am a fan of Toy Red. Slightly less wear, though lots of folks run green with few issues. Also a fan of replacing the water pump around 120K or so, it won't last much longer than that and it is cheap insurance. A Toy reman is just fine.
 

Red_Chili

Hard Core 4+
Joined
Aug 24, 2005
Messages
8,335
Location
Littleton CO
You might consider soldering the crimped connections in the fuel injector harness too. Just sayin'.

FWIW, doing it yourself just makes you that much more sure of what is going on in there. These motors are easy to work on. Part of the joy really.

[edit] duh, you are carbed IIRC, right? Even simpler.
 

ATLR

0
Joined
Jun 20, 2008
Messages
23
Location
4295 Kipling St Wheat Ridge Co
Subzai, Offer still stans. If you do break a head bolt I have lots of used ones. If you need OEM parts I will sell them to you way cheeper than you can get them from S Toyota. I use a whole sale house that deals in only OEM but for $$$$ Less. ( These parts are made for toyota and some times come in Toyota boxes) Water pump from toyota 86.59 this is not with your dicount, From me the same pump 47.98 plus tax ( dam gov. ) This is a AISIN pump the same as toyota but rite from AISIN ( skip the mid man TOYOTA )
 

DaveInDenver

Rising Sun Ham Guru
Joined
Jun 8, 2006
Messages
13,960
Location
Grand Junction
In fact, the Toyota OEM head has been known to develop a crack between #3 and #4, allowing coolant to weep into the exhaust but hard to find as it only happens when it is hot. Not sure the rate of occurrence, probably low, but that was enough to persuade me to switch to a Topline head with slightly more thickness in that coolant passage
Just a point of clarification, I understood this crack to usually develop between the #4 and #3 spark plug holes. Is that not the case or can the crack develop pretty much anywhere on the exhaust side of that corner?
The few 22RE headgaskets I've seen have shown incipient breakdown around the #3 fire ring, between 3 & 4, exhaust side, also. The Chili had a failure there at 145K right after I bought it, and the block deck was corroded as a result. :( Change your coolant often, biggest cause besides overheating.
Good advise, coolant with lots of combustion crud and acid and pieces of metal is gonna be much much worse than using whatever green, red, purple or blue coolant.
If they break, they break, but I doubt they will. You DO need to clear the threads either with a thread chaser (preferable to a tap, a couple thousandths smaller) or a used head bolt with a groove ground in it to clean the threads out. Of course, you will be using new head bolts. They are a single use item.
The 3VZ head bolts are torque-to-yield, 22R are not and so I guess there is some debate as to technically whether they are single use items or not. The FSM does not show them as non-reusable since they didn't put that little black diamond one-time use item flag. But obviously if they are all nasty and corroded, then you shouldn't reuse them as they probably won't take the torque and if the threads do not rotate smoothly in their seats, the torque on the HG won't be even. Also they are not expensive, even from the dealer, about $5 at the Rising Sun price. You can get a set from Ted for like $30, even. So no reason to re-use an important part like that, but I think if you had a pile of 20 and could choose the best 10 to clean up, they'd be fine.
 
Last edited:

subzali

Hard Core 4+
Joined
Aug 22, 2005
Messages
10,641
Location
Denver CO
You might consider soldering the crimped connections in the fuel injector harness too. Just sayin'.

FWIW, doing it yourself just makes you that much more sure of what is going on in there. These motors are easy to work on. Part of the joy really.

[edit] duh, you are carbed IIRC, right? Even simpler.

'91 is EFI dood...:hill:

Just talked with Jesse for a few minutes - gonna try to bump up the pressure on the impact and see if I can break a head bolt :hill:
 

Red_Chili

Hard Core 4+
Joined
Aug 24, 2005
Messages
8,335
Location
Littleton CO
Not all of 'em. Carb could be gotten then and even later.
Well anywho, think about soldering and sealing them crimps.
 

DaveInDenver

Rising Sun Ham Guru
Joined
Jun 8, 2006
Messages
13,960
Location
Grand Junction
'91 is EFI dood...:hill:
Not always. Pretty sure you could still get a 22R in 1991, depending on configuration. I think the first year that all Toyota trucks in all 50 states were EFI was 1992. I've seen a white, regular cab, 2WD base truck with a carb still which was a 1991 (or maybe 1990, the memory isn't good). Yours is an XtraCab and SR5, so it would have come with a 22R-E automatically, though.
 

Evrgrnmtnman

Trail Ready
Joined
Aug 22, 2005
Messages
392
Location
Bailey
Yea, I think the 2WD was still available with a Carb. Just don't come across them much out here in Colorado.
2.4 vs. 2.7 Obviously more valves per cylinder, I guess more HP, any other advantages one over the other?
 
Last edited:

Red_Chili

Hard Core 4+
Joined
Aug 24, 2005
Messages
8,335
Location
Littleton CO
2.7 was not until '95.5. Never with a carb, that was 22R only.
It (3RZ) is a decent motor with a manual behind it, makes about the same power as a 3.0 3VZE, but with only four cylinders and much better economy and reliability. About as bulletproof as a 22RE I hear.
With an auto behind it, it sucks as bad as the 3.0 with an auto. Which is bad. DAMHIK.
I understood this crack to usually develop between the #4 and #3 spark plug holes.
As far as the crack between #3 and #4, what I heard (from Ted, who gave input to Topline to make the aluminum thicker than OEM), was that it leaked coolant into the exhaust. Aluminum gets thin there. Don't know about a crack between the spark plug holes, that would be some crack!
:lmao:
You mean between #2 and #3? Not heard of that.
 

subzali

Hard Core 4+
Joined
Aug 22, 2005
Messages
10,641
Location
Denver CO
Update:

My truck is a Deluxe I believe, I don't have a tach or a voltmeter...didn't know about carb'ed engines that late, but then again I never claimed to be a minitruck guy...;)

My sister's '97 with the 2.7 - I love that Taco (4x4)! Manual tranny, that thing has great torque and gets good mileage and power! Is it dual overhead cam too it seems like my memory is telling me?

I got all the head bolts out without breaking any. The two that were stuck were a) the one between #1 and #2 on the exhaust side and b) the one between #3 and #4 on the exhaust side. I had been hitting them with some PB Blaster (for what it was worth, probably not much :rolleyes:) and the impact gun for a while. I called Jesse and he said to crank up the psi on the compressor to about 125. If it ended up breaking a bolt then that would be good because it would release pressure on the head and if it broke down the shaft a bit then the head would slide off fairly easy. This is because most of what holds the head bolts stuck there is corrosion and buildup in the head, not in the threads in the block. But I got lucky, I cranked on the breaker bar a little bit harder and realized that the bolt was spinning ever so slightly, and I wasn't just rounding the tops of the heads off. Whew. They were pretty gummed up.

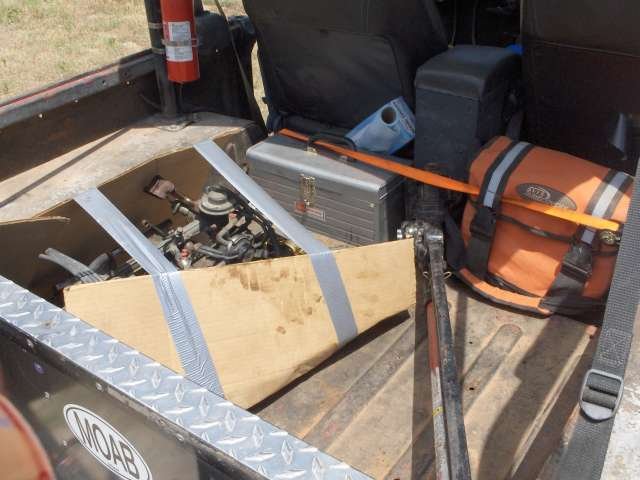
So I then tossed the head and intake into the new parts chaser (below) ;) and ran up to Jesse's shop. What a great guy! Thanks for the tip CJ, Jesse spent like an hour and a half helping me with the allen head to get the intake off, then helped me clean stuff up a little bit, and gave me lots of tips and advice! Standup! :thumb:

I then took the head over to Gunn Automotive, used those guys for the Cruiser 1 1/2 years ago, really like their shop! Hopefully I'll get it back Tuesday. At first glance it didn't look too bad but we'll see what they say once they get it apart. Probably replace springs, I doubt any valves will need to be replaced, maybe #4 exhaust if any. This head has never been off, the "whiskers" as Jesse called them are still there from the factory. That was expected.

Anyway, I broke the timing chain guide (long one) getting the head off, so I'm going to have to pull the timing chain apart again, and I think it dropped in the oil pan, so I'm going to have to pull that again to fish it out. Sigh. I'm replacing the water pump though, have a new one of those on hand now thanks to Jesse.

So anyway either Sunday night or Monday night I'm going to start hitting it hard again, try to make this as quick and painless as possible. Going into the timing chain isn't all that bad, as there were things I could have and should have done better with that job, that I know about now and am going to do right this time. It was fun driving the 40 Friday and looking forward to driving it for the first part of this week, but the red truck is a lot nicer! 14mpg in the 40 isn't quite 27mpg in the red truck!
 

Attachments

  • HPIM3578.jpg
    HPIM3578.jpg
    36.9 KB · Views: 185
  • HPIM3579.jpg
    HPIM3579.jpg
    54.5 KB · Views: 215

subzali

Hard Core 4+
Joined
Aug 22, 2005
Messages
10,641
Location
Denver CO
Question: when changing the fuel filter, do the bolts need to be in a certain spot so the holes drilled in them will allow fuel to flow? Or is the fitting designed to allow fuel flow no matter the orientation of the bolt, so I can just crank it on tight?
 

Red_Chili

Hard Core 4+
Joined
Aug 24, 2005
Messages
8,335
Location
Littleton CO
Banjo bolts work no matter the orientation. Use the new copper washers that should have come with the fuel filter, or anneal the old ones. Watch the heat... DAMHIK. :rolleyes:
 

Hulk

RS Webmaster
Staff member
Cruise Moab Committee
Joined
Aug 22, 2005
Messages
17,371
Location
Centennial
...or anneal the old ones.

anneal • \uh-NEEL\ • verb link

*1 : to make (as steel or glass) less brittle by heating and then cooling

2 : strengthen, toughen

Example Sentence:
The glassmaker shaped the vase with quick, fluid movements and then placed it in the oven to anneal the glass.

Did you know?
If you were looking for a saying to apply to the word "anneal," it might be "everything old is new again." The word was originally associated with one of the oldest technologies of humankind: fire. It derives from the Old English word "onælan," which was formed from the Old English root "āl," meaning "fire." In its earliest known uses, which date from around the year 1000, "anneal" meant simply "to set on fire." That sense has become obsolete, however, and nowadays "anneal" is associated with a much more recent technological development. It has come to be used in the context of DNA research, in reference to the heating and cooling of double-stranded nucleic acid.​


Hey, I learned a new word today! Thanks!
 

DaveInDenver

Rising Sun Ham Guru
Joined
Jun 8, 2006
Messages
13,960
Location
Grand Junction
And you may ask how does one anneal a copper washer? I use my propane torch, a pair of pliers, one can of beer (Oskar Blues is preferred for annealing) and a cup of water.

Hold the washer around it's edges (I figure I want a minimum amount of material under the plier's grip, my thinking is more even heating). If you have a big steel or ceramic plate, you could set the washer on that and heat, your choice.

Hold pre-opened beer in left hand (assuming you are right handed), hold washer in flame with right and heat the copper until it glows dark orange or almost cherry and enjoy beer at reasonable pace. It'll only take a minute to heat up, but using the beer timer will guarantee you have it hot enough (not to mention keeps operator cool). BTW, technically it needs to be about 775F or hotter, but you know it's just a washer so no one's judging on perfection. Just as an aside, a propane torch flame burns at about 1,800F and so it's technically possible to melt the copper if you hold it right at the point of the blue flame. But this unlikely unless you are a really slow drinker, don't shake at all or you live in Phoenix where the ambient temp is just below the melting point of copper anyway.

Once it's there, let it cool. If you are in a hurry, throw it in the water, doesn't matter since (unlike steel) in your garage you are not gonna cool it fast enough to change its characteristics and cooling slow will not make a difference. Go for convenience and throw 'er in the water and be done. If the copper object is large, be mindful of the happy super-heated water that may jump out of the cup.

Presto, what was once hardened and squished will be pliable again, ready to re-squish next time. I just used new copper fuel line washers, but our old Civic had a copper washer on it's oil drain plug and I didn't like the idea of spending the money for a new one every 3,000 miles.
 

subzali

Hard Core 4+
Joined
Aug 22, 2005
Messages
10,641
Location
Denver CO
timing stuff - getting the crank and cam aligned. If the crank pulley is on TDC and the cam is "up" - meaning the notch in the cam gear is up - then that's always the correct time right? What happens if I'm a tooth off on the cam gear? The dimple isn't EXACTLY straight up and down, it's on the right slightly, but if I jump a tooth then it'll be slightly on the left of straight up. :confused:

As long as the crank is "up" and the cam is "up" there's no way for me to get it 180 degrees off or anything right?
 
Back
Top