• REGISTER FOR RISING SUN'S 2ND BEST EVENT: THE COLOYOTA EXPO. IT'S ONLY $5, DUDE.
    → No extra fee to bring yer extra stuff and sell it at the swap meet.
    → It's not Cruise Moab, but it's way cheaper and you can sleep in your own bed.
    Businesses: Still time to register your company to be an exhibitor at the event, too!
    Click here to register today..

FJ140 Build

Capriblue45

Rising Sun Member
Joined
May 28, 2023
Messages
531
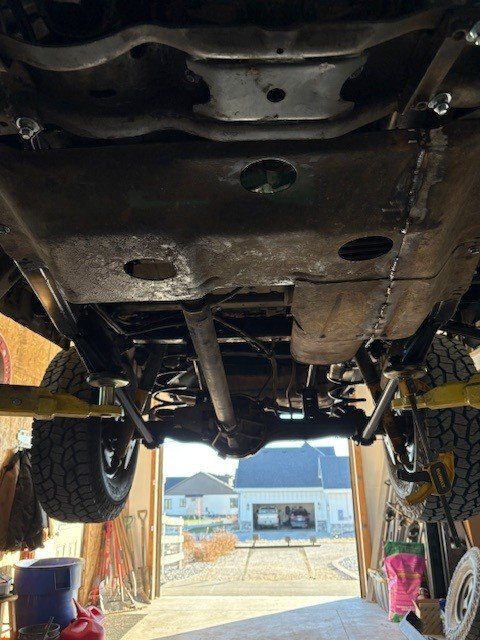
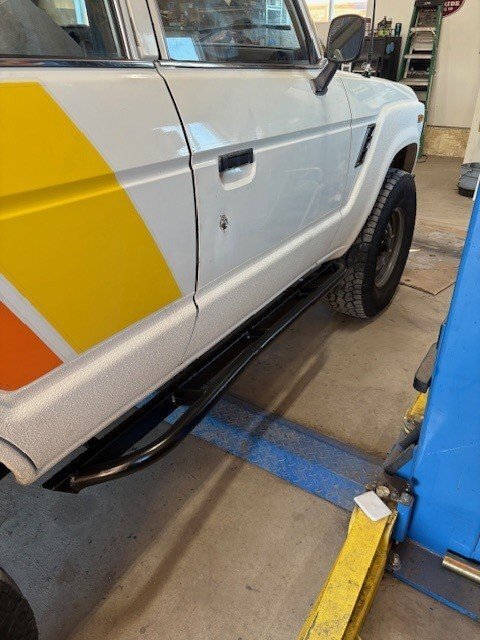
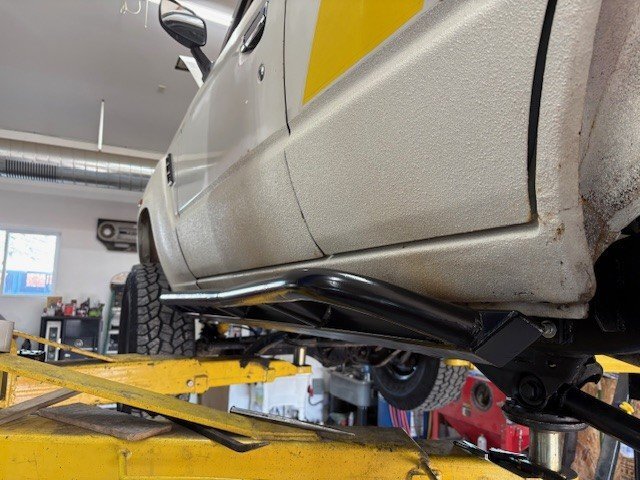
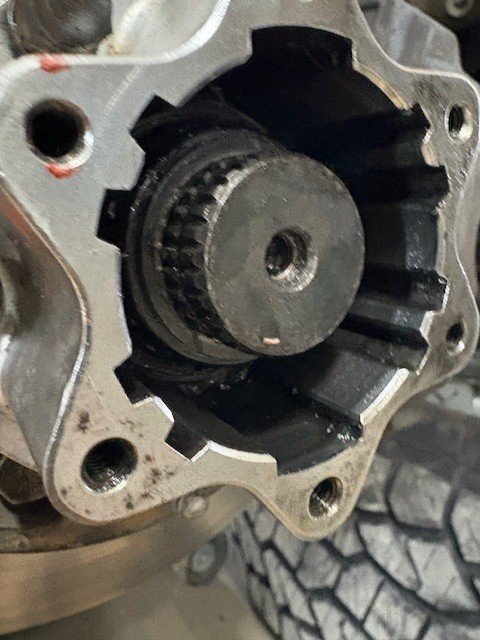
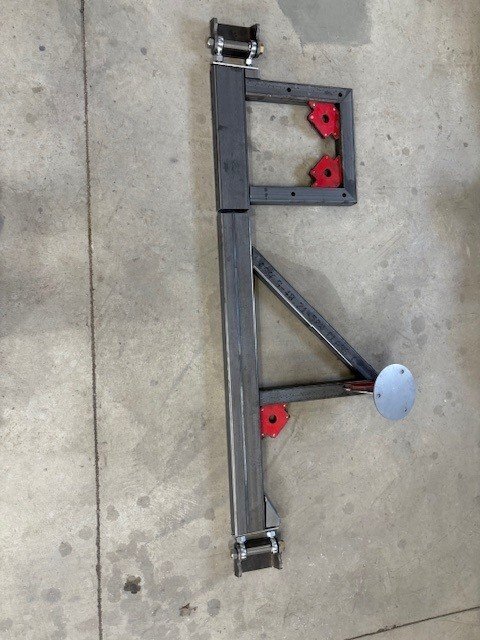
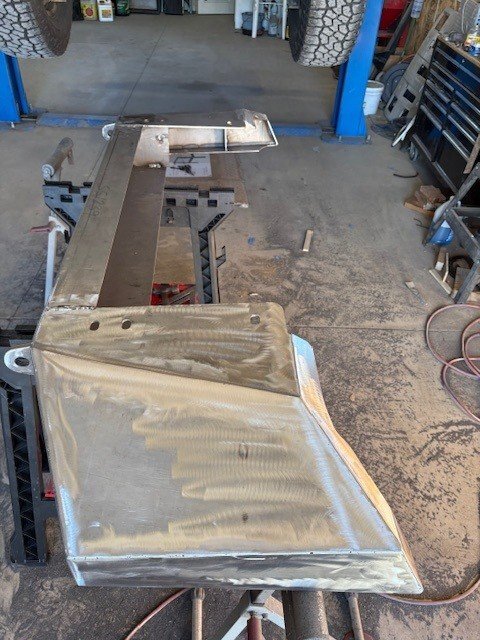
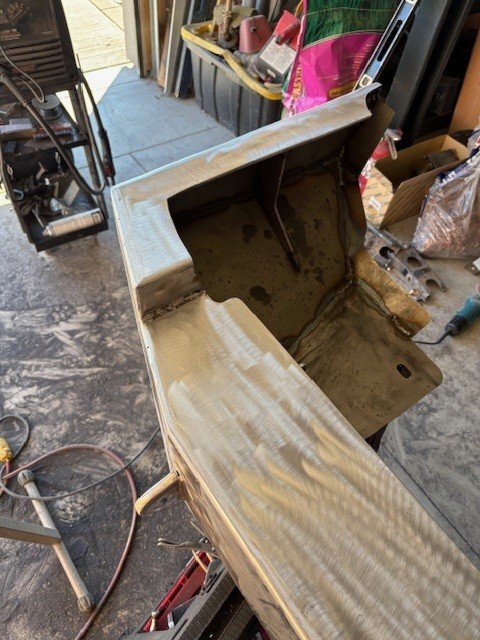
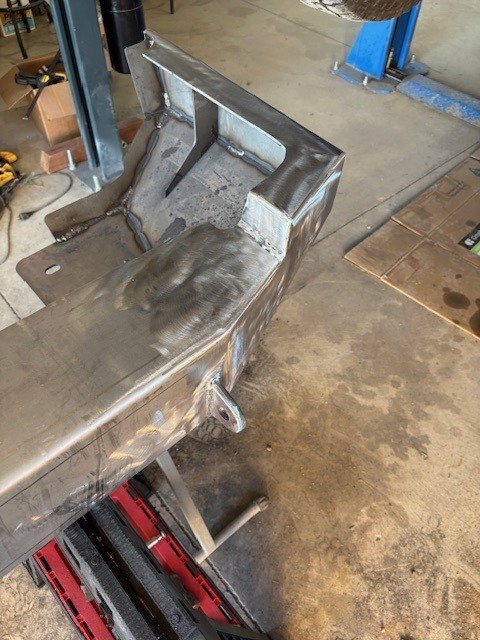
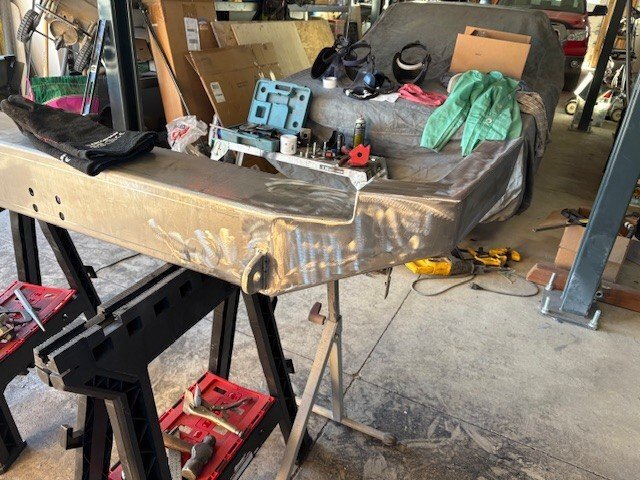
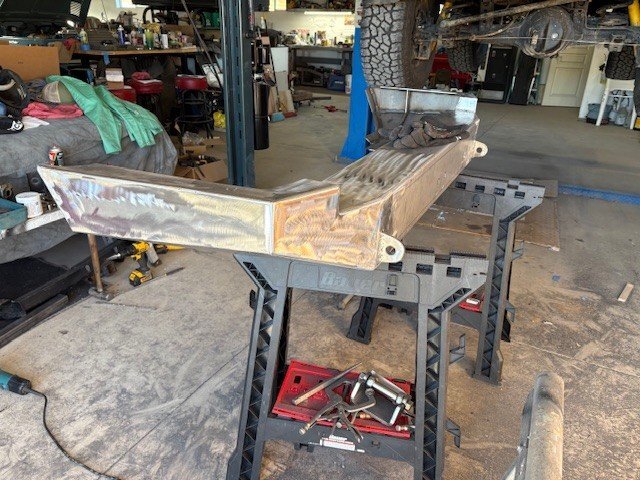
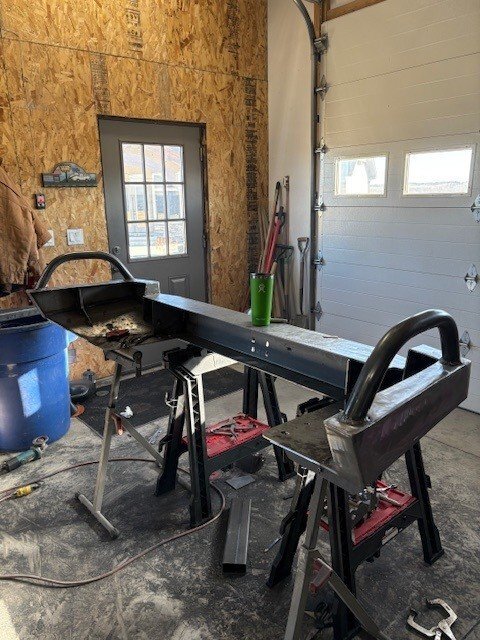
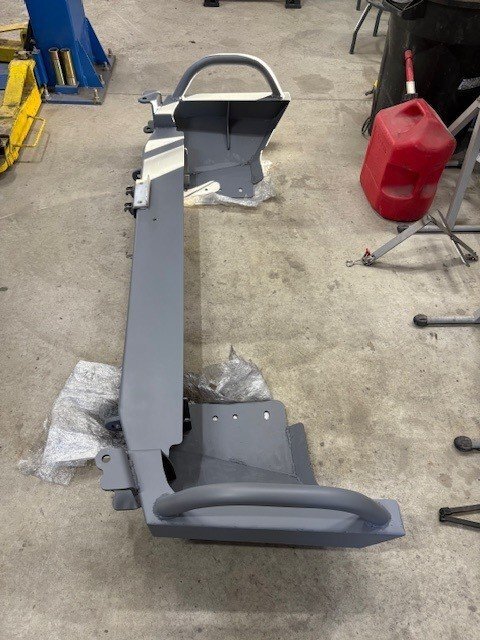
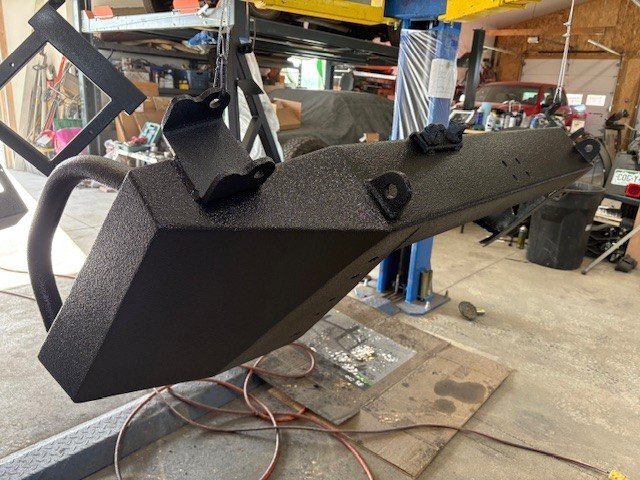
Got the sliders modified to fit the 80 frame over the past 2 days. Also took the opportunity to roll them up at a 20 degree angle. Also got the front driveshaft installed and the 60 series bash plate modified to fit the 80 series chassis.

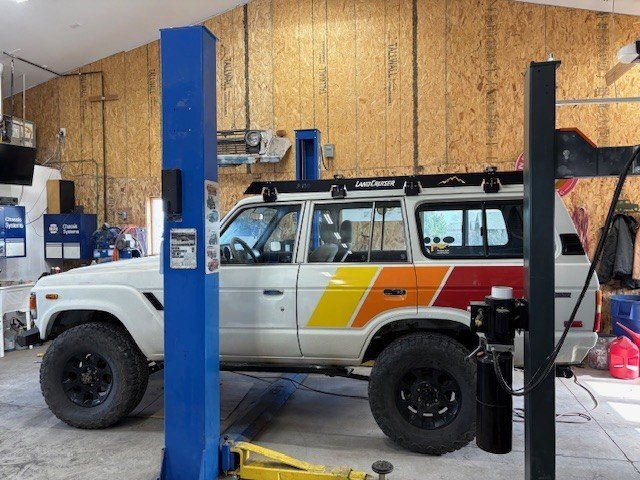
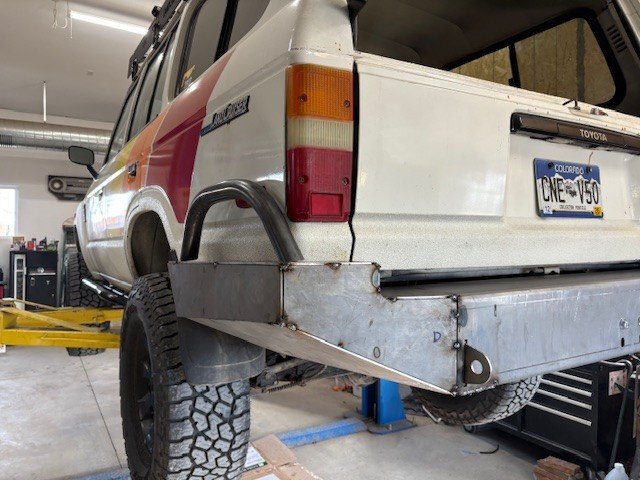
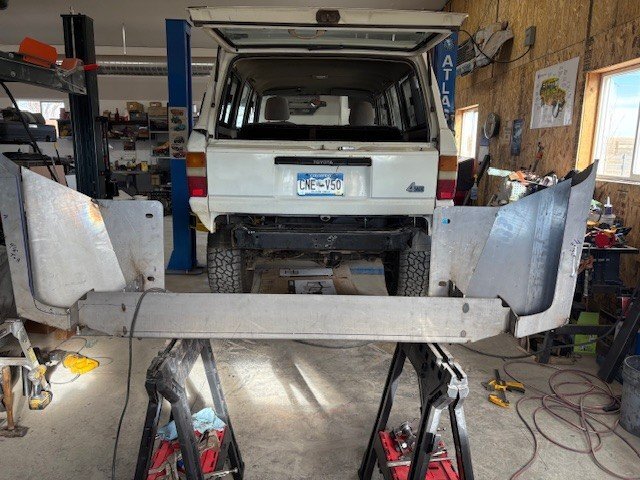
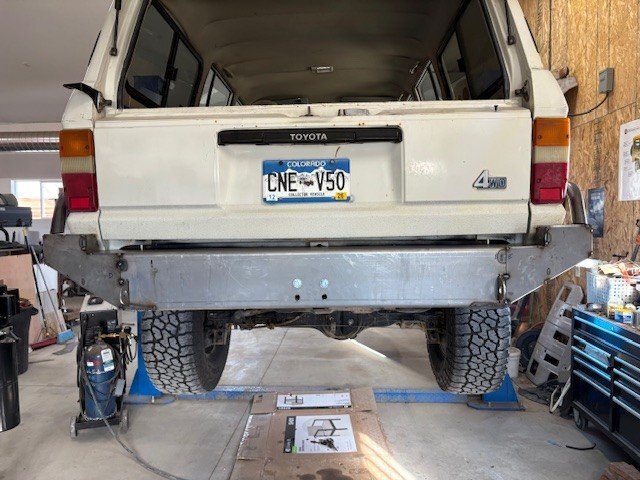
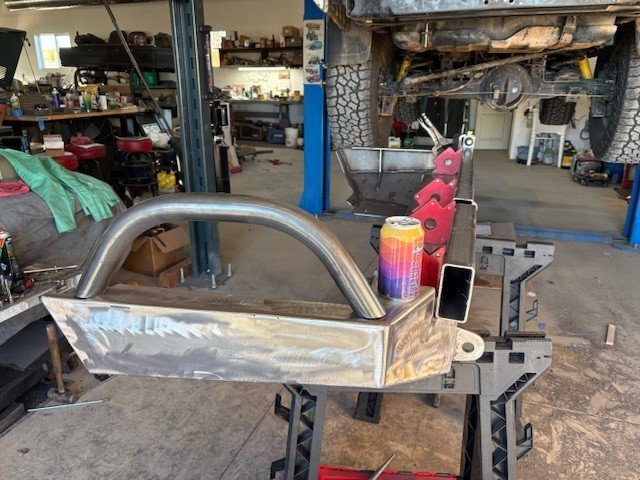
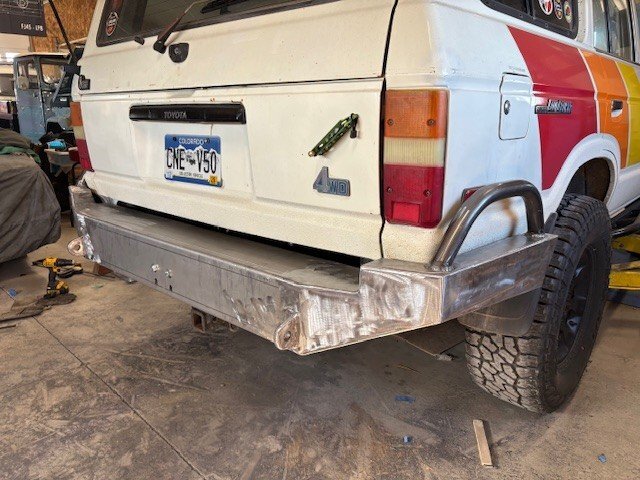
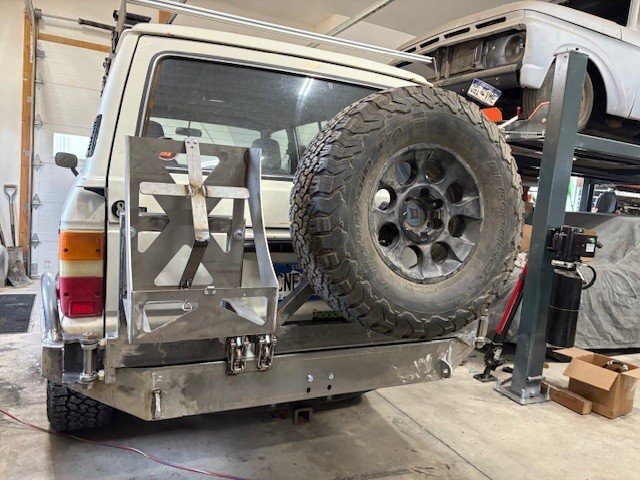
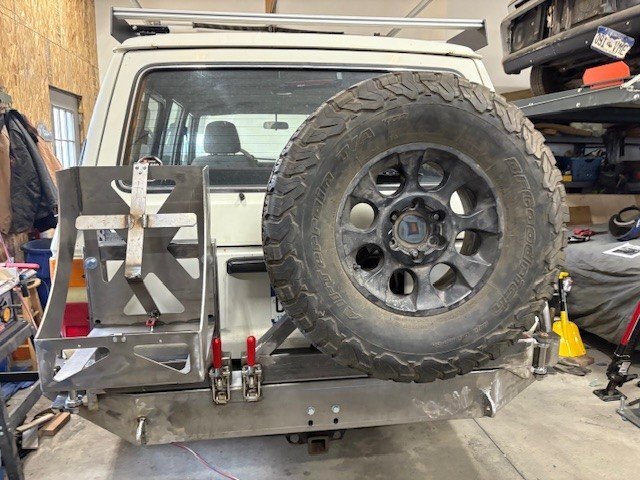
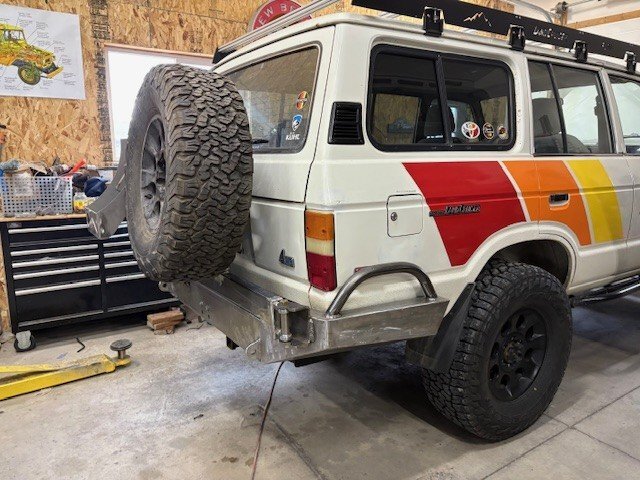
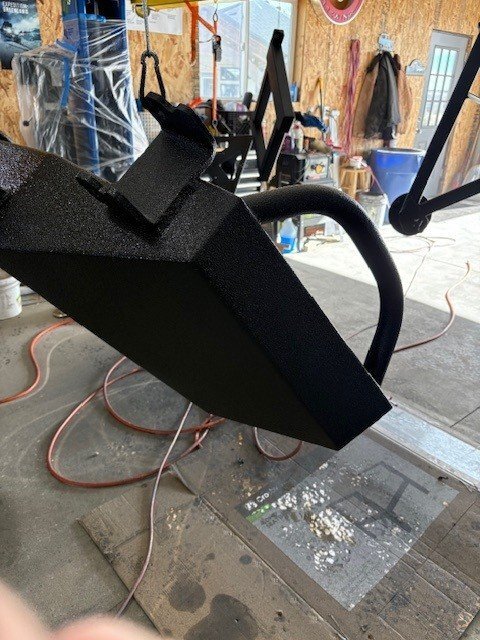
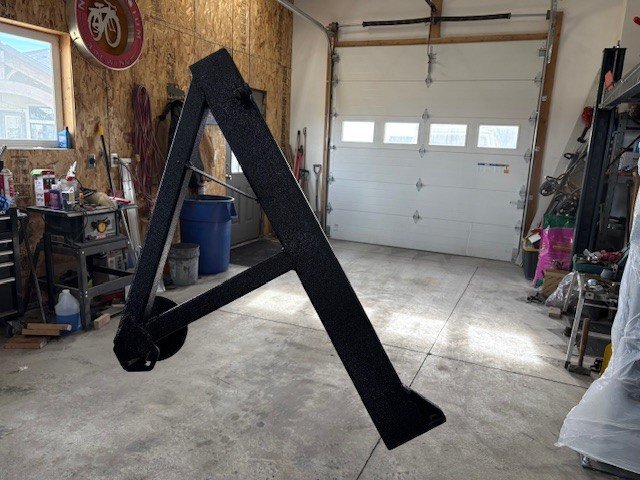
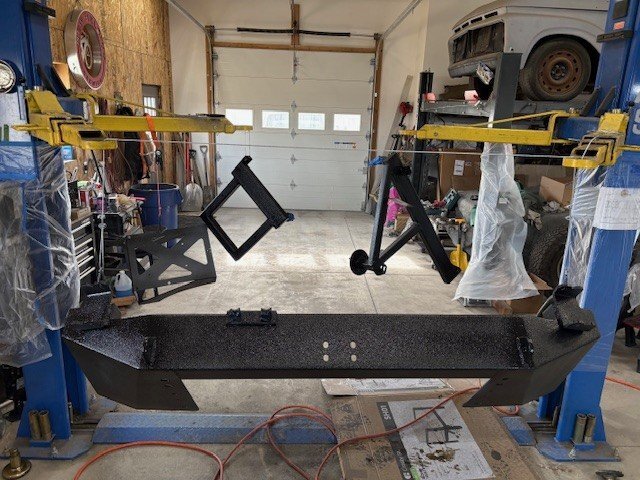
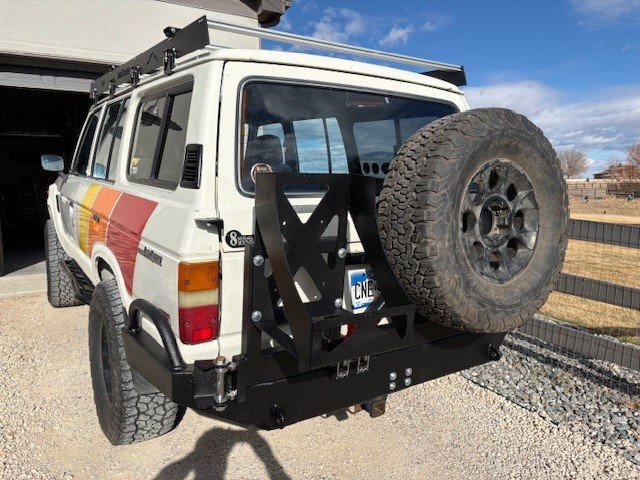
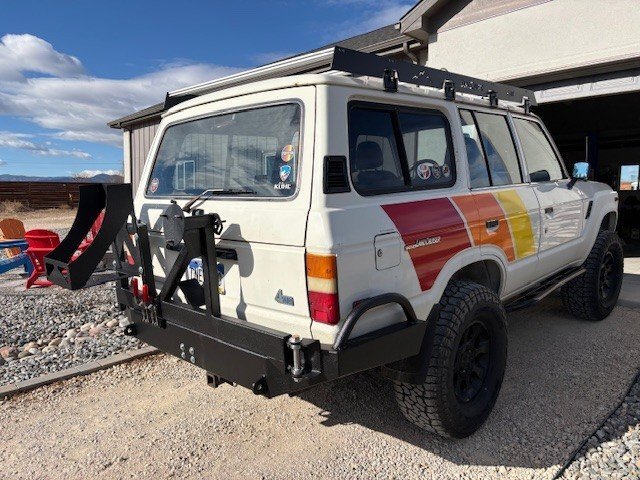
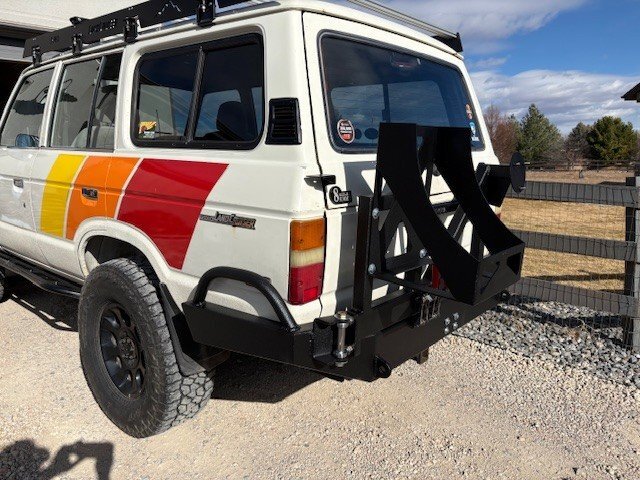
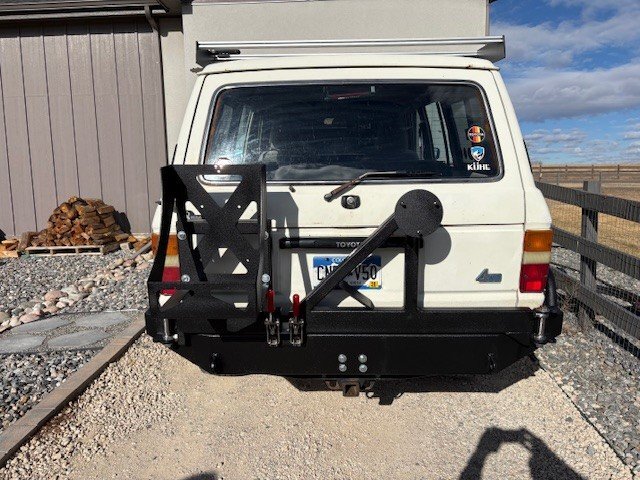
I have been looking at rear bumpers with swing outs so I can get the spare out of the back of the truck. In measuring the 2 bodys I think a 80 series bumper might be my best solution since the frame is the 80. I was somewhat surprised to find that the 60 and 80 have the same width tailgate.
 

Attachments

  • skid plate.jpg
    skid plate.jpg
    81.7 KB · Views: 158
  • slider 5.jpg
    slider 5.jpg
    73.1 KB · Views: 105
  • sliders.jpg
    sliders.jpg
    82 KB · Views: 93

Capriblue45

Rising Sun Member
Joined
May 28, 2023
Messages
531
Pulled the Assin hubs off the 60 axle this morning and regreased them and installed on the 80 front axle. I had to cut in a second groove 13mm back from the end of the shaft to make them work. In doing research on Mud I found a link where a member posted their pictures of their part time 80 conversion. They used worm drive hose clamps on the axle as a guide for the 1/8" wide groove for the circlip. I followed this method with my 4" grinder with a 1/16" cut off wheel and it was a breeze. Wish I could claim this as my idea as it's brilliant.
 

Attachments

  • lock out 2.jpg
    lock out 2.jpg
    76.8 KB · Views: 82
  • lock outs.jpg
    lock outs.jpg
    80.4 KB · Views: 97

Capriblue45

Rising Sun Member
Joined
May 28, 2023
Messages
531
The front of the 140 was drooping under the weight of the bumper and winch so I swapped out the front springs for a stiffer set. I also took off the 32's and put the 315/70/17 BFG's back on. It looks much tougher this way.

I decided to give the old girl a Christmas present and ordered a new pair of shoes and a Coastal offroad dual swing rear bumper today, damn black friday pop ups. Oh well she should be ready for cruise Moab next April.
 

Attachments

  • 35's.jpg
    35's.jpg
    95 KB · Views: 101

Capriblue45

Rising Sun Member
Joined
May 28, 2023
Messages
531
Locker wiring complete, thanks to @DaveInDenver for some assistance on completing this. The rig is now running a balanced desmogged 2F with shaved head, and a header. It also has the 4:1 low range Sumo gears in the split case and factory locked 80 series axles, suspension and chassis.

Next on the list is welding out the Coastal Offroad dual swing out rear bumper. It is scheduled to deliver by the end of the week, but due to the holidays it will be after the first of the year before it gets started. Can't wait to wheel this thing at Cruise Moab in April.
 

Attachments

  • magic dial 60.jpg
    magic dial 60.jpg
    63.5 KB · Views: 86

Capriblue45

Rising Sun Member
Joined
May 28, 2023
Messages
531
got about 1/2 the parts for the Coastal Offroad bumper. I have no idea why FEDEX would ship some of these direct to Denver while 2 of the boxes routed through Memphis. They are based in BC Canada?? Still missing the main bumper and the pieces to make the dual fuel can basket.
 

Attachments

  • rear swing outs.jpg
    rear swing outs.jpg
    77.4 KB · Views: 67

Capriblue45

Rising Sun Member
Joined
May 28, 2023
Messages
531
Got the rear bumper tacked up on Saturday. I will test fit it this morning and make sure everything is still aligned then weld out and grind smooth. I plan to shorten the hoops on the sides to just below the markers so they can be removed to change bulbs in the future. I have been very happy with the fit of the precut pieces with this bumper.
 

Attachments

  • rb 2.jpg
    rb 2.jpg
    77.4 KB · Views: 61
  • Rear bumper.jpg
    Rear bumper.jpg
    92.6 KB · Views: 65
  • rb 3.jpg
    rb 3.jpg
    81.9 KB · Views: 52

Capriblue45

Rising Sun Member
Joined
May 28, 2023
Messages
531
After 8 hours of welding and grinding I remember why I went into management in my 30's. This is hard work, but I'm liking the results.. Needing a few beers and Ibuprofen so I can keep at it tomorrow.
 

Attachments

  • RB 4.jpg
    RB 4.jpg
    90.9 KB · Views: 57
  • RB 5.jpg
    RB 5.jpg
    92.2 KB · Views: 54
  • RB 6.jpg
    RB 6.jpg
    86.9 KB · Views: 59
  • RB 7.jpg
    RB 7.jpg
    102.7 KB · Views: 59
  • RB 8.jpg
    RB 8.jpg
    102.8 KB · Views: 49
  • RB 9.jpg
    RB 9.jpg
    97.3 KB · Views: 54

Capriblue45

Rising Sun Member
Joined
May 28, 2023
Messages
531
I finished up the main bumper today, then ran to my local paint supply store and got some black Raptor so I can coat everything once the swing outs are completed. Very happy how the bumper fit given I put a bumper designed for an 80 series on a 60. It seemed to be the best choice given the 80 series chassis. I decided not to cut down the hoops as they looked out of scale and the marker bulbs can be changed by removing the interior panel. This thing is a beast of a bumper built out of 3/16" steel.
 

Attachments

  • RB 12.jpg
    RB 12.jpg
    83.6 KB · Views: 50
  • RB 11.jpg
    RB 11.jpg
    87.3 KB · Views: 54
  • RB 10.jpg
    RB 10.jpg
    96.9 KB · Views: 54

Capriblue45

Rising Sun Member
Joined
May 28, 2023
Messages
531
Got the main bumper and the fuel can swing out final sanded and in primer today. I'll give the primer a few days to off gas then prep for black Raptor and hopefully mount the new bumper for the last time. I also fabricated a mount for the high lift jack to store behind the spare.
 

Attachments

  • RB 13.jpg
    RB 13.jpg
    85 KB · Views: 50
  • RB 14.jpg
    RB 14.jpg
    80.9 KB · Views: 56
  • RB 15.jpg
    RB 15.jpg
    93.7 KB · Views: 47
  • RB 16.jpg
    RB 16.jpg
    94.2 KB · Views: 53
  • RB 17.jpg
    RB 17.jpg
    92.8 KB · Views: 54

Capriblue45

Rising Sun Member
Joined
May 28, 2023
Messages
531
Love that bumper. Jealous of that extra side protection.
I have been very happy with the quality and fit of this DIY bumper. I decided to go with this one as it allowed me to adapt it to the 60 body with the 80 chassis. The added side protection is a definite bonus as this is my primary wheeling rig.
 

Capriblue45

Rising Sun Member
Joined
May 28, 2023
Messages
531
Got the bumper sprayed with 2 coats of black raptor today. I will give it 3 or 4 days to cure then mount on the 140 for hopefully the last time. I also installed the Tuffy center console that arrived this past weekend.

Getting close to having everything ready for Cruise Moab.
 

Attachments

  • RB 21.jpg
    RB 21.jpg
    93.8 KB · Views: 54
  • RB 20.jpg
    RB 20.jpg
    94.8 KB · Views: 54
  • RB 19.jpg
    RB 19.jpg
    83.6 KB · Views: 43
  • RB 18.jpg
    RB 18.jpg
    97.2 KB · Views: 52
  • center console.jpg
    center console.jpg
    87 KB · Views: 52

Capriblue45

Rising Sun Member
Joined
May 28, 2023
Messages
531
The rear bumper is complete and on the truck. It is going to be nice to not have that 35" BFG in the back any more. The bumper and the hitch look to give me great protection for the relocated 80 series fuel tank.
 

Attachments

  • RB 27.jpg
    RB 27.jpg
    99.5 KB · Views: 57
  • RB 26.jpg
    RB 26.jpg
    90.3 KB · Views: 52
  • RB 25.jpg
    RB 25.jpg
    97.4 KB · Views: 57
  • RB 23.jpg
    RB 23.jpg
    101.3 KB · Views: 48
  • RB 22.jpg
    RB 22.jpg
    99.5 KB · Views: 53

Capriblue45

Rising Sun Member
Joined
May 28, 2023
Messages
531
With the upcoming road trip to Moab I decided I needed to add a bit more sound deadening around the trans tunnel. Above 3,000 RPM the gear whine from the Sumo reduction gears was a little hard on the hearing. Did a double layer of sound mat on everything upfront. It has knocked down the noise quite a bit and should make the drive more bearable.
 

Attachments

  • sound mat 2.jpg
    sound mat 2.jpg
    108.5 KB · Views: 40
  • sound mat.jpg
    sound mat.jpg
    105.9 KB · Views: 62

KC Masterpiece

Hard Core 4+
Joined
May 4, 2019
Messages
2,089
A bit of foam on top of the killmat style deadening will go a long way to help with noise. I noticed a big difference vs just kilmat. I could not get the heavy stuff I used for the floor to work well on the trans tunnel.


This stuff worked great for me. Keeps the heat down too. I have some extra if you are ever driving through.
 

Capriblue45

Rising Sun Member
Joined
May 28, 2023
Messages
531
I took the 140 to the CM pre-run this past weekend and it worked flawlessly over the 950 miles of highways and trails. I was able to keep pace with the traffic up I 70 as well as scramble up the hard lines on 7 mile rim. The only minor issue is a bit of tire rub on the drivers rear when stuffed but that should get resolved by rolling over the pinch weld on the bottom of the wheel arch. I am delighted at the final results and looking forward to many years of enjoying the trails with this rig.
 

Attachments

  • gore pass.jpg
    gore pass.jpg
    146.4 KB · Views: 55

rover67

Rising Sun Member
Joined
Nov 1, 2007
Messages
9,731
Location
Boulder, Co
awesome Mike, that's a great feeling. So excited for the successful shake down run!!!
 

timmbuck2

Land Use Coordinator
Staff member
Cruise Moab Committee
Joined
Oct 5, 2005
Messages
5,864
Location
Denver
I got to follow @Capriblue45 around on Saturday when we ran Deadman, and it was a pleasure to watch that rig perform!! Very nice job Mike!!
 

Capriblue45

Rising Sun Member
Joined
May 28, 2023
Messages
531
awesome Mike, that's a great feeling. So excited for the successful shake down run!!!
Thanks Marco, I'm just glad that I could carry on at least a part of your 80. The lockers worked perfect and I played with them on a few obstacles just to become familiar with their capability. I told several people at the run that a locked 80 series chassis is like cheating on the trails.
 
Back
Top