Custom Off Road Camp Trailer

Brucker

Hard Core 4+
Joined
Jul 10, 2013
Messages
782
Location
Broomfield, CO
***Disclaimer: This project was completed earlier this year and is currently out being used and loved by the owners.***

Recently, I was tasked to design and build a few parts for a custom camp trailer being built off of a late 40's/early 50's era Bantam TC3 utility trailer. These parts are to include a water resistant, self lifting, lockable roof/lid (yes, the tailgate will still open without having to open the top), a custom scissor lift assembly for a rooftop tent (Tuff Stuff RTT with annex room), as well as reinforce the main structure of the trailer (yes, an exo cage on a trailer) to handle the additional weight. Also fix an issue with the aftermarket hitch (Lock N Roll), and lengthen the factory support leg to compensate for the height difference after the client did an axle flip and larger tires.

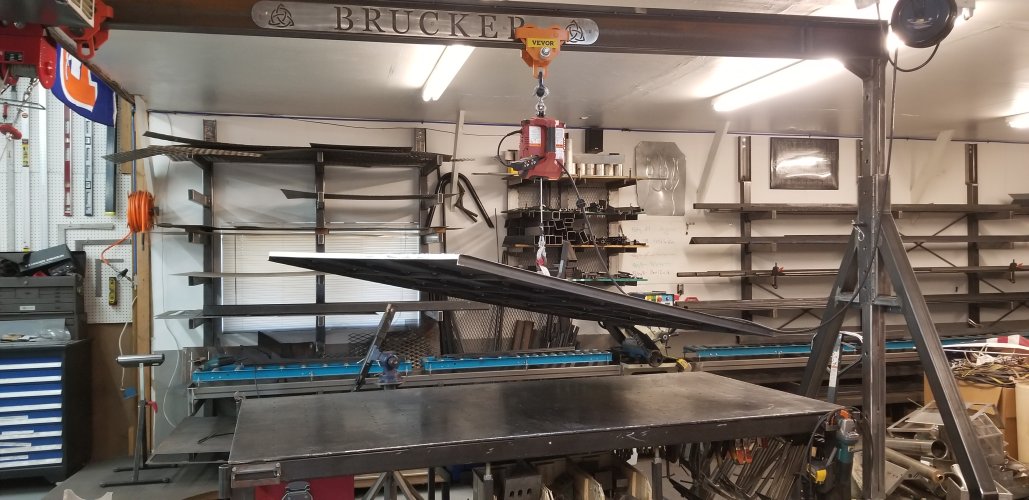
Trailer and RTT were brought into the shop. The RTT was then put on a shelf till it's needed. The trailer was inspected and a game plan was formed.

20221109_152801.jpg

20221109_155820.jpg

20221109_155709.jpg
 

Brucker

Hard Core 4+
Joined
Jul 10, 2013
Messages
782
Location
Broomfield, CO
First order of business was to lengthen the factory support leg. Client wanted to keep the factory components and looks as much as possible. So we designed and built a simple extension bracket that offered just that.

Existing support leg, just a tad short:

20221109_155416.jpg

20221114_174838.jpg


Removed:

20221114_225647.jpg

20221114_225712.jpg


New extension:

20221115_135015.jpg

20221115_135023.jpg

20221115_135409.jpg


Reassembled:

20221115_135932.jpg

20221115_135904.jpg

20221115_135835.jpg
 

Brucker

Hard Core 4+
Joined
Jul 10, 2013
Messages
782
Location
Broomfield, CO
With the main framework welded up, I added some 1.5" channel along the front edge and sides to create a sturdy lip and some eye appeal to the structure. The rear gets left alone so the tailgate is able to open and close without lifting the top.

20221115_165209.jpg

20221116_133053.jpg

20221116_130924.jpg


Test fitting:

20221117_201503.jpg

20221117_201519.jpg

20221117_201530.jpg
 

Brucker

Hard Core 4+
Joined
Jul 10, 2013
Messages
782
Location
Broomfield, CO
Skinning the top is always a long process. Heat from welding will easily warp the structure if not done correctly. I cut a sheet of 16ga to the exact measurements needed. Then start the tedious process of welding it up solid.

20221127_145636.jpg

20221127_173308.jpg

20221130_123418.jpg

20221201_175648.jpg


With the welding complete, everything gets sanded smooth. Amazing how much metal dust one can create in a short amount of time

20221202_160345.jpg

20221202_161312.jpg


Now that the top is all cleaned up, I use the shop built rolling gantry crane to help with the heavy lifting. Test fit of the top and everything is aligned perfectly. And the top is still as straight as an arrow.

20221202_162317.jpg

20221202_162517.jpg

20221202_162532.jpg
 

Attachments

  • 20221202_155957.jpg
    20221202_155957.jpg
    2.5 MB · Views: 30

Brucker

Hard Core 4+
Joined
Jul 10, 2013
Messages
782
Location
Broomfield, CO
The Lock N Roll hitch that was installed at some point, was done so poorly. It was welded in at an angle and wasn't square to the trailer. So I dismantled the welded and bolted together assembly and cleaned everything off of the actual hitch. I will rebuild this structure correctly at a later date. I then removed the front toolbox so I could properly align the frame rails again.

20221121_141659.jpg
20221121_142354.jpg
20221201_175628.jpg
20221204_165631.jpg

20221208_143811.jpg

20230203_154114.jpg
 

Brucker

Hard Core 4+
Joined
Jul 10, 2013
Messages
782
Location
Broomfield, CO
I am designing and building this as I go. Client dropped off the trailer and tent, told me what he wanted as a final outcome, and is leaving the rest up to me. Because of this, I haven't ordered in all the necessary parts as I still am unsure of exactly what I will need. So I decided to jump into designing and building the scissor lift assembly so I can figure out some of what's needed and get it ordered.

Decided to build a simple rectangular upper frame that the tent will mount to. And that the rest of the scissor assembly will be attached to. A center bar will be needed for the jack that will be used for the actual lifting. The client wants a manually operated jack so that the setup will work anywhere, anytime, without power or access to tools. I tried to convince them that a liner actuator and a deep cycle battery charged when hooked to the vehicle and even possibly some solar panels. But that was a no go. They really liked the idea of using a scissor style automotive jack, so I figured out some heights and ordered one in. You'll notice the crank will accept a 19mm socket. This will allow me to make this semi-powered by using an electric impact. Then the client could do the same if they so desire, or they can crank on it by hand.

20221209_162316.jpg

20221209_162327.jpg

20221209_162335.jpg


I figured out the size of top framework, then cut the needed pieces and welded them together. As with everything on this build, I want this assembly to be fairly lightweight but it still need to be sturdy and durable. This needs to support an RTT along with 2-3 people and possibly a dog or two in the tent.

20221206_164954.jpg
20221208_140653.jpg

20221208_140707.jpg


And just to appease my own curiosity, I set up the frame on the jack to get a better sense of what the next steps I should take will be.

20221209_162550.jpg
20221209_164119.jpg
20221209_164130.jpg
 

Brucker

Hard Core 4+
Joined
Jul 10, 2013
Messages
782
Location
Broomfield, CO
Each corner of the lift will need to be supported in order to achieve the correct weight distribution throughout the entire travel of the scissor assembly. I decided to go with a collapsing X for each corner. The outside top and bottom would be bolted into place and the inner top and bottom would be the slides with the lower being able to be pinned into multiple different locations. The slides and other bushings would be made out of delrin as to keep moving parts to a minimum. And as well to keep the noise and rattles away. Took a few measurements and started cutting most of the small parts needed to make up the different X assemblies.


20230103_180907.jpg

20230104_182511.jpg

20230104_230517.jpg

20230104_231243.jpg

20230104_231446.jpg

20230104_231516.jpg

20230104_231537.jpg


Then the machine work came for the parts that needed it:

20230104_231627.jpg

20230105_123511.jpg

20230109_172807.jpg

20230109_172845.jpg

20230109_173031.jpg

20230105_123611.jpg


Test fit a few pieces:

20230105_123717.jpg

20230105_124523.jpg

20230105_124527.jpg
 
Last edited:

Brucker

Hard Core 4+
Joined
Jul 10, 2013
Messages
782
Location
Broomfield, CO
Got started on the lower tracks. These will be welded to the new top of the trailer and become the lower part of the scissor assembly. Cut some angle iron, drilled the necessary holes, the spaced them correctly on the fab table to start tack welding the assembly together. Then cut the rest of the pieces needed and added them in. Once all were tacked together, everything was welded up solid. I left the corners of the ends open so they would trap in any dirt or other debris.

20230114_163140.jpg


20230114_181845.jpg


20230114_180245.jpg

20230115_103709.jpg
20230115_134328.jpg

20230115_105834.jpg

20230115_134142.jpg
 

Brucker

Hard Core 4+
Joined
Jul 10, 2013
Messages
782
Location
Broomfield, CO
More small part work. This time the bolt on tops for the upper slides. And the backets I already made get drilled and tapped. These will also get some delrin for easy movement.

20230122_131316.jpg

20230122_131236.jpg

20230122_130952.jpg

20230122_131045.jpg

20230122_131814.jpg

Then tack welded the jack mounts into position.
20230115_153837.jpg

20230127_171550.jpg
 

Brucker

Hard Core 4+
Joined
Jul 10, 2013
Messages
782
Location
Broomfield, CO
Parts are trickling in and the lower springs finally arrived. These will help keep a constant pressure against the lower slides which will help the slides travel at the same pace since the tent is not perfectly weight balanced at each corner from the factory. I cut some small tabs to use as mounts for the springs. Then welded them into position and attached the springs.

20230127_174103.jpg
20230127_173134.jpg
20230127_173142.jpg
20230127_173710.jpg
20230127_173951.jpg
20230128_132443.jpg
20230128_132517.jpg
20230127_235959.jpg
 

Brucker

Hard Core 4+
Joined
Jul 10, 2013
Messages
782
Location
Broomfield, CO
Separated the upper frame from the rest of the assembly. This gets final welded after some mounts for the tent get added to it. I also clearance the lower frame rails for some of the hardware so I could get the assembly to sit as low as possible when collapsed.

20230128_172423.jpg
20230128_172427.jpg
20230104_231516.jpg
20230129_104200.jpg
20230131_180357.jpg
20230131_180441.jpg
 

Brucker

Hard Core 4+
Joined
Jul 10, 2013
Messages
782
Location
Broomfield, CO
With the majority of work being completed with the lift (pretty much just waiting on the upper springs) I shift my focus to the trailer itself. It is an older light weight unit. It was designed to contain items within it's walls, not really on top of them. And even though the top will distribute the weight across the front and both sides. The top still will open to one side putting all the weight onto only one side. And those sides are just sheet metal. So the whole thing needs to be re-enforced. Decided to do just that by creating an exo cage of sorts. I came to this decision because of a few reasons. One, I want to keep as much space available inside the trailer. Another is that I just so happened to build an exo on a Jeep XJ a few years back for the same client. I know he wants the color scheme to match the XJ so why not match the styling as well?

Here is a look at the trailer before any tubework is added.

20230203_154102.jpg
20230203_154108.jpg

20230203_154139.jpg


Decided to start at the top and work my way down to the frame. Took some measurements and cut some pieces to wrap around the top perimeter just under the rolled edge. Then clamped them into position.

20230203_154054.jpg

20230203_163106.jpg

20230203_163142.jpg

20230203_163115.jpg


Then mark out where I need to make a notch at the rear for the stock tailgate chains. These holes will also be used to lock the tailgate with padlocks. Once marked the sides get cut, welded, and sanded smooth. Then get clamped back into position.

20230204_125144.jpg

20230204_125634.jpg

20230204_130752.jpg

20230204_132115.jpg

20230204_132459.jpg

20230204_132523.jpg
 

Brucker

Hard Core 4+
Joined
Jul 10, 2013
Messages
782
Location
Broomfield, CO
Got to work on the front down bars. Took some measurements and the cut and notched the tubes so they would fit nice and tight.

20230203_175049.jpg

20230203_175322.jpg


And you can see that this exo will not add any overall width/length to the trailer as it is flush with the rolled top edge.

20230203_175351.jpg


Then got to work on the side down bars

20230206_133302.jpg
20230206_134817.jpg
20230206_153810.jpg
20230206_153828.jpg
20230206_153952.jpg
 

Brucker

Hard Core 4+
Joined
Jul 10, 2013
Messages
782
Location
Broomfield, CO
Trailer and exo get prepped for welding. Really tried to keep the prep for the weld area on the trailer to a minimum for maximum protection from rust. And the backside of the exo gets coated in weld thru primer.

20230215_172148.jpg

20230215_172211.jpg

20230215_172219.jpg


Then started tack welding the exo into position:

20230216_180016.jpg

20230216_180003.jpg

20230216_180041.jpg


Then welded the assembly solid:

20230218_171123.jpg

20230218_171136.jpg

20230218_171208.jpg
 
Top