No pictures yet, maybe this weekend. I didn't take a close look at it but my buddy said it wasn't a shear failure, it failed in bending (i.e. I came down on the rock and that snapped it - it wasn't over-torque from suddenly gaining traction)
You are using an out of date browser. It may not display this or other websites correctly.
You should upgrade or use an alternative browser.
You should upgrade or use an alternative browser.
Broken rear pinion
- Thread starter subzali
- Start date
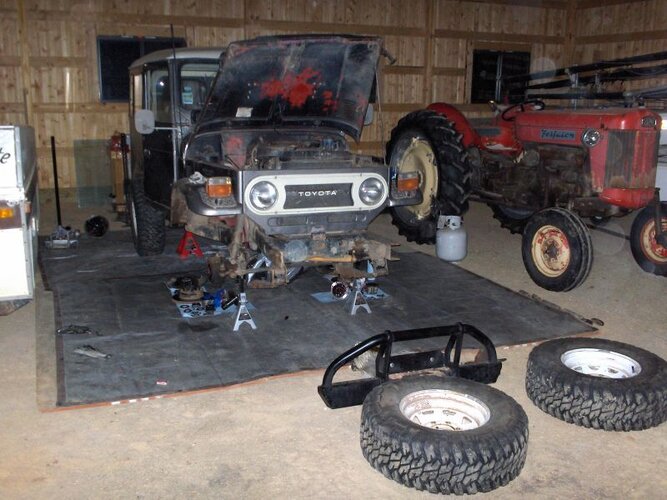
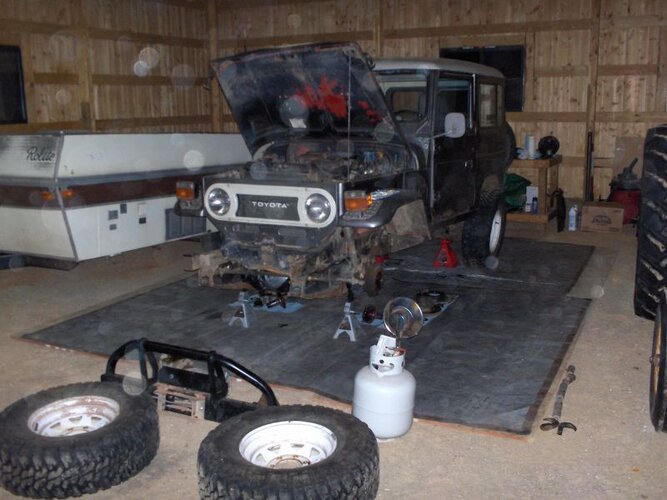
Well my camera decided it wanted to stop working, but progress has started on getting my truck back together. The first step was making space in the barn, which my dad and I did last night. It's still dirt floor, so we put down some plywood sheeting, layed a couple tarps over it, then drove on top of it.
-Pulled my rear driveshaft and the front output nose cone last night. The bearing race in the nose cone has scoring and pitting on it, not sure what that's about...but going to put it back together for now. I'm trying to figure out what would make noise ONLY when the shifter is engaged in 4hi, but not 2hi. Hubs locked in both instances, it ONLY makes noise in 4hi. Thoughts?
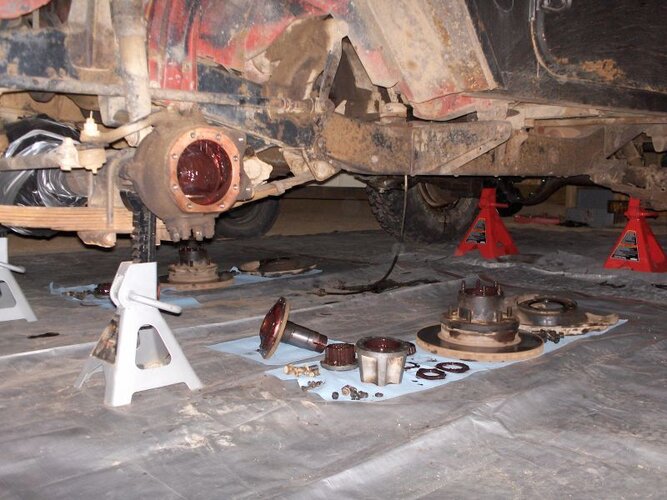
-Tonight I tore both front axles down to the steering knuckles, going to replace the oil seals (they were both leaking after only 2 years?) and put them back together after I put Ige's 3rd member on (thanks again!).
-Also tore down rear axle and pulled 3rd member to reseal all that stuff, since we did a quick Permatex job on the side of the road - I need to put my locker back in anyway and replace a couple studs and nuts for the 3rd member - it seems they've been hit by rocks?
")
-Pulled the ebrake drum as well because even after rebuilding it it still does not engage satisfactorily. It looked clean, just like when I put it together, so now I'm thinking there must be an adjustment in the cab that's out of whack, allowing me to pull the lever all the way out without engaging the drum?
-I also cracked my 8274 apart, and it's kinda gross looking inside there. I guess I clean it out best I can and add new oil (it looks kinda low, but I have nothing to gauge that by)
-Also have to replace the brake booster and a couple wheel cylinders, replace the rear axle seals, replace my drain plugs with allen head plugs, paint my frame gussets and license plate bracket I got for the bumper, and get a new skid plate fabbed up (Jim?), and that should be it! Whew that's a lot of work...I'm going to try and not break anything anymore...
-Pulled my rear driveshaft and the front output nose cone last night. The bearing race in the nose cone has scoring and pitting on it, not sure what that's about...but going to put it back together for now. I'm trying to figure out what would make noise ONLY when the shifter is engaged in 4hi, but not 2hi. Hubs locked in both instances, it ONLY makes noise in 4hi. Thoughts?
-Tonight I tore both front axles down to the steering knuckles, going to replace the oil seals (they were both leaking after only 2 years?) and put them back together after I put Ige's 3rd member on (thanks again!).
-Also tore down rear axle and pulled 3rd member to reseal all that stuff, since we did a quick Permatex job on the side of the road - I need to put my locker back in anyway and replace a couple studs and nuts for the 3rd member - it seems they've been hit by rocks?
-Pulled the ebrake drum as well because even after rebuilding it it still does not engage satisfactorily. It looked clean, just like when I put it together, so now I'm thinking there must be an adjustment in the cab that's out of whack, allowing me to pull the lever all the way out without engaging the drum?
-I also cracked my 8274 apart, and it's kinda gross looking inside there. I guess I clean it out best I can and add new oil (it looks kinda low, but I have nothing to gauge that by)
-Also have to replace the brake booster and a couple wheel cylinders, replace the rear axle seals, replace my drain plugs with allen head plugs, paint my frame gussets and license plate bracket I got for the bumper, and get a new skid plate fabbed up (Jim?
), and that should be it! Whew that's a lot of work...I'm going to try and not break anything anymore...nuclearlemon
Hard Core 4+
-Pulled the ebrake drum as well because even after rebuilding it it still does not engage satisfactorily. It looked clean, just like when I put it together, so now I'm thinking there must be an adjustment in the cab that's out of whack, allowing me to pull the lever all the way out without engaging the drum?
...
where the ebrake cable goes through the firewall, there is a nut on each side to adjust in cable/housing in and out of the vehicle. move the cable more into the engine compartment to tighten it up. also, do you have the little adjuster on the ebrake cranked out?
 Since it's never really worked since I've owned the truck I finally figured it might be something else
 Got parts on order, front and rear diff housings cleaned up, broken pinion removed from case, breather extensions up and coming...
One question - how does one remove the ring gear from the carrier? I'm having a little bit of a hard time finding a leverage point so I can really yank on those M14 bolts.
Okay two questions - trying to get the pinion bearing off, it's not coming easy - should I just quit fiddling with it and do a destructive removal method (puller and/or whacker bar thingy )? I hear that that's easier, but the FSM would suggest that you can remove it without destruction.
Setting up gears is gonna be fun!
One question - how does one remove the ring gear from the carrier? I'm having a little bit of a hard time finding a leverage point so I can really yank on those M14 bolts.
Okay two questions - trying to get the pinion bearing off, it's not coming easy - should I just quit fiddling with it and do a destructive removal method (puller and/or whacker bar thingy
)? I hear that that's easier, but the FSM would suggest that you can remove it without destruction.Setting up gears is gonna be fun!
Rzeppa
Rising Sun Member
Answer to first question: Air impact wrench has worked best for me. If not available, you'll have to make a makeshift SST to slip a big a$$ breaker bar to hold the sucker while you honk on them with your other breaker bar with the socket on the end.Got parts on order, front and rear diff housings cleaned up, broken pinion removed from case, breather extensions up and coming...
One question - how does one remove the ring gear from the carrier? I'm having a little bit of a hard time finding a leverage point so I can really yank on those M14 bolts.
Okay two questions - trying to get the pinion bearing off, it's not coming easy - should I just quit fiddling with it and do a destructive removal method (puller and/or whacker bar thingy
Setting up gears is gonna be fun!
Second question, big a$$ press to get the race off. The one down by the pinion gear itself is always a PITA. Heating it up can help, it expands it some.
Are you putting new gears in? Are you installing new bearings?
Got parts on order, front and rear diff housings cleaned up, broken pinion removed from case, breather extensions up and coming...
One question - how does one remove the ring gear from the carrier? I'm having a little bit of a hard time finding a leverage point so I can really yank on those M14 bolts.
Okay two questions - trying to get the pinion bearing off, it's not coming easy - should I just quit fiddling with it and do a destructive removal method (puller and/or whacker bar thingy
Setting up gears is gonna be fun!
Matt, The pinion bearing will come off easy with a clamshell (pictured below)and a press. If you use a large vise you can clamp the carrier by the case. You can also use a cheater of some kind slipped through the side gear windows of the case.

Thanks guys, yeah Jeff I thought of the impact wrench as I was lying in bed last night
I'm gonna see how much a new bearing is, and since I need to buy a few new tools anyway I'll just get it all at once.
I'm replacing the broken pinion, but I only want to use the ring and pinion from the donor diff I was given. I think the bearings look good, so I'm going to reuse those, unless there's a reason not to. I think I'm gonna destroy the pinion bearing getting it off, so I'll have to replace that one and get a new race.
Rzeppa
Rising Sun Member
Hi Matt, I have a clamshell as Kevin has pictured above if you'd like to borrow it.

") I got it pretty clean now.
I got it pretty clean now.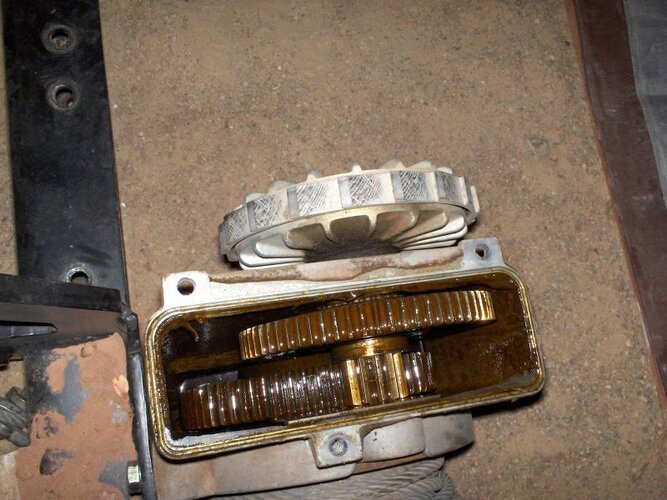


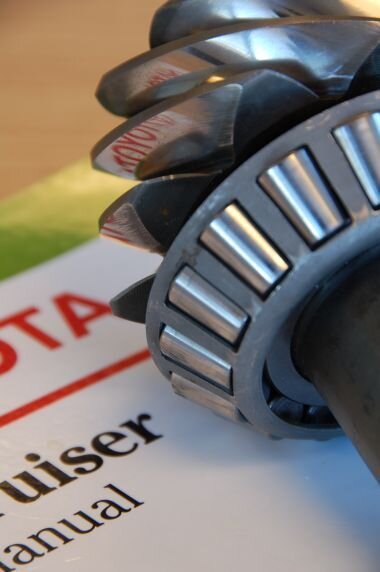
The Star of the Show
Got any metallurgists around here?
It looks like a torsional shear fracture to me, but I can't figure out the dark "heat spot" or the melted-looking surface. Now I got a nice heavy paperweight (that is, the main part of my pinion - it's fun too because it has a spinning bearing on it!)
Got any metallurgists around here?
It looks like a torsional shear fracture to me, but I can't figure out the dark "heat spot" or the melted-looking surface. Now I got a nice heavy paperweight (that is, the main part of my pinion - it's fun too because it has a spinning bearing on it!)
Attachments

Shark Bait
Rising Sun Member
30 year old parts. Bound to break sometime. 


Latest update: not sure if master install kits are available for aftermarket vendors for setting up ring and pinion sets, but for whatever reason I decided to piecemeal the items together from Toyota. The clamshell worked good to get the pinion bearing off to the point where I could get something else on it to drive it the rest of the way off.
Got my winch back together with 6 oz. of non-detergent SAE 30 per Warn, mounted my front bumper (let's hope for the last time for a while) after painting my gussets and license plate bracket.
Got my front output nosecone on the t-case off and inspected it, everything looked okay, found out it was leaking because nobody had put a gasket on that surface! I put a gasket on and going to drive it carefully to make sure I don't grenade anything in there (hopefully preload on the bearing is okay and maybe the noise in 4hi goes away - if not I'll be ginger with it through the winter and take it apart this summer - have to choose my battles right? I cleaned up my parking brake (again) and put it all back together, and then was able to adjust it so it's tight, so hopefully after all this time with a marginal hand brake it will actually work the way it's supposed to.
Got my rear diff housing all cleaned up and new rear axle seals installed, and then put my diff in, installed Lockright and driveshaft.
Last night I finally got my front diff in. I was setting up my gears but then went to Motoloco's to get some new rear springs and he gave me a '73 front axle - which has the same 3rd member as mine. So I used our tractor with the fork to get it out of the back of my truck, pulled off the drums, Selectro hubs and disassembled the front axles and pulled the diff. It looked like it was in good shape, so I cleaned up the front axle housing (realized the gasket was cooked to the housing - - so I had to remove all the studs one by one by the double-nut technique, clean it up with a wire wheel and a rag shoved in the axle tubes, and then reinstall all the studs with Locktight and then put the 3rd member on) and it's all happy now. Now I can leisurely set up my gears in my current 3rd member, and have a spare one laying around if I ever have to do this again. I need to make up a couple SSTs first per Charlie Glabe's writeup, but at least now I can relax about it.
I was going to recenter my steering knuckles, but the top bearings broke so I ordered a kit from Cruiser Outfitters and I'm just going to redo it. So waiting on that, maybe Sat. night I can get my front axle buttoned up.
Have to restake the front pinion nut, do my front axle, and replace my three frozen rear wheel cylinders, and then I'll be on the road again! Next is to relocate my CB and install a Ham, and replace my rear springs at some point (probably with an overload leaf installed), which will also include redoing my shackles per Whatley's article a few TT issues ago, and then all will be good!
Got my winch back together with 6 oz. of non-detergent SAE 30 per Warn, mounted my front bumper (let's hope for the last time for a while) after painting my gussets and license plate bracket.
Got my front output nosecone on the t-case off and inspected it, everything looked okay, found out it was leaking because nobody had put a gasket on that surface!
I put a gasket on and going to drive it carefully to make sure I don't grenade anything in there (hopefully preload on the bearing is okay and maybe the noise in 4hi goes away - if not I'll be ginger with it through the winter and take it apart this summer - have to choose my battles right? I cleaned up my parking brake (again) and put it all back together, and then was able to adjust it so it's tight, so hopefully after all this time with a marginal hand brake it will actually work the way it's supposed to.Got my rear diff housing all cleaned up and new rear axle seals installed, and then put my diff in, installed Lockright and driveshaft.
Last night I finally got my front diff in. I was setting up my gears but then went to Motoloco's to get some new rear springs and he gave me a '73 front axle - which has the same 3rd member as mine. So I used our tractor with the fork to get it out of the back of my truck, pulled off the drums, Selectro hubs and disassembled the front axles and pulled the diff. It looked like it was in good shape, so I cleaned up the front axle housing (realized the gasket was cooked to the housing -
- so I had to remove all the studs one by one by the double-nut technique, clean it up with a wire wheel and a rag shoved in the axle tubes, and then reinstall all the studs with Locktight and then put the 3rd member on) and it's all happy now. Now I can leisurely set up my gears in my current 3rd member, and have a spare one laying around if I ever have to do this again. I need to make up a couple SSTs first per Charlie Glabe's writeup, but at least now I can relax about it.I was going to recenter my steering knuckles, but the top bearings broke so I ordered a kit from Cruiser Outfitters and I'm just going to redo it. So waiting on that, maybe Sat. night I can get my front axle buttoned up.
Have to restake the front pinion nut, do my front axle, and replace my three frozen rear wheel cylinders, and then I'll be on the road again! Next is to relocate my CB and install a Ham, and replace my rear springs at some point (probably with an overload leaf installed), which will also include redoing my shackles per Whatley's article a few TT issues ago, and then all will be good!
MDH33
Hard Core 4+
...
Have to restake the front pinion nut, do my front axle, and replace my three frozen rear wheel cylinders, and then I'll be on the road again! Next is to relocate my CB and install a Ham, and replace my rear springs at some point (probably with an overload leaf installed), which will also include redoing my shackles per Whatley's article a few TT issues ago, and then all will be good!
Progress!
Anything specific you need to do when installing the new pinion seal and nut? My front pinion is still drooling 90 wt and I have the new seal and nut but just wondering if there is anything I need to know before opening it up?
Nope, it's very easy. Just yank the driveshaft, remove the nut and washer, pull the yoke, use a seal puller to remove the seal, drive the new seal in, slide the yoke back in, put some permatex in to seal the splines, put the washer on, put the nut on and torque it down then stake it with a punch (some people also put red Locktite on the nut as an extra safety), then put the driveshaft back on (some people put blue Locktite on the d-shaft bolts so they don't come out). 1/2 hour. Actually I'm not sure if you have to drain the diff or not; I'm not sure if the oil comes up that high just sitting there or if it's slung up to the pinion bearing just while the truck is moving.
Got my wheel cylinders replaced the other night, so I'm down to front axle service, putting the driveshafts on, topping off all the fluids, readjusting the brakes once they're pumped up, and then drive it and do an oil change first thing! I'm shooting for having it on the road again before Feb. 1!
Got my wheel cylinders replaced the other night, so I'm down to front axle service, putting the driveshafts on, topping off all the fluids, readjusting the brakes once they're pumped up, and then drive it and do an oil change first thing!
I'm shooting for having it on the road again before Feb. 1!RicardoJM
Hard Core 4+
Matt, if you're going to to be working on the front axle Saturday night, would you mind if I stopped by to learn/lend a hand?