Project Fauxverlander 200 Series Land Cruiser Build Thread

rover67

Rising Sun Member
Joined
Nov 1, 2007
Messages
9,570
Location
Boulder, Co
Me likey
 

LARGEONE

Rising Sun Member
Joined
Jun 12, 2007
Messages
3,176
Location
Broomfield, CO
I want one :)

Edit: Keep it going....I showed my wife your early build pics and she likes it as well. She says she likes it better than my GX. I like where she's going with this!
 
Last edited:
Joined
Dec 19, 2013
Messages
700
Location
Tampa, FL
Now you just need to match the red rings on the LEDs up front to the trim ring on the rims!
 

LARGEONE

Rising Sun Member
Joined
Jun 12, 2007
Messages
3,176
Location
Broomfield, CO
We might need to move this thread to the Tech section if this keeps up?!
 

cruiseroutfit

Wasatch Cruisers
Cruise Moab Committee
Joined
Aug 1, 2006
Messages
625
Location
Sandy, UT
Stage 3 continued, baby steps:

Time has been scarce this winter as I've been busy with work, play and other projects (finally making some headway on the Old Lady's 66' FJ45 build) but we had a few minutes of down time last week during the holidays and more importantly, the 200 wasn't buried in snow. This thing has needed brakes since day one, in fact I commented on the warped rotors to the seller (husband) and his reply was that his wife hadn't mentioned a thing about it. I laughed and said "they never do". They were not horrible but when braking at 60+ mph hour speeds there was definite shimmy that needed to go away. I had conceded to using stock OEM rotors and our aftermarket AISIN pads (same as OEM other than box color and price) but I started investigating higher performance options even before I had ordered the first part for the build. Performance 360 kept popping up on my radar and we had been impressed by a set we recently installed a customers FZJ80, so why not give them a go?

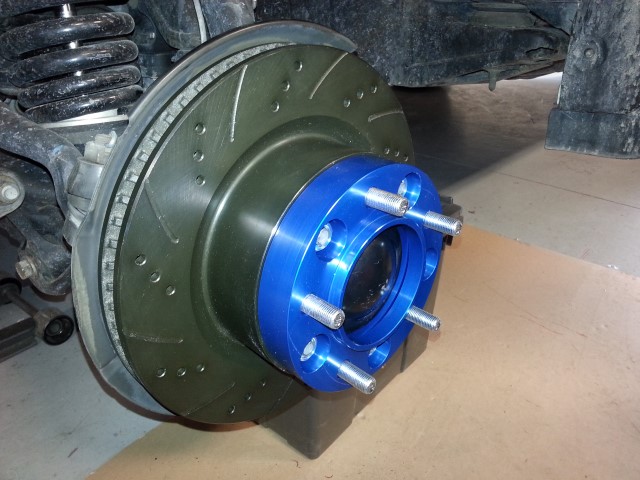
I chatted with the gents at Performance 360 and things snowballed, the next thing I know we had a full stock order worked out, all of their front and rear LC applications. We ordered most in the native zinc/silver coloring but I did snag a front and rear set of drilled and slotted rotors with a black coating for the 200. While the front wheels were of off to swap rotors, it was also perfect time to install Spidertrax 1.25" wheel spacers. I hadn't included these in my original build parts list but following the suspension and wheel/tire install, I felt the front end needed a tad more width. Many have reservations about wheel spacers and a number of diatribes have been offered about them one way or the other. I've been running them for a long time on my 100 and other rigs previous to that, I've got customers who have been running them for 10+ years. My diatribe, a quality spacer, properly installed and periodically maintained is a non-issue. Your results may vary so take it for what it's worth. Rotor's on later model Land Cruisers are super cake to do, like 2 bolts on the caliper, slip the old rotor off, the new rotor on and you're done. We knocked out the fronts rotors and spacers and went back to work on paying projects. :D

front_brake.jpg

Front Performance 360 drilled/slotted rotor & Spidertrax spacer

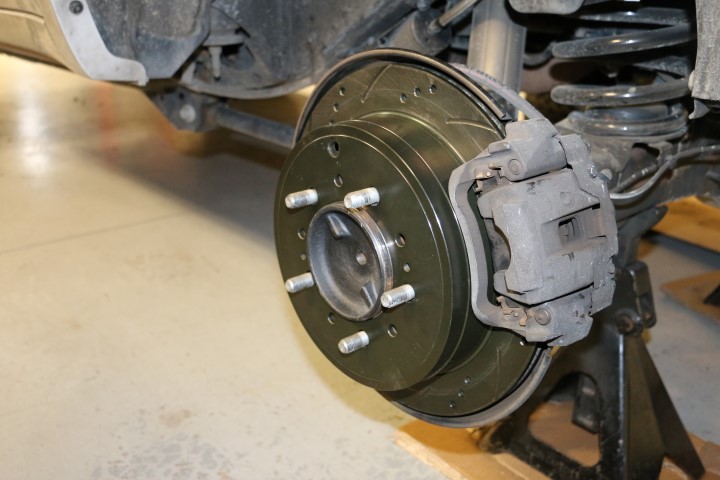
This afternoon offered a bit of shop time to finish up rotor upgrades, we swapped the rear, inspected and adjusted the park brake and snugged it all back together. The rear is also a slip-fit rotor but the caliper assembly has a couple of additional bolts you have to deal with but nothing major. The brakes weren't the only shudder I wanted to resolve, both side mirrors had an annoying shake at highway speeds. Toyota is well aware of this and offers a repair "kit" to fix the issue. The kit consists of 3 new screws that incorporate a lock-washer and flat washer rather than the original integrated flat washer. It's a 5 minute job to swap them out and as the bottom mirror trim is likely to break when you access the screws, they include that too. If your 200 Series mirrors are wiggly, check out the Mud thread that includes a copy of Toyota's Technical Service Bulletin (TSB) and the needed part numbers for repair.

rear_brake.JPG

Rear Performance 360 drilled/slotted rotor

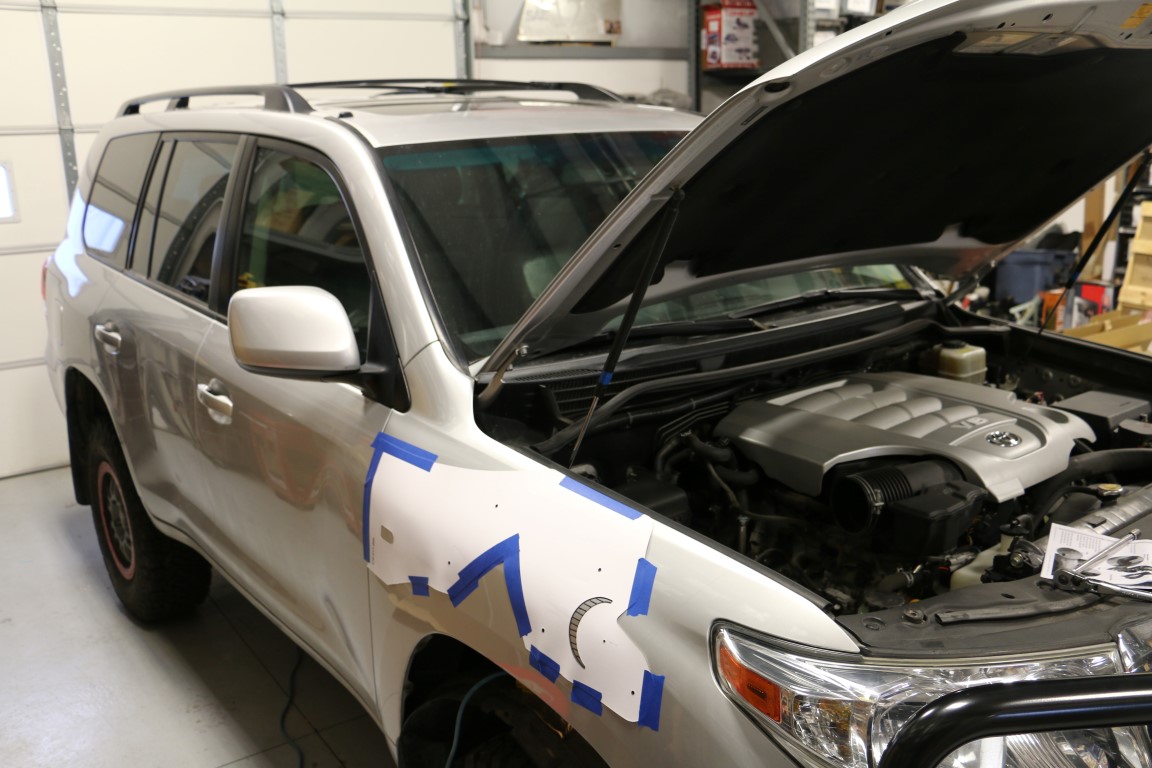
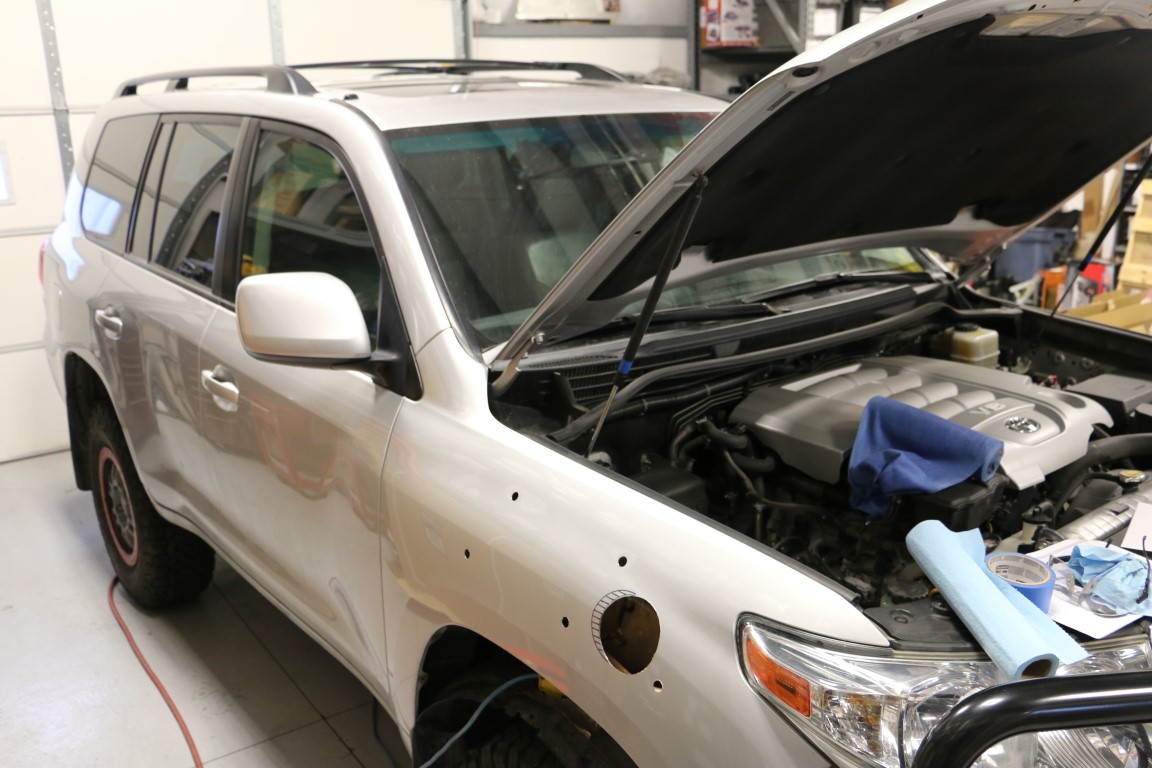
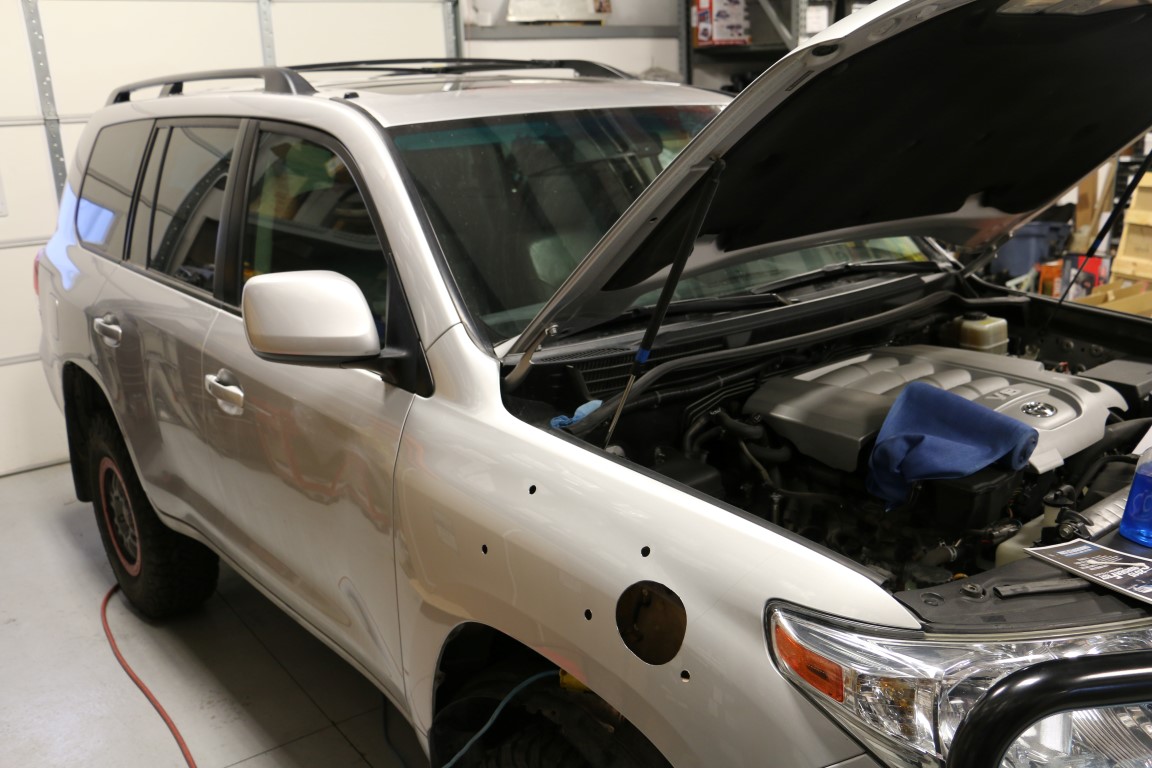
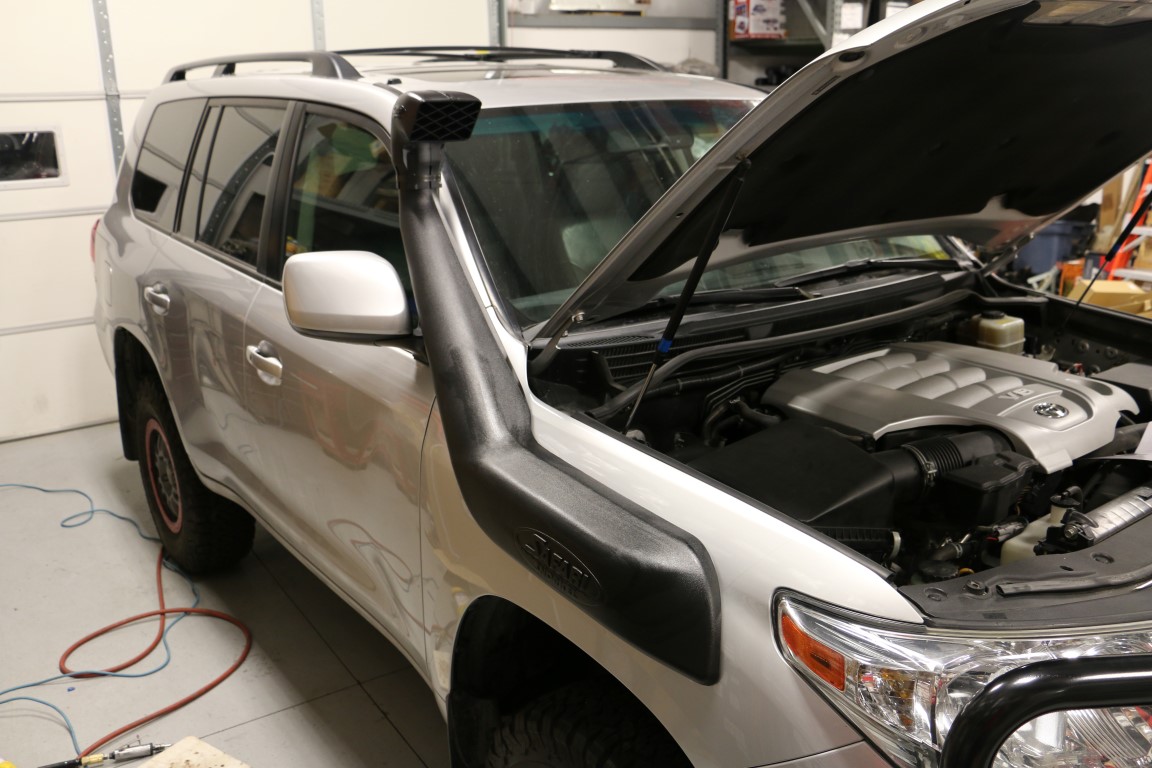
So, what next? Drawers would be nice to get tackled but I wasn't feeling that energetic, the rear bumper would have to wait until I had more time. Snorkel it was. The 200 Safari Snorkel is very straightforward, the instructions are complete and they've made some pretty nice changes to the kit comp. Now, allow me a minute to preach if you will. There are a bunch of knock-off snorkels hitting the market that are nothing short of a direct copy of the Safari Snorkel. We know them well, as we move a fair number of snorkels each year we get suited by companies trying to sell us kits and through that process we can learn a bit about their R&D (or lack thereof), their customer service, tech support, spare parts availability, etc. I fully know that Safari Snorkel's cost 2-3x that of a no-name Alibaba solution but I also know I can call them if something doesn't fit, I can get a spare part if something fails in the future and I know their plastic is going to last 20+ years in the sun, in the snow and even on the rocks. Rant off, picture time!
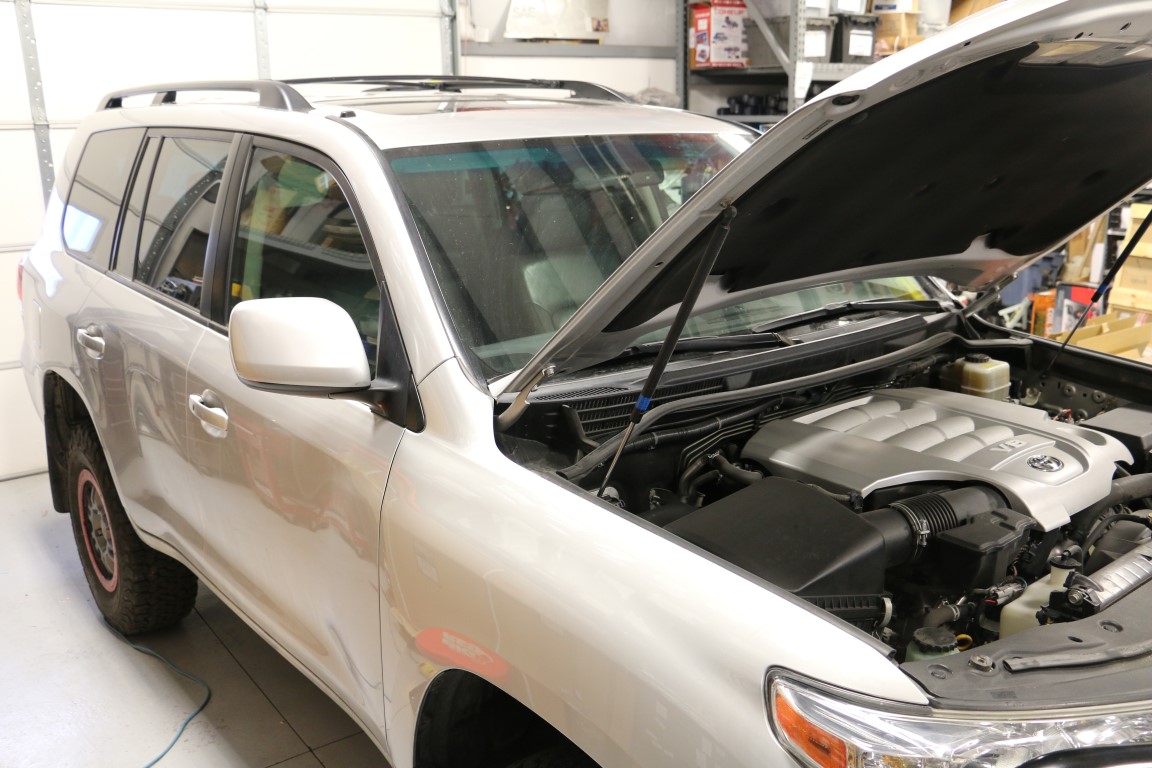
snorkel_1.JPG

Before

snorkel_2.JPG

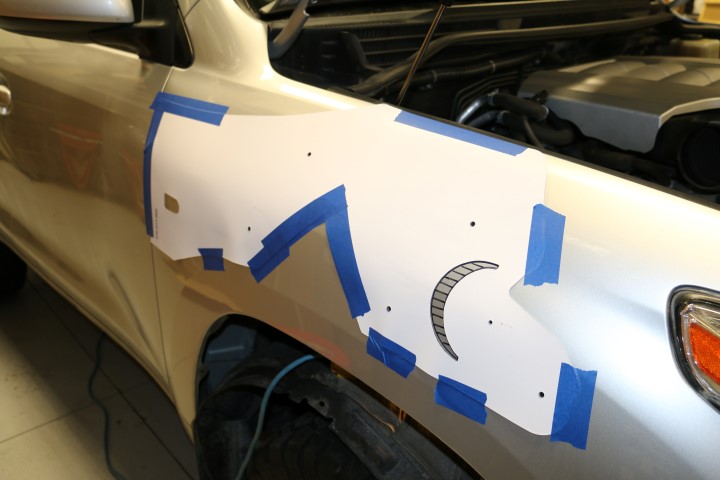
Template attached, holes marked

snorkel_3.JPG

Holes

snorkel_4.JPG

Bigger Holes

snorkel_5.JPG

Finished!


Some detail shots of the process.

template.JPG

Closeup of the template and fender marking

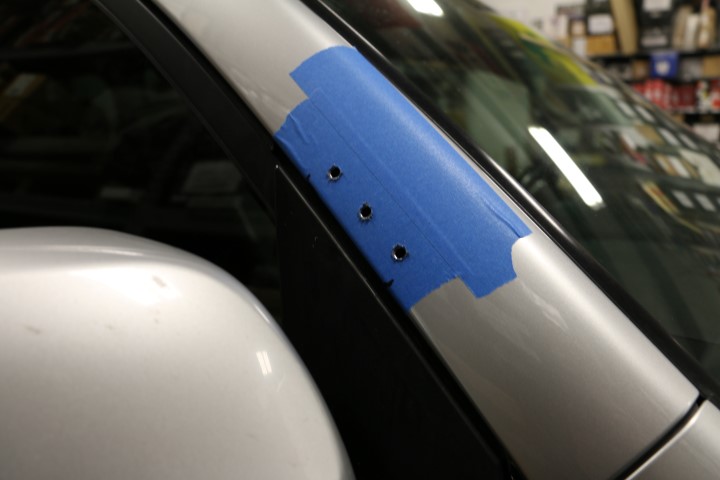
pillar.JPG

A-Piller marking and drilling using a step-drill

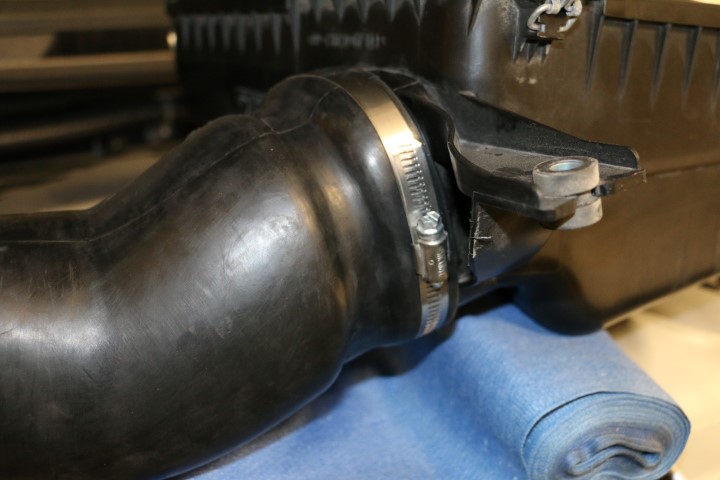
hose.JPG

The hose mounting between the factory airbox and snorkel body was giving us some fits so we ended up warming it up to make the rubber more pliable. That did the trick and it slipped tightly onto the factory airbox and did the needed contorting to adapt to the snorkel body.

The snorkel is just part one of the waterproofing process, I'll be using the ARB Differential Breather kit (part# 170112) to tie the gear boxes up to the breather manifold which will be mounted up high in the engine bay. Some other considerations on the snorkel install can be found in a Tacoma Magazine article I wrote here.

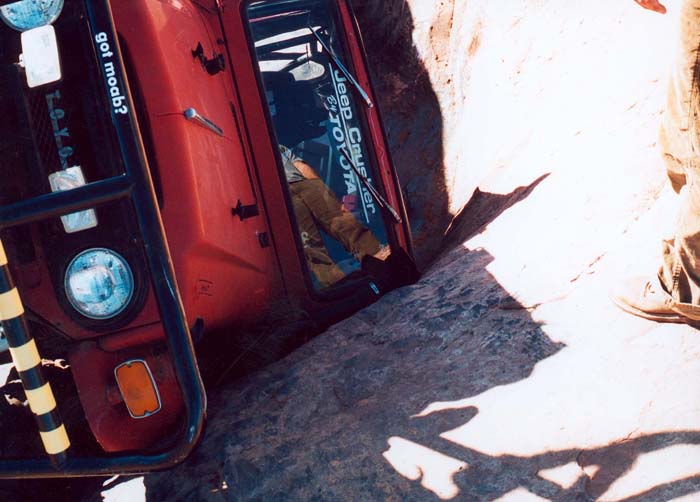
One last pic to echo my earlier genuine Safari Snorkel comments. My buddy Greg laid his FJ40 on it's side in a Moab hot tub in the late 90's. He was sure the snorkel was going to be cracked. Nope, flexed right back into shape. 15 years later and that snorkel still looks and functions great on Greg's daily driver FJ40, Safari Snorkel for the win.
Cruzr-41.jpg
 

cruiseroutfit

Wasatch Cruisers
Cruise Moab Committee
Joined
Aug 1, 2006
Messages
625
Location
Sandy, UT
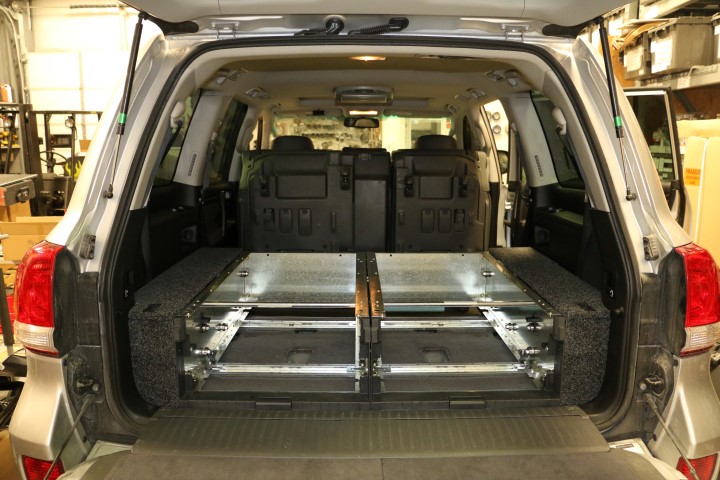
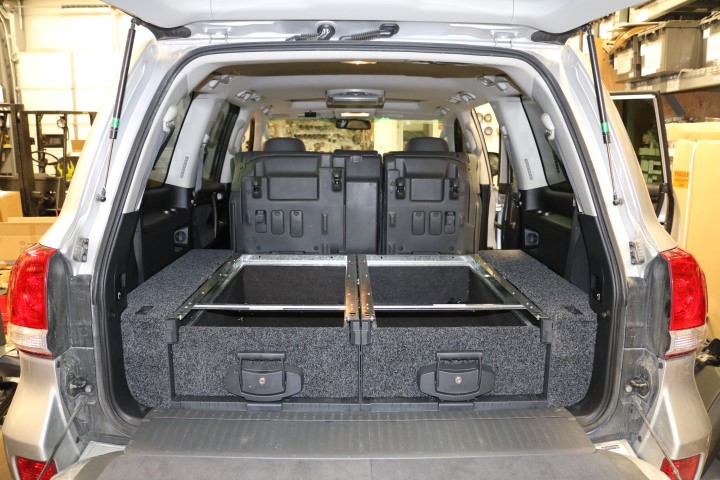
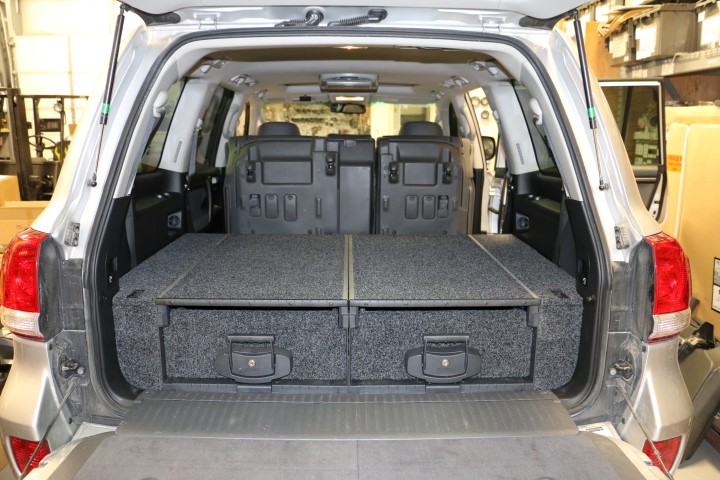
Stage Three Continues - Drawers

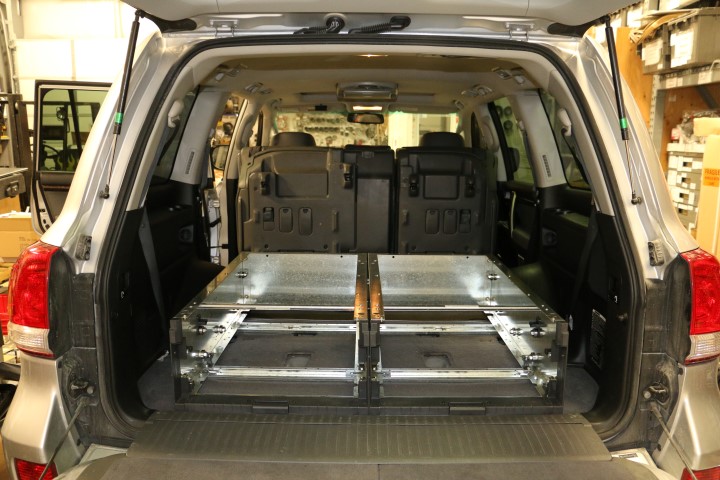
My buddy Dave is a fellow 200 Series owner and recently installed a set of Outback Drawers in his 200. He had actually purchased them along with a 100 Series fit kit for his UZJ100 but it went on to a new home before he mounted the drawers so he mounted them into the 200. At the time there wasn't a 200 specific fit kit here in the US so he used the already purchased 100 fit kit and cleanly modified it to fit the slightly different side profile of the 200. His install was super tidy but he was still curious about the 200 fit kit, just curious enough to help me install my drawers this evening. :cool:

Start to Finish

drawer_1.JPG


drawer_2.JPG


drawer_3.JPG


drawer_4.JPG


drawer_5.JPG


drawer_6.JPG


drawer_7.JPG


The install went pretty smooth. We've installed a handful of drawer kits in the shop and Dave did his not to long ago so most of it was pretty familiar to us. We varied a bit from the instructions. They have you assembled the two drawer frames outside of the vehicle and then install together. However not only are you dealing with a bulky frame, it's a VERY tight fit in the 200's and I found it easier to install on side with the bolts loosely started and then install the second. With both loosely fitted we can them mount them together and true them up. It worked perfectly and we had it finished up in just about 3 hours total including some vacuuming/cleaning before hand and some BS time through the middle. I've got a couple of things to work on back there yet to come including 12V/USB outlets and mounting/wiring the fridge. I need to spend some time laying out my electrical wants needs for the entire vehicle so I can knock it all out at once rather than have wires heading every direction twice. I'll save that for another day.

I've gone on and on about how much I've enjoyed the drawers in the 100 Series over the years, so I'll save you my diatribe tonight :D
 
Last edited:

bh4rnnr

Outlaw, Scoundrel, Miscreant
Joined
Aug 23, 2005
Messages
6,285
Location
Littleton
Thinking you need to sponsor a one Perry Loughridge. This vehicle would be well suitable for his needs in exploring the West and photographing those awesome places. A no worries platform for a man that loves to get out (when able). Perry is considering a "call for residence" in Glacier this year. Perry thinks the drive up to Glacier NP in that fine rig would be :thumb::cool::bowdown::cheers:

:beer::beer:
 
Last edited by a moderator:

cruiseroutfit

Wasatch Cruisers
Cruise Moab Committee
Joined
Aug 1, 2006
Messages
625
Location
Sandy, UT
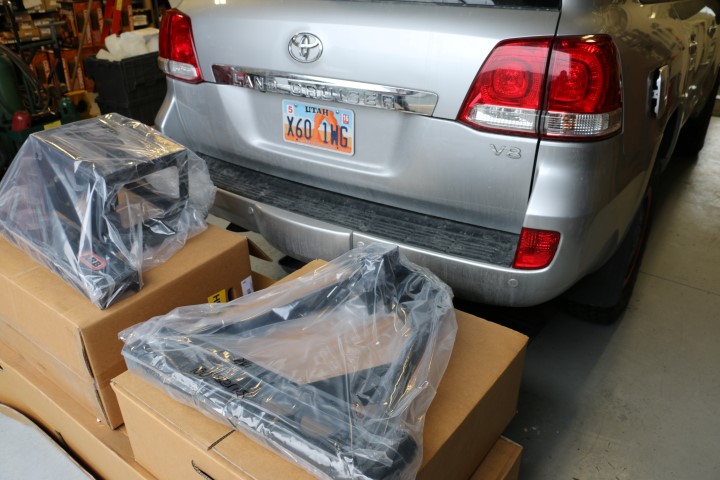
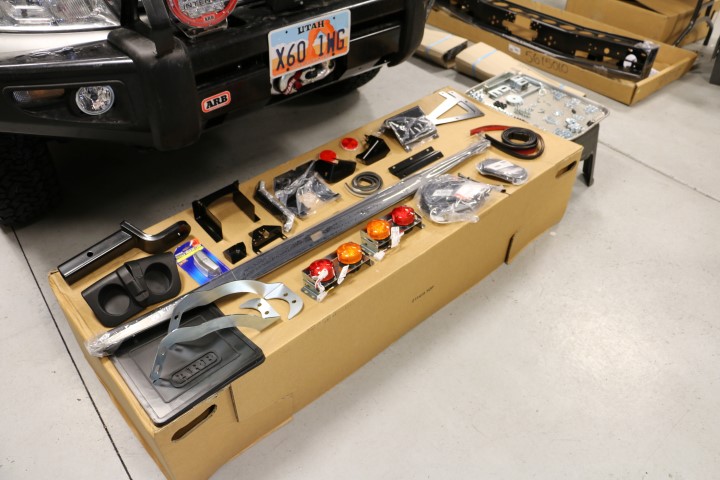
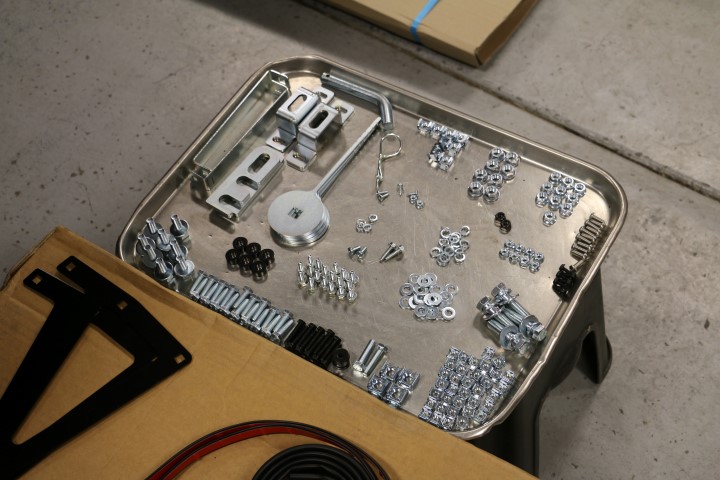
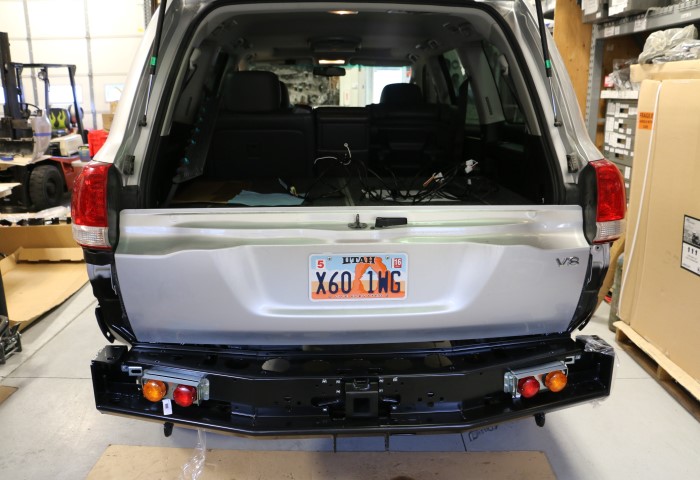
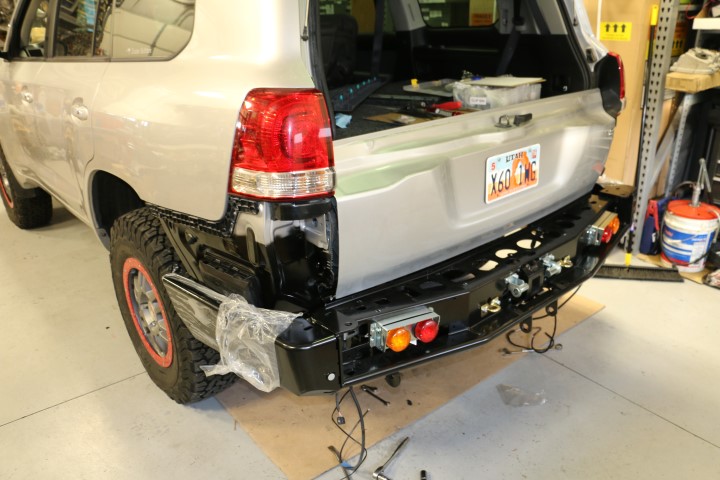
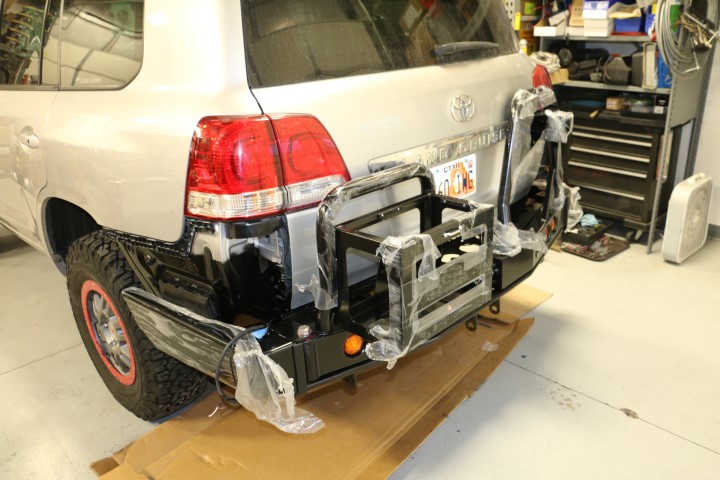
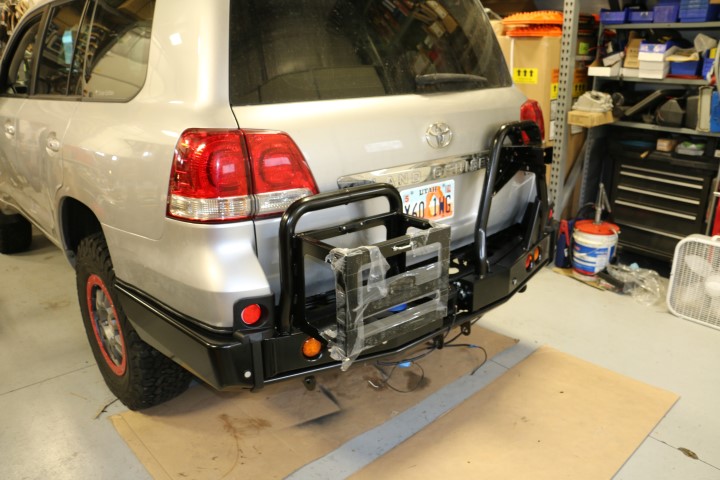
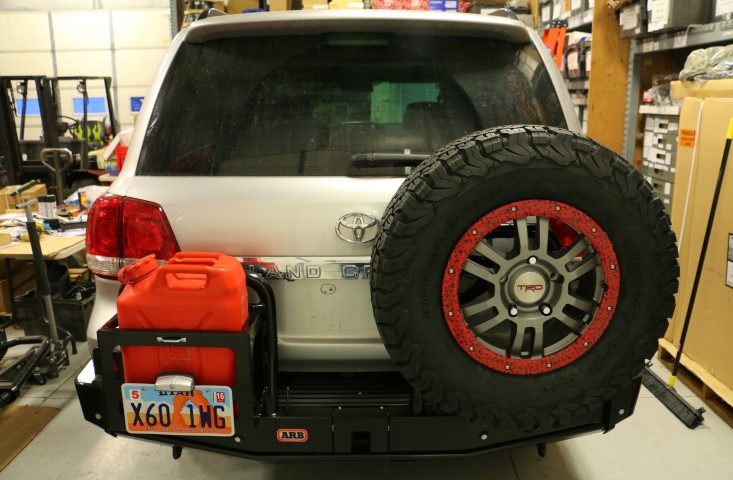
Next up? Time to tackle the ARB rear bumper, and boy did that take a minute.

rear_bumper_1.JPG

Boxes ready to be torn open and installed

rear_bumper_2.JPG

The parts of the rear bumper (not including carriers) laid out, inventoried and ready

rear_bumper_3.JPG

The pile of hardware, not including the hardware for the carriers

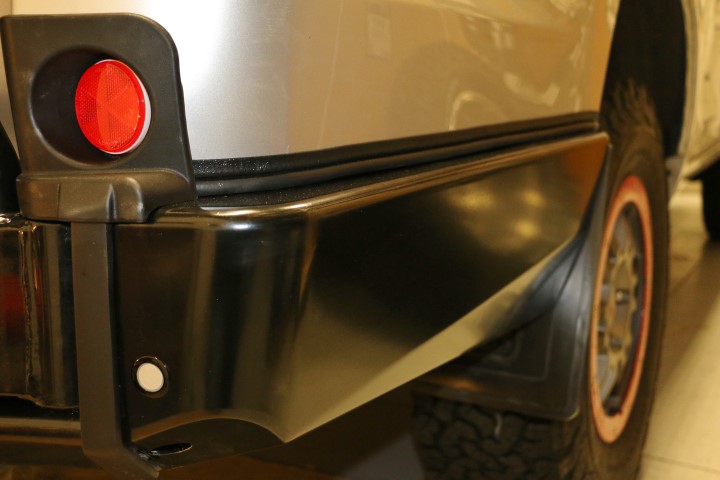
We've done a fair number of ARB rear bumper installs here in the shop but this was the first dual swing utilizing the factory park sensor system. The 4 ultrasonic sensors require not only drilling and physical mounting but more tedious, extending the pigtails on 3 of the 5 harness plugs. While the paint was drying on the new sensor holes, I made a wiring diagram as those 3 sensor plug extensions will require a total of 30 wire connections as two of leads have 6 uniquely colored wires and the other has 3. About half way through the park sensor install I started to really question the additional work to incorporate the sensors into the new bumper, I mean I had never really used them to date. The system is there and I might as well get familiar with it, so I marched on with the wiring.

Coming together, piece by piece:

rear_bumper_4.JPG


rear_bumper_5.JPG


rear_bumper_6.JPG


rear_bumper_7.JPG


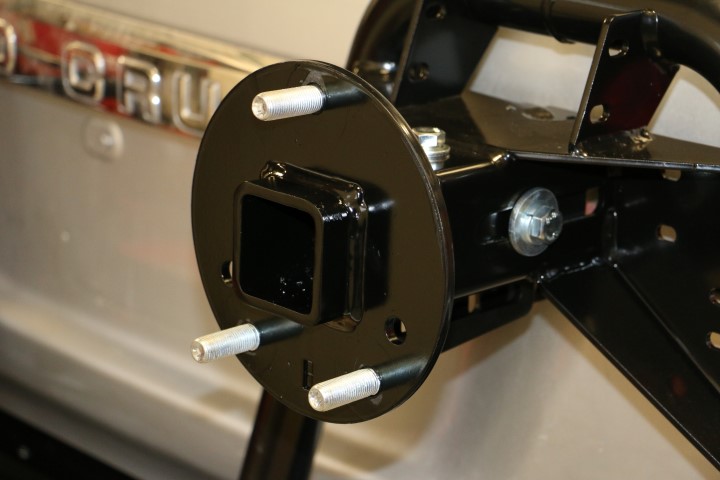
As the carrier components are universal with the 80 and 100 Series offerings, ARB still includes 12mm wheel studs and lug nuts, despite the fact Toyota hasn't used that size on a heavy-duty Land Cruiser for almost 20 years now :D Easy enough fix, we've crossed that bridge with the 100 and have a nice assortment of the needed 14mm hardware. I suppose you could use the 12mm hardware but the taper wouldn't sit right in the wheel and I like the idea of having some spare lug nuts if/when they are needed. It does require a quick re-drill of the tire carrier as well as some different lug nut hardware. I had ordered spares to match the splined lug style used with the TRD wheels, this gave me matching hardware across the vehicle, one lug-nut socket to carry and a matching lock if I end up someplace I'm worried about security.

rear_bumper_9.JPG

14mm studs in place for the 5-lug configuration

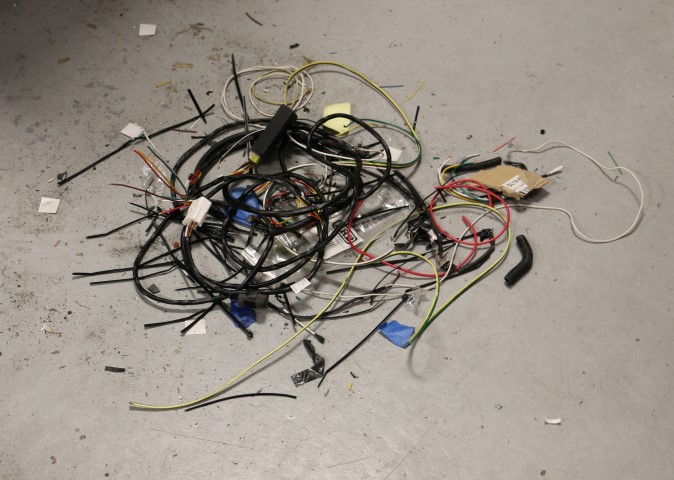
Land Cruisers have flipped-flopped on the turn signal coloring over the years, red into the 70's, amber into the 2000's, red for the tail end of the 100's and back to Amber with the 200's. The red-tail/stop & red-turn is easy to work out with a simple red lens swap, ARB provides their bumpers with a red/Amber combo but they have the red lenses available for those applications. However, the red-tail/stop and amber-turn is a bit tougher. ARB includes a plug/play harness that requires popping open the rear panels (easier said than done when drawers are installed), but, it plugs into the same place as the US spec 7-Pin trailer harness. It does have a lead for a 5 pin trailer harness but I prefer to leave the factory 7-Pin in place. So, rather than pull drawers apart, pull panels and drop lines from the L & R tail lamp assemblies, I opted for a far easier and cleaner (imo) method. I tied into the 7-Pin trailer harness and used a converter to go from the combined tail/turn (red) back a separate tail (now red) and turn (now amber). It does require mounting a small converter (this size of a credit card) under the vehicle but they come with some good self-adhesive and I've not had one fall off or fail to date. This method allows one to trim down a considerable portion of the ARB harness and really end up with a tidy and simple install with just 5 connections into the trailer harness.

rear_bumper_10.JPG

Remnants of the ARB harness and the wiring portion of the project

Another time consuming aspect of the bumper install is the OE bumper cover trimming. We used a loose variation of ARB's recommended measurements and they got us close but we fined tuned the trimming and installed a nice clean w/s edge material that offers a really clean fitment while allowing the needed flex that the bumper and cover panel will experience. This is where we could really streamline a future install as we kept some good notes on what worked for us and the w/s is something I'll have available ahead of time next go around.

rear_bumper_8.JPG

Trimmed panel with w/s in place

So, while it likely represented the longest I've ever spent on a bumper install, I'm quite confident the remaining installs will take a fraction of the time. I've since done an additional ARB rear bumper on a 200 while it was a different configuration, the trimming portion took a few minutes :D

rear_bumper_11.JPG

Finished product!
 

cruiseroutfit

Wasatch Cruisers
Cruise Moab Committee
Joined
Aug 1, 2006
Messages
625
Location
Sandy, UT
Looks good, but does the rear spare completely block the right turn signal?

They do block much of the factory light, thus they put lights in the lower bumper. I'm just a few feet away in my shot with a wide lens so it's a bit deceiving. Here is a better look from the rear, not mine but identical setup:

2-3500370_g.jpg


It's not different than the setup I've been running on my 100, no issues to speak of.
 

cruiseroutfit

Wasatch Cruisers
Cruise Moab Committee
Joined
Aug 1, 2006
Messages
625
Location
Sandy, UT
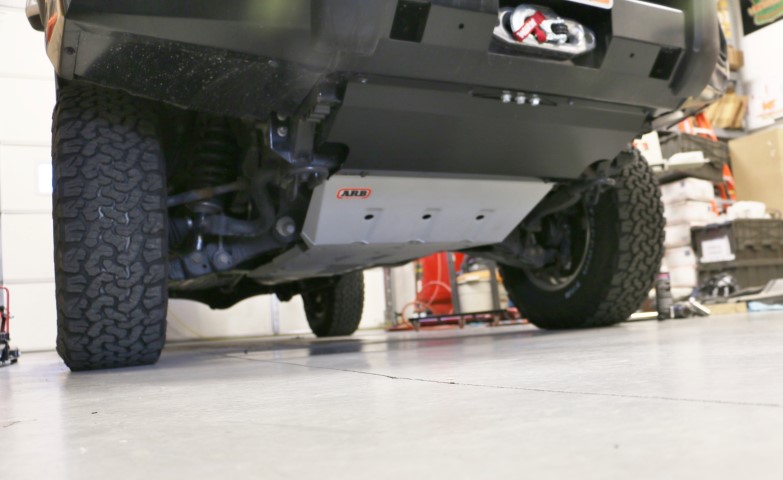
Next stop? Skid plates

Accessory install time has become quite rare for me here in the shop the last few weeks. As such a project that should take a couple of hours (such as these skids) in fact took 4 days, 10 minutes here, 20 minutes there... I swear I spent more time remembering where I left off :D

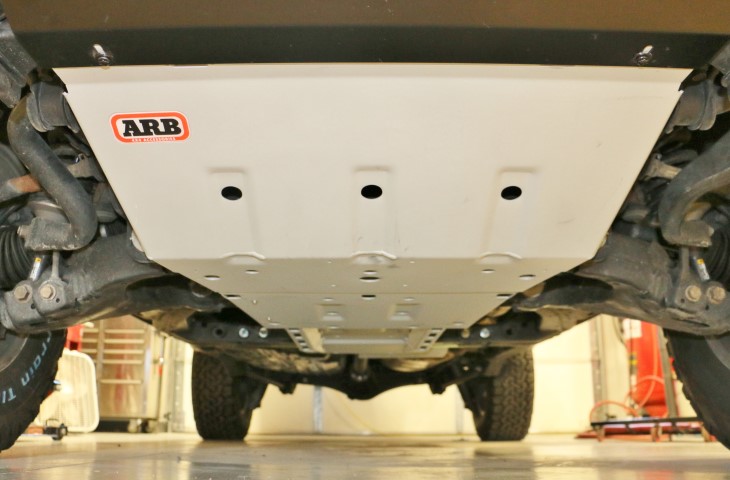
I did spent a bit of time with a rattle can cleaning up some factory welds and light corrosion, nothing out of the ordinary but I wanted to address it before I started covering things back up with the clean aluminum skids.

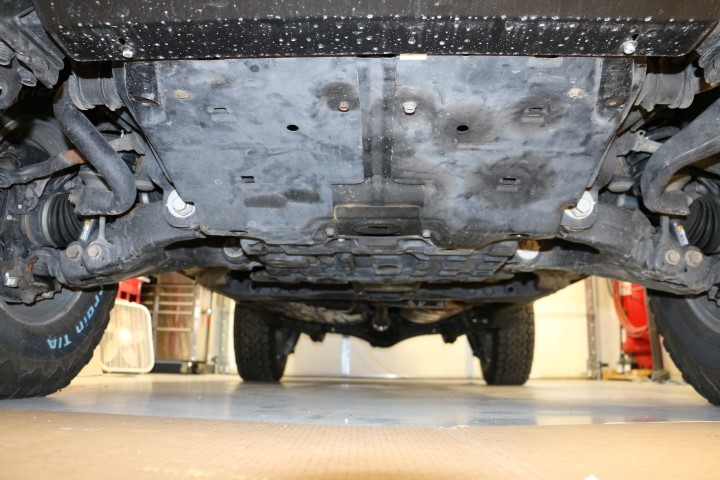
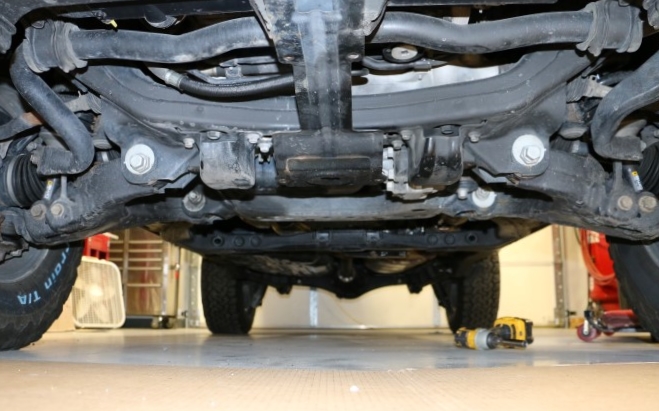
I'm very impressed with the fit and finish and I'm confident they'll offer the protection I'm after. I run the Slee skid system on my 100 Series and they have taken a beating and still clean up nicely. Had they offered them for the 200 I would have given them a really hard look. With the 200, ARB has a fantastic option for a full kit, front, mid (oil pan), trans and even a beefy t-case skid, far better than the tin/plastic covers it started with.

Before, during and after:

skid_2.JPG

The factory setup

skid_1.JPG

Gone with the factory stuff

skid_3.JPG

ARB installed

skid_4.JPG

ARB installed

Next up, sliders and side rails. When? Who knows :D
 

Jenny Cruiser

Hard Core 4+
Joined
Nov 22, 2006
Messages
1,282
Location
North of Hell
Very nice Kurt. :thumb:
 

cruiseroutfit

Wasatch Cruisers
Cruise Moab Committee
Joined
Aug 1, 2006
Messages
625
Location
Sandy, UT
If you wait until the last minute, it only takes a minute. So they say anyways.

With Cruise Moab just around the corner I had made some goals to get the some of the 200 projects finished up. It's a bit frustrating seeing 200 projects stack up with no progress and I've been spending a bunch of time on other rigs that are in reality less of a priority.

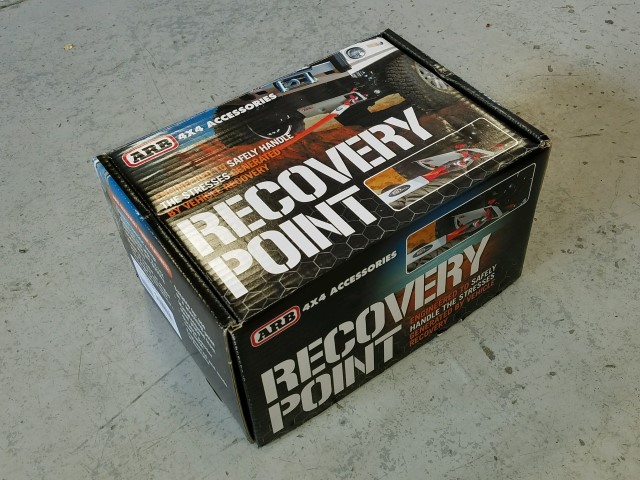
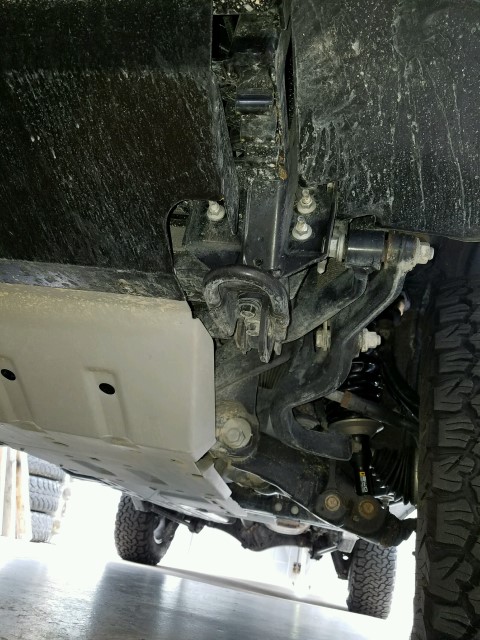
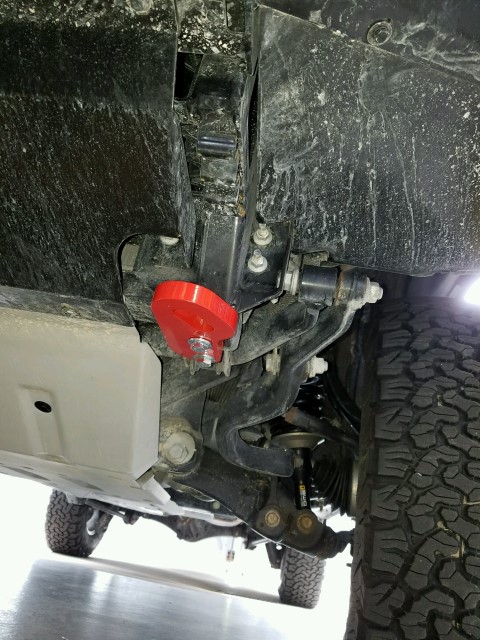
ARB Recovery Point. This thing took longer to take out of the box than it did install. Two bolts and you're done. The factory "tow hooks" are not compatible with a standard recovery shackle and are not often recommended for recovery use.

recovery_1%20%28Small%29.jpg

The box of one, about 20 could realistically fit in this box

recovery_2%20%28Small%29.jpg

The old

recovery_3%20%28Small%29.jpg

The new

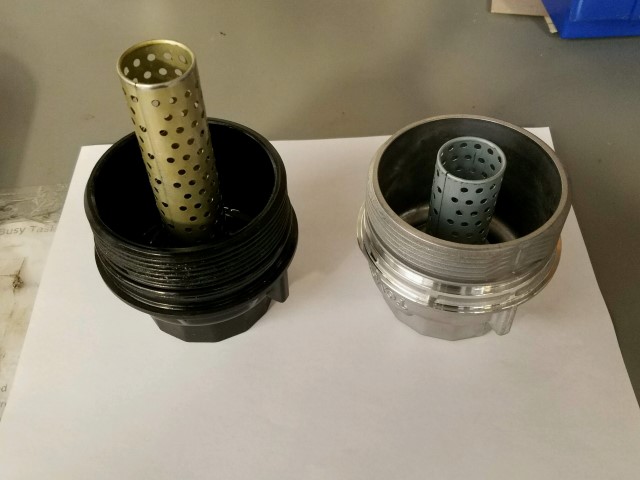
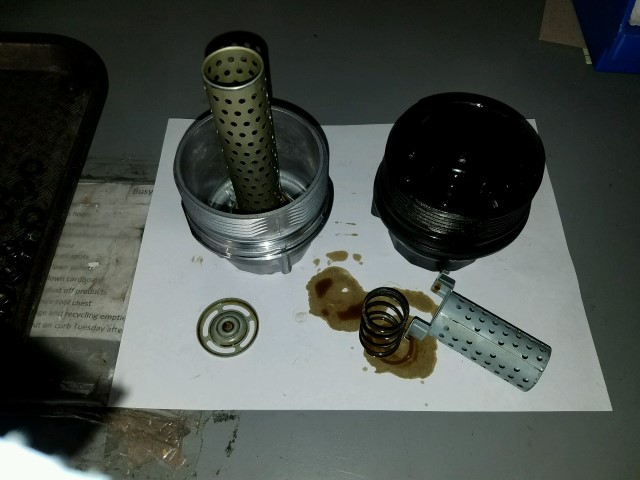
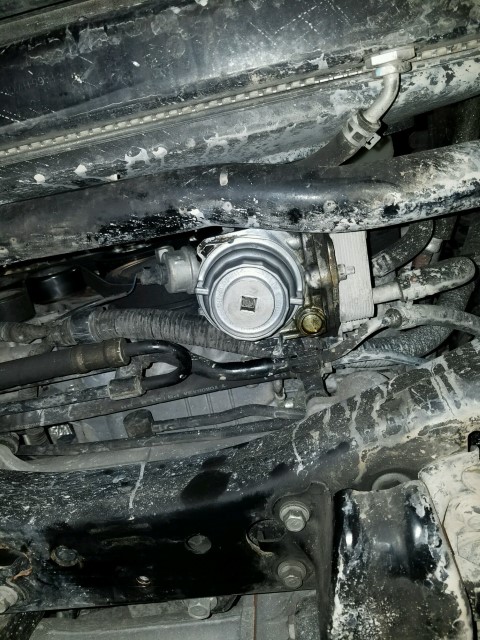
Next up was an oil change. Nothing major there but I did install the Fumoto Valve and upgraded the plastic element housing to the aluminum version. You have to swap out the element tube but it's as easy as tweaking a couple of tabs. I installed the TRD filter element at the same time. All oiled up.
oil_1%20%28Small%29.jpg

Pre-swap

oil_2%20%28Small%29.jpg

Swapped

oil_3%20%28Small%29.jpg

Installed
 

cruiseroutfit

Wasatch Cruisers
Cruise Moab Committee
Joined
Aug 1, 2006
Messages
625
Location
Sandy, UT
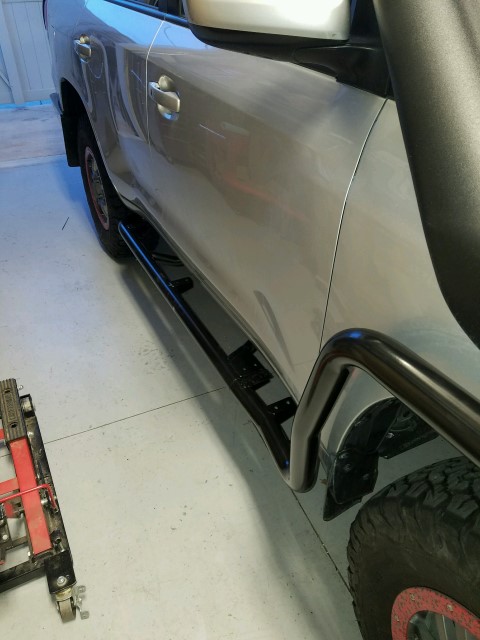
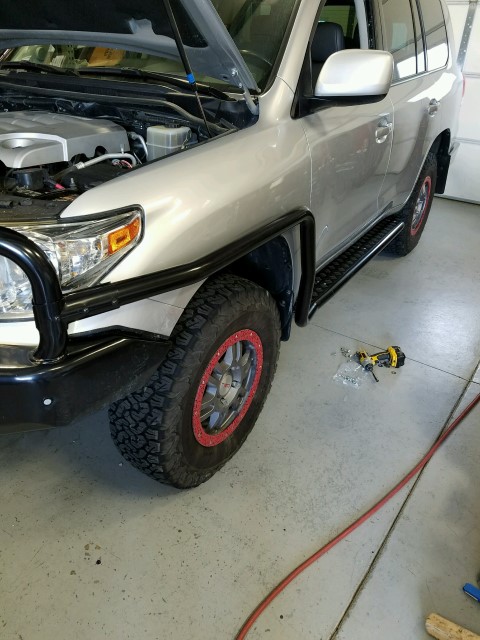
Next up was the ARB Step/Side Rails. I realize many don't like the look of the integrated side rails between the rockers and the front bumper and I can understand that. For me they are embraced. I've had them on my 40 Series for 15 years, my 100 for 5 and I'm sure I'll come to be glad I have them on the 200 as well. They've saved countless fenders and the look works for me personally. They are a fair bit of work to install, particular the frame mounts on the KDSS side of the frame (left). There is a bunch going on with the KDSS plumbing and ARB really had to make some interesting brackets to allow the mounting. The deck plates come with an natural aluminum finish, I had them coated in a satin black to match the deck plate on the rear bumper, all mirrors of the directions I went on the 100 Series.

rail_1%20%28Small%29.jpg

Mounting the side rails

rail_3%20%28Small%29.jpg

Mounting the side rails

rail_2%20%28Small%29.jpg

Passenger side complete, waiting for the deck plate

rail_4%20%28Small%29.jpg

Drivers side complete, powder-coated deck plate installed.

IMG_7416%20%28Small%29.JPG

Had a great Cruise Moab, particularly some ghost town exploring on the way home.
 

SteveH

Hard Core 4+
Joined
Aug 10, 2006
Messages
3,082
Location
Colo Springs
Does anyone make a spin-on filter adapter? I hated that miserable 'filter element' on my '08 Sienna - makes for a time-consuming mess, every time you change the oil.
 

cruiseroutfit

Wasatch Cruisers
Cruise Moab Committee
Joined
Aug 1, 2006
Messages
625
Location
Sandy, UT
Does anyone make a spin-on filter adapter? I hated that miserable 'filter element' on my '08 Sienna - makes for a time-consuming mess, every time you change the oil.

That is a great question. It could be done with a remote filter setup and perhaps a different filter base?
 

simps80

Rising Sun Member
Joined
Jan 22, 2009
Messages
2,887
Location
Arvada, CO
I really like the step/slide rails!
thanks for posting this thread
 

wesintl

Moderator
Joined
Aug 22, 2005
Messages
8,738
Location
in da house
that's a good looking truck!
 

Rezarf

Hard Core 4+
Joined
Aug 25, 2005
Messages
5,913
Location
In Uncle Ben's Shadow
Looks GREAT Kurt!

Can you get the ARB recovery point for the 100's? I have a 1999 and my Sahara bar doesn't off poo for pulling on. Not only that but its mounting hardware eliminated my Spresso' recovery points due to room on the frame rail so I am on the hunt for a rated pul point.

How did the 200 do in Moab?

Did you see Christo's new rear bumper? It looked amazing to me, I saw a sneak peak at the shop as they were prepping for CM16
 

maxpowerzz

Trail Ready
Joined
Oct 4, 2015
Messages
404
Location
Denver
Stage One - Maintenance & Baseline:


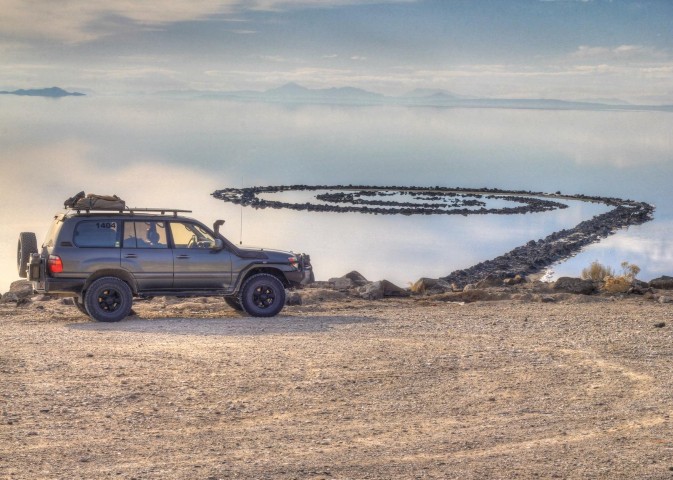
Bart_Williams_Spiral_Jetty.jpg

The "Death Star" 100 Series. The vehicle the 200 will eventually replace - Photo by Bart W.


Beautiful build, and great shot at the Spiral Jetty!
 
Back
Top