
RicardoJM
Hard Core 4+
Yesterday afternoon I dropped by Randy's garage to lend a hand with pulling the head from his F engine. The engine has poor compression (40 psi) in cylinder number 4. I had planned to get there at 4:00, but as it turned out the traffic kept me on the road until 4:20. When I arrived, Randy had already disconnected the radiator hoses, removed the valve cover and just finished removing the nuts from the manifold bolts. A handshake with Randy was the first order of business so the dog knew I was good people. I also took a closer look at the rear bumper Randy built and will post up some pictures in his bumper thread. The bumper really looks nice and clean.
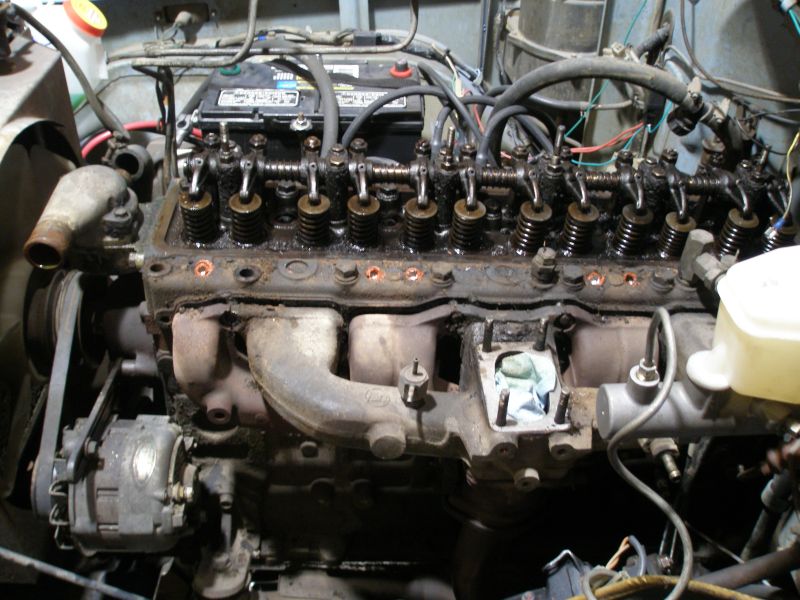
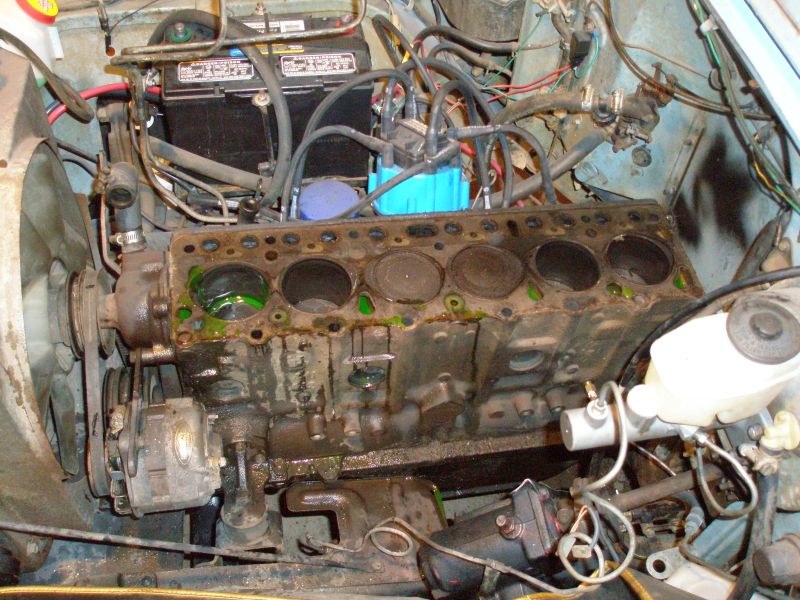
In a couple of minutes I had my wrenching suit on and was pulling the manifolds off the block. Here is how the engine compartment looked at that time.
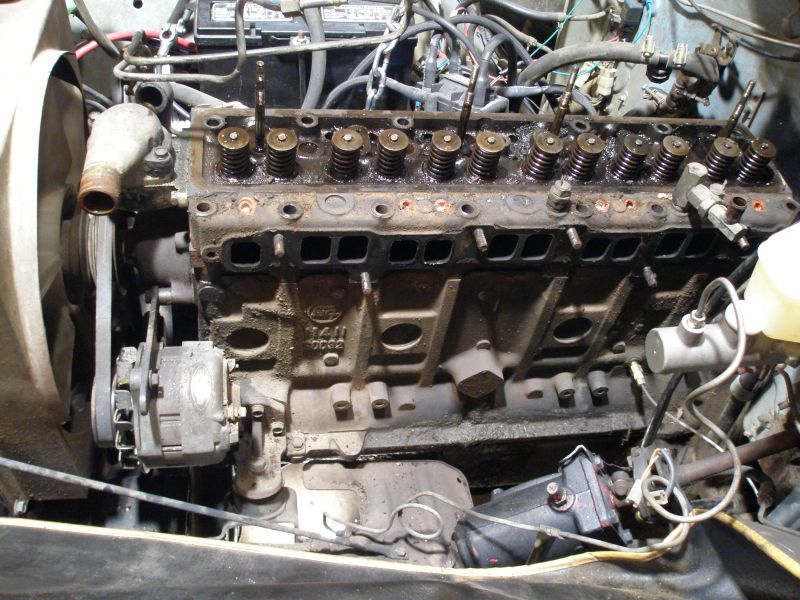
After removing the manifold we removed the nuts and bolts holding the valve train to the block. With the nuts and bolts off, we removed the valve train and push rods. This gave us plenty of room to use the breaker bar and impact wrench as needed to remove the head bolts. IIRC most of them came up with just the impact and those that needed the breaker were not really too much trouble. Of course there was not room for the impact wrench on the bolts furthest to the rear of the block so we used the socket wrench. Air powered tools really make this kind of work easier. I don't think I got a picture, but Randy has a coffe can (do you still call the plastic containers cans?) connected to the front bumper that holds all the nuts and bolts that were removed. This is a great system for making sure nothing goes astray. Here is the head all ready to be lifted out.
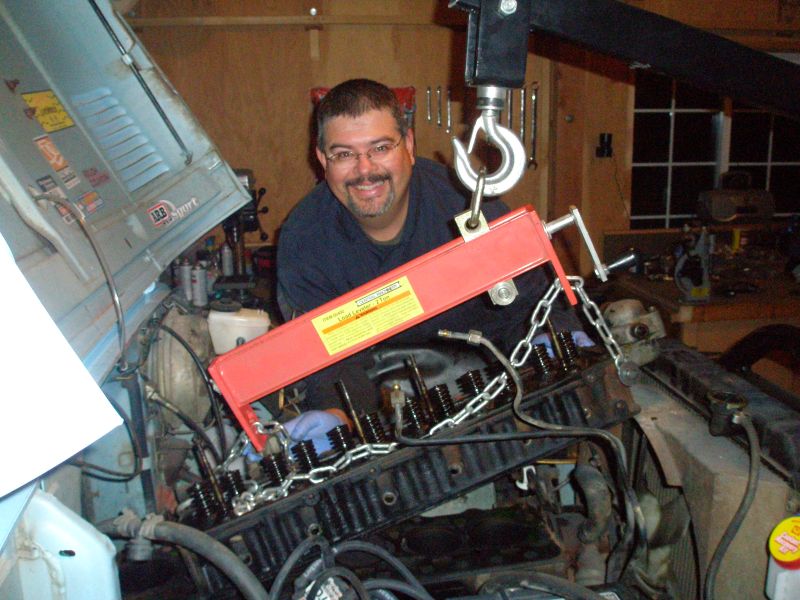
The head is heavy and two big strong guys used to lifting heavy things together could probably lift it right up and out. Randy and an are not used to lifting heavy things together so we used the engine hoist. The head only had a hook on the back side so it took a a bit of time to find the proper bolt to be used hold the chain to the front of the block. Upon sorting that out, we moved the hoist into place and found out the stinger on the bumper would only let us get in so far, and it was not quite as far as we would like. Not really a problem, we hooked up the load levler to get some additional reach. Here is the hoist in as far as it will go before it hits the stinger.
Working with Randy was great. His shop is set up well, warm and he knows his way around an engine. Throughout the process he would describe what we were doing, what we were seeing and how it related to troubleshooting the issue of low compression in cylinder 4. He also took time to answer other questions that popped into my mind as we were working and even took my picture as the head was coming out.
With the head off, we spent a time looking at the block, head and cylinders to see what their condition and operation might tell us. While we didn't find a single obvious issue telling us why compression is low in cylinder 4, it looks like getting the head re-done is an appropriate next step. Even if issue is a simple as the head gasket needing to be replaced, the head job baselines the valves. Of course, it could be there is an issue with the valves over cylinder 4, in which case the head work is really needed.
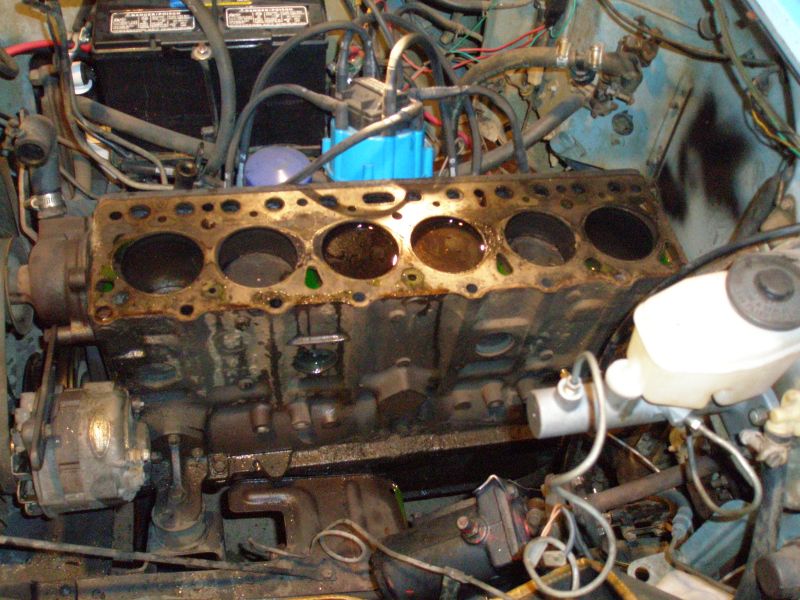
Here is the engine block with the head removed. We could see the area between cylinders 4 and 5 were really different than all the other "between cylinder areas". While the old head gasket did not show obvious signs of deterioration, replacing it will be done.
Here is a close up of cylinders 3 and 4. It is very clear that cylinder 4 was much darker than all the other cylinders. This is consistent with what would likely happen when the fuel is not fully burned, which is likely to occur in low compression cylinders.

With the head on the hoist, Randy went over it top and bottom looking for signs of an obvious burnt valve. None found on the bottom of the head. It could be the valves are all good, but the head will be taken in and gone through for good measure.
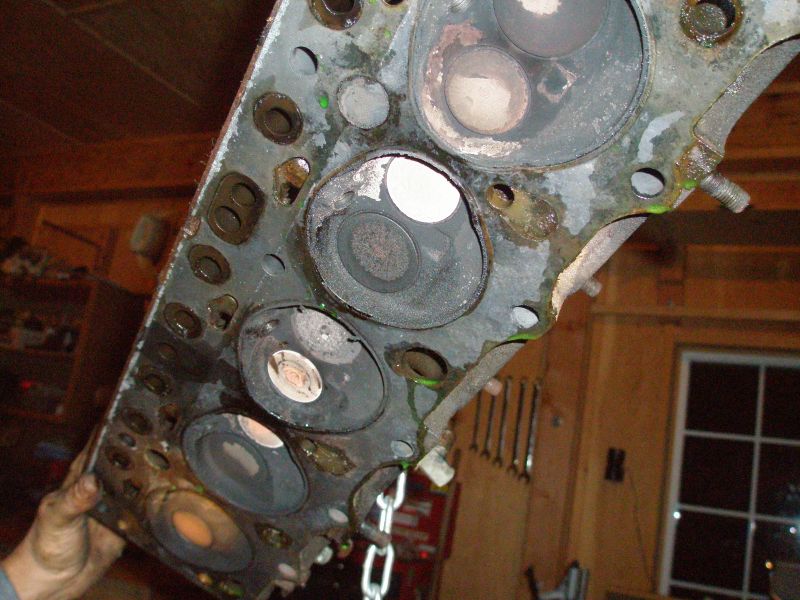
and none found on the top of the head. Even though the head is being re-done, it was good to go through the inspection and understand the condition of what is being sent in.
We also did a leak down test in cylinders 3 and 4 to see if they were holding tight to the cylinder walls. They seemed to be doing ok. If there had been something obvious, the next step would likely have been having to remove the oil pan to get a good look at the internals of the engine block. Here are the cylinders with kerosene in them.
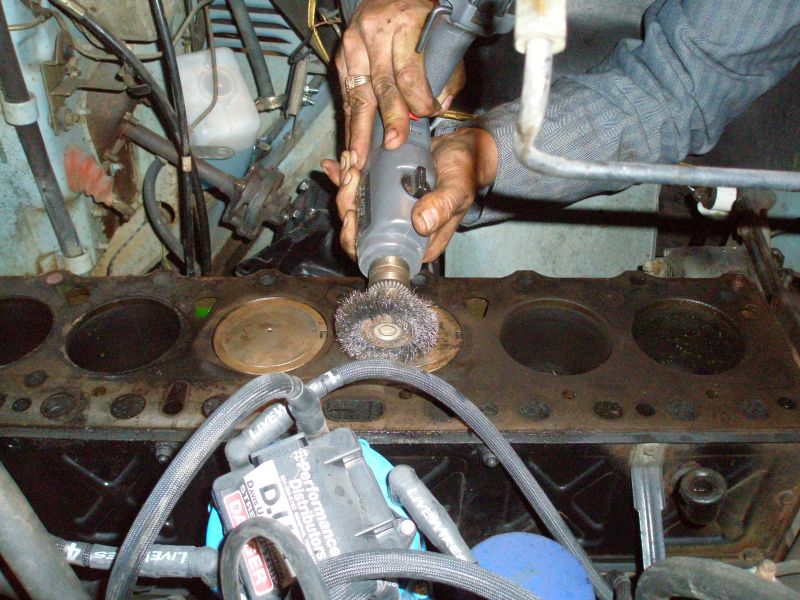
We also took a wire brush to clean the top of the pistons and looked for cracks. There were no obvious ones that could be seen and the pistion heads looked very good.
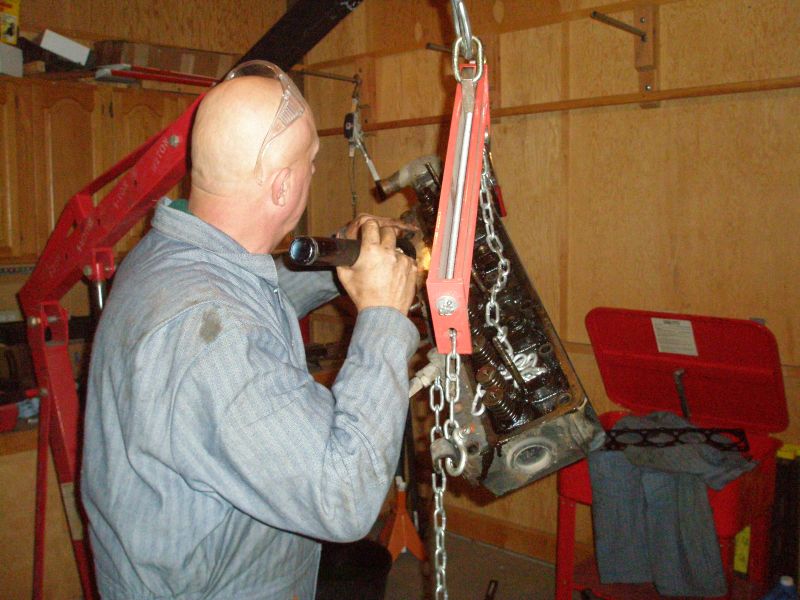
We loaded the head into the bed of Randy's truck and it is off to the shop today. With the days work done, we jumped out of our wrenching suits and enjoyed a soda. Randy, thanks for having me over to lend a hand. I learned quite a bit and again got to see something first hand that I've wondered about.
In a couple of minutes I had my wrenching suit on and was pulling the manifolds off the block. Here is how the engine compartment looked at that time.
After removing the manifold we removed the nuts and bolts holding the valve train to the block. With the nuts and bolts off, we removed the valve train and push rods. This gave us plenty of room to use the breaker bar and impact wrench as needed to remove the head bolts. IIRC most of them came up with just the impact and those that needed the breaker were not really too much trouble. Of course there was not room for the impact wrench on the bolts furthest to the rear of the block so we used the socket wrench. Air powered tools really make this kind of work easier. I don't think I got a picture, but Randy has a coffe can (do you still call the plastic containers cans?) connected to the front bumper that holds all the nuts and bolts that were removed. This is a great system for making sure nothing goes astray. Here is the head all ready to be lifted out.
The head is heavy and two big strong guys used to lifting heavy things together could probably lift it right up and out. Randy and an are not used to lifting heavy things together so we used the engine hoist. The head only had a hook on the back side so it took a a bit of time to find the proper bolt to be used hold the chain to the front of the block. Upon sorting that out, we moved the hoist into place and found out the stinger on the bumper would only let us get in so far, and it was not quite as far as we would like. Not really a problem, we hooked up the load levler to get some additional reach. Here is the hoist in as far as it will go before it hits the stinger.
Working with Randy was great. His shop is set up well, warm and he knows his way around an engine. Throughout the process he would describe what we were doing, what we were seeing and how it related to troubleshooting the issue of low compression in cylinder 4. He also took time to answer other questions that popped into my mind as we were working and even took my picture as the head was coming out.
With the head off, we spent a time looking at the block, head and cylinders to see what their condition and operation might tell us. While we didn't find a single obvious issue telling us why compression is low in cylinder 4, it looks like getting the head re-done is an appropriate next step. Even if issue is a simple as the head gasket needing to be replaced, the head job baselines the valves. Of course, it could be there is an issue with the valves over cylinder 4, in which case the head work is really needed.
Here is the engine block with the head removed. We could see the area between cylinders 4 and 5 were really different than all the other "between cylinder areas". While the old head gasket did not show obvious signs of deterioration, replacing it will be done.
Here is a close up of cylinders 3 and 4. It is very clear that cylinder 4 was much darker than all the other cylinders. This is consistent with what would likely happen when the fuel is not fully burned, which is likely to occur in low compression cylinders.
With the head on the hoist, Randy went over it top and bottom looking for signs of an obvious burnt valve. None found on the bottom of the head. It could be the valves are all good, but the head will be taken in and gone through for good measure.
and none found on the top of the head. Even though the head is being re-done, it was good to go through the inspection and understand the condition of what is being sent in.
We also did a leak down test in cylinders 3 and 4 to see if they were holding tight to the cylinder walls. They seemed to be doing ok. If there had been something obvious, the next step would likely have been having to remove the oil pan to get a good look at the internals of the engine block. Here are the cylinders with kerosene in them.
We also took a wire brush to clean the top of the pistons and looked for cracks. There were no obvious ones that could be seen and the pistion heads looked very good.
We loaded the head into the bed of Randy's truck and it is off to the shop today. With the days work done, we jumped out of our wrenching suits and enjoyed a soda. Randy, thanks for having me over to lend a hand. I learned quite a bit and again got to see something first hand that I've wondered about.
Last edited:

 .
. Sounds like you did your homework.