RicardoJM
Hard Core 4+
Engine is in
I didn't get much of anything done last week and yesterday due to a bunch of other committments. Today, we put the new engine in . I was hoping to get the transmission stabbed before calling it a day but broke a clutch bolt that retains the pressure plate to the flywheel. A real bummer
 . I used brand new OEM bolts for the bell housing to engine and flywheel, but was reusing the old pressure plate bolts and it was just too much for one of them.
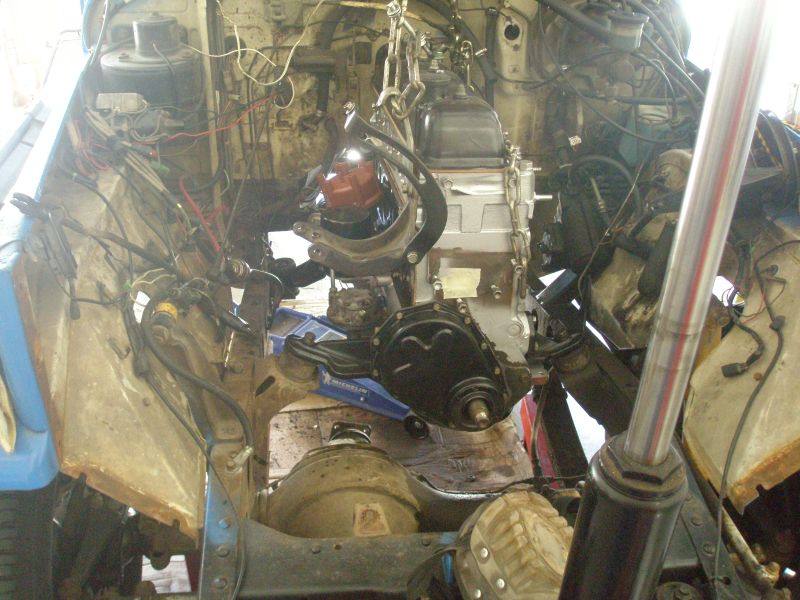
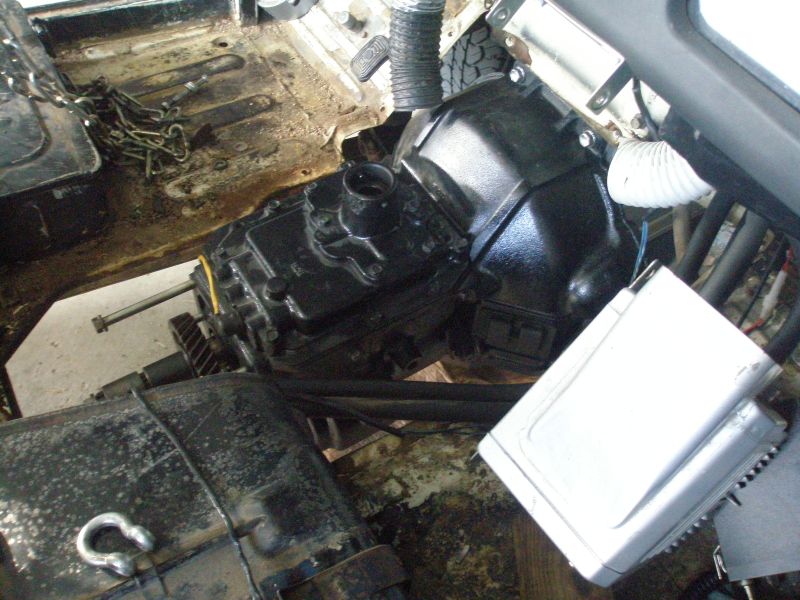
TheBoomBoom gave me a hand today and I was very glad to have the extra set of hands. The engine went in a bunch smoother that what I was expecting. We took our time and used the leveler to slowly work the load back and into place. We also removed the rear brackets from the side of the bell housing and put them on after clearing the steering box and brake line. This one adjustment to the process made a huge difference in ease. As needed, we used a floor jack for slight adjustments from below. The picture didn't come out so great, but here is the new engine in its new home.
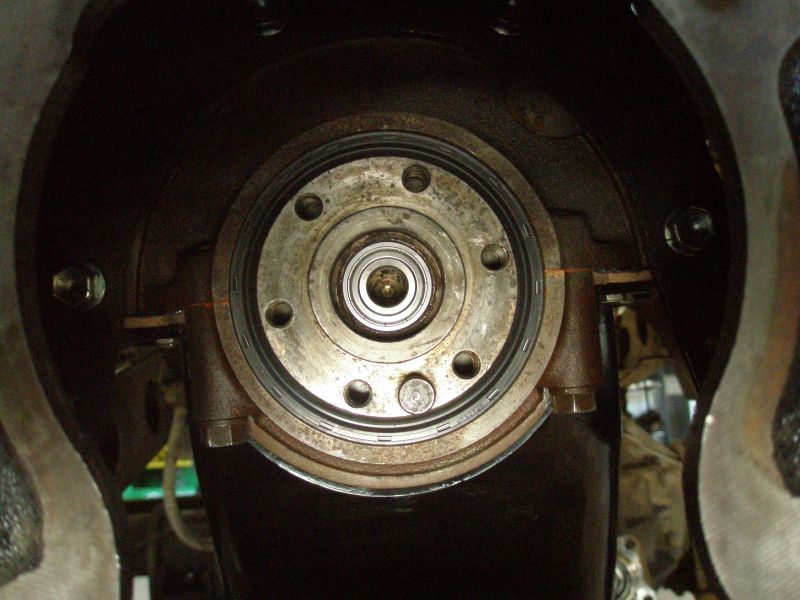
I managed to ruin a pilot bearing during install. After a quick trip to NAPA we had sourced a new bearing, sealed on both sides. I like it better than the OEM issue bearing. In short order the new pilot bearing was installed. With a new rear main seal and pilot bearing, things are starting to look good.
The flywheel was put on with new OEM bolts and lock plates. Each bolt was coated with ultra black so it should not leak. The ends of the lock plates were bent up.
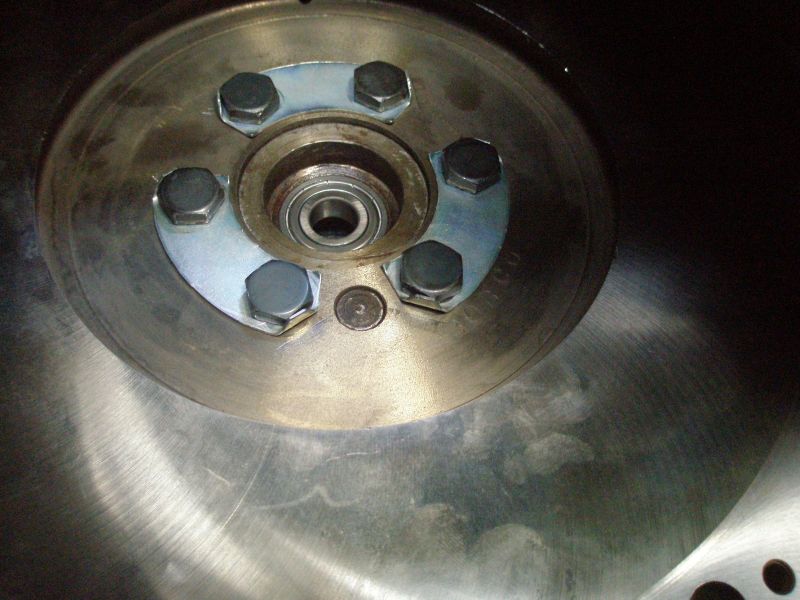
Next, we got the clutch up and in position and started to attach the bolts. I got all six threaded in by hand and then was working them in a couple of turns at a time when one of them snapped. So, down came the clutch and pressure plate. I'm hoping to lay my hands on a right angle drill so that tomorrow afternoon I can get at it with a left hand drill bit or extractor. I'm pretty sure it will come right out. I'm trying to avoid having to drop the flywheel, but if it comes to that - down it will have to come.
Once the clutch is done, the tranny should slide right in. The t-case will not slide right on because of interference from a frame cross member. This should not be too big of a problem as we will remove the engine mount bolts and angle the back down to install the t-case. With the hoist, the leveler and a jack underneath it should go pretty smooth.
I didn't get much of anything done last week and yesterday due to a bunch of other committments. Today, we put the new engine in
. I was hoping to get the transmission stabbed before calling it a day but broke a clutch bolt that retains the pressure plate to the flywheel. A real bummer. I used brand new OEM bolts for the bell housing to engine and flywheel, but was reusing the old pressure plate bolts and it was just too much for one of them.TheBoomBoom gave me a hand today
and I was very glad to have the extra set of hands. The engine went in a bunch smoother that what I was expecting. We took our time and used the leveler to slowly work the load back and into place. We also removed the rear brackets from the side of the bell housing and put them on after clearing the steering box and brake line. This one adjustment to the process made a huge difference in ease. As needed, we used a floor jack for slight adjustments from below. The picture didn't come out so great, but here is the new engine in its new home.
I managed to ruin a pilot bearing during install. After a quick trip to NAPA we had sourced a new bearing, sealed on both sides. I like it better than the OEM issue bearing. In short order the new pilot bearing was installed. With a new rear main seal and pilot bearing, things are starting to look good.
The flywheel was put on with new OEM bolts and lock plates. Each bolt was coated with ultra black so it should not leak. The ends of the lock plates were bent up.
Next, we got the clutch up and in position and started to attach the bolts. I got all six threaded in by hand and then was working them in a couple of turns at a time when one of them snapped. So, down came the clutch and pressure plate. I'm hoping to lay my hands on a right angle drill so that tomorrow afternoon I can get at it with a left hand drill bit or extractor. I'm pretty sure it will come right out. I'm trying to avoid having to drop the flywheel, but if it comes to that - down it will have to come.
Once the clutch is done, the tranny should slide right in. The t-case will not slide right on because of interference from a frame cross member. This should not be too big of a problem as we will remove the engine mount bolts and angle the back down to install the t-case. With the hoist, the leveler and a jack underneath it should go pretty smooth.

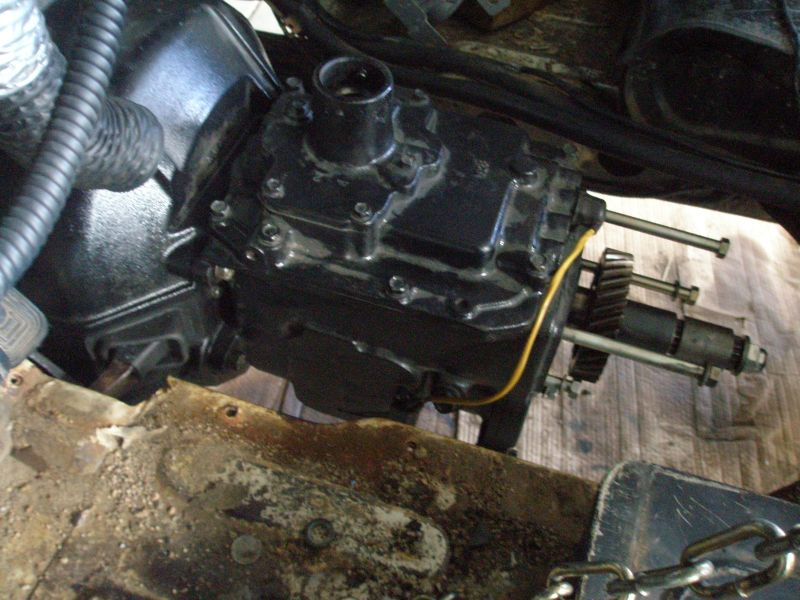
 . I spent the balance of the evening listening to the baseball game on the radio, checking the pre-load and buttoning up parking brake with a new output seal and gasket. The t-case is all ready to go on the transmission tomorrow, hopefully my helper is available as well
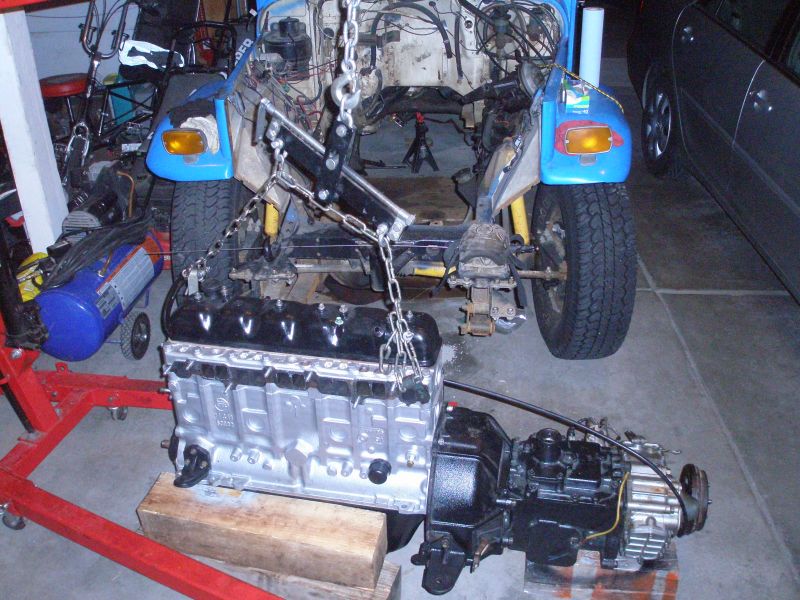

 - You're right...I bet no one invites me over to help level out their engine, or help build a plane for that matter