• REGISTER FOR RISING SUN'S 2ND BEST EVENT: THE COLOYOTA EXPO. IT'S ONLY $5, DUDE.
    → No extra fee to bring yer extra stuff and sell it at the swap meet.
    → It's not Cruise Moab, but it's way cheaper and you can sleep in your own bed.
    Businesses: Still time to register your company to be an exhibitor at the event, too!
    Click here to register today..

FJ140 Build

Capriblue45

Rising Sun Member
Joined
May 28, 2023
Messages
531
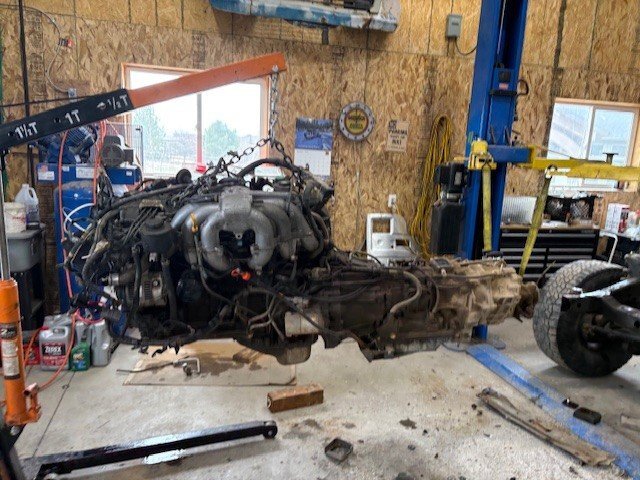
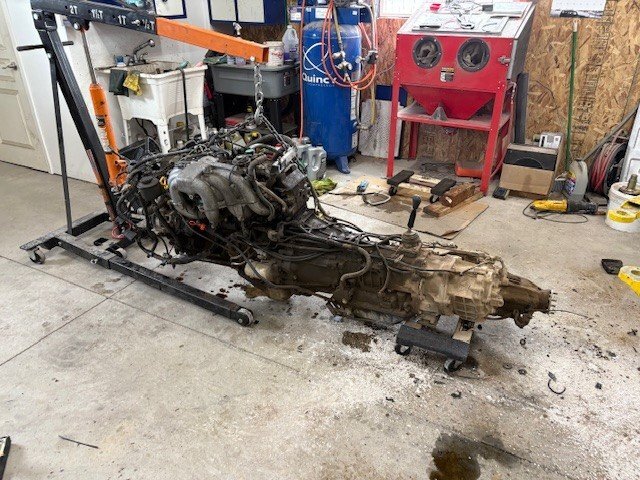
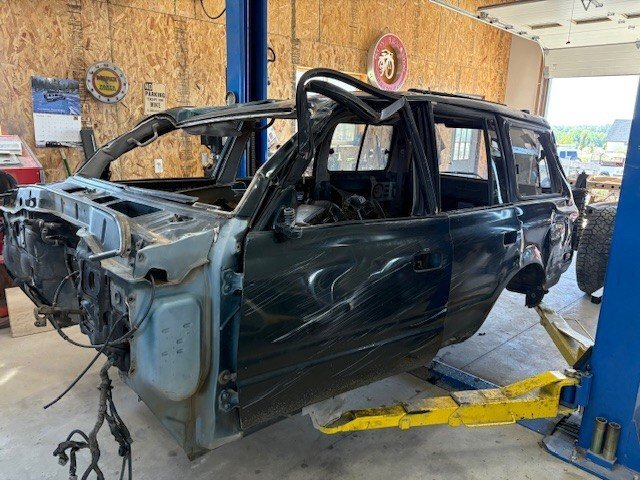
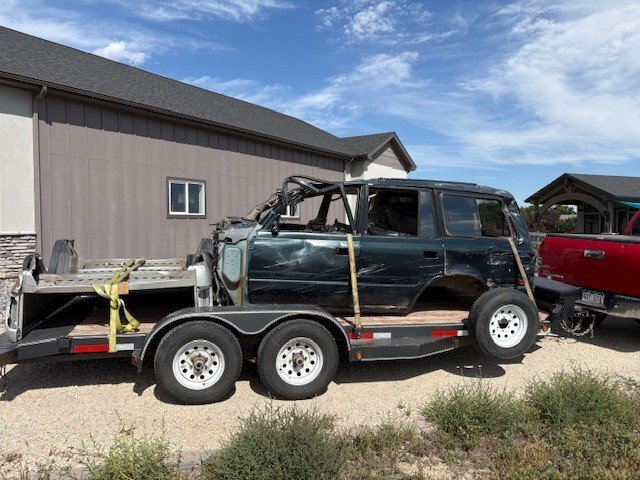
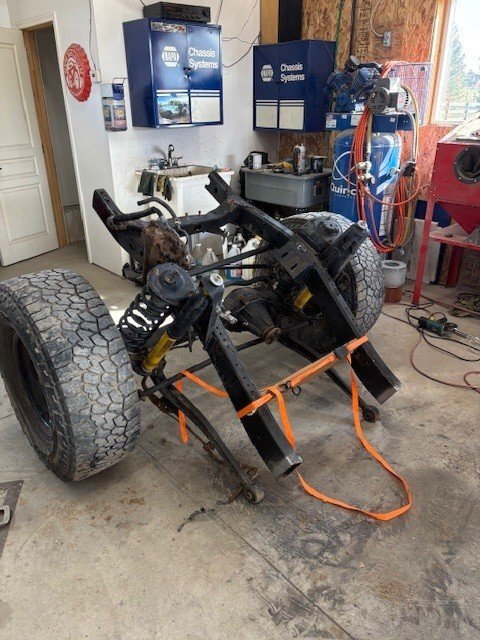
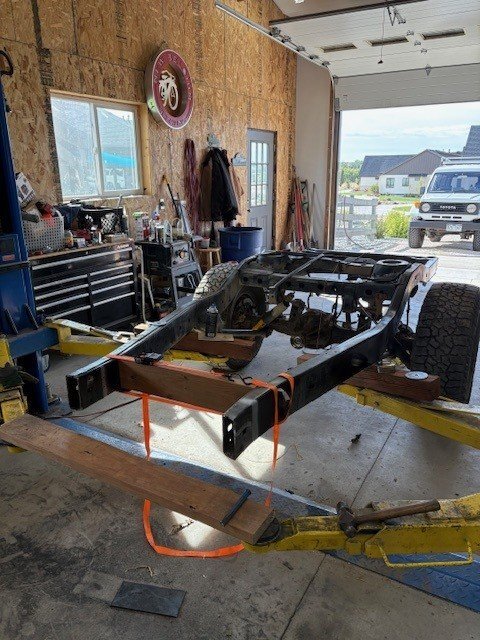
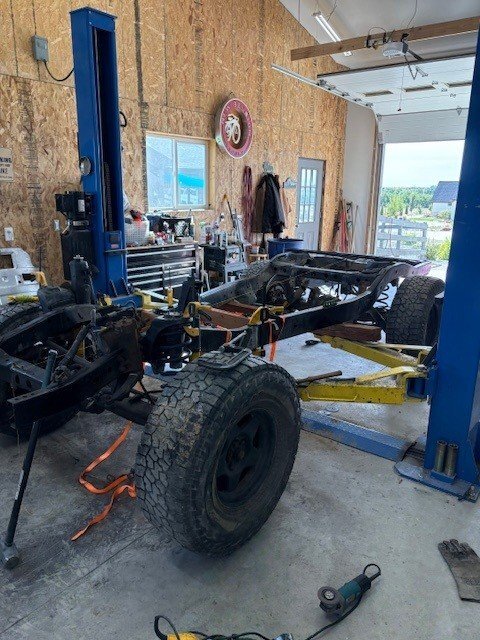
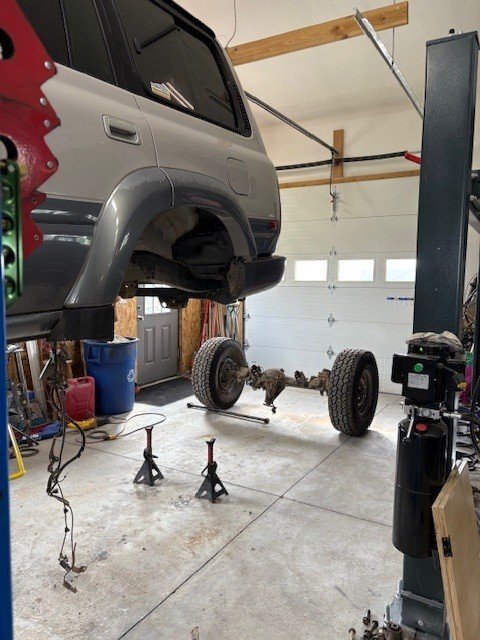
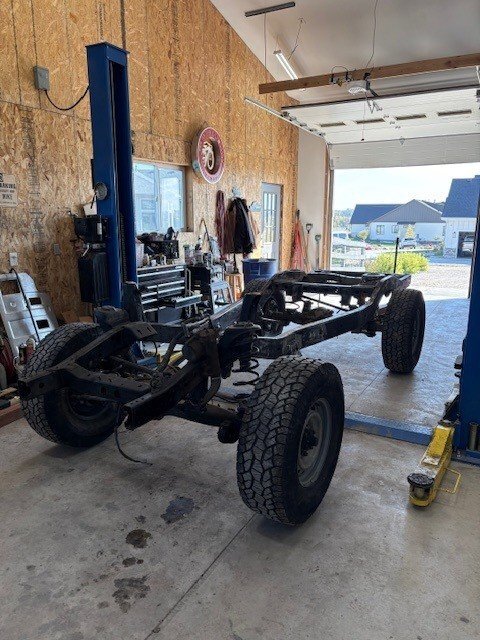
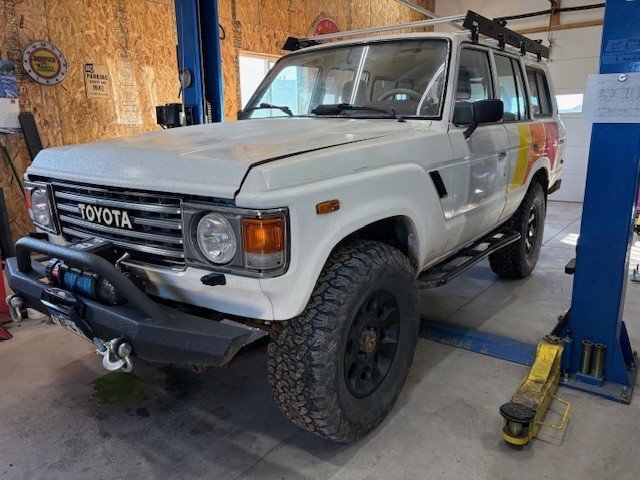
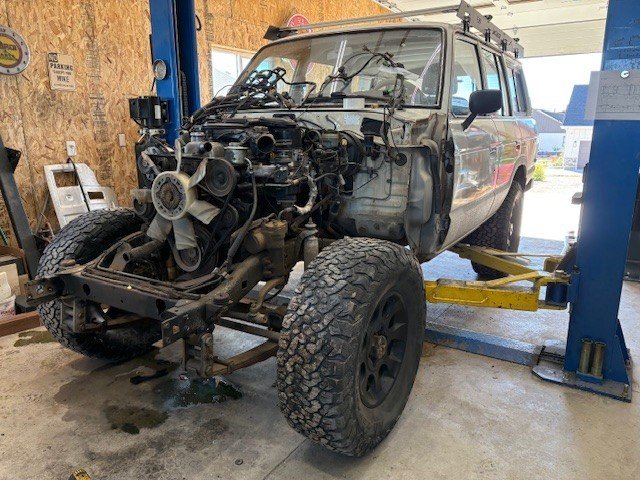
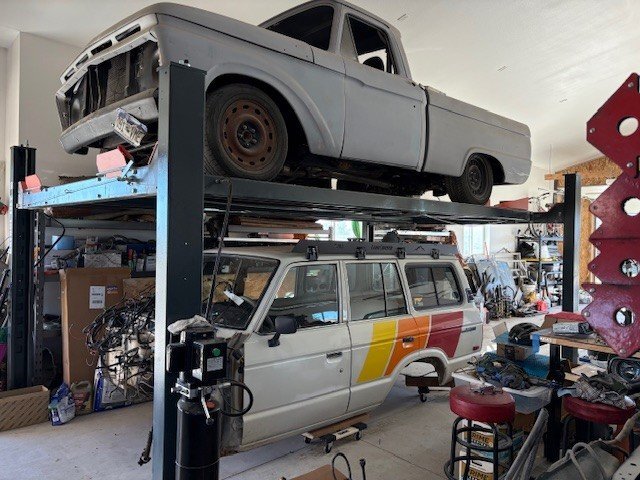
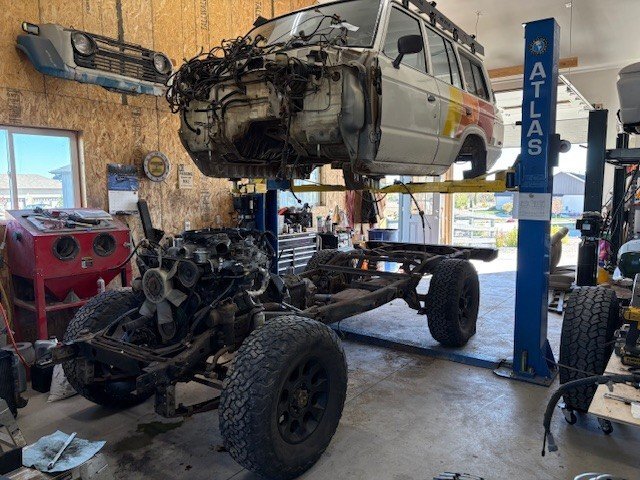
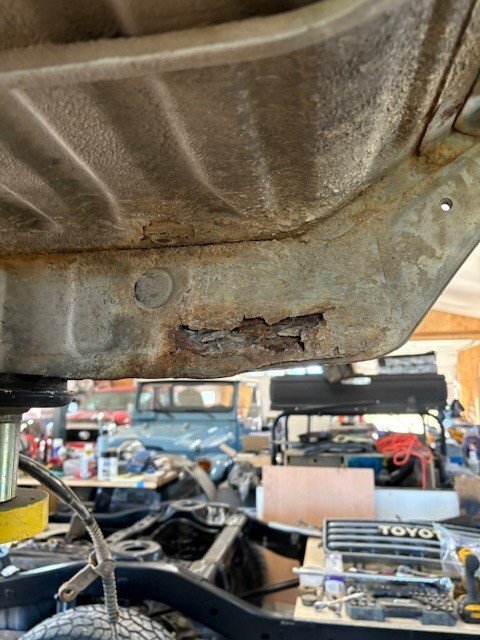
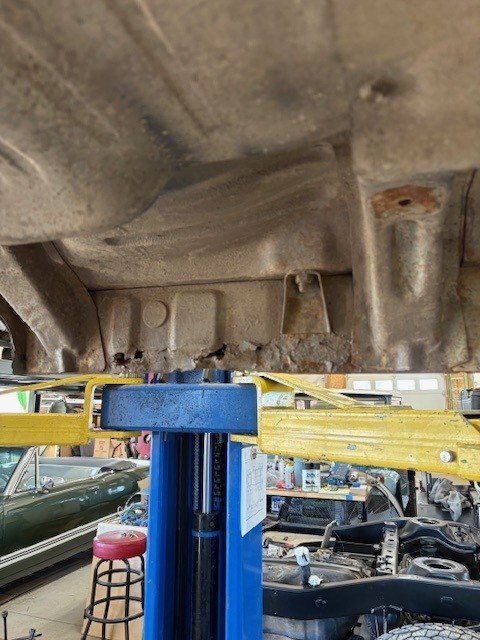
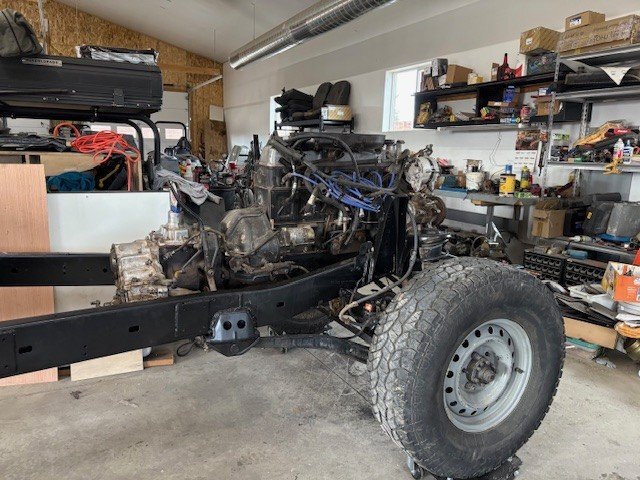
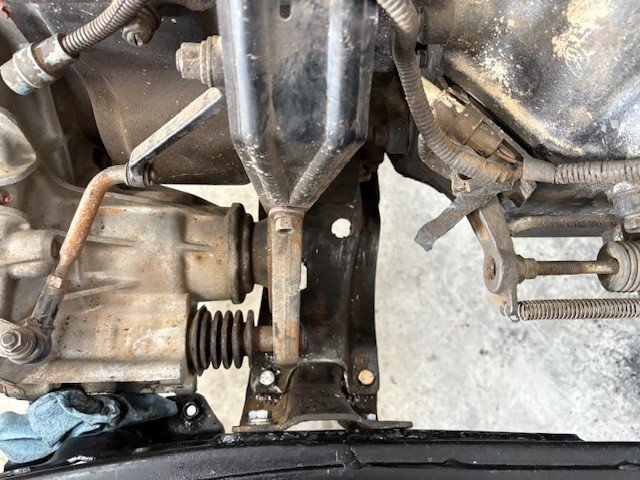
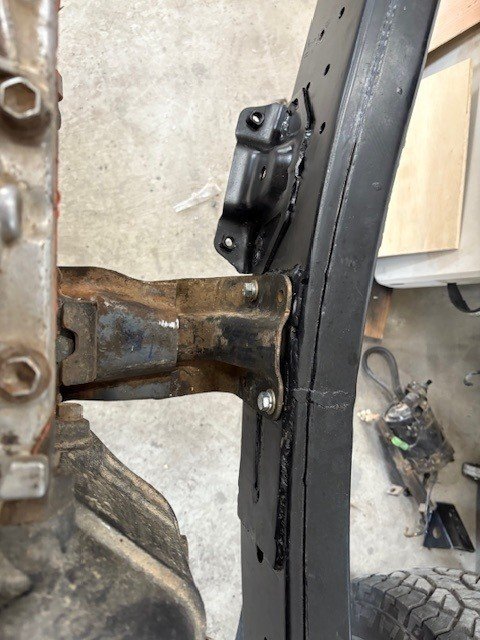
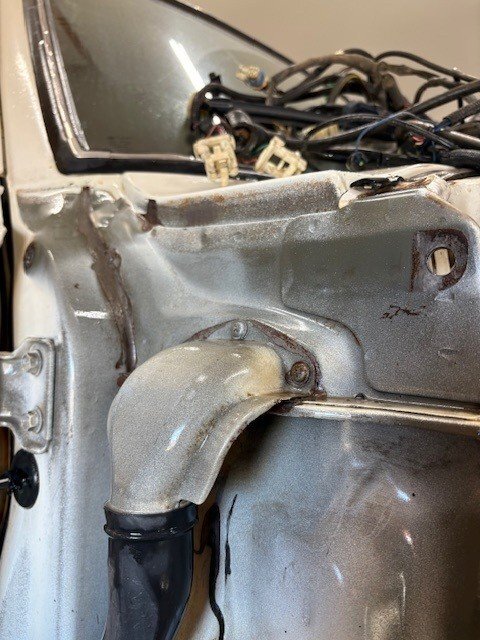
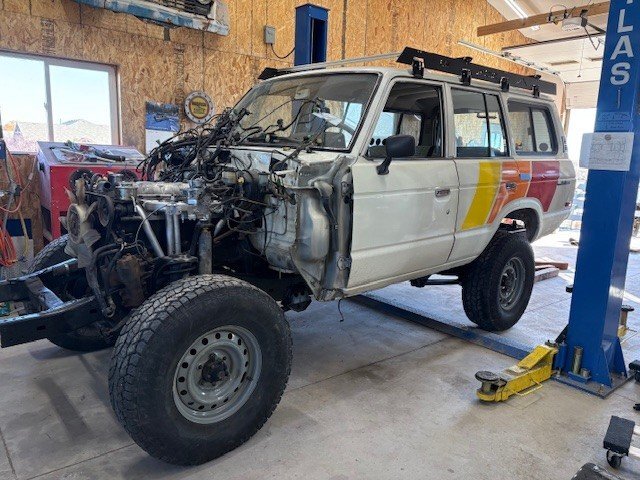
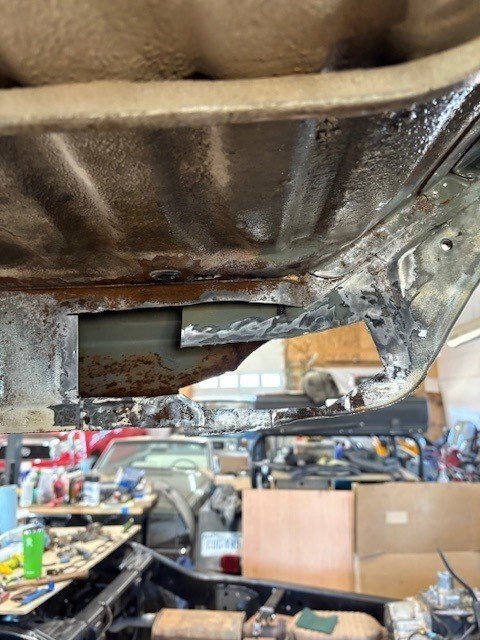
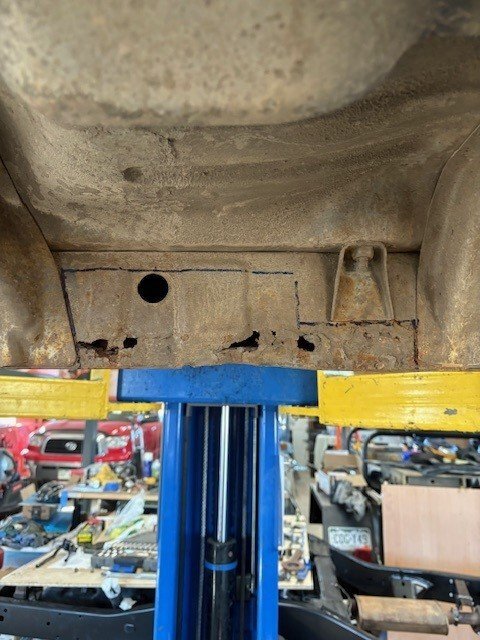
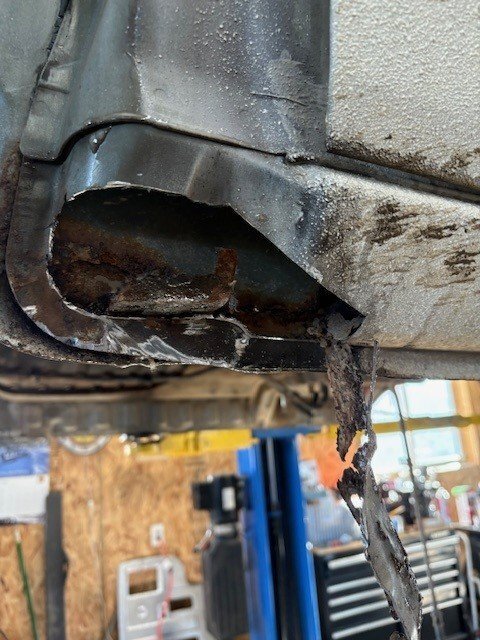
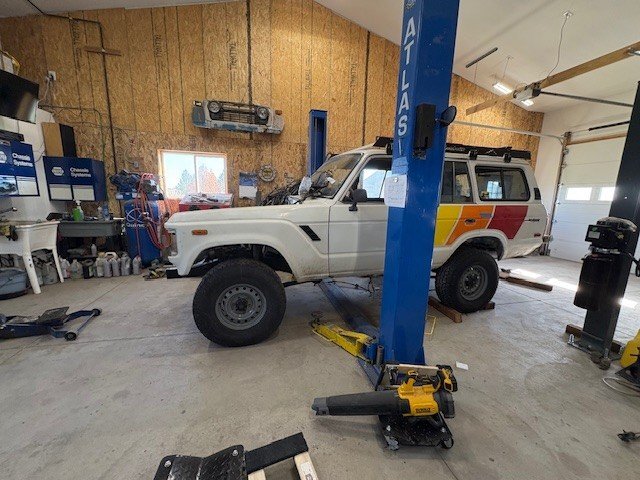
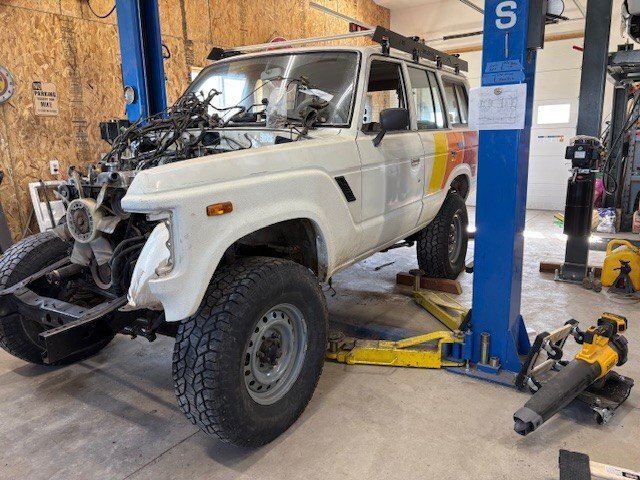
Yesterday I started the journey of rebuilding my 1984 FJ60. The current plan is to graft the body, engine, transmission and transfer case of the 60 on to the rolling chassis of a 1994 FZJ80. After stripping the interior of the 80 series I have moved on to removal of the heart of the beast and will soon be pulling the body off to send it to the metal recycler.

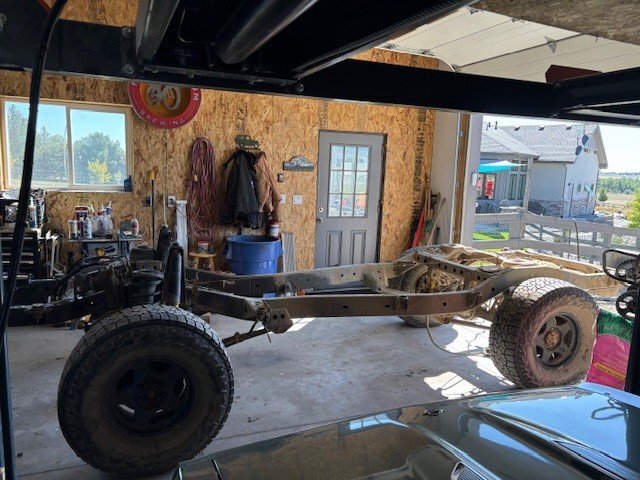
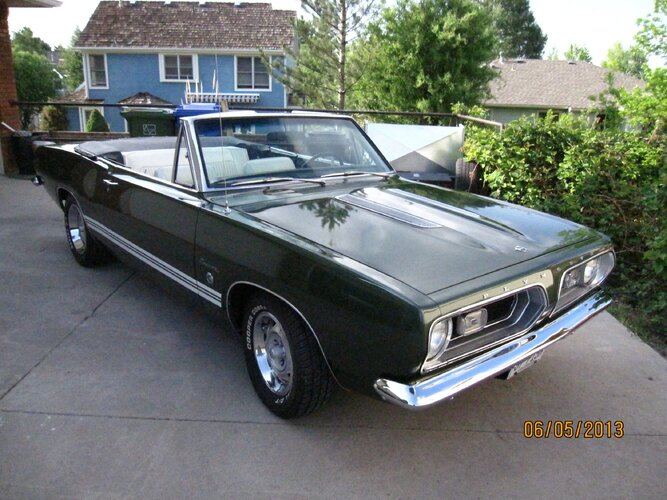
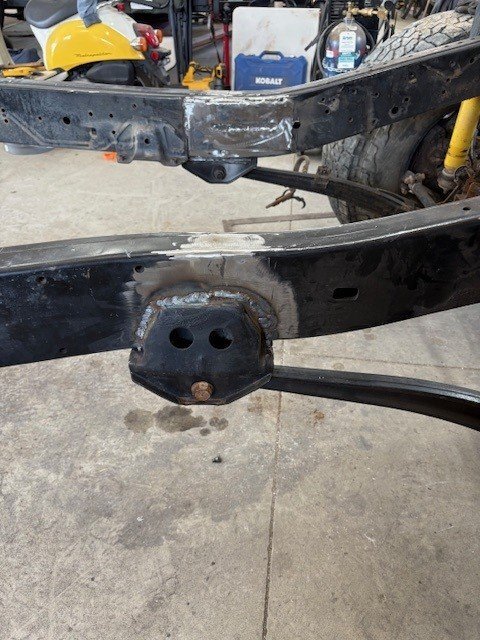
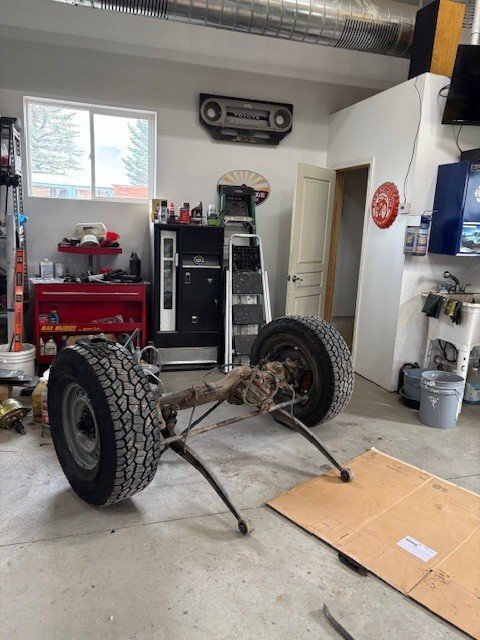
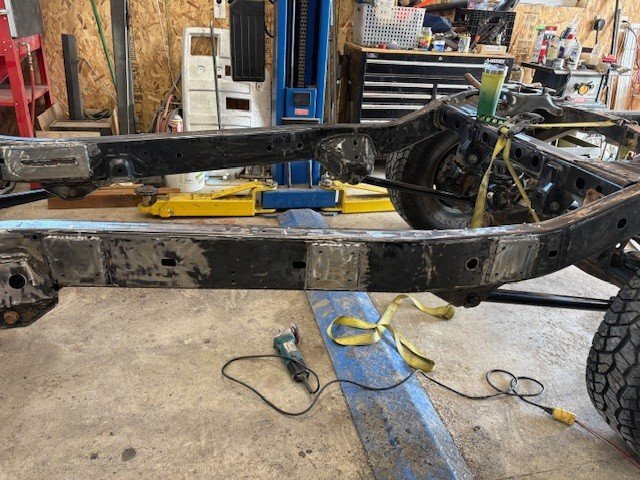
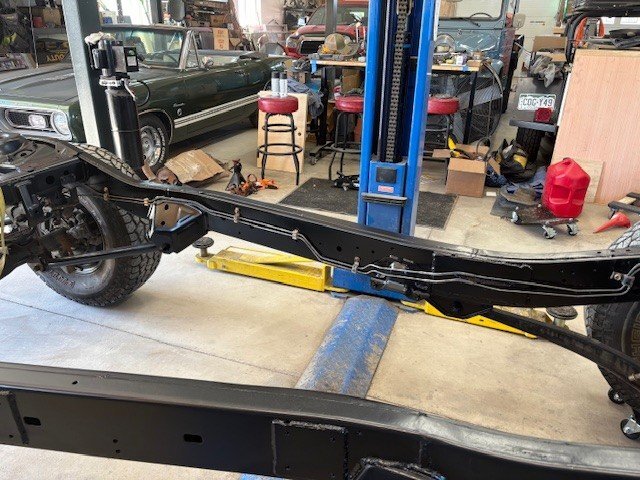
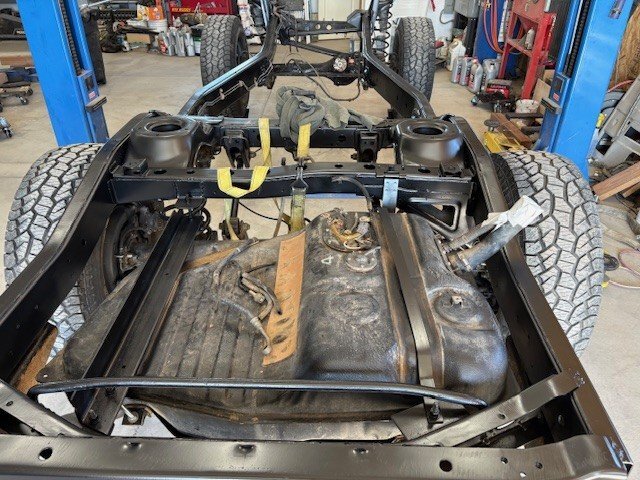
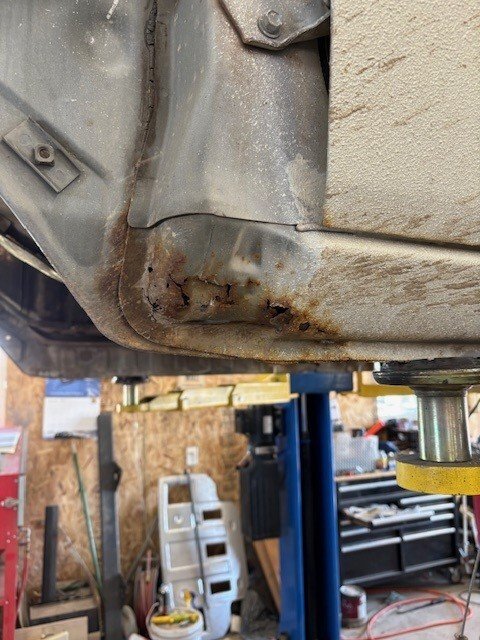
First order of business is to get the 80 down to bare frame, clean and repair anything that needs it and rebuild the axles complete with lockers. I plan to keep the 60 whole through the summer and fall so we can enjoy it on the trails as much as possible until taking it out of service in mid-late October.

I will try to document the steps as I work through this build over the next year with a goal of taking it to Cruise Moab 2026.
 

Attachments

  • 1FZ.jpg
    1FZ.jpg
    98.5 KB · Views: 309
  • Empty shell.jpg
    Empty shell.jpg
    108.5 KB · Views: 300
  • removal.jpg
    removal.jpg
    113.3 KB · Views: 284

Capriblue45

Rising Sun Member
Joined
May 28, 2023
Messages
531
With fall just around the corner it's time to get serious about the 140 build. Spent the day pulling the damaged body off of the 80 and have it loaded up to take to the local metal recycler. Next step is to get a ton of pictures and measurements of the critical dimensions of the 60 so I can begin the job of shortening the 80 chassis.
 

Attachments

  • frame 2.jpg
    frame 2.jpg
    92.7 KB · Views: 141
  • junk body.jpg
    junk body.jpg
    100.9 KB · Views: 145
  • ready for scrap yard.jpg
    ready for scrap yard.jpg
    94.3 KB · Views: 156

Notyourmomslx450

GIG 'EM GILL
Staff member
Cruise Moab Committee
Joined
Aug 4, 2014
Messages
4,259
Location
Westminster
sorry, derail.... but tell me about the 68 Barracuda.
 

Telly

Rising Sun Member
Joined
Jan 4, 2008
Messages
1,840
Location
Monument
I forgot you were the one that picked up that rolled 80 from the guy I bought the tires from in Canyon City. Sounds like an awesome project and looking forward to your build thread!
 

Capriblue45

Rising Sun Member
Joined
May 28, 2023
Messages
531
sorry, derail.... but tell me about the 68 Barracuda.
Your close, it's a 67 convertible with a 340/ 4 speed I did a 2-1/2 year restoration on it about 15 years ago. It was originally a 273 auto car but that was long gone so I sourced the 340 from a 68 for proper Mopar power.
 

Attachments

  • 392.JPG
    392.JPG
    1,010.1 KB · Views: 157

Capriblue45

Rising Sun Member
Joined
May 28, 2023
Messages
531
Today was the day, took a cut of wheel to the 80 series frame. Only took about an hour and a half to have it in 2 pieces. The hardest part was removing the front brackets for the radius arms without damaging them. Managed to get in pulled back together and start the process of welding it out. I'm using a 1/4" fish plate on the inside of the frame to reinforce the area where it is welded back together.
 

Attachments

  • front half.jpg
    front half.jpg
    105.1 KB · Views: 139
  • bracing frame.jpg
    bracing frame.jpg
    94.1 KB · Views: 128
  • back half.jpg
    back half.jpg
    101.8 KB · Views: 136
  • tacked up.jpg
    tacked up.jpg
    100.4 KB · Views: 130

Capriblue45

Rising Sun Member
Joined
May 28, 2023
Messages
531
Big day today, removed the factory locked axles from Marco's wrecked 80 and got them mounted under the shortened 80 chassis. Also pulled all the brake lines, fuel lines and fuel tank from the 80. Once the spare tire carrier is out of the way the 80 tank looks to fit nicely in the space vacated by the spare. Just need to turn it 90 degrees and I will have to fabricate some hangers for it. I think this will be a good upgrade to the 20 gallon 60 series tank given the in tank fuel pump to go along with the GM fuel injection I am currently running on the 2F. Plan is to start tearing the 60 down latter this month.
 

Attachments

  • axle removal.jpg
    axle removal.jpg
    83.6 KB · Views: 104
  • axle removal 2.jpg
    axle removal 2.jpg
    84.6 KB · Views: 108
  • rolling 140.jpg
    rolling 140.jpg
    95.5 KB · Views: 118

Capriblue45

Rising Sun Member
Joined
May 28, 2023
Messages
531
welded on three 1/4" pads and drilled and taped them on each side of the frame so I can build the sliders with a matched pad and they can be removable. Trying to get as much done to the frame before I drop in a drivetrain and set the body on.
 

Attachments

  • slider pads.jpg
    slider pads.jpg
    115 KB · Views: 107

Capriblue45

Rising Sun Member
Joined
May 28, 2023
Messages
531
The frame clean up is completed and I have started the build back. Got the fuel tank from the 80 relocated to behind the axle and started to run the brake lines. Once all the work is completed for the frame I will take the 60 out of service and start the transplant of the engine, transmission and transfer case. Planning to drive the 60 a bunch this next week so I can have a good feel for the difference this will make. Might even do a 0-60 run just for fun, any guesses? :ROFLMAO:
 

Attachments

  • brake lines.jpg
    brake lines.jpg
    99.8 KB · Views: 112
  • gas tank relocation.jpg
    gas tank relocation.jpg
    111.3 KB · Views: 102

Capriblue45

Rising Sun Member
Joined
May 28, 2023
Messages
531
Had a productive day on the 140 build. Rolled the 60 into the shop at 8:30 this morning and had the body separated from the frame by 2:30. Plan to remove the driveline tomorrow so I can start mocking up motor and transmission mounts for the 80 frame.

There will be a little rust repair on the drivers side before the body can be set on the 80 frame.
 

Attachments

  • ready for disassembly.jpg
    ready for disassembly.jpg
    87.9 KB · Views: 102
  • front clip removed.jpg
    front clip removed.jpg
    104.4 KB · Views: 97
  • body stored away.jpg
    body stored away.jpg
    89.6 KB · Views: 100
  • body off.jpg
    body off.jpg
    104 KB · Views: 107
  • drivers front.jpg
    drivers front.jpg
    89 KB · Views: 108
  • drivers mid way.jpg
    drivers mid way.jpg
    78.8 KB · Views: 101
  • drivers side.jpg
    drivers side.jpg
    92 KB · Views: 110

Capriblue45

Rising Sun Member
Joined
May 28, 2023
Messages
531
Got the motor mounts welded in yesterday and set in the driveline this morning. I was able to use the original 60 series transmission mount with a few modifications. The 80 series frame is around 2" narrower where the transmission sits but nothing that can't fixed with a cut off wheel. I was able to drill and tap the plate where I tied the 2 subframes together to bolt it in.
 

Attachments

  • engine installed.jpg
    engine installed.jpg
    98.7 KB · Views: 105
  • engine in 2.jpg
    engine in 2.jpg
    96.5 KB · Views: 106
  • cross member.jpg
    cross member.jpg
    98.6 KB · Views: 99
  • cross member 2.jpg
    cross member 2.jpg
    76.1 KB · Views: 114

Capriblue45

Rising Sun Member
Joined
May 28, 2023
Messages
531
Thanks Marco, next big milestone is to get the body mocked up so I can figure out new body mounts. Defiantly a project where measuring twice comes in handy.
 

Capriblue45

Rising Sun Member
Joined
May 28, 2023
Messages
531
Another productive day on the 140 build. I got all the rust issues on the drivers side cut out and new steel welded in. When I finished that I thought what the hell, I have it in the air I might as well drop the body on the chassis to see if everything is going to work the way it did in my head. I still need to do some small tweaks to the body alignment so I can measure and build mounts but very happy with the way things are progressing.

I used a rustoleum gel rust dissolver to clean up the areas behind the fenders very happy with the results.
 

Attachments

  • all clean.jpg
    all clean.jpg
    85.5 KB · Views: 101
  • body mock up.jpg
    body mock up.jpg
    97.2 KB · Views: 106
  • rust drivers front.jpg
    rust drivers front.jpg
    87 KB · Views: 110
  • rust drivers rear.jpg
    rust drivers rear.jpg
    82.5 KB · Views: 99
  • drivers front corner.jpg
    drivers front corner.jpg
    91.9 KB · Views: 117

RDub

Trail Ready
Joined
Feb 9, 2021
Messages
490
Location
Boulder, CO
Looking great. Jealous! Tell us more about the Rustoleum product, Mike.
 

Capriblue45

Rising Sun Member
Joined
May 28, 2023
Messages
531
Looking great. Jealous! Tell us more about the Rustoleum product, Mike.
I purchased it at Home Depot. You remove any loose scale then spray on the gel and brush with a stiff bristle brush. The instructions say to keep it wet for 30 minutes then rinse off with water. I just used a spray bottle to mist it about every 10 minutes and ran the brush over it as well. It removes all of the surface rust and left a clean surface behind.
 

RDub

Trail Ready
Joined
Feb 9, 2021
Messages
490
Location
Boulder, CO
That’s very cool. Thanks. I have uses for that on our motorhome.
 

Capriblue45

Rising Sun Member
Joined
May 28, 2023
Messages
531
Got all the body mounts measured and drawn up. There is a metal shop in Fort Collins that I have used in the past for custom fabrication work. I dropped off my fab drawings and hope to have the new brackets mid next week so I can get the body final mounted on the new frame. In the meantime I will be making new fuel lines from the relocated 80 series tank. Looks like the frame shortening worked out perfect.
 

Attachments

  • reassembly 2.jpg
    reassembly 2.jpg
    87.8 KB · Views: 90
  • reassembly.jpg
    reassembly.jpg
    99.4 KB · Views: 92
Back
Top