Last Minute Project

Rzeppa

Rising Sun Member
Joined
Aug 24, 2005
Messages
8,240
Location
Kittredge CO, USA
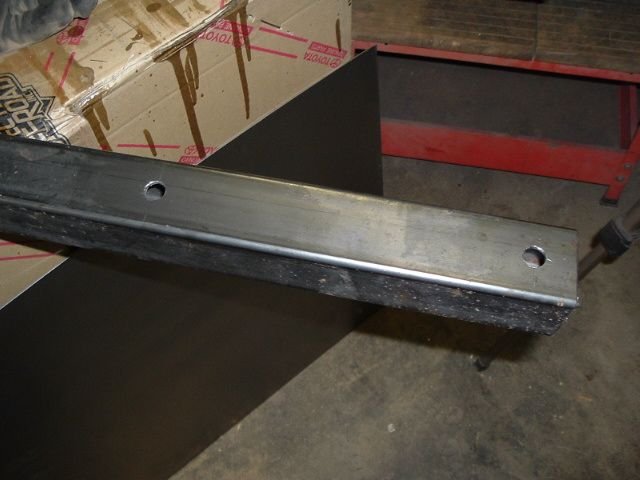
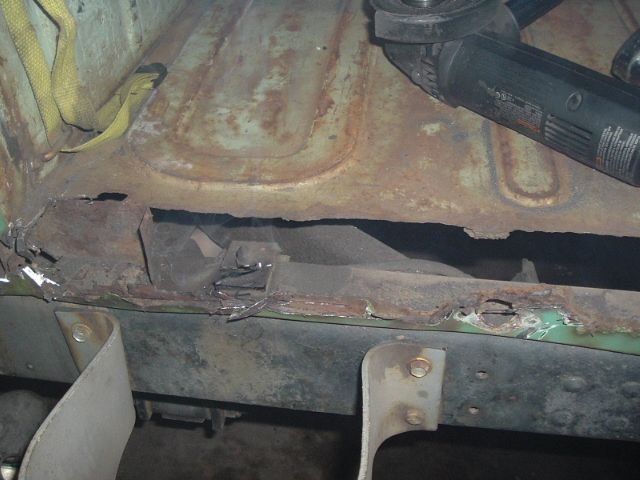
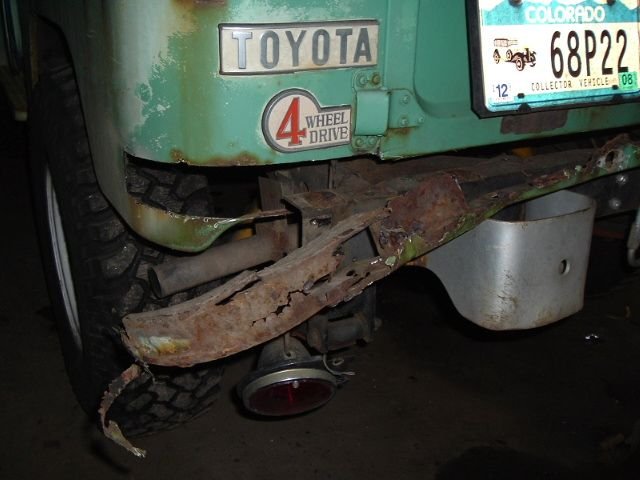
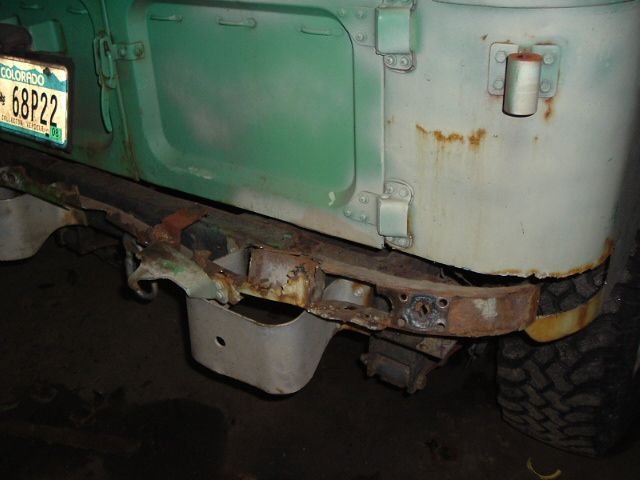
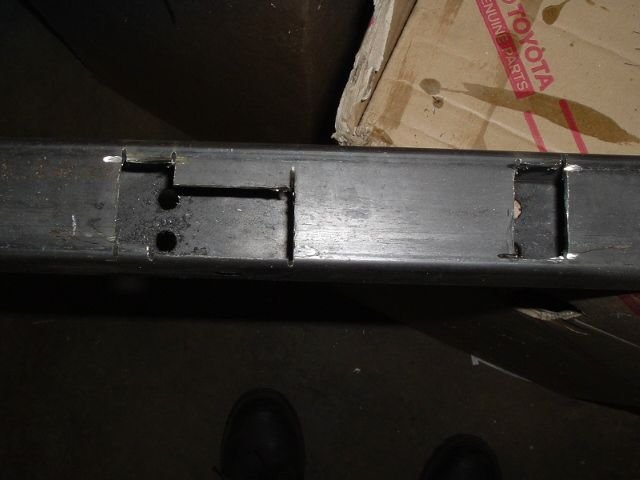
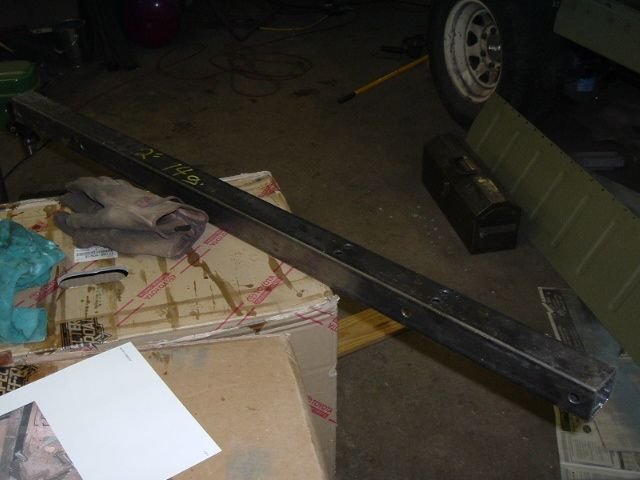
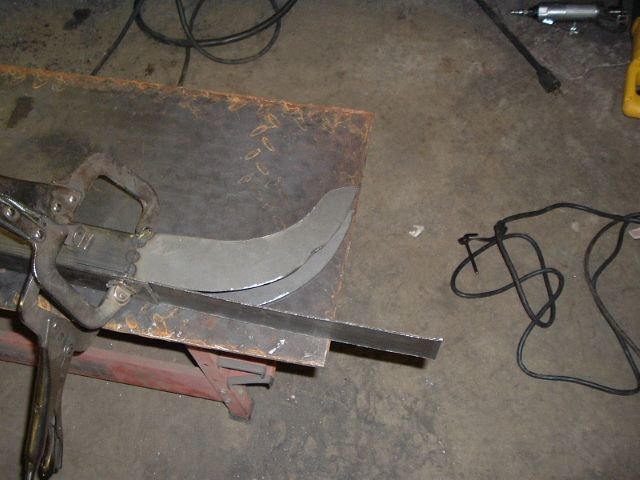
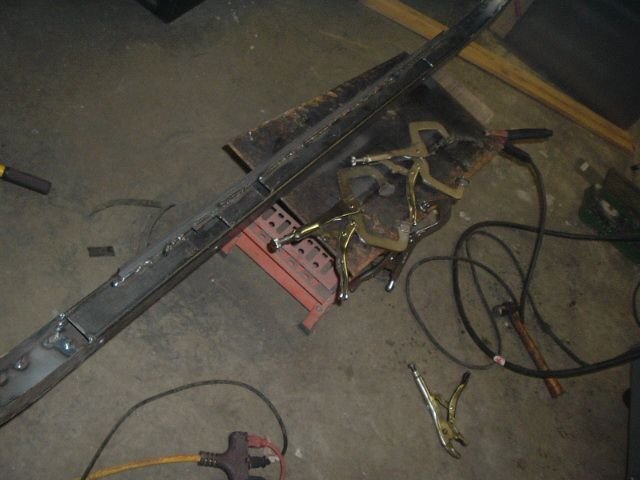
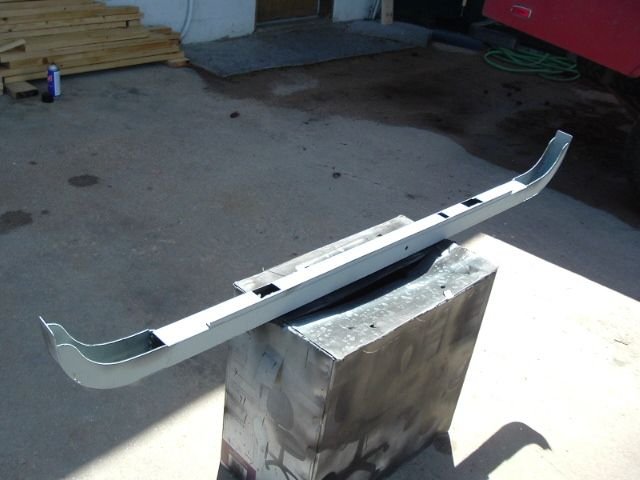
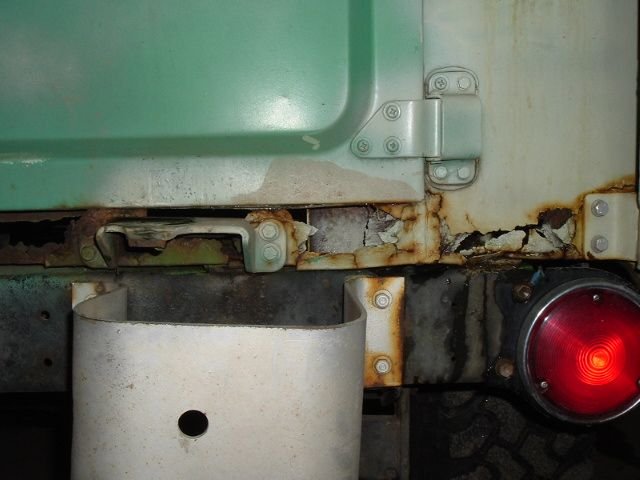
Every year, it seems I have some kind of last-minute wrenching project before Moab. This year, I vowed to fix the rusted rear sill. Ian had given me a section of 2x2 square tube at the packing party a couple years ago, and last year at Moab, Bob Brown, who was following me on a trail, noted that every time I went over a bump, he could see air between the rear of my body and the frame crossmember.

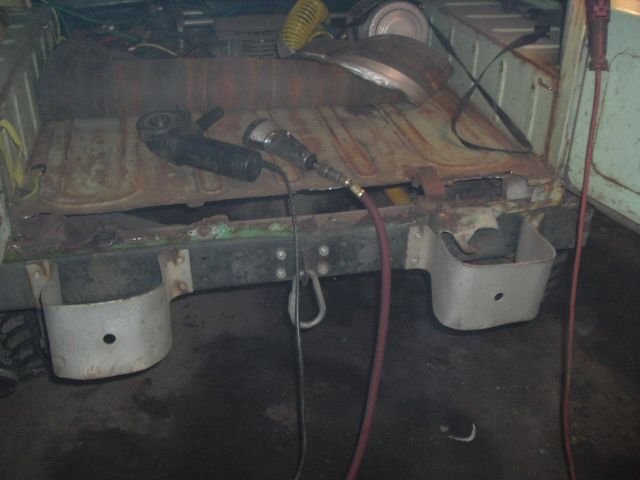
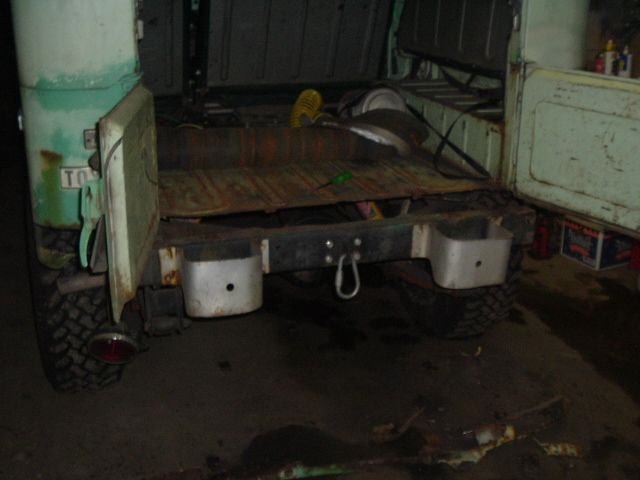
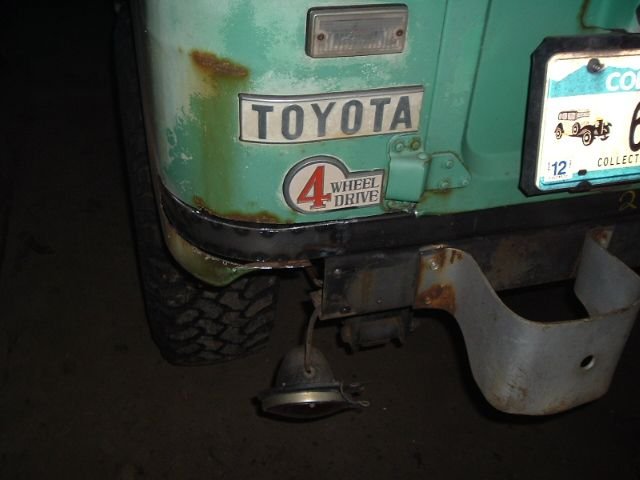
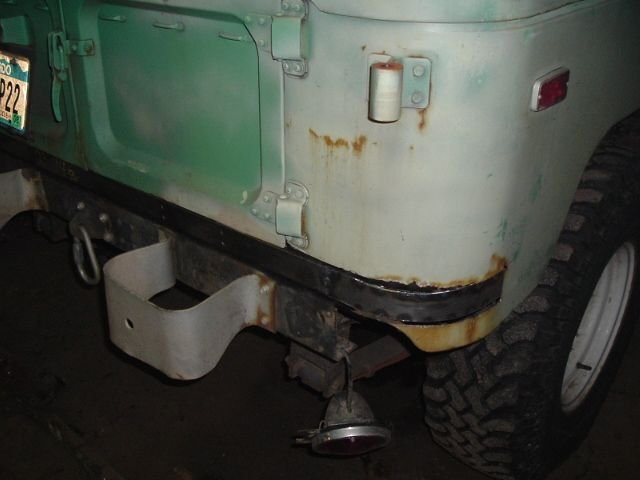
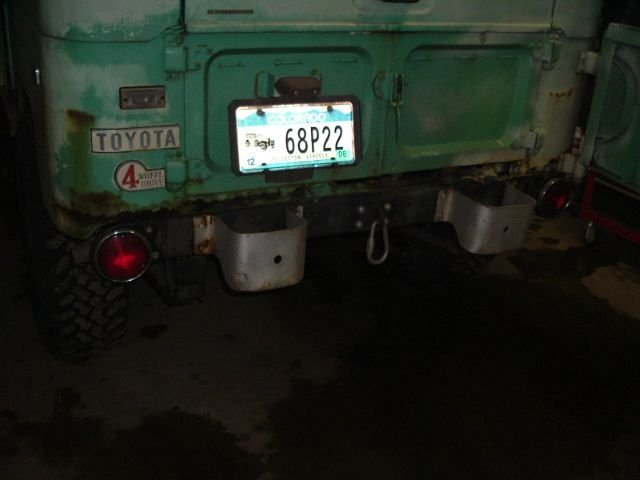
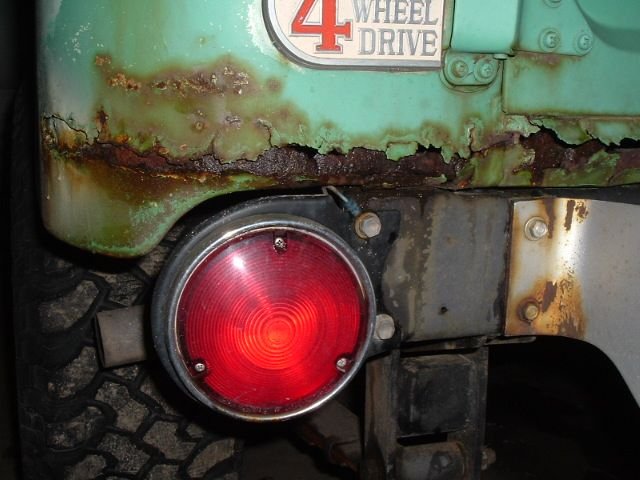
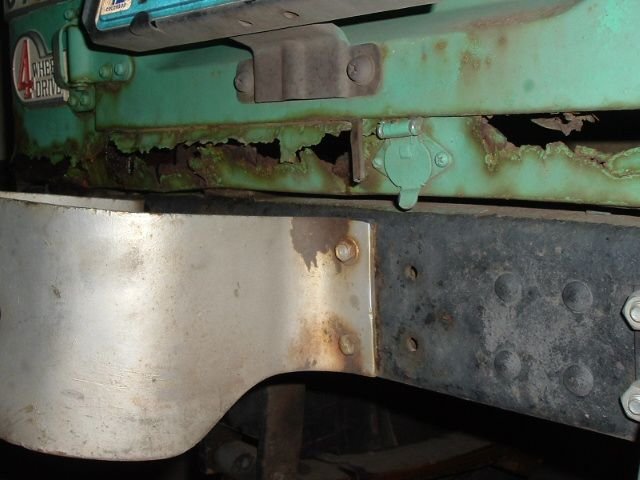
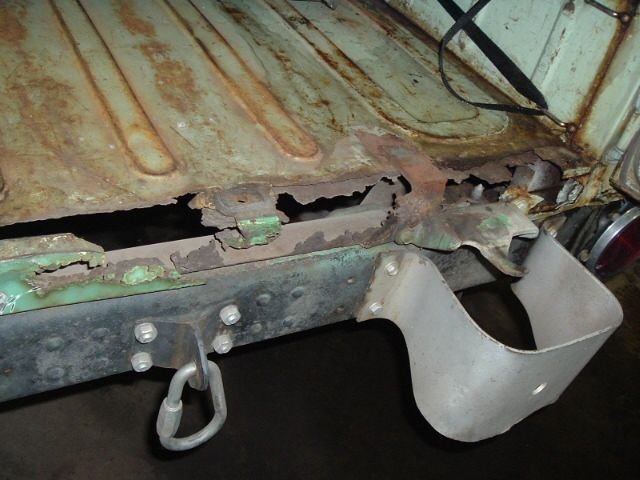
Here's what I had to start with:
 

Attachments

  • 2006_0425Image0086.JPG
    2006_0425Image0086.JPG
    27.4 KB · Views: 439
  • 2006_0425Image0087.JPG
    2006_0425Image0087.JPG
    50.9 KB · Views: 428
  • 2006_0425Image0088.JPG
    2006_0425Image0088.JPG
    39.3 KB · Views: 452
  • 2006_0425Image0089.JPG
    2006_0425Image0089.JPG
    44 KB · Views: 430
  • 2006_0425Image0090.JPG
    2006_0425Image0090.JPG
    51.3 KB · Views: 475
Last edited:

Rzeppa

Rising Sun Member
Joined
Aug 24, 2005
Messages
8,240
Location
Kittredge CO, USA
First I measured and drilled holes for the body mounts in the square tube:
 

Attachments

  • 2006_0425Image0091.JPG
    2006_0425Image0091.JPG
    38.1 KB · Views: 410
Last edited:

Rzeppa

Rising Sun Member
Joined
Aug 24, 2005
Messages
8,240
Location
Kittredge CO, USA
I had to fit the body mounts through the back of the square tube somehow, so I cut some openings:
 

Attachments

  • 2006_0425Image0093.JPG
    2006_0425Image0093.JPG
    39 KB · Views: 413
  • 2006_0425Image0092.JPG
    2006_0425Image0092.JPG
    37.8 KB · Views: 623

Rzeppa

Rising Sun Member
Joined
Aug 24, 2005
Messages
8,240
Location
Kittredge CO, USA
Cutting out the old sill. As you'd imagine, the body mount bolts just twisted off, even after soaking with liquid wrench. What the hey, I got new ones! You can see the condition of the old sill - it's history!
 

Attachments

  • 2006_0425Image0094.JPG
    2006_0425Image0094.JPG
    47.1 KB · Views: 422
  • 2006_0425Image0095.JPG
    2006_0425Image0095.JPG
    35.1 KB · Views: 428
  • 2006_0425Image0096.JPG
    2006_0425Image0096.JPG
    43.1 KB · Views: 1,174
  • 2006_0425Image0097.JPG
    2006_0425Image0097.JPG
    35 KB · Views: 411
  • 2006_0425Image0098.JPG
    2006_0425Image0098.JPG
    31.3 KB · Views: 1,312

Rzeppa

Rising Sun Member
Joined
Aug 24, 2005
Messages
8,240
Location
Kittredge CO, USA
After that, I posted up on the LCML, asking for advice on how to mount the spare carrier latch. I got a lot of good suggestions; in the end I cut openings through which I could install nuts and washers onto bolts. I was thinking of welding nuts in there, but wanted to make sure I had a little slop in order to position the latch just right. It was late, I was tired and this project was already taking WAY longer than I planned.

Due to parallax of the camera angle, it doesn't look like the cut-outs line up behind the holes. They actually do.
 

Attachments

  • 2006_0426Image0099.JPG
    2006_0426Image0099.JPG
    30.2 KB · Views: 416

Rzeppa

Rising Sun Member
Joined
Aug 24, 2005
Messages
8,240
Location
Kittredge CO, USA
Here's a couple other angles of the finished square tube:
 

Attachments

  • 2006_0426Image0101.JPG
    2006_0426Image0101.JPG
    36.2 KB · Views: 407
  • 2006_0426Image0100.JPG
    2006_0426Image0100.JPG
    43.2 KB · Views: 409

Rzeppa

Rising Sun Member
Joined
Aug 24, 2005
Messages
8,240
Location
Kittredge CO, USA
Next up was to cut the "wings" for the ends. I "cheated" and used my CCoT channel on my 76 as a template. Cutting 4 of them with reasonable precision took quite a while.
 

Attachments

  • 2006_0426Image0102.JPG
    2006_0426Image0102.JPG
    29.1 KB · Views: 401

Rzeppa

Rising Sun Member
Joined
Aug 24, 2005
Messages
8,240
Location
Kittredge CO, USA
After I had all 4 cut out, trimmed and ground, I welded them to the ends of the square tube:
 

Attachments

  • 2006_0426Image0103.JPG
    2006_0426Image0103.JPG
    37.2 KB · Views: 405

Rzeppa

Rising Sun Member
Joined
Aug 24, 2005
Messages
8,240
Location
Kittredge CO, USA
Next, I cut some rectangles for the curved outside, and welded them in:
 

Attachments

  • 2006_0426Image0104.JPG
    2006_0426Image0104.JPG
    44.9 KB · Views: 425
  • 2006_0426Image0105.JPG
    2006_0426Image0105.JPG
    48.4 KB · Views: 635

Rzeppa

Rising Sun Member
Joined
Aug 24, 2005
Messages
8,240
Location
Kittredge CO, USA
I decided that I wanted plenty of surface to weld the old floor pan to, so I added a length of 1/2" angle iron:
 

Attachments

  • 2006_0426Image0108.JPG
    2006_0426Image0108.JPG
    39.7 KB · Views: 325

Rzeppa

Rising Sun Member
Joined
Aug 24, 2005
Messages
8,240
Location
Kittredge CO, USA
The moment of truth! Fitment...yep, it fits!
 

Attachments

  • 2006_0426Image0109.JPG
    2006_0426Image0109.JPG
    33.1 KB · Views: 298
  • 2006_0426Image0110.JPG
    2006_0426Image0110.JPG
    31.5 KB · Views: 292

Rzeppa

Rising Sun Member
Joined
Aug 24, 2005
Messages
8,240
Location
Kittredge CO, USA
Now for some Zero-Rust inside and out, with weld-through zinc where it's going to be welded:
 

Attachments

  • 2006_0426Image0111.JPG
    2006_0426Image0111.JPG
    45.8 KB · Views: 271
  • 2006_0426Image0112.JPG
    2006_0426Image0112.JPG
    37 KB · Views: 678

74fj40

Hard Core 4+
Joined
Oct 6, 2005
Messages
1,305
Location
Castle Rock, CO
wow! great job
 

Convert

Hard Core 4+
Joined
Aug 25, 2005
Messages
1,412
Nice work Jeff :thumb:
 

subzali

Hard Core 4+
Joined
Aug 22, 2005
Messages
10,318
Location
Denver CO
Amazing what you can do with some sheet metal and a little ingenuity! Nice work! Want to see the finished product!
 

Hulk

RS Webmaster
Staff member
Moderator
Cruise Moab Committee
Joined
Aug 22, 2005
Messages
16,455
Location
Centennial
Looking good dude! Great fab work. You'll be looking cool in Moab.
 

IanB

0
Joined
Aug 23, 2005
Messages
811
Location
Just this side of reality.
Looks good. Where did you get weld through zinc?
 

Rzeppa

Rising Sun Member
Joined
Aug 24, 2005
Messages
8,240
Location
Kittredge CO, USA
IanB said:
Looks good. Where did you get weld through zinc?
The first can I got at a body shop supply store on Broadway in Denver. Then I discovered that regular "cold galvanizing compound" from any hardware store is actually the same stuff, something like 95-97% zinc. It's half the price and saves a trip into the middle of Denver. I use it on inside surfaces which will be welded and can't be subsequently accessed.

Hey Ian, thanks so much for that square tube you gave me! It's been a long time, but I finally got around to using it.
 

Rzeppa

Rising Sun Member
Joined
Aug 24, 2005
Messages
8,240
Location
Kittredge CO, USA
For the skin, to replace what I cut out of the quarter panel, I cut some strips, then drilled them. The holes are to weld them to the wings in the channel. After I cut and drilled them, I sprayed what will be the inside surface with cold weld-through zinc.
 

Attachments

  • 2006_0427Image0055.JPG
    2006_0427Image0055.JPG
    32.9 KB · Views: 211
Top